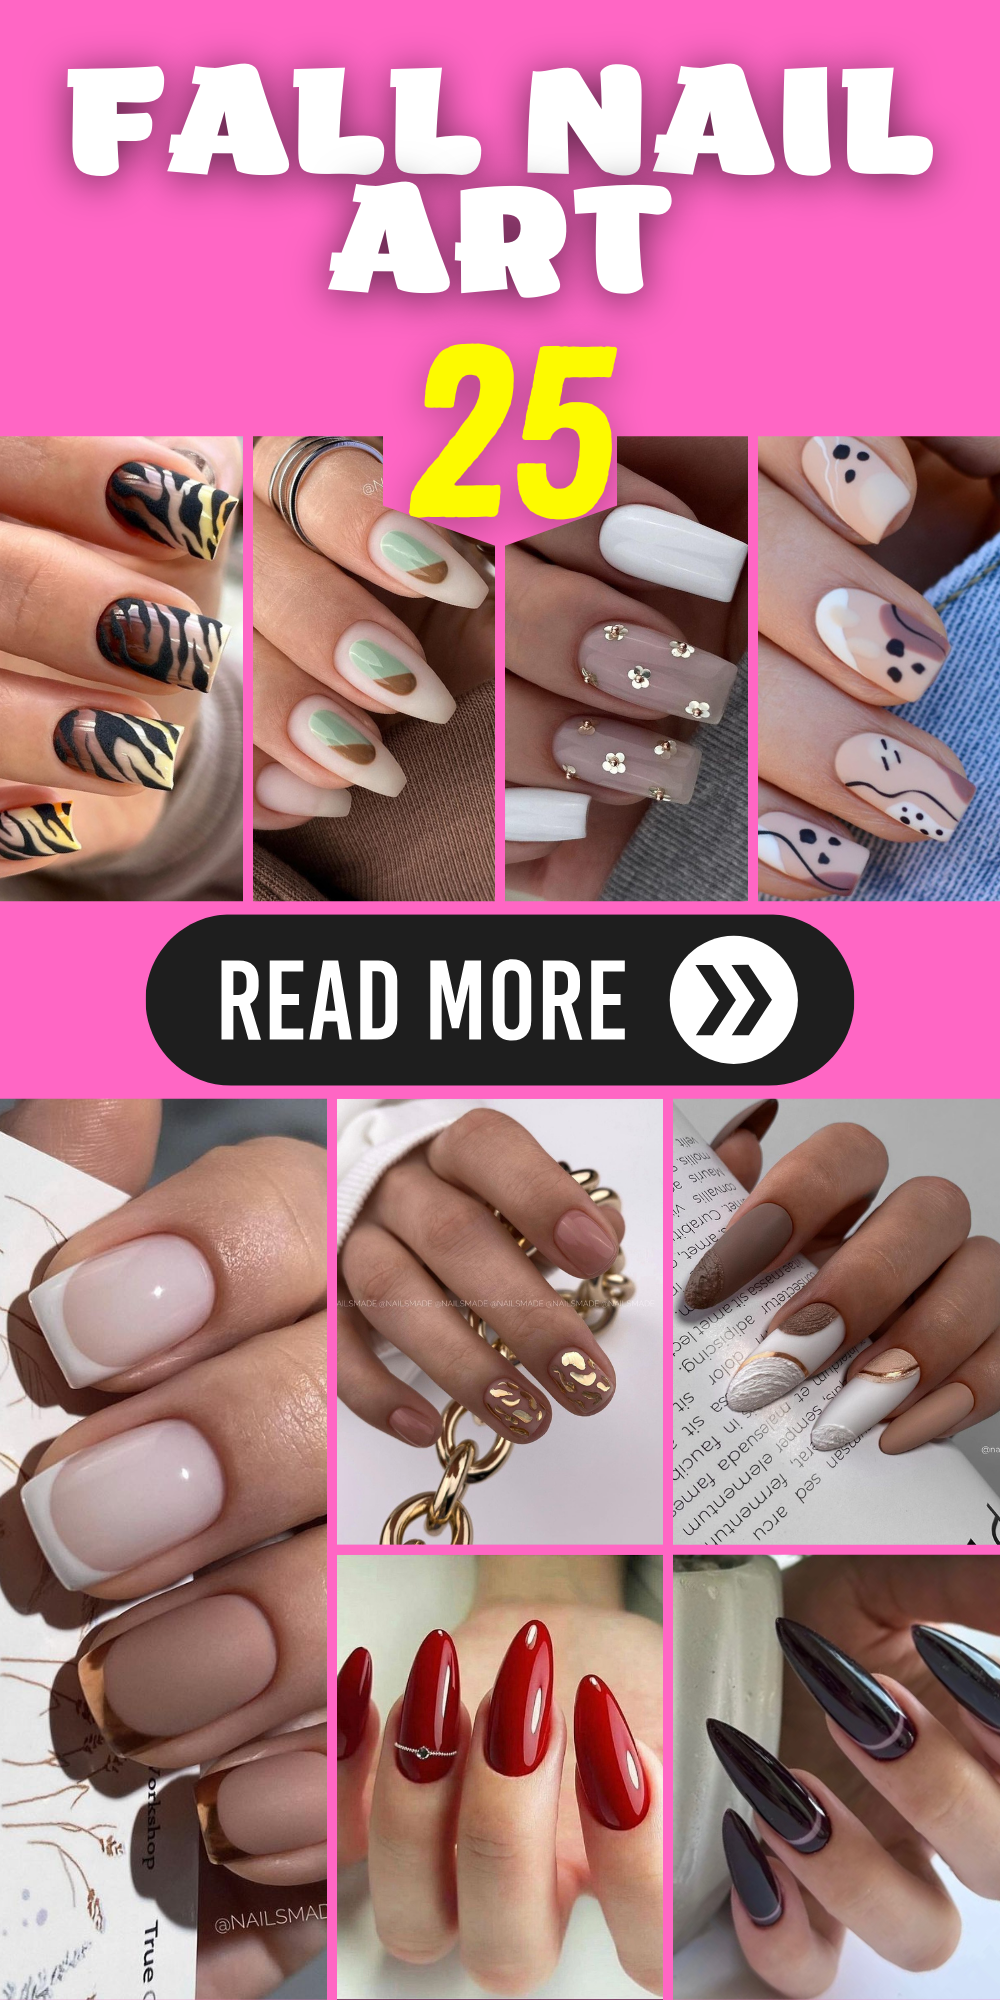
Are you ready to elevate your nail game this autumn? From rich hues to intricate designs, fall nail art is all about embracing the season’s beauty and mood. Whether you prefer simple and minimalist styles or bold and detailed patterns, this guide has something for every occasion. Keep reading to discover the top trends and how you can recreate these stunning looks at home.
Red Elegance
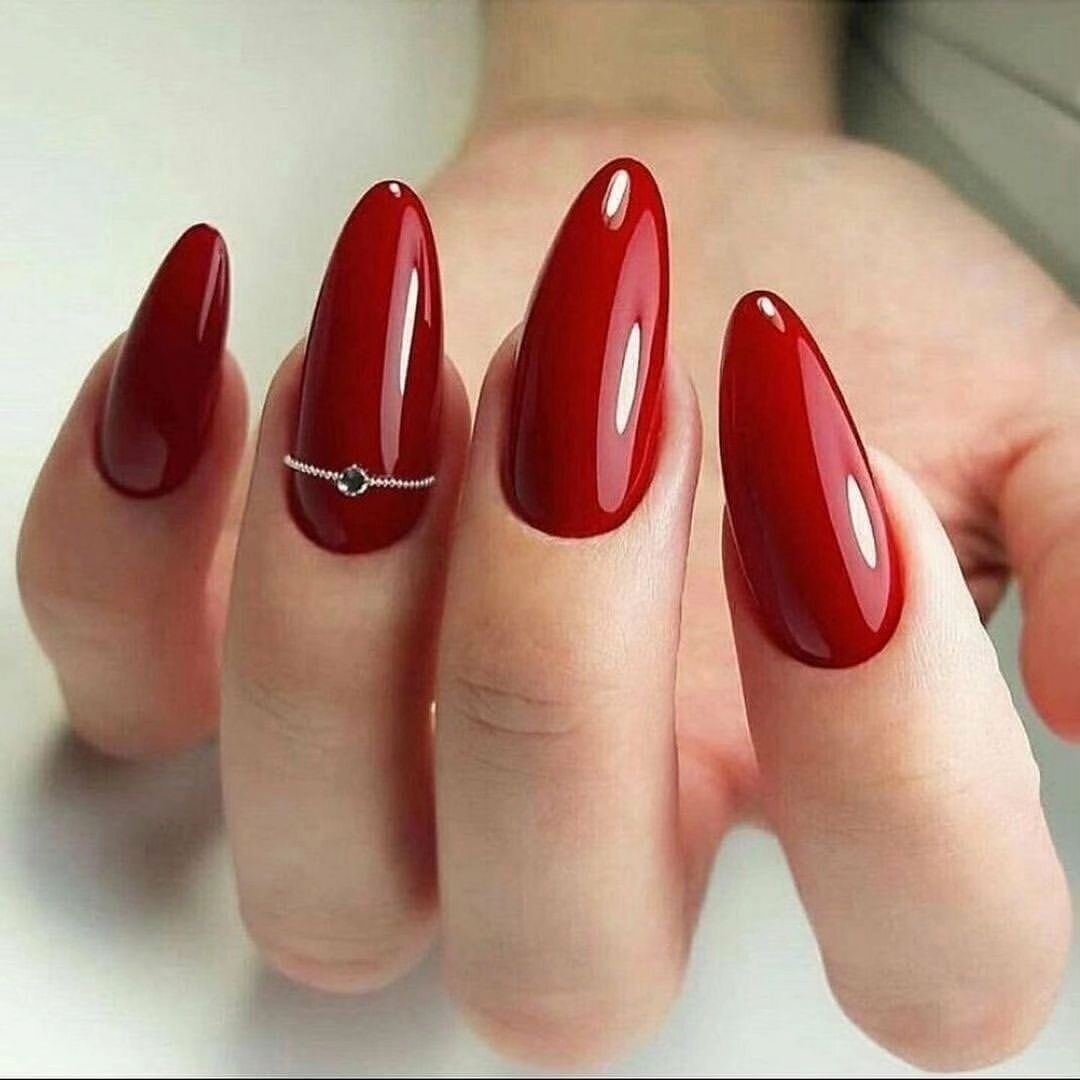
The deep, rich red in this manicure is the epitome of classic elegance with a modern twist. The glossy finish and the delicate chain accent on the ring finger add a touch of sophistication that makes this design perfect for any fall occasion.
-
- Red gel polish (e.g., OPI GelColor in ‘Big Apple Red’)
- Glossy top coat (e.g., Essie Gel Couture Top Coat)
- Nail chain or delicate jewelry accent (e.g., Born Pretty Chain Nail Art Decoration)
- UV/LED nail lamp
Instructions:
-
- Prep your nails by shaping them into an almond shape and applying a base coat.
- Apply two coats of red gel polish, curing each layer under a UV/LED lamp.
- Carefully place the nail chain on the ring finger while the top coat is still tacky, then cure.
- Finish with a glossy top coat on all nails and cure once more for a high-shine finish.
Neutral Gradient
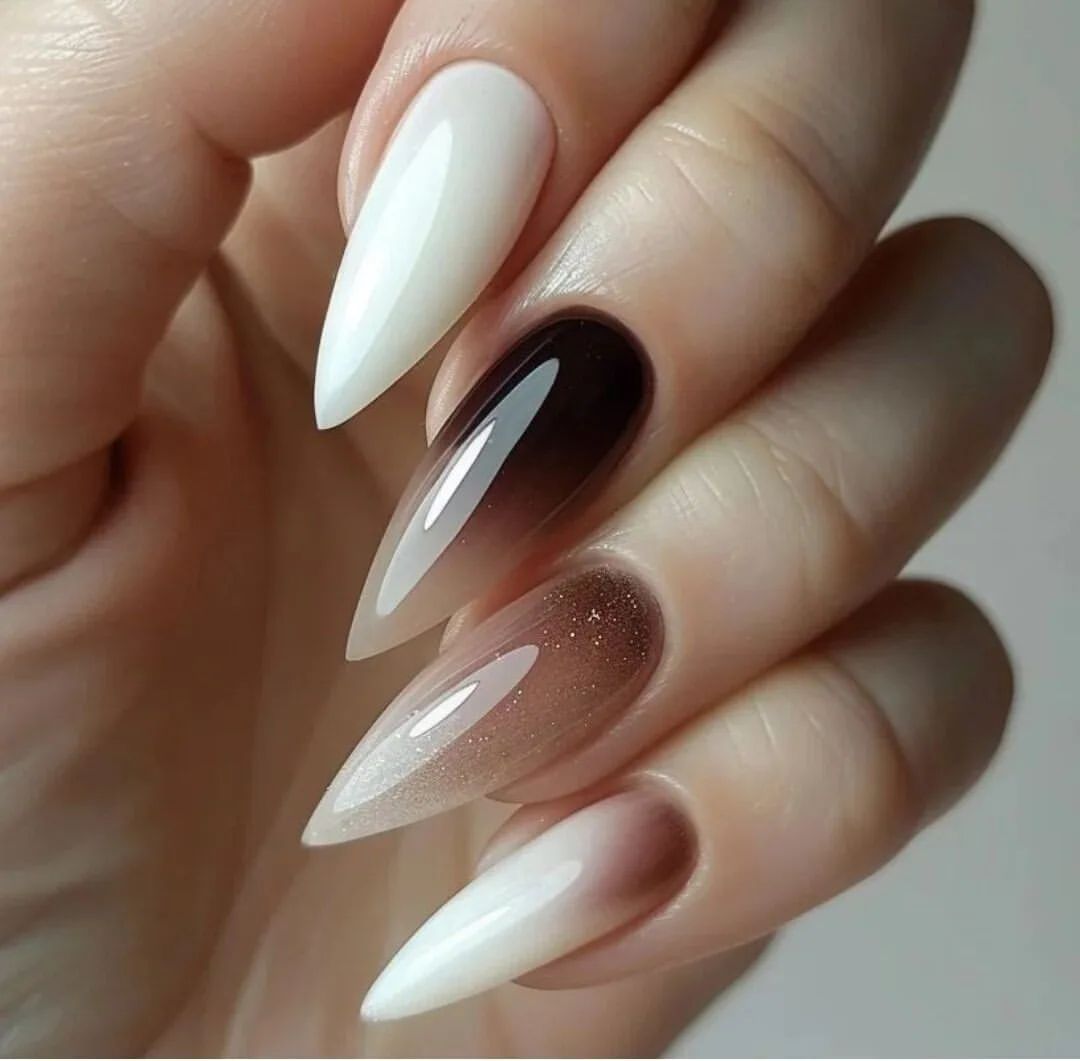
This manicure showcases a stunning gradient of neutral shades, transitioning from creamy white to a soft brown. It’s a perfect example of how minimalist designs can still make a bold statement.
-
- White gel polish (e.g., Gelish in ‘Arctic Freeze’)
- Light brown gel polish (e.g., CND Shellac in ‘Field Fox’)
- Gradient sponge
- Glossy top coat
- UV/LED nail lamp
Instructions:
-
- Start with a base coat and cure.
- Apply the white gel polish on half of the gradient sponge and the brown on the other half.
- Dab the sponge on your nails to create the gradient effect, curing between layers.
- Apply a glossy top coat and cure for a smooth, blended finish.
Sparkling Elegance
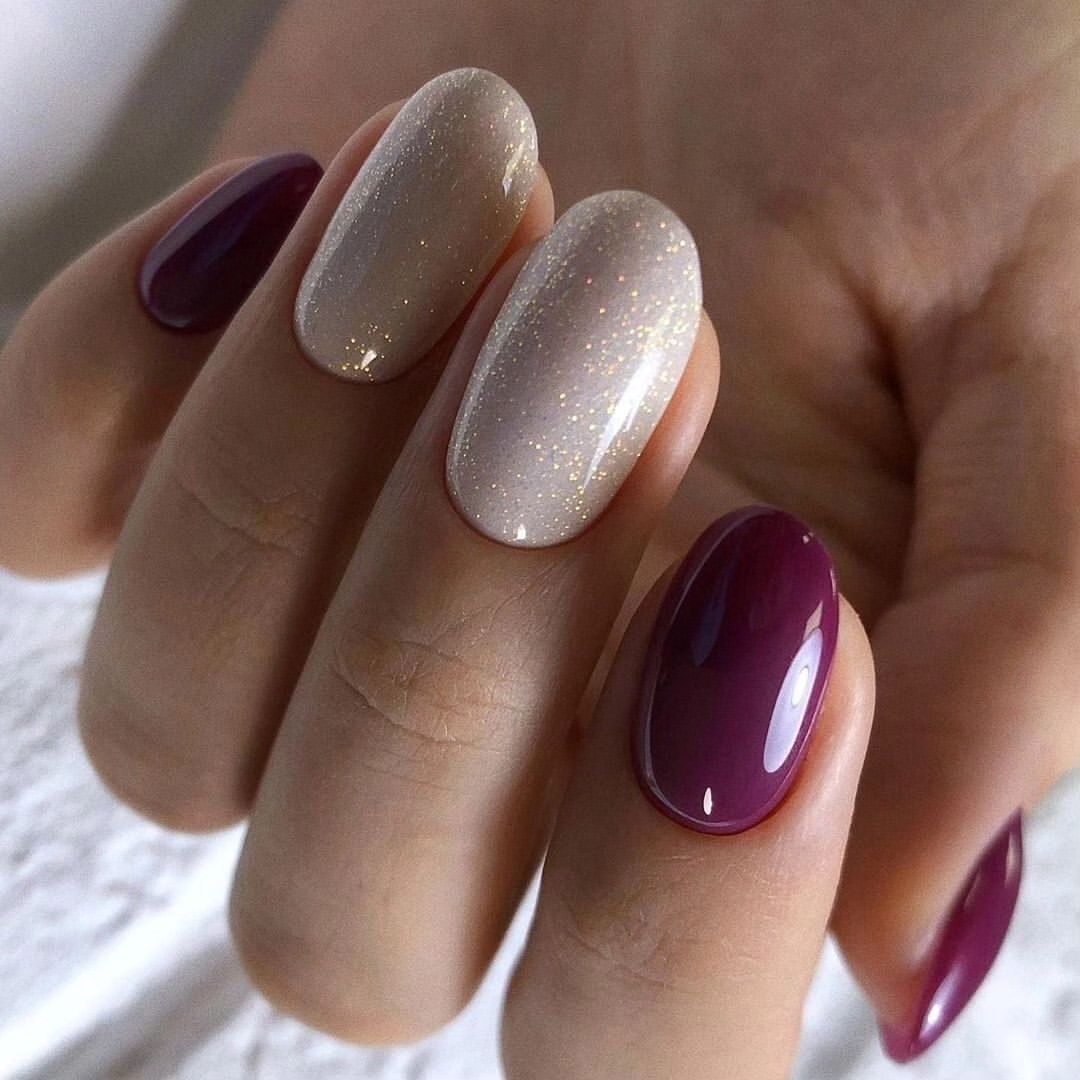
This design combines deep plum and shimmering champagne for a look that’s both luxurious and festive. The mix of solid and glitter nails is perfect for adding a bit of sparkle to your fall style.
-
- Plum gel polish (e.g., Essie Gel Couture in ‘Gala-Vanting’)
- Champagne glitter gel polish (e.g., China Glaze Gelaze in ‘Twinkle Twinkle Little Star’)
- Glossy top coat
- UV/LED nail lamp
Instructions:
-
- Shape your nails into an oval shape and apply a base coat.
- Paint alternate nails with the plum and glitter polishes, curing each layer.
- Apply a glossy top coat to all nails and cure for a high-shine, long-lasting finish.
Glossy Nude Perfection
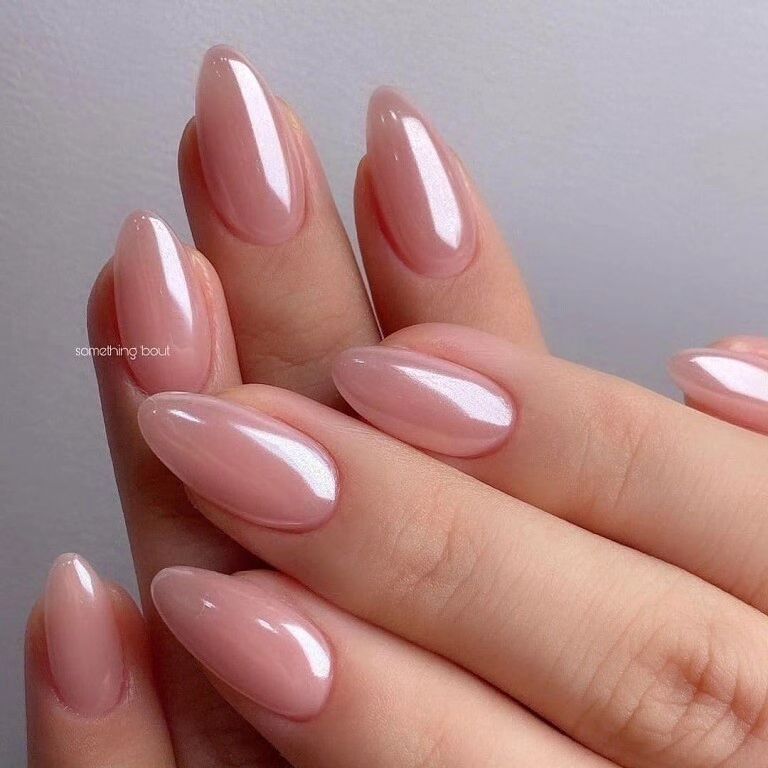
This glossy nude manicure is a timeless classic, perfect for those who love a clean and elegant look. The subtle sheen adds a touch of sophistication, making it suitable for any occasion, whether casual or formal. The almond shape enhances the natural beauty of the nails, giving them a chic and refined appearance.
-
- Nude gel polish (e.g., OPI GelColor in ‘Bubble Bath’)
- Glossy top coat (e.g., Seche Vite Dry Fast Top Coat)
- UV/LED nail lamp
- Nail buffer and file
Instructions:
-
- Begin by shaping your nails into an almond shape and buffing the surface for smoothness.
- Apply a base coat and cure under a UV/LED lamp.
- Apply two coats of nude gel polish, curing each layer thoroughly.
- Finish with a glossy top coat and cure for a high-shine finish.
Save Pin
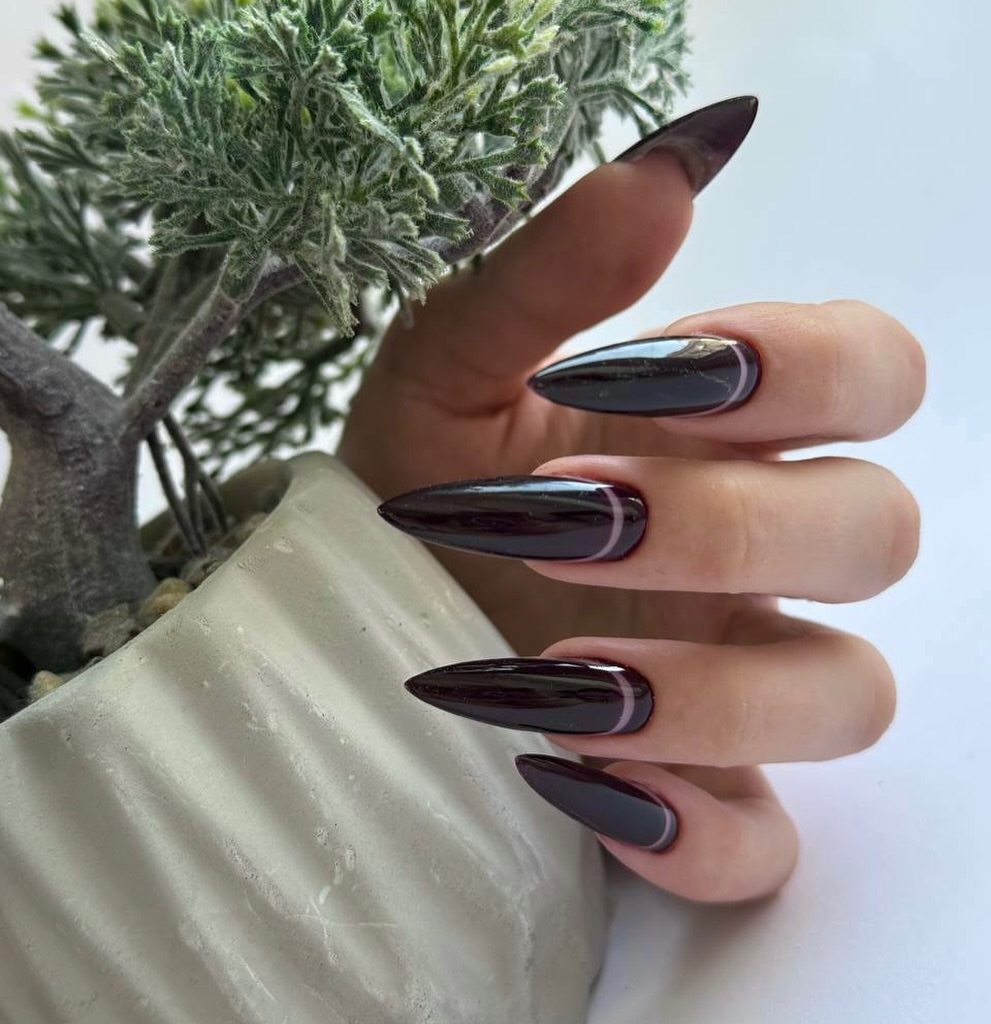
Dark and Mysterious
For those who prefer a bold and dramatic look, this deep, dark manicure is a showstopper. The stiletto shape adds an edgy vibe, while the glossy finish keeps it sophisticated. This look is perfect for making a statement and exuding confidence.
-
- Black gel polish (e.g., Gelish in ‘Black Shadow’)
- Glossy top coat (e.g., Sally Hansen Miracle Gel Top Coat)
- UV/LED nail lamp
- Nail file and buffer
Instructions:
-
- File your nails into a stiletto shape and buff the surface.
- Apply a base coat and cure under a UV/LED lamp.
- Apply two coats of black gel polish, curing each layer for the recommended time.
- Seal with a glossy top coat and cure to lock in the shine and ensure longevity.
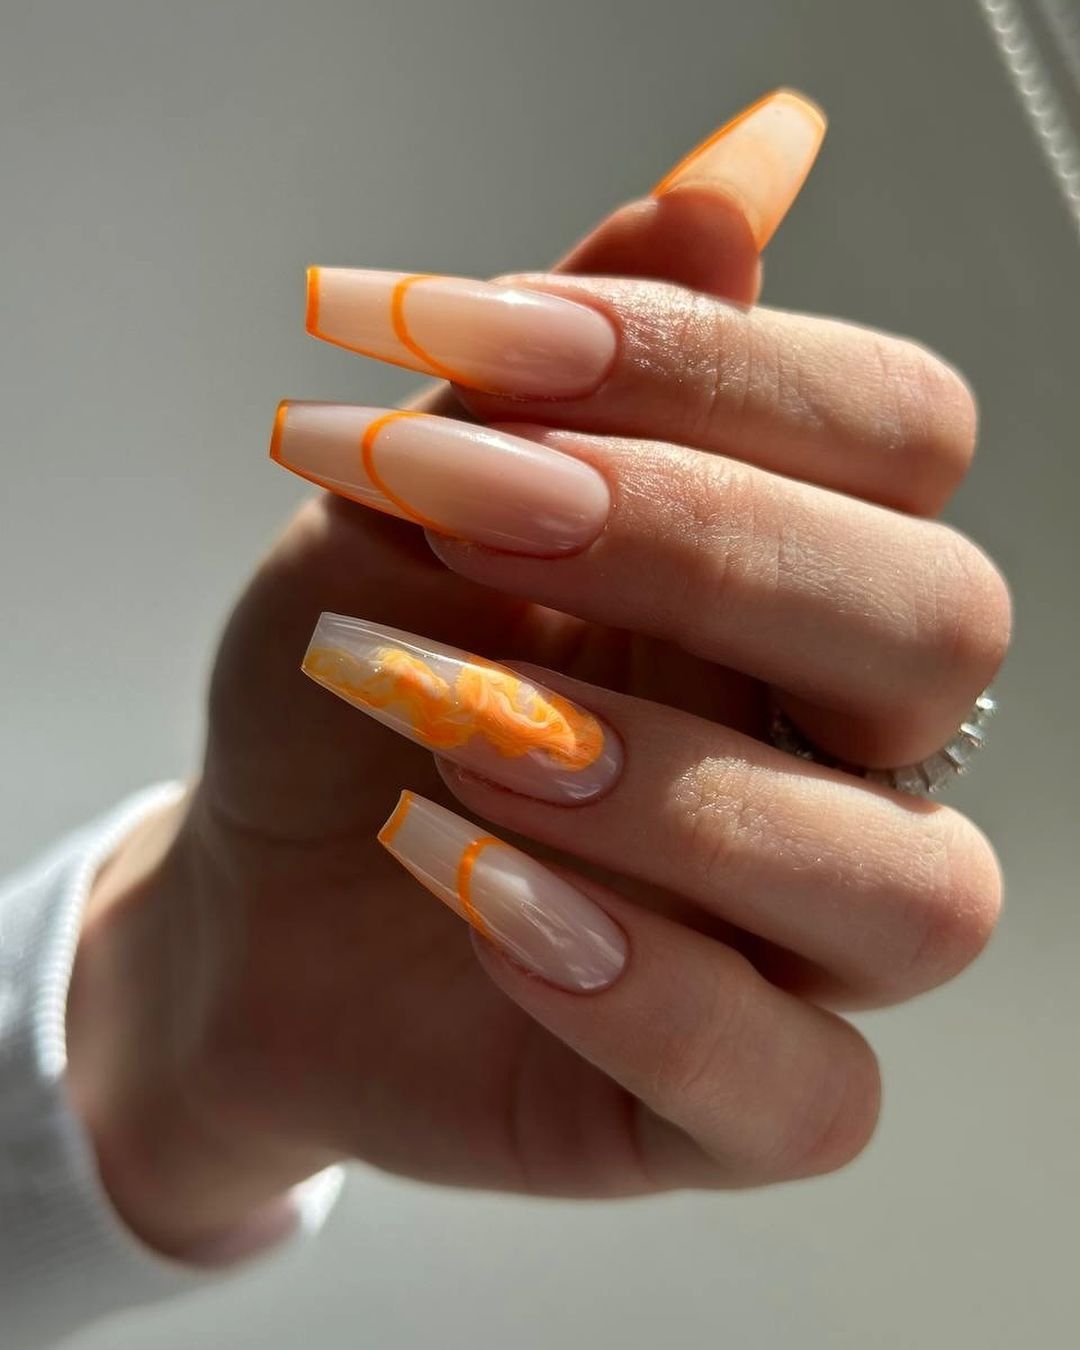
Vibrant Orange Tips
This vibrant orange French tip manicure brings a playful twist to a classic design. The bold orange tips add a pop of color, while the marbled accent nail introduces a fun and creative element. The coffin shape enhances the modern feel of this design, making it perfect for those who love to experiment with their nail art.
-
- Nude base gel polish (e.g., Essie Gel Couture in ‘Fairy Tailor’)
- Orange gel polish (e.g., OPI GelColor in ‘No Tan Lines’)
- Marbling tool or fine nail brush
- Glossy top coat
- UV/LED nail lamp
Instructions:
-
- Shape your nails into a coffin shape and buff them smooth.
- Apply a base coat and cure under a UV/LED lamp.
- Apply a nude base color and cure.
- Using a fine brush, paint the orange tips and create the marbled accent nail. Cure after each step.
- Finish with a glossy top coat and cure for a durable, high-shine finish.
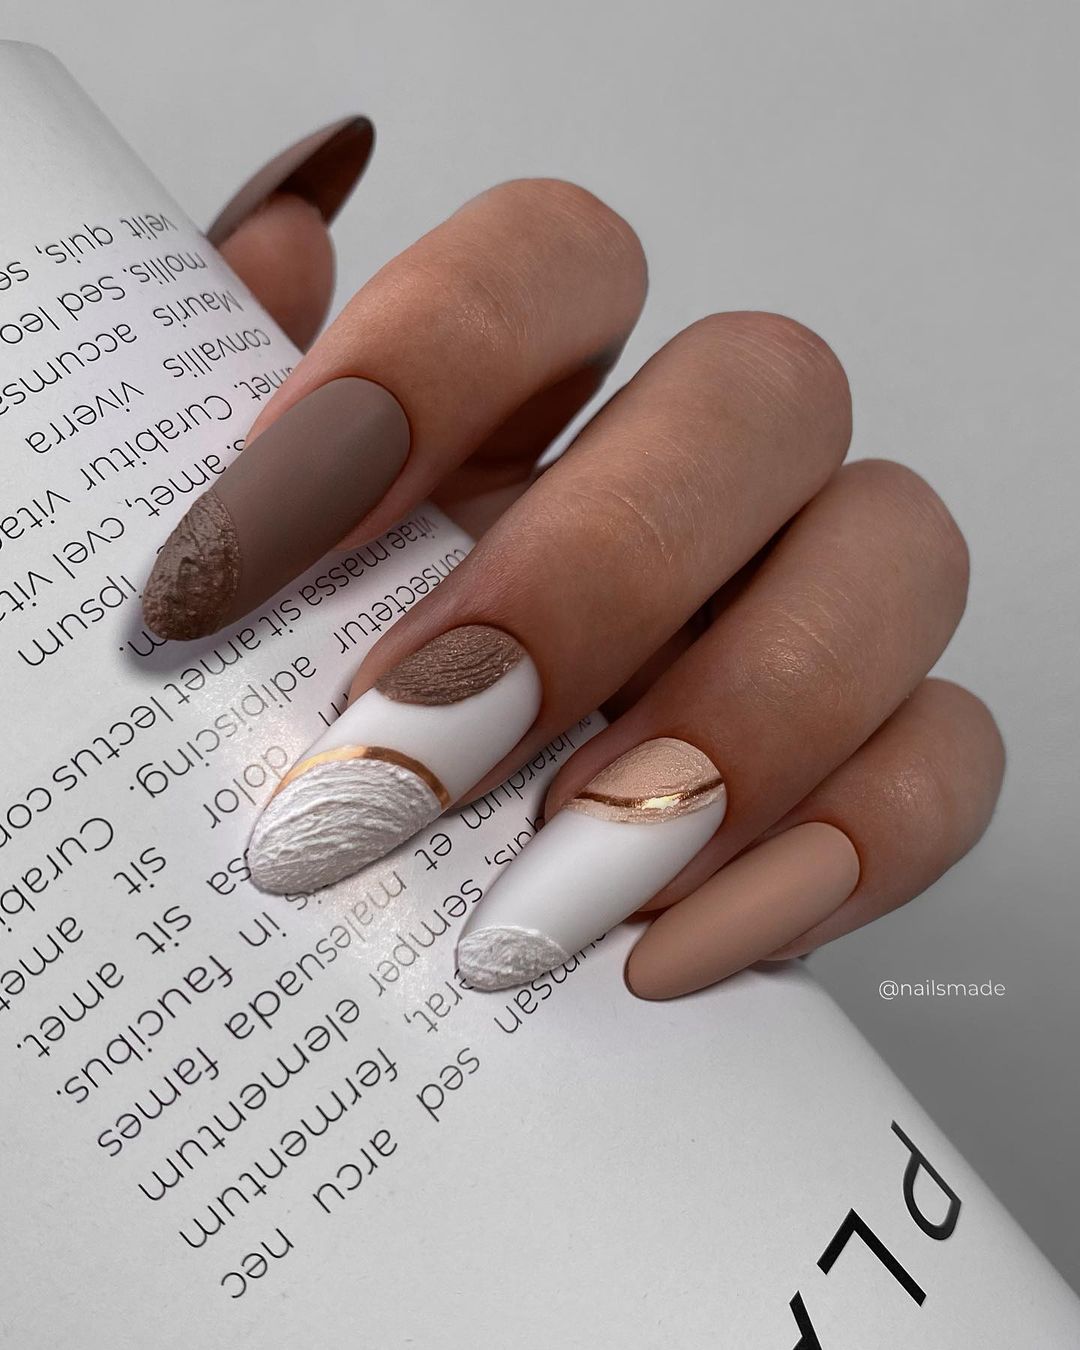
Earthy Textures
This nail art combines matte and glossy finishes with earthy tones to create a chic and sophisticated look. The mix of textures adds depth and interest, making this design perfect for those who love a unique twist on neutral colors. The abstract patterns and subtle gold accents add a touch of elegance.
-
- Matte brown gel polish (e.g., OPI GelColor in ‘Taupe-less Beach’)
- White gel polish (e.g., CND Shellac in ‘Cream Puff’)
- Gold foil or striping tape (e.g., Born Pretty Gold Foil)
- Textured top coat
- UV/LED nail lamp
Instructions:
-
- Shape your nails into a coffin or almond shape and buff the surface.
- Apply a base coat and cure under a UV/LED lamp.
- Paint some nails with matte brown and others with white gel polish, curing each layer.
- Add abstract patterns and gold accents as desired, curing between steps.
- Finish with a top coat, using a textured top coat on specific nails for added dimension, and cure.
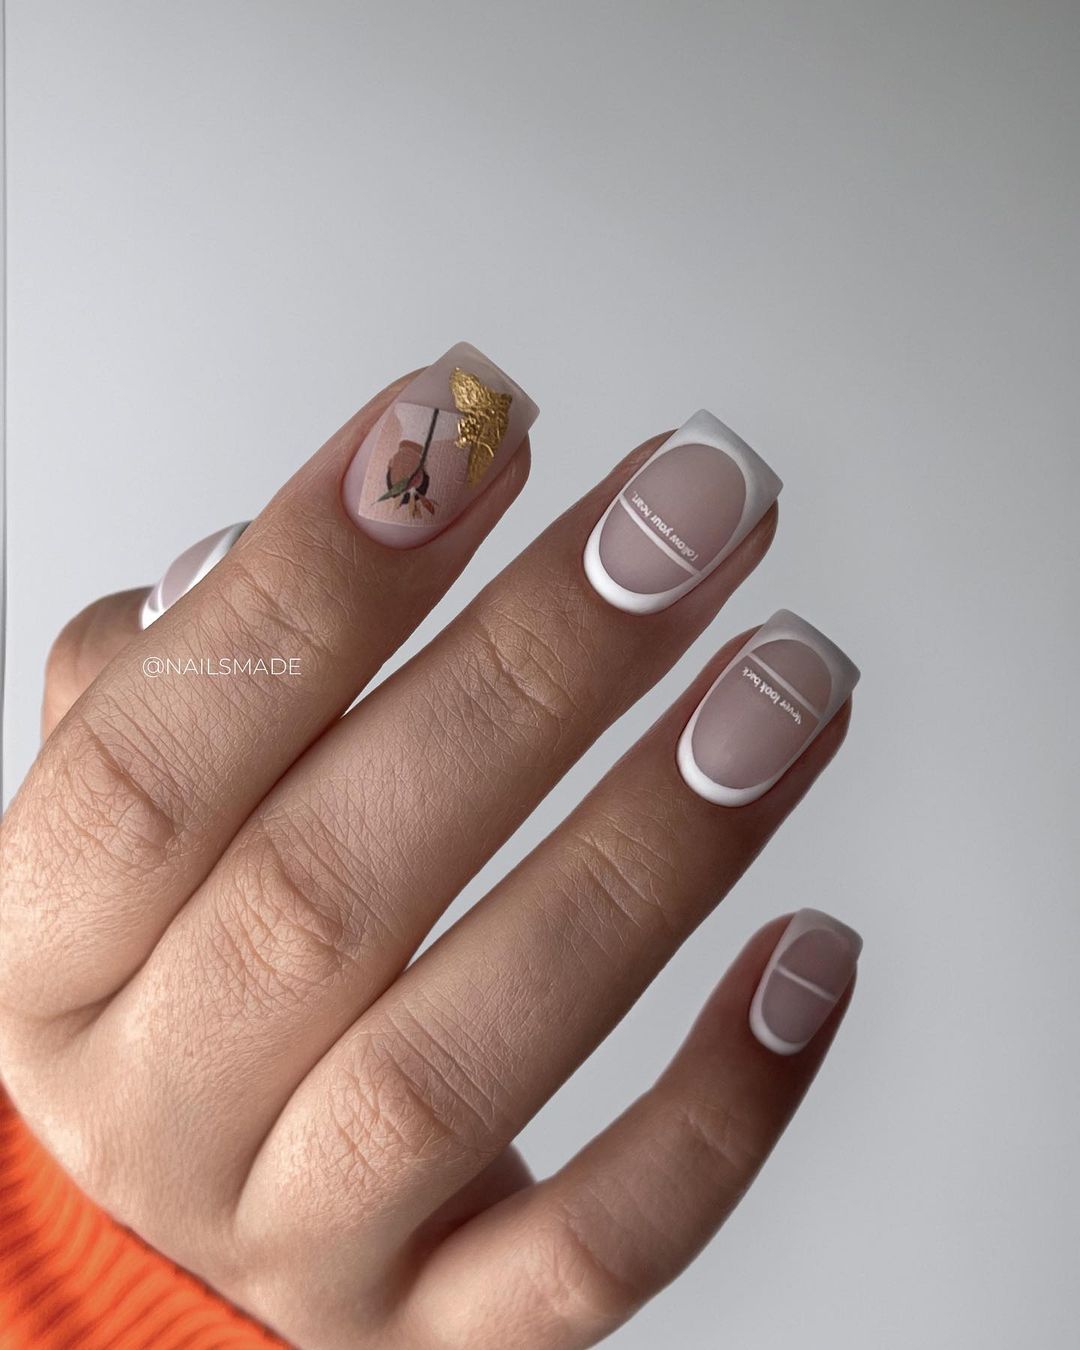
Minimalist French Tips
This minimalist take on the classic French manicure features a unique twist with fine lines and delicate details. The combination of nude and white gel polish, along with subtle gold leaf accents, makes this design both elegant and modern. The short square shape adds to the minimalist aesthetic, making it perfect for everyday wear.
-
- Nude gel polish (e.g., Essie Gel Couture in ‘Fairy Tailor’)
- White gel polish (e.g., Gelish in ‘Arctic Freeze’)
- Gold leaf (e.g., La Demoiselle Gold Leaf Flakes)
- Fine nail art brush
- UV/LED nail lamp
Instructions:
-
- File nails into a short square shape and buff the surface.
- Apply a base coat and cure under a UV/LED lamp.
- Paint nails with nude gel polish and cure.
- Use a fine brush to create the minimalist French tips and add gold leaf accents, then cure.
- Seal with a glossy top coat and cure for a durable finish.
Fall Freshness
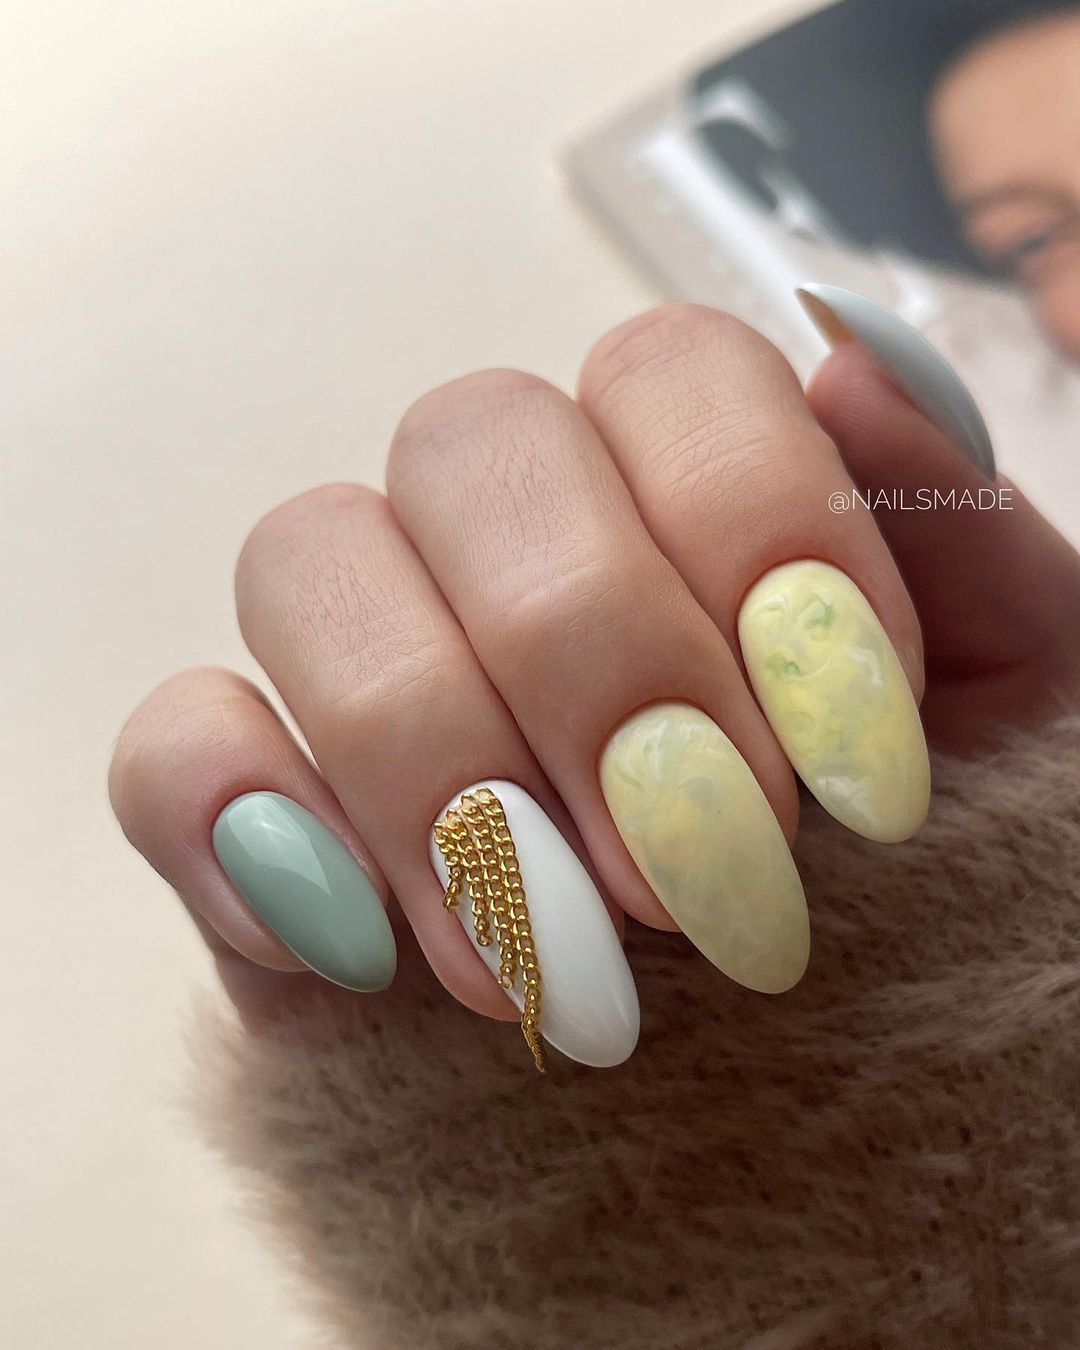
This design brings a refreshing feel with its mix of pastel colors and marbled effects. The light green, white, and yellow shades are complemented by a gold chain accent, adding a touch of luxury to this vibrant look. The almond shape is perfect for showcasing the soft, flowing patterns.
-
- Pastel green gel polish (e.g., OPI GelColor in ‘How Does Your Zen Garden Grow?’)
- White gel polish (e.g., CND Shellac in ‘Cream Puff’)
- Yellow gel polish (e.g., China Glaze Gelaze in ‘Lemon Fizz’)
- Gold chain or nail art decoration (e.g., Born Pretty Gold Chain)
- UV/LED nail lamp
Instructions:
-
- Shape nails into an almond shape and buff the surface.
- Apply a base coat and cure under a UV/LED lamp.
- Paint nails with pastel green, white, and yellow gel polish, curing each layer.
- Create marbled effects using a thin brush, blending the colors together before curing.
- Add the gold chain accent while the top coat is still tacky, then cure for a final time.
Save Pin
Luxe Leopard
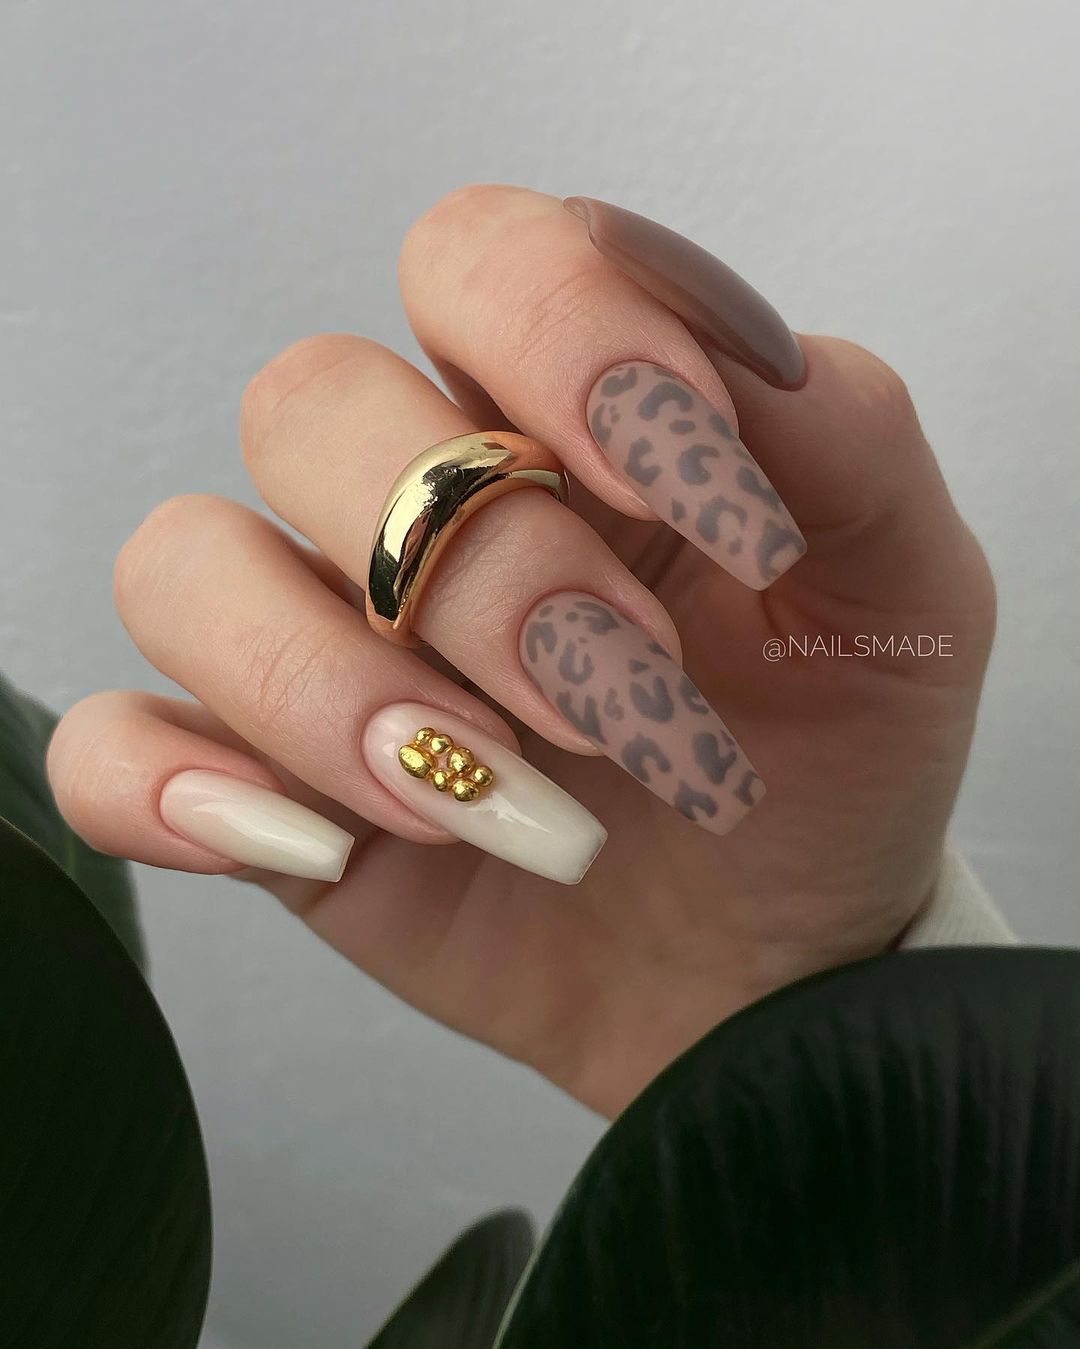
This design is perfect for those who love a bit of wild elegance. The matte leopard print combined with glossy accents and gold embellishments creates a bold yet refined look. The combination of neutral tones with animal print is ideal for making a statement without being too flashy.
-
- Nude gel polish (e.g., Essie Gel Couture in ‘Fairy Tailor’)
- Matte top coat (e.g., OPI Matte Top Coat)
- Leopard print nail stickers or hand-painted designs (e.g., KADS Nail Art Stamping Plate)
- Gold studs or rhinestones (e.g., Swarovski Flatback Crystals)
- UV/LED nail lamp
Instructions:
-
- Shape nails into a coffin or square shape and buff the surface.
- Apply a base coat and cure under a UV/LED lamp.
- Paint nails with nude gel polish and cure.
- Apply leopard print stickers or paint the design by hand, then cure.
- Seal with a matte top coat and cure, adding gold studs or rhinestones for extra flair.
Classic French with a Twist
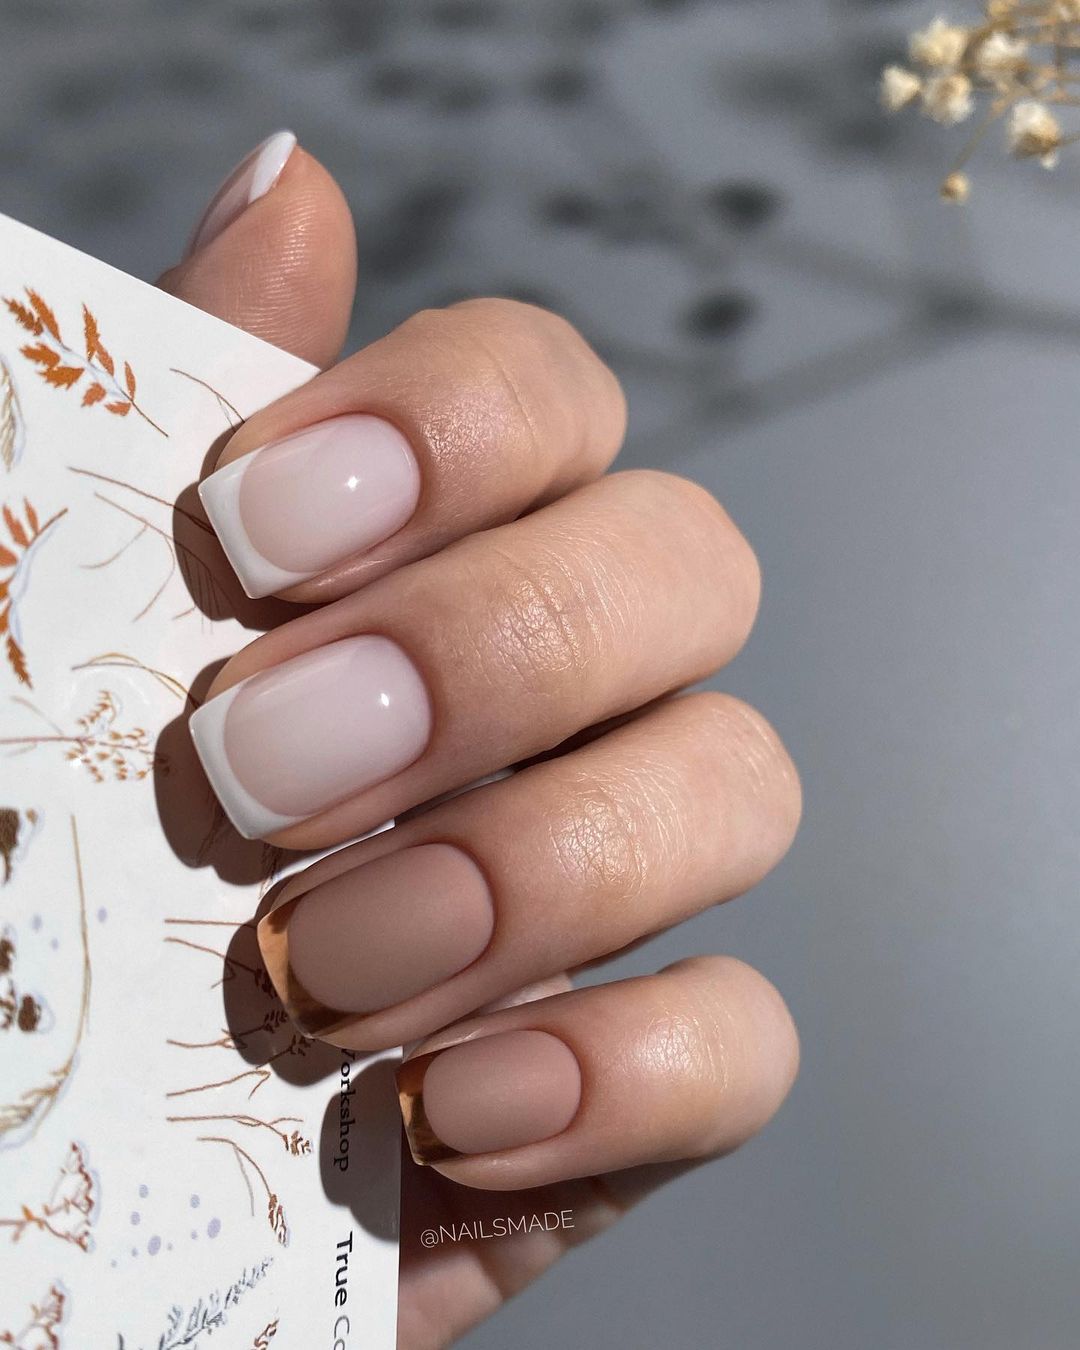
This modern take on the French manicure features both glossy and matte finishes, creating a subtle yet stylish contrast. The nude base color combined with white tips and a touch of matte finish gives a fresh update to this timeless look. The square shape adds to the contemporary feel.
-
- Nude gel polish (e.g., Gelish in ‘Simple Sheer’)
- White gel polish (e.g., OPI GelColor in ‘Alpine Snow’)
- Matte top coat (e.g., Essie Matte About You Top Coat)
- UV/LED nail lamp
Instructions:
-
- File nails into a square shape and buff the surface.
- Apply a base coat and cure under a UV/LED lamp.
- Paint nails with nude gel polish and cure.
- Create the French tips with white gel polish and cure.
- Apply a glossy top coat to some nails and a matte top coat to others, then cure for a sophisticated finish.
Artistic Abstract
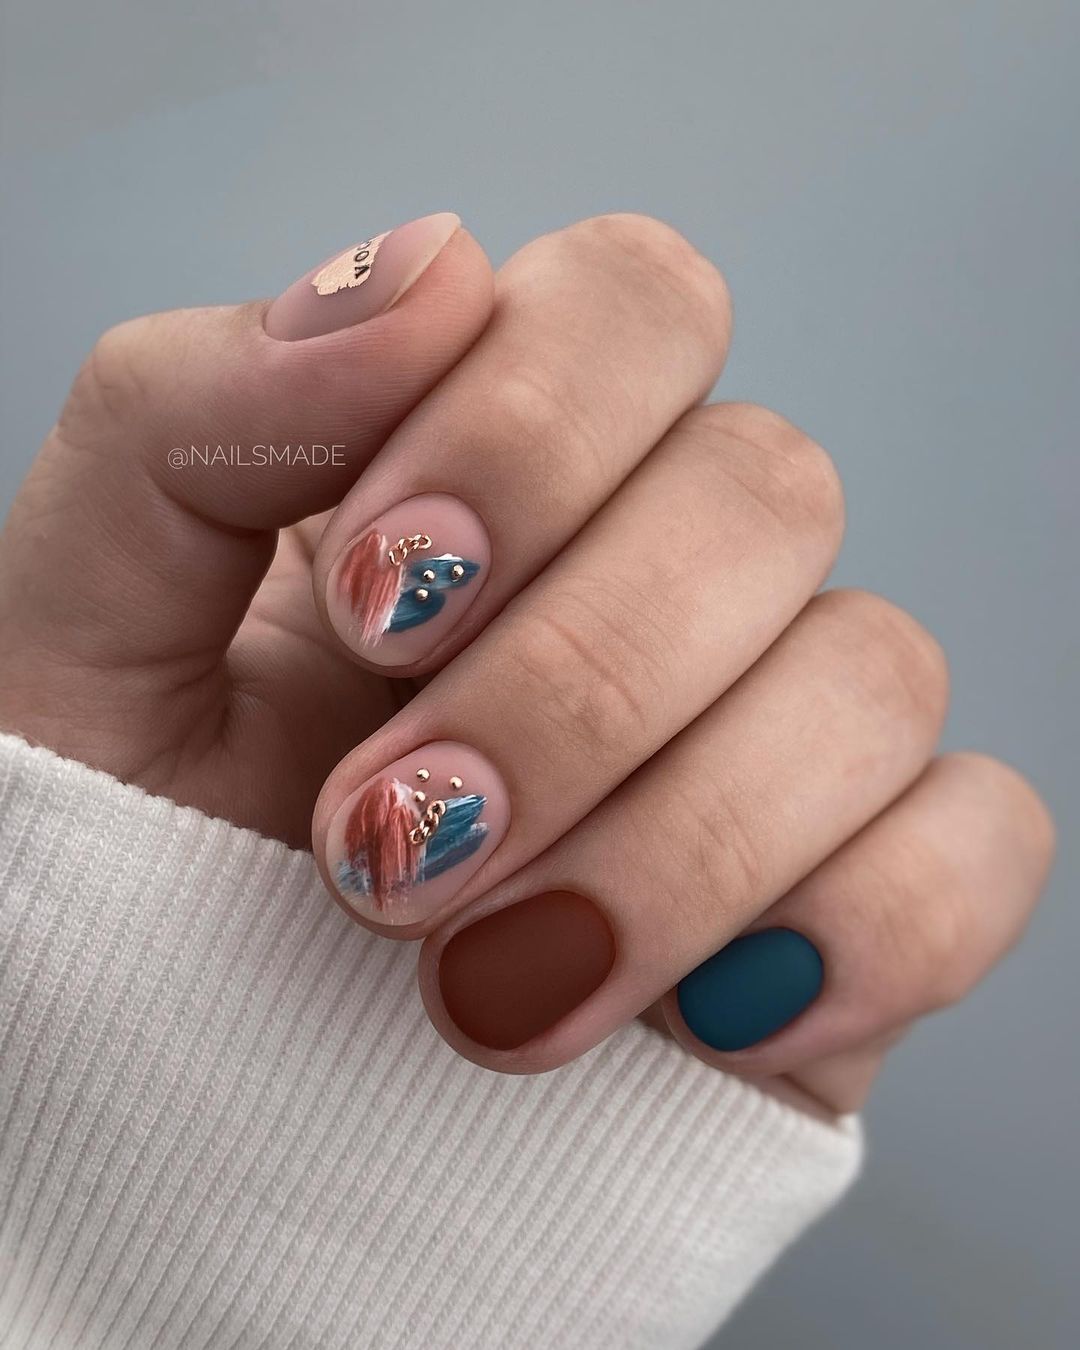
This artistic nail design features a mix of vibrant colors and abstract patterns, perfect for those who love to experiment with their look. The combination of matte and glossy finishes adds depth, while the short length makes it practical for everyday wear. The use of blue, pink, and neutral tones creates a dynamic and eye-catching effect.
-
- Blue gel polish (e.g., Essie Gel Couture in ‘Surrounded by Studs’)
- Pink gel polish (e.g., OPI GelColor in ‘Mod About You’)
- Nude gel polish (e.g., CND Shellac in ‘Beau’)
- Gold foil or leaf (e.g., Born Pretty Gold Foil)
- Fine nail art brush
- UV/LED nail lamp
Instructions:
-
- Shape nails into a short round or square shape and buff the surface.
- Apply a base coat and cure under a UV/LED lamp.
- Paint nails with blue, pink, and nude gel polish, curing each layer.
- Use a fine brush to create abstract patterns and add gold foil accents, then cure.
- Finish with a combination of matte and glossy top coats, curing for a striking final look.
Botanical Matte Magic
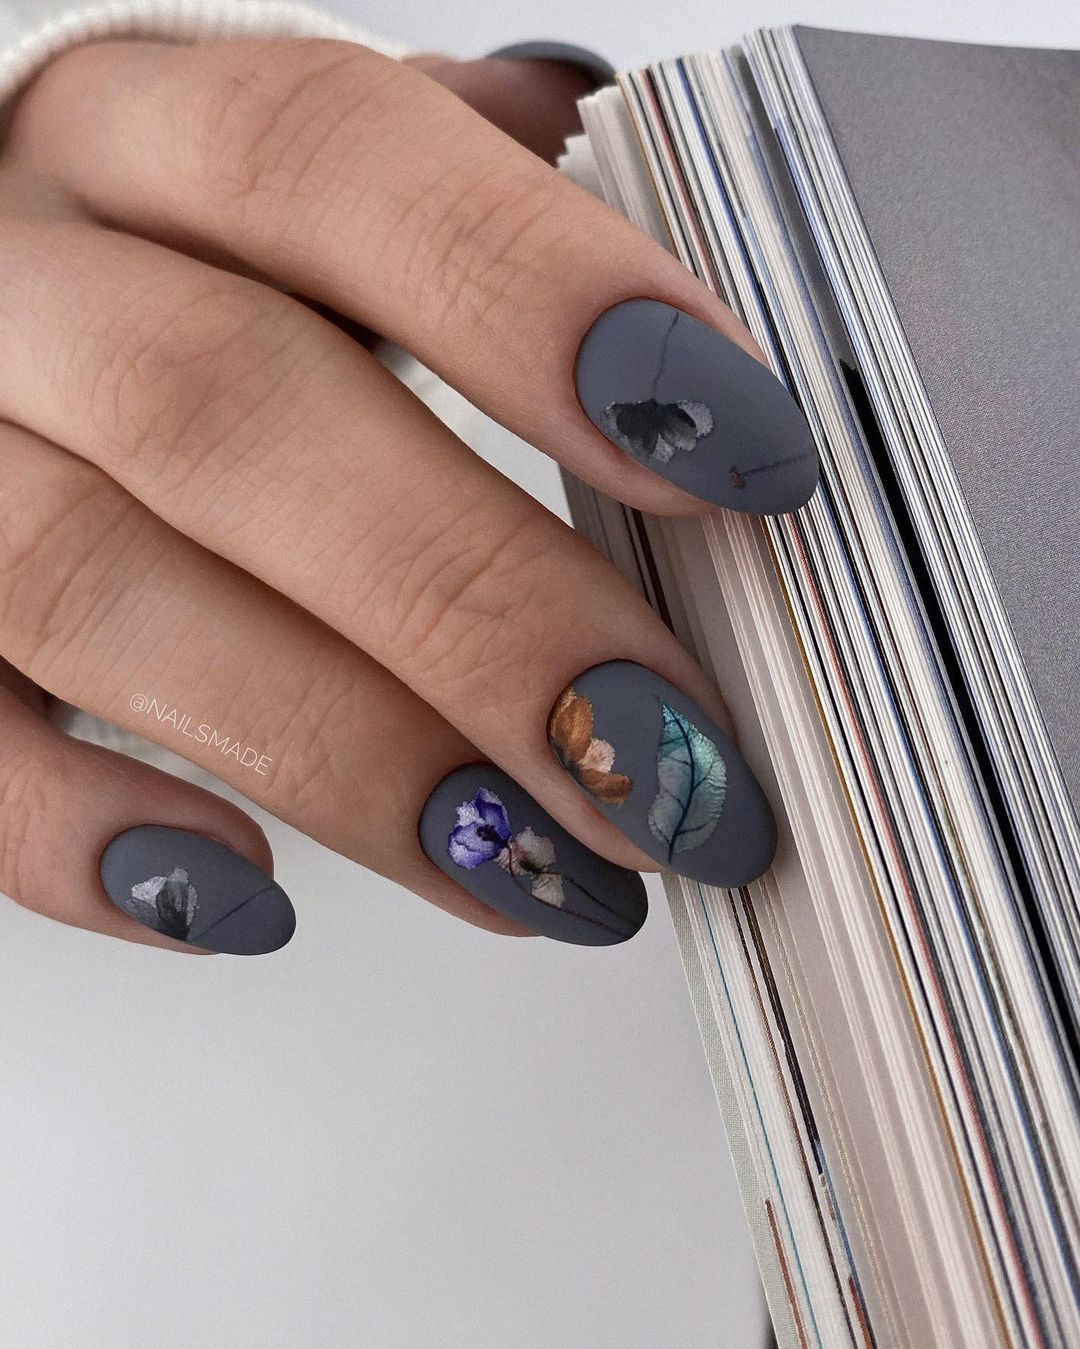
This stunning matte nail art features delicate botanical designs that evoke a serene autumn mood. The muted gray base color is the perfect backdrop for the intricate floral details, adding a touch of nature’s beauty to your nails. The matte finish enhances the sophisticated feel of this design, making it ideal for both casual and formal occasions.
-
- Matte gray gel polish (e.g., OPI GelColor in ‘Icelanded a Bottle of OPI’)
- Botanical nail stickers or hand-painted designs (e.g., NICENEEDED Flower Nail Art Stickers)
- Matte top coat (e.g., Essie Matte About You Top Coat)
- UV/LED nail lamp
Instructions:
-
- Shape your nails into an almond or oval shape and buff the surface.
- Apply a base coat and cure under a UV/LED lamp.
- Paint nails with matte gray gel polish and cure.
- Apply botanical nail stickers or hand-paint the designs, then cure.
- Seal with a matte top coat and cure for a velvety, smooth finish.
Floral Elegance
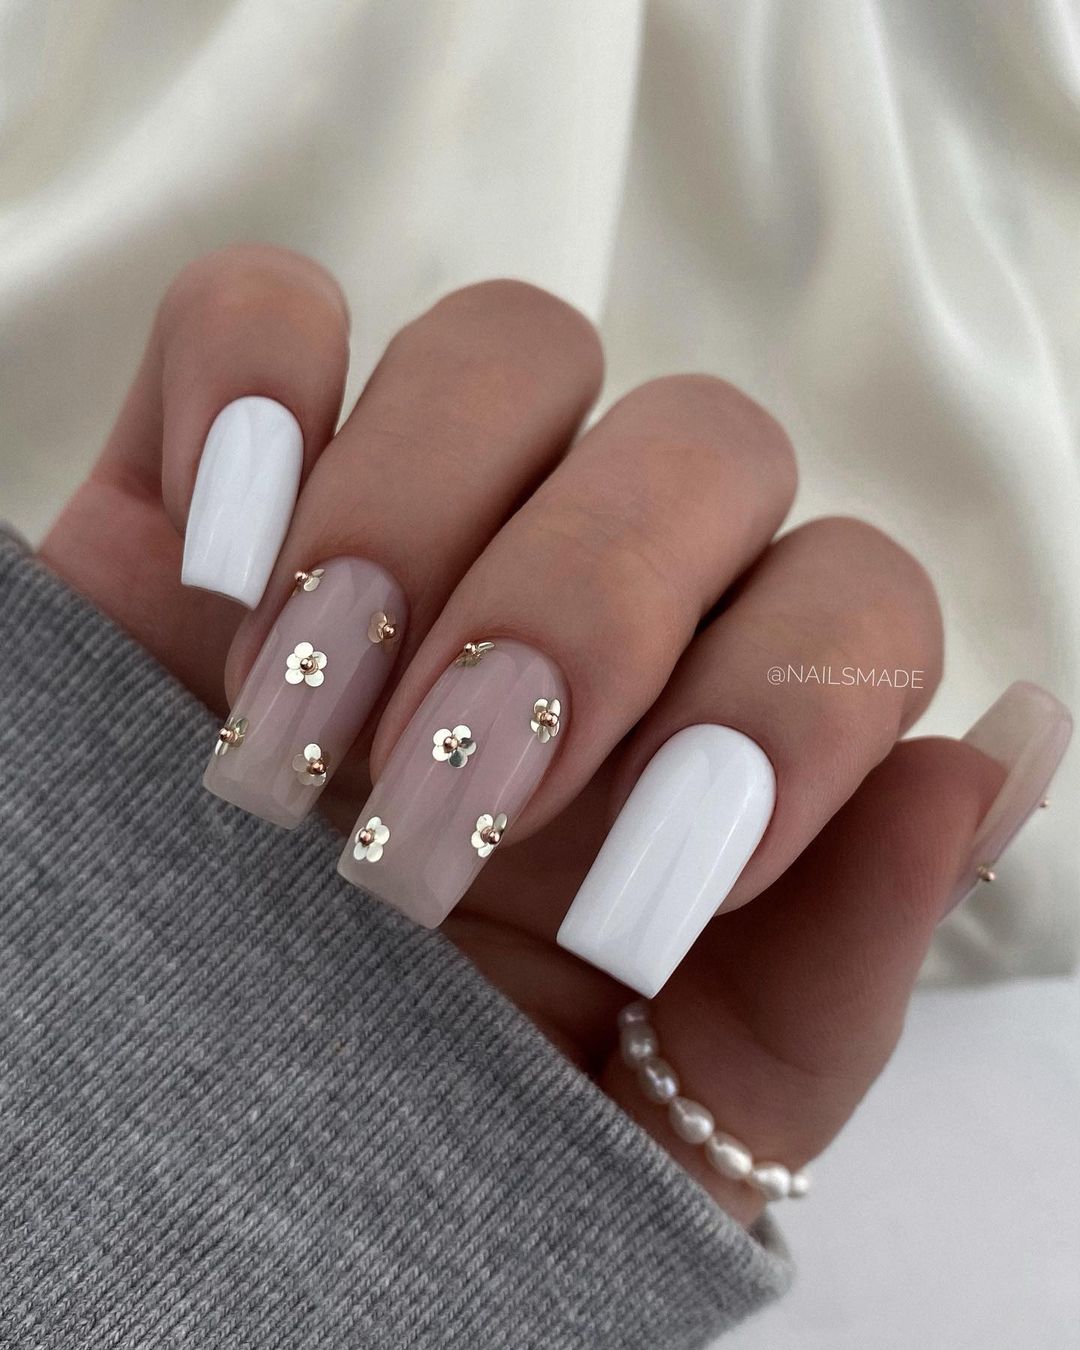
This floral design combines clear and white polish with delicate gold accents to create a feminine and elegant look. The clear base allows the small gold flowers to stand out, giving a subtle yet sophisticated appearance. The combination of glossy and matte finishes adds depth and dimension to this design.
-
- Clear gel polish (e.g., CND Shellac in ‘Clearly Pink’)
- White gel polish (e.g., Gelish in ‘Arctic Freeze’)
- Gold flower nail stickers or decals (e.g., GOROANLY Nail Art Stickers)
- Glossy top coat
- UV/LED nail lamp
Instructions:
-
- Shape nails into a coffin or square shape and buff the surface.
- Apply a base coat and cure under a UV/LED lamp.
- Paint some nails with clear gel polish and others with white, then cure.
- Apply gold flower stickers on the clear nails and cure.
- Seal with a glossy top coat and cure for a beautiful, long-lasting finish.
Gold Leaf Accents
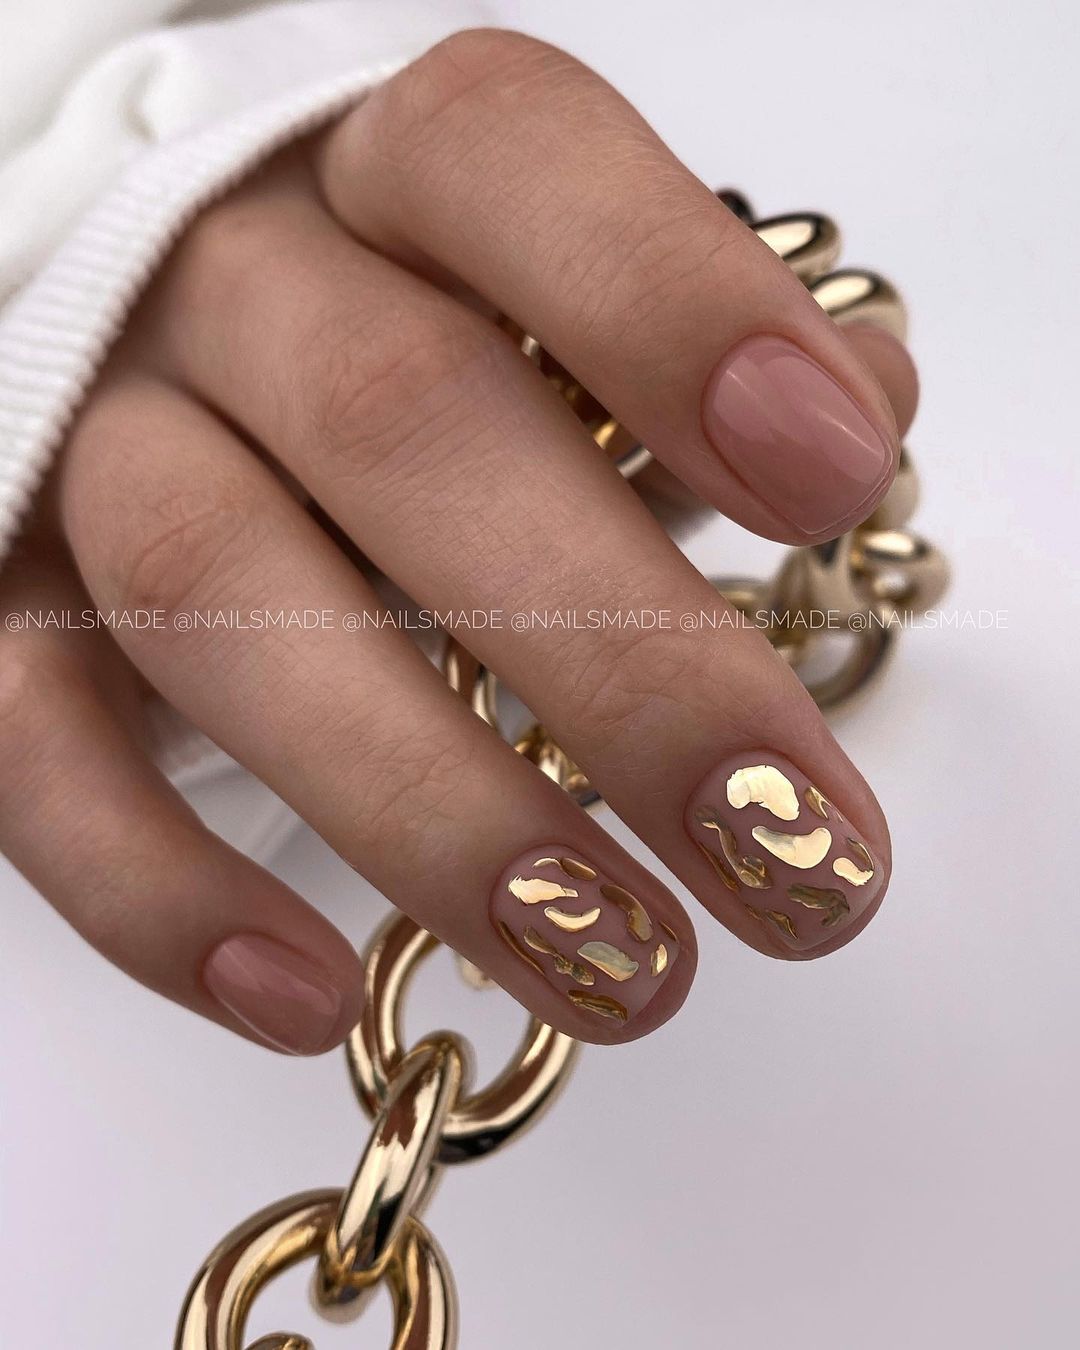
This nail art features a nude base color with striking gold leaf accents, creating a luxurious and sophisticated look. The gold leaf adds a touch of glamour, while the nude base keeps it elegant and understated. This design is perfect for special occasions or whenever you want to add a bit of shine to your look.
-
- Nude gel polish (e.g., Essie Gel Couture in ‘Fairy Tailor’)
- Gold leaf flakes (e.g., Born Pretty Gold Foil Flakes)
- Glossy top coat
- UV/LED nail lamp
Instructions:
-
- Shape your nails into a short square or round shape and buff the surface.
- Apply a base coat and cure under a UV/LED lamp.
- Paint nails with nude gel polish and cure.
- Carefully apply gold leaf flakes on select nails and cure.
- Seal with a glossy top coat and cure for a dazzling finish.
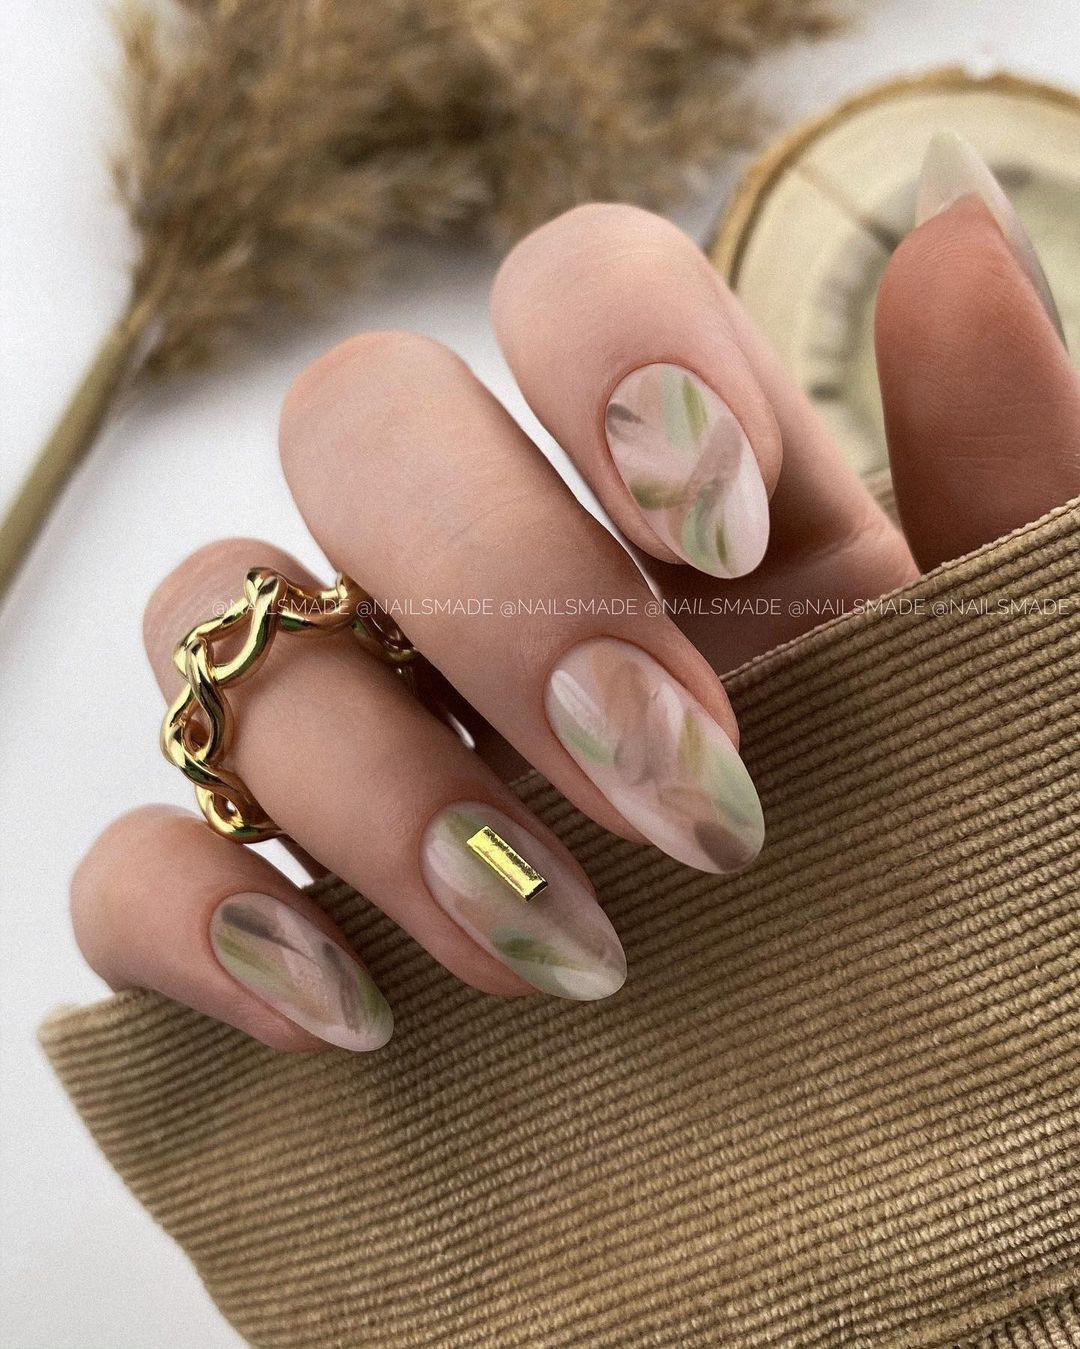
Soft Marble
This soft marble design combines gentle shades of green and beige to create a serene and elegant look. The subtle marbling effect is both sophisticated and trendy, making it a perfect choice for those who want a chic yet understated manicure. The almond shape enhances the overall graceful appearance of this design.
-
- Light green gel polish (e.g., OPI GelColor in ‘How Does Your Zen Garden Grow?’)
- Beige gel polish (e.g., CND Shellac in ‘Field Fox’)
- Marbling tool or fine nail brush
- Glossy top coat
- UV/LED nail lamp
Instructions:
-
- Shape nails into an almond shape and buff the surface.
- Apply a base coat and cure under a UV/LED lamp.
- Paint nails with light green and beige gel polish, curing each layer.
- Use a marbling tool or fine brush to blend the colors, creating a marble effect, then cure.
- Finish with a glossy top coat and cure for a polished look.
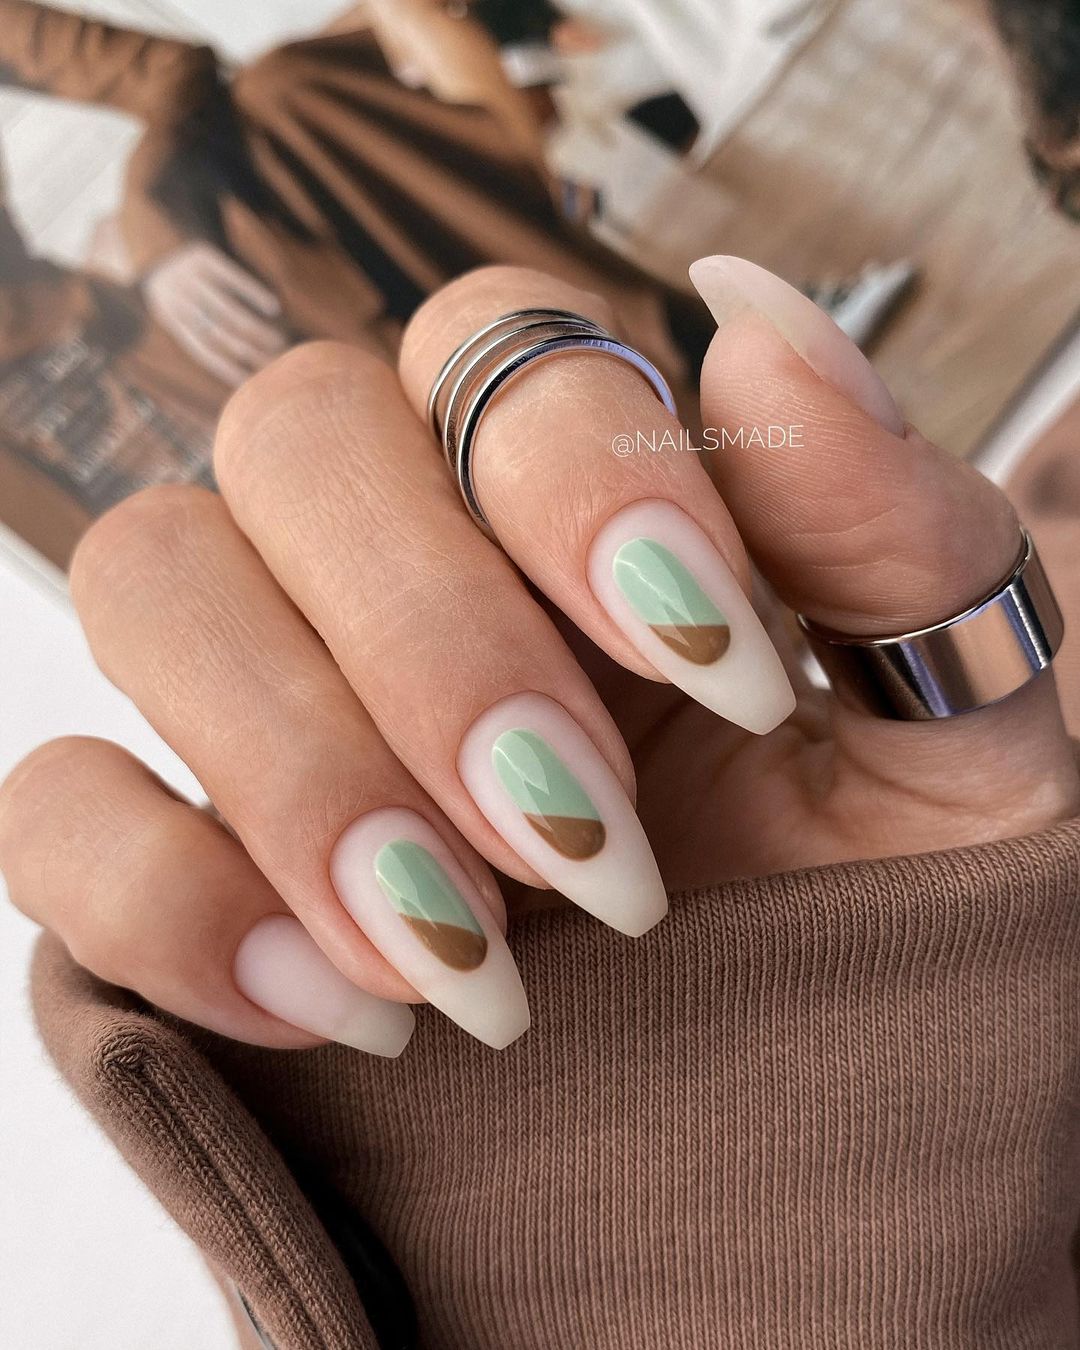
Green and Brown Harmony
This design combines earthy tones of green and brown to create a harmonious and stylish look. The color blocking technique adds a modern twist, while the matte finish keeps it sophisticated. This design is perfect for those who love minimal yet impactful nail art.
-
- Light green gel polish (e.g., OPI GelColor in ‘How Does Your Zen Garden Grow?’)
- Brown gel polish (e.g., Essie Gel Couture in ‘Take Me to Thread’)
- Matte top coat (e.g., OPI Matte Top Coat)
- Fine nail art brush
- UV/LED nail lamp
Instructions:
-
- Shape nails into a coffin shape and buff the surface.
- Apply a base coat and cure under a UV/LED lamp.
- Paint nails with light green gel polish and cure.
- Use a fine brush to create the brown color blocks, then cure.
- Seal with a matte top coat and cure for a sleek, modern finish.
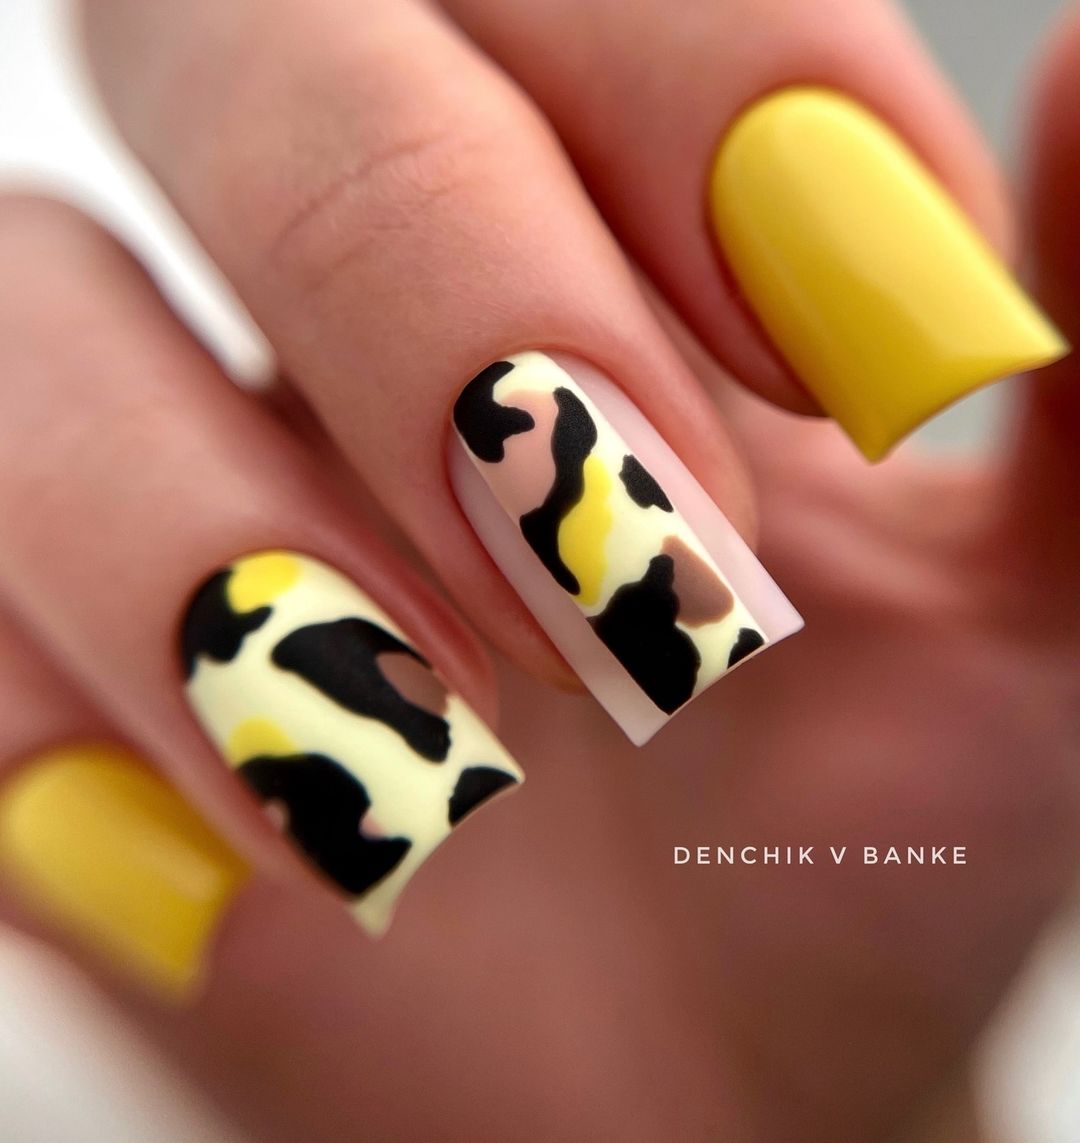
Vibrant Cow Print
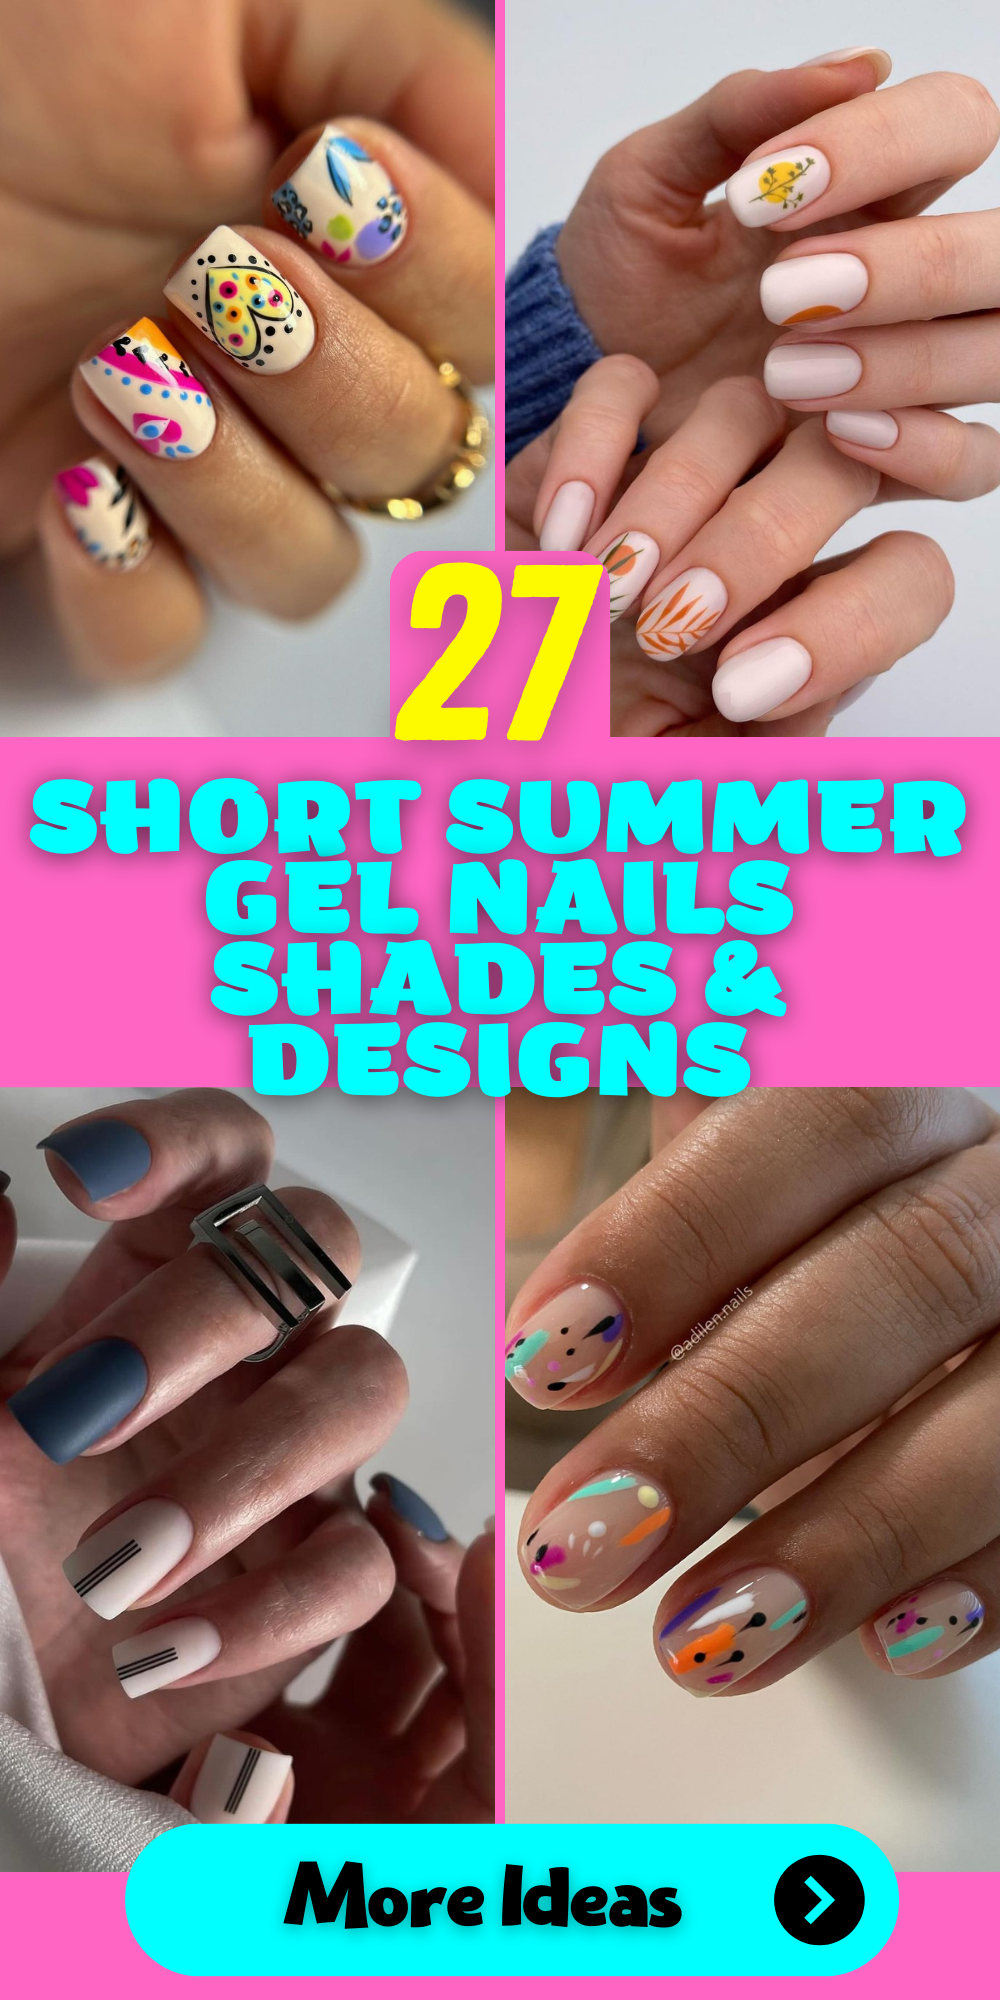
This bold and playful cow print design features a vibrant yellow and black pattern on a nude base. The striking contrast between the colors makes this design a real standout. The glossy finish adds a touch of sophistication, making it perfect for those who love to experiment with their nails.
-
- Nude gel polish (e.g., Gelish in ‘Simple Sheer’)
- Yellow gel polish (e.g., OPI GelColor in ‘Exotic Birds Do Not Tweet’)
- Black gel polish (e.g., Gelish in ‘Black Shadow’)
- Fine nail art brush
- Glossy top coat
- UV/LED nail lamp
Instructions:
-
- Shape nails into a short square shape and buff the surface.
- Apply a base coat and cure under a UV/LED lamp.
- Paint nails with nude gel polish and cure.
- Use a fine brush to create the cow print design with yellow and black gel polish, then cure.
- Finish with a glossy top coat and cure for a vibrant, polished look.
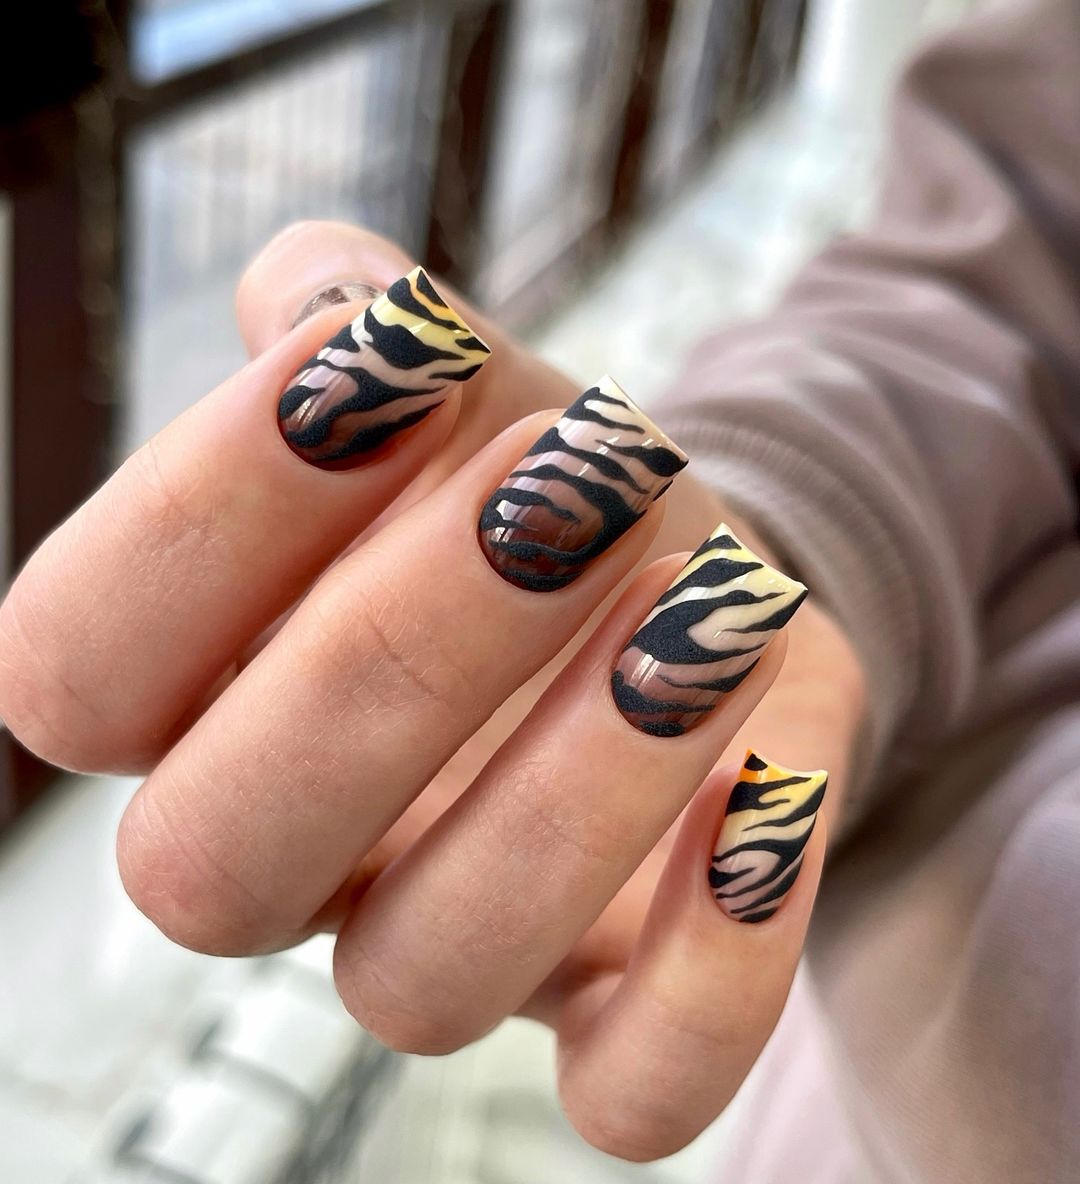
Wild Zebra
This bold zebra print design brings a touch of the wild to your nails. The gradient effect adds depth and dimension, making each stripe pop against the nude base. The combination of black, brown, and cream hues creates a sophisticated yet playful look, perfect for making a statement.
-
- Nude gel polish (e.g., Essie Gel Couture in ‘Fairy Tailor’)
- Black, brown, and cream gel polishes (e.g., OPI GelColor in ‘Black Onyx’, ‘Chocolate Moose’, ‘Alpine Snow’)
- Fine nail art brush
- Glossy top coat
- UV/LED nail lamp
Instructions:
-
- Shape nails into a short square shape and buff the surface.
- Apply a base coat and cure under a UV/LED lamp.
- Paint nails with nude gel polish and cure.
- Use a fine brush to create the zebra stripes with black, brown, and cream gel polishes, then cure.
- Finish with a glossy top coat and cure for a sleek, polished look.
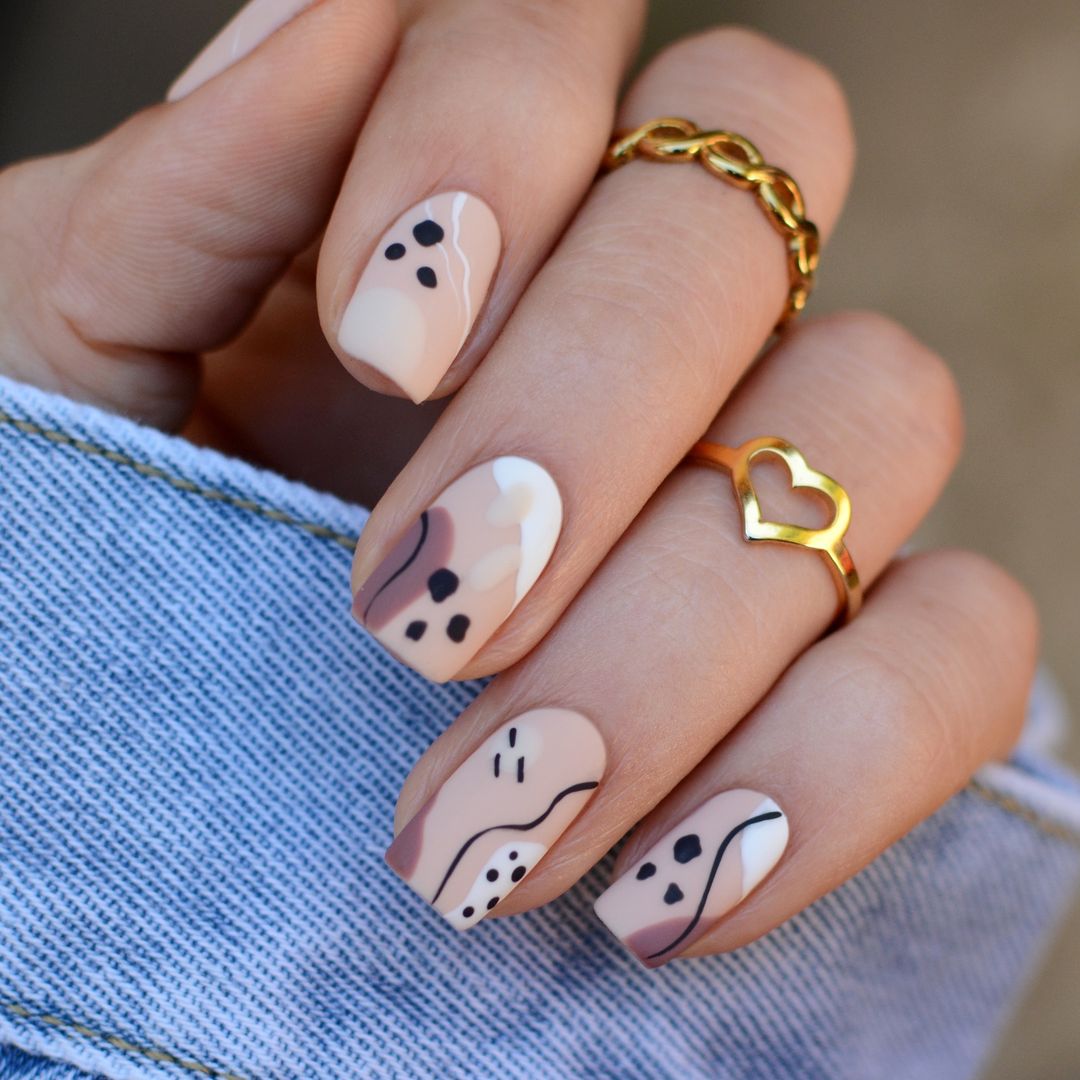
Abstract Doodles
This nail design features an array of abstract shapes and lines in neutral tones, creating a modern and artistic look. The matte finish gives it a sophisticated touch, making it perfect for any occasion. The combination of beige, brown, and black hues adds a chic and trendy vibe to your nails.
-
- Beige gel polish (e.g., CND Shellac in ‘Beau’)
- Brown and black gel polishes (e.g., Essie Gel Couture in ‘Take Me to Thread’ and ‘Licorice’)
- Matte top coat (e.g., OPI Matte Top Coat)
- Fine nail art brush
- UV/LED nail lamp
Instructions:
-
- Shape nails into a short round or square shape and buff the surface.
- Apply a base coat and cure under a UV/LED lamp.
- Paint nails with beige gel polish and cure.
- Use a fine brush to draw abstract shapes and lines with brown and black gel polishes, then cure.
- Seal with a matte top coat and cure for a stylish, modern finish.
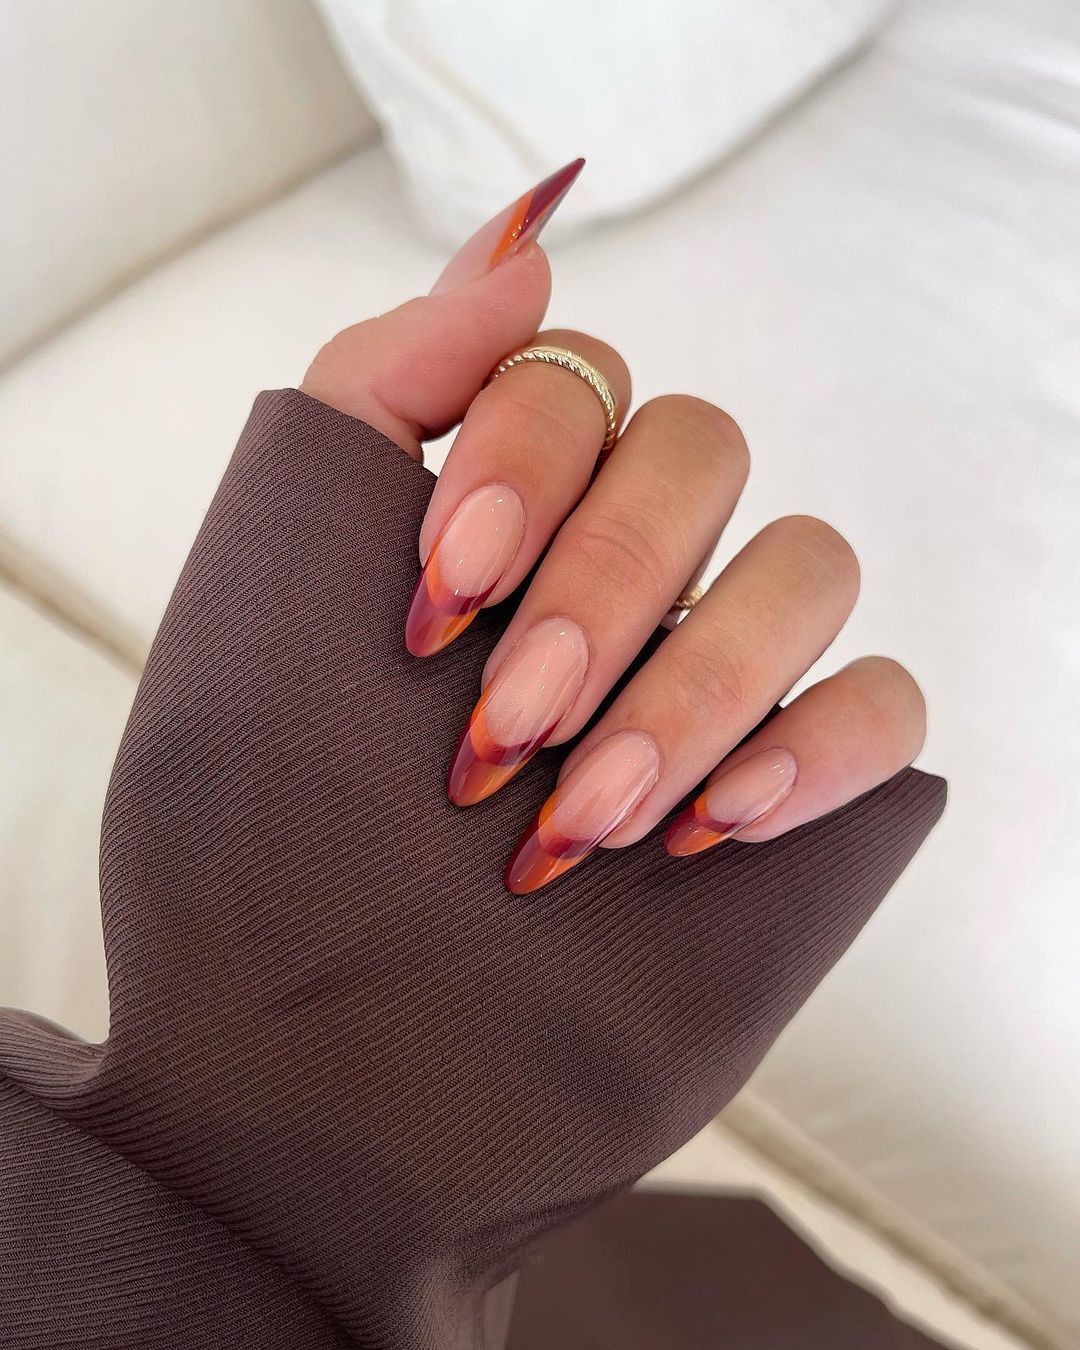
Fiery French Tips
This design puts a fiery twist on the classic French manicure with vibrant red and orange tips. The almond shape enhances the boldness of the design, making it perfect for those who love to stand out. The glossy finish adds a touch of sophistication, making this look ideal for any autumn occasion.
-
- Nude gel polish (e.g., Gelish in ‘Simple Sheer’)
- Red and orange gel polishes (e.g., OPI GelColor in ‘Big Apple Red’ and ‘No Tan Lines’)
- Fine nail art brush
- Glossy top coat
- UV/LED nail lamp
Instructions:
-
- Shape nails into an almond shape and buff the surface.
- Apply a base coat and cure under a UV/LED lamp.
- Paint nails with nude gel polish and cure.
- Use a fine brush to create the French tips with red and orange gel polishes, then cure.
- Finish with a glossy top coat and cure for a vibrant, polished look.
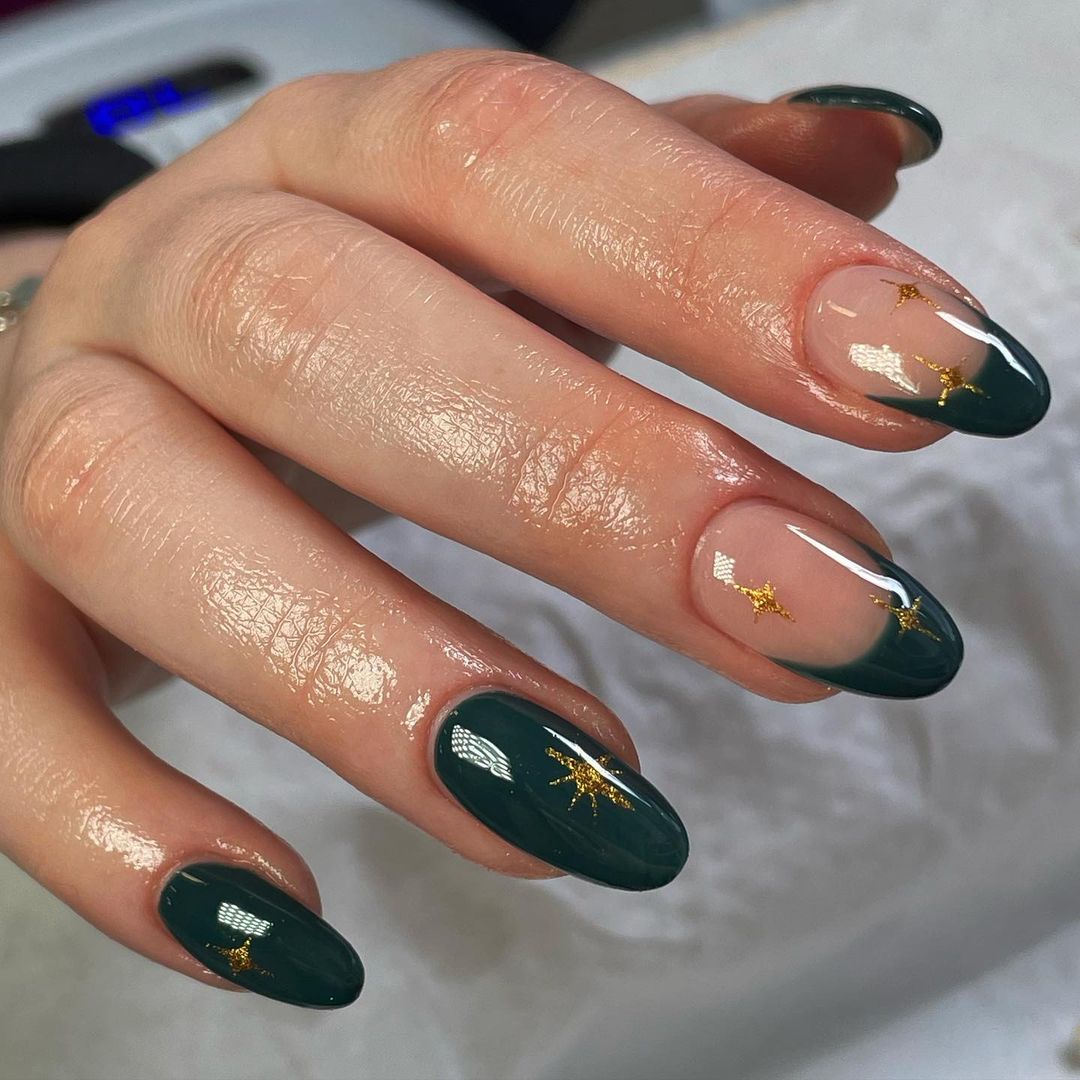
Elegant Green French Tips
This elegant design features deep green French tips with delicate gold star accents. The almond shape and glossy finish give it a sophisticated and festive look, perfect for the fall season. The combination of green and gold adds a touch of luxury and elegance to your nails.
-
- Nude gel polish (e.g., Essie Gel Couture in ‘Fairy Tailor’)
- Green gel polish (e.g., OPI GelColor in ‘Stay Off the Lawn!’)
- Gold star nail stickers or decals (e.g., Born Pretty Gold Star Stickers)
- Glossy top coat
- UV/LED nail lamp
Instructions:
-
- Shape nails into an almond shape and buff the surface.
- Apply a base coat and cure under a UV/LED lamp.
- Paint nails with nude gel polish and cure.
- Create the French tips with green gel polish and cure.
- Apply gold star stickers, seal with a glossy top coat, and cure for a luxurious finish.
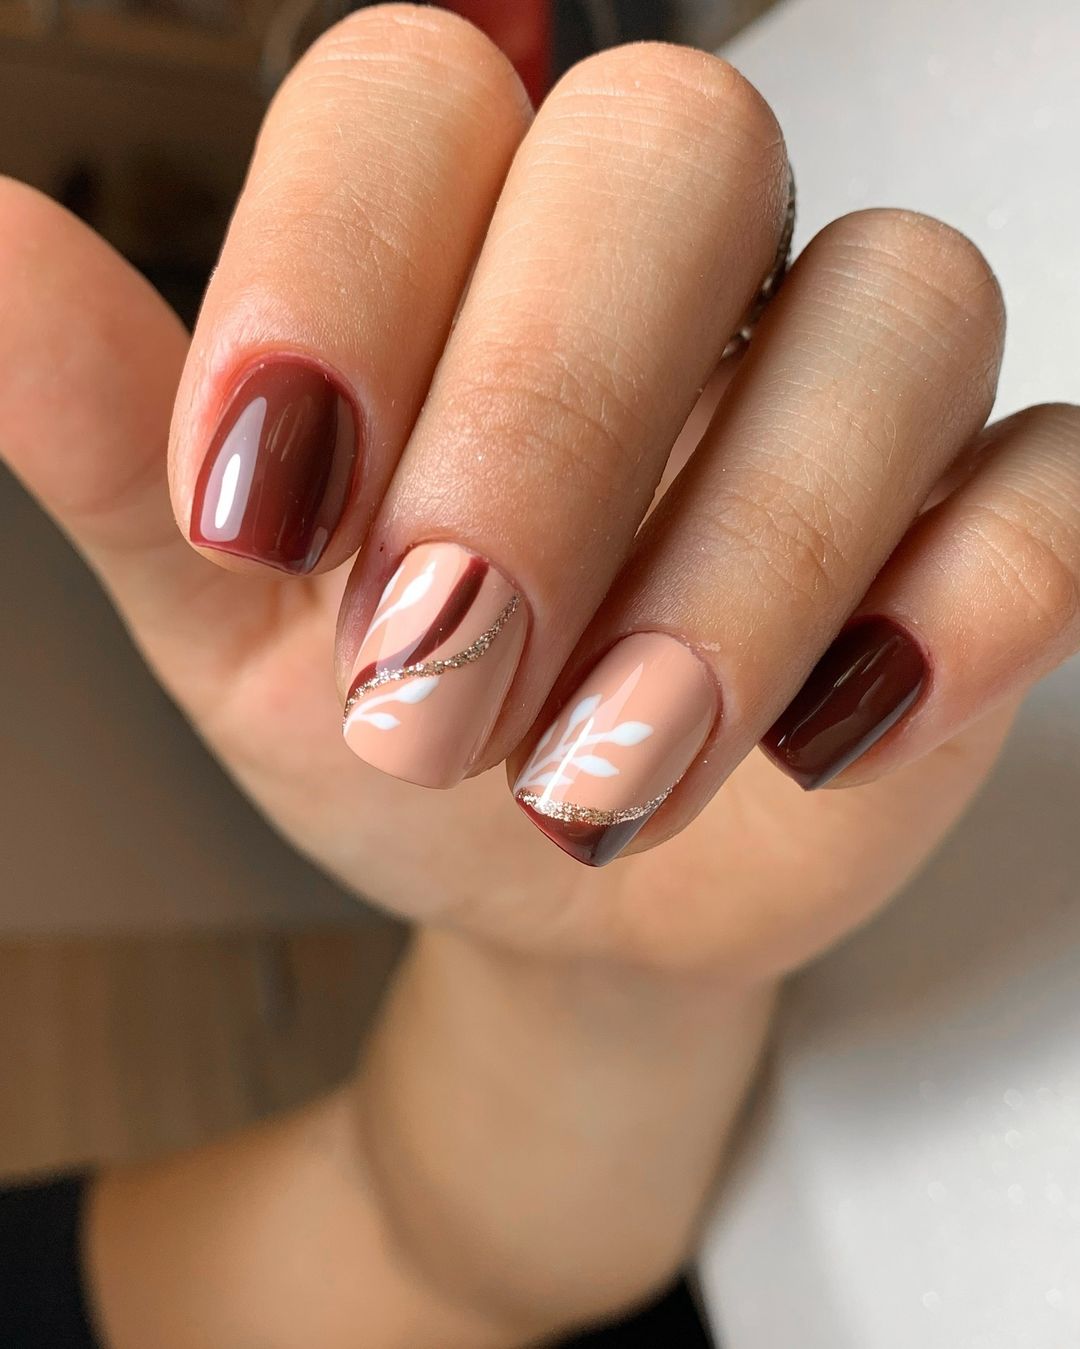
Autumnal Elegance
This design combines rich brown and nude tones with delicate white leaf accents and glitter. The mix of colors and textures creates a warm and sophisticated look, perfect for the autumn season. The short square shape adds to the modern and chic appearance of this manicure.
-
- Nude and brown gel polishes (e.g., Gelish in ‘Simple Sheer’ and ‘Do I Look Buff?’)
- White gel polish (e.g., CND Shellac in ‘Cream Puff’)
- Silver glitter gel polish (e.g., OPI GelColor in ‘Glitzerland’)
- Fine nail art brush
- UV/LED nail lamp
Instructions:
-
- Shape nails into a short square shape and buff the surface.
- Apply a base coat and cure under a UV/LED lamp.
- Paint nails with nude and brown gel polishes, curing each layer.
- Use a fine brush to create white leaf accents and add glitter details, then cure.
- Seal with a glossy top coat and cure for a polished finish.
Tortoiseshell Chic
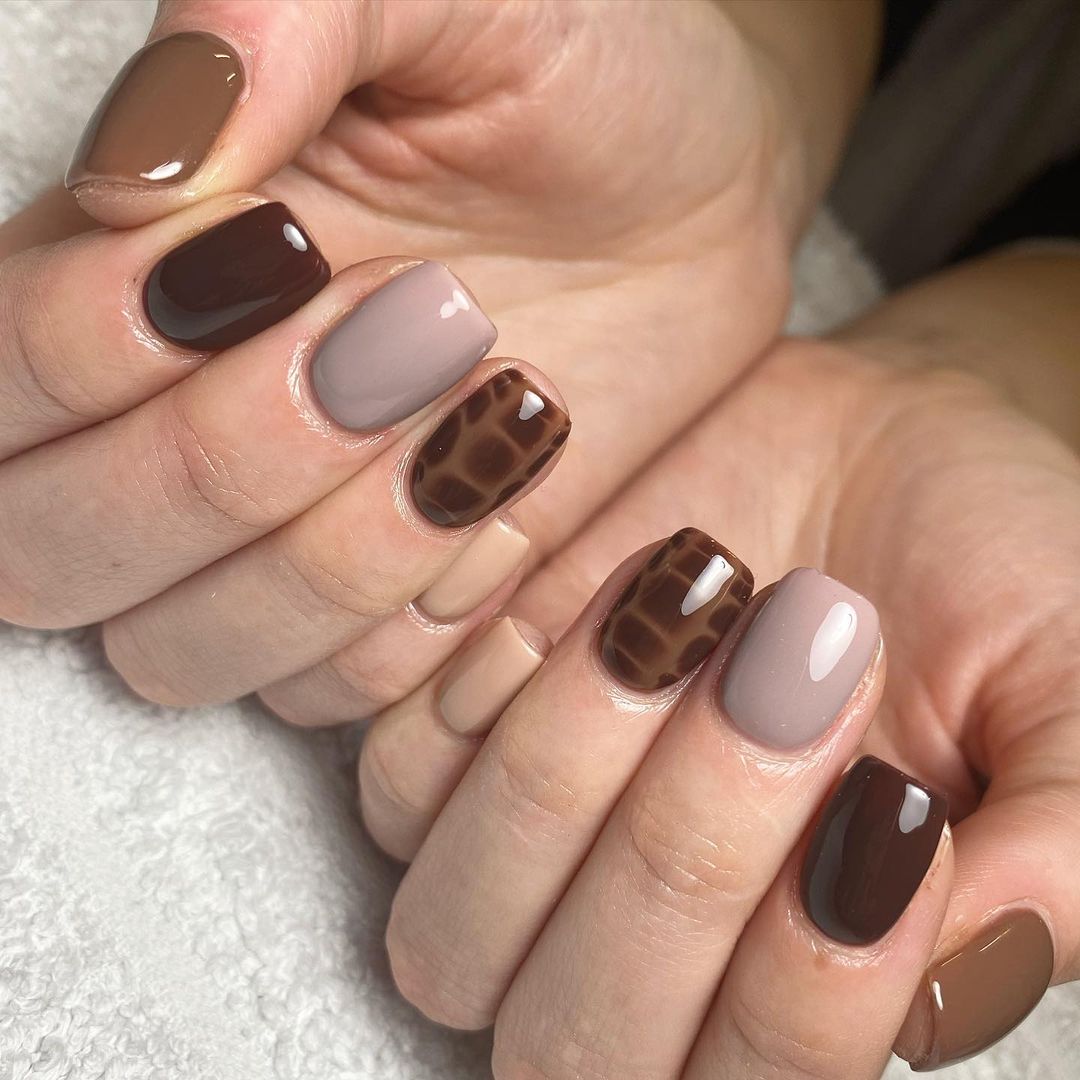
This tortoiseshell design combines various shades of brown and beige to create a chic and trendy look. The glossy finish enhances the depth and dimension of the pattern, making it a standout design for the fall season. The short square shape is both practical and stylish, perfect for everyday wear.
-
- Beige, brown, and dark brown gel polishes (e.g., OPI GelColor in ‘Dulce de Leche’, ‘That’s What Friends Are Thor’, and ‘Lincoln Park After Dark’)
- Glossy top coat
- Nail art brush
- UV/LED nail lamp
Instructions:
-
- Shape nails into a short square shape and buff the surface.
- Apply a base coat and cure under a UV/LED lamp.
- Paint nails with beige gel polish and cure.
- Use a nail art brush to create the tortoiseshell pattern with brown and dark brown gel polishes, then cure.
- Finish with a glossy top coat and cure for a chic, glossy finish.
Autumn Leaf Art
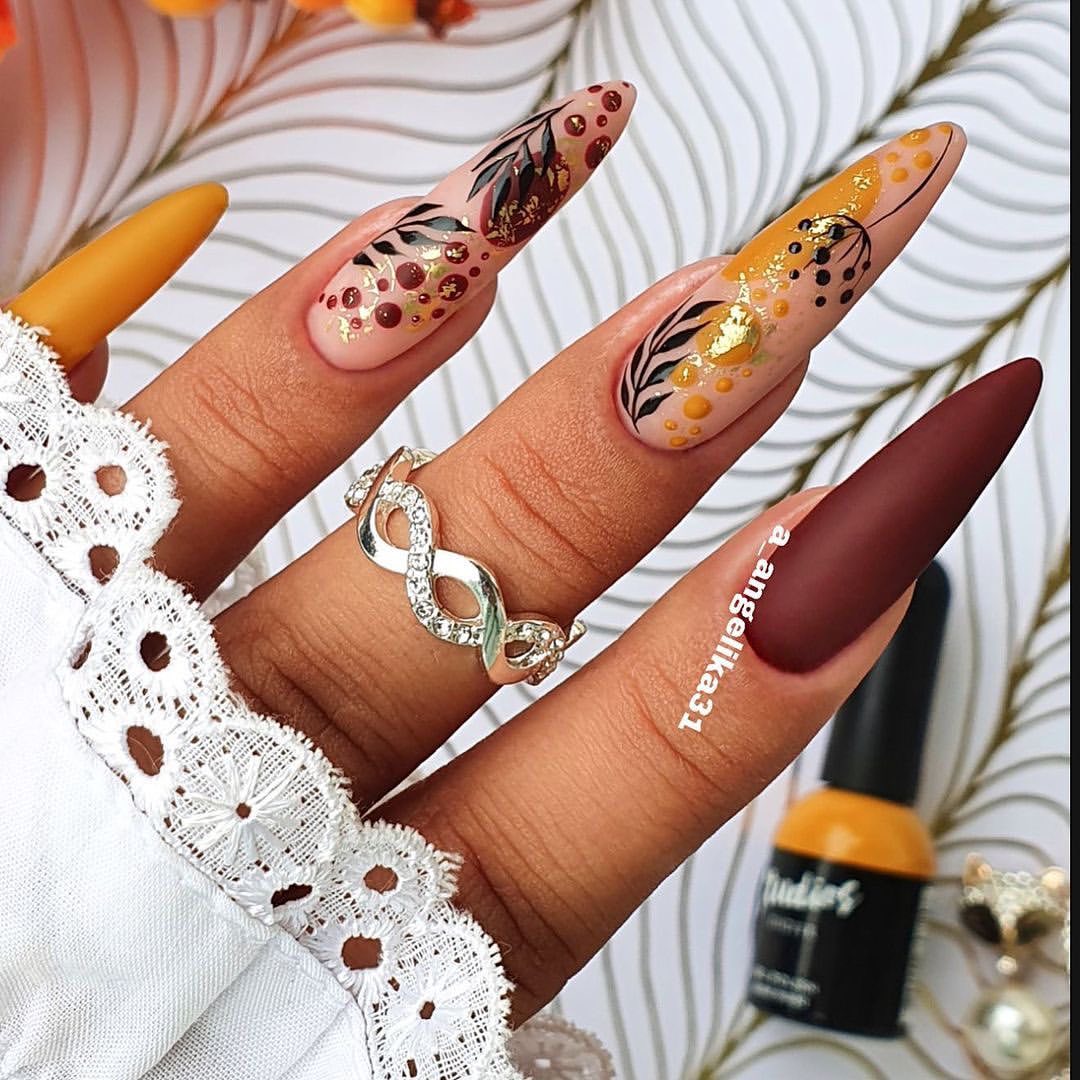
This intricate autumn leaf design features a mix of matte and glossy finishes with vibrant yellow, orange, and brown hues. The stiletto shape adds an edgy touch, while the detailed leaf patterns bring out the beauty of the fall season. This design is perfect for those who love to showcase their creative side.
-
- Nude gel polish (e.g., Gelish in ‘Simple Sheer’)
- Yellow, orange, and brown gel polishes (e.g., OPI GelColor in ‘Exotic Birds Do Not Tweet’, ‘No Tan Lines’, and ‘Chocolate Moose’)
- Leaf nail stickers or hand-painted designs (e.g., NICENEEDED Autumn Leaf Nail Art Stickers)
- Matte and glossy top coats
- UV/LED nail lamp
Instructions:
-
- Shape nails into a stiletto shape and buff the surface.
- Apply a base coat and cure under a UV/LED lamp.
- Paint nails with nude gel polish and cure.
- Use a fine brush to create the leaf patterns with yellow, orange, and brown gel polishes, then cure.
- Finish with a mix of matte and glossy top coats and cure for a detailed, artistic finish.
FAQ
Q: How do I prevent my gel polish from chipping? A: Ensure you prep your nails properly by buffing and cleaning them before application. Always use a high-quality base and top coat, and avoid using your nails as tools to prolong the manicure’s life.
Q: Can I mix and match different gel polish brands? A: Yes, but it’s best to stick to the same brand for base and top coats to ensure compatibility and longevity of the manicure.
Q: What’s the best way to remove gel polish at home? A: Soak a cotton pad in acetone, place it on your nail, and wrap it in aluminum foil. Let it sit for 10-15 minutes before gently pushing off the softened gel with an orange stick.
Q: How do I maintain my manicure? A: Keep your nails hydrated by applying cuticle oil daily, and wear gloves when doing household chores to protect your manicure.
By following these detailed instructions and using the right products, you can achieve salon-quality nails at home. Happy nail designing!
Save Pin
