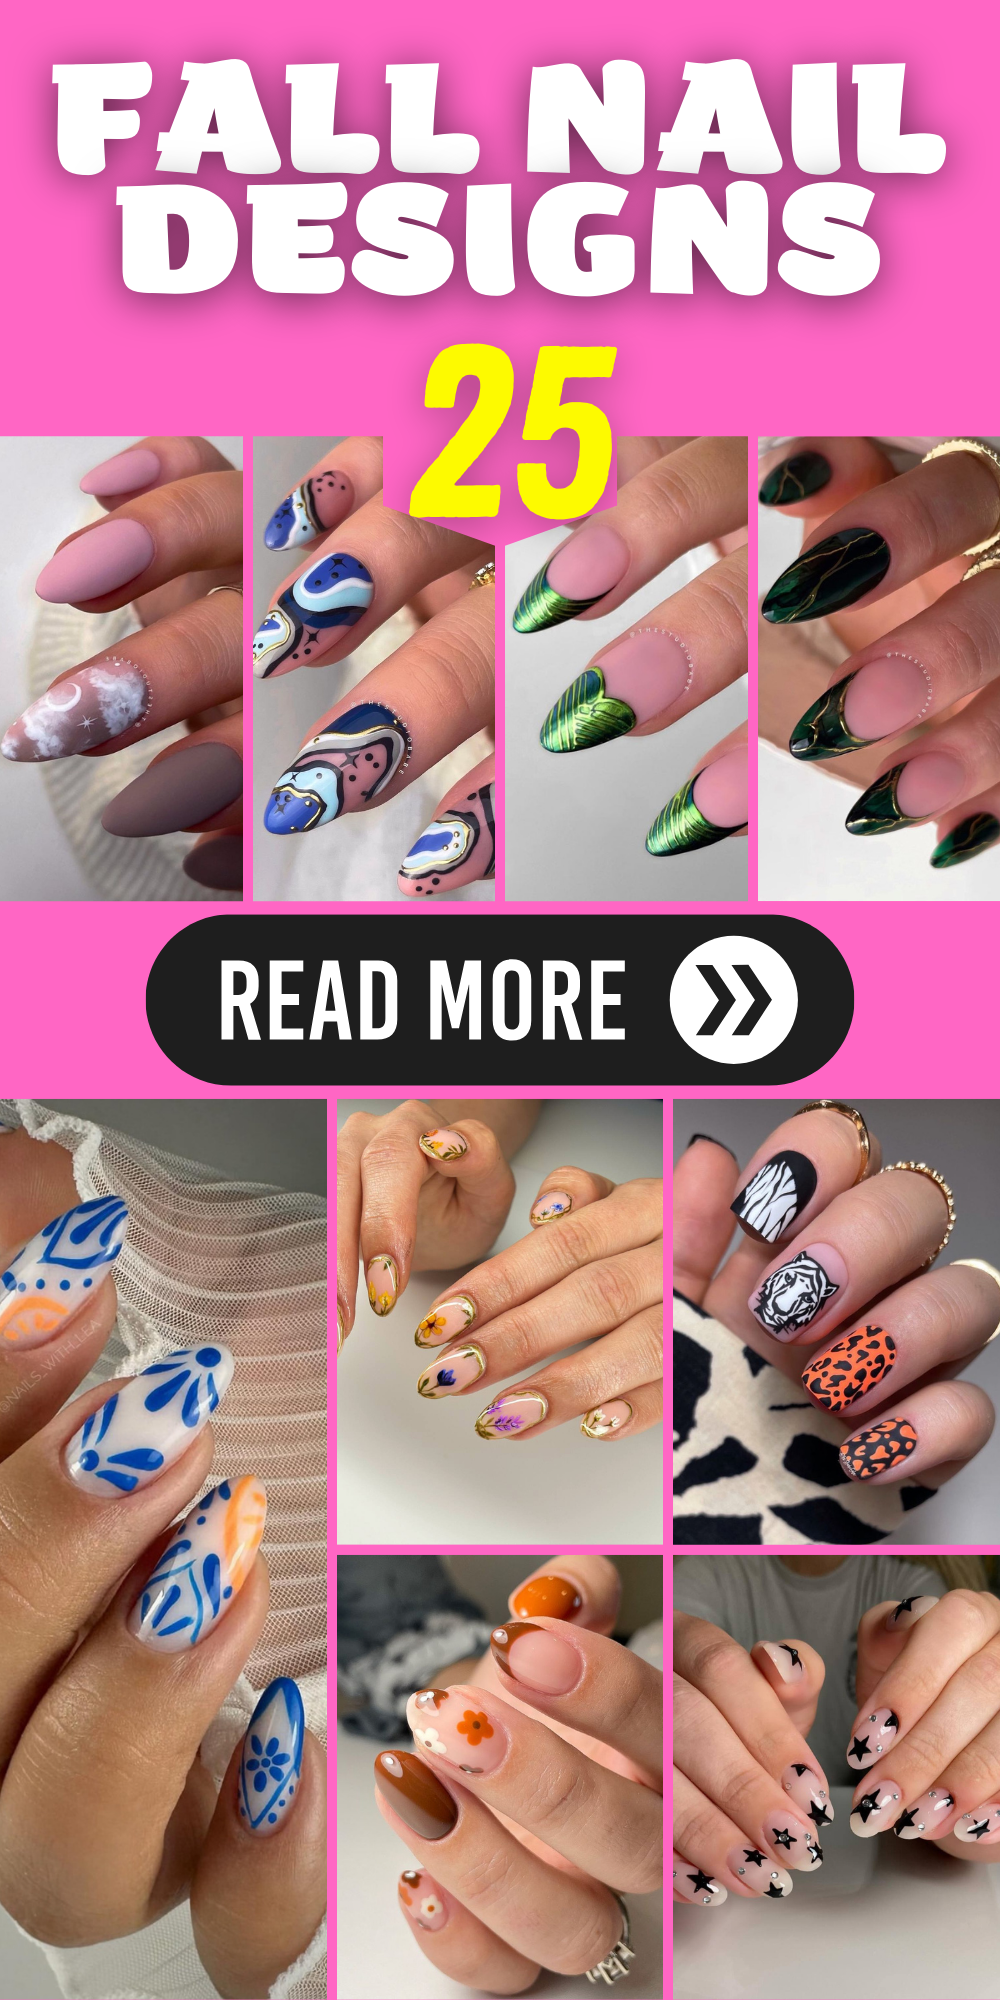
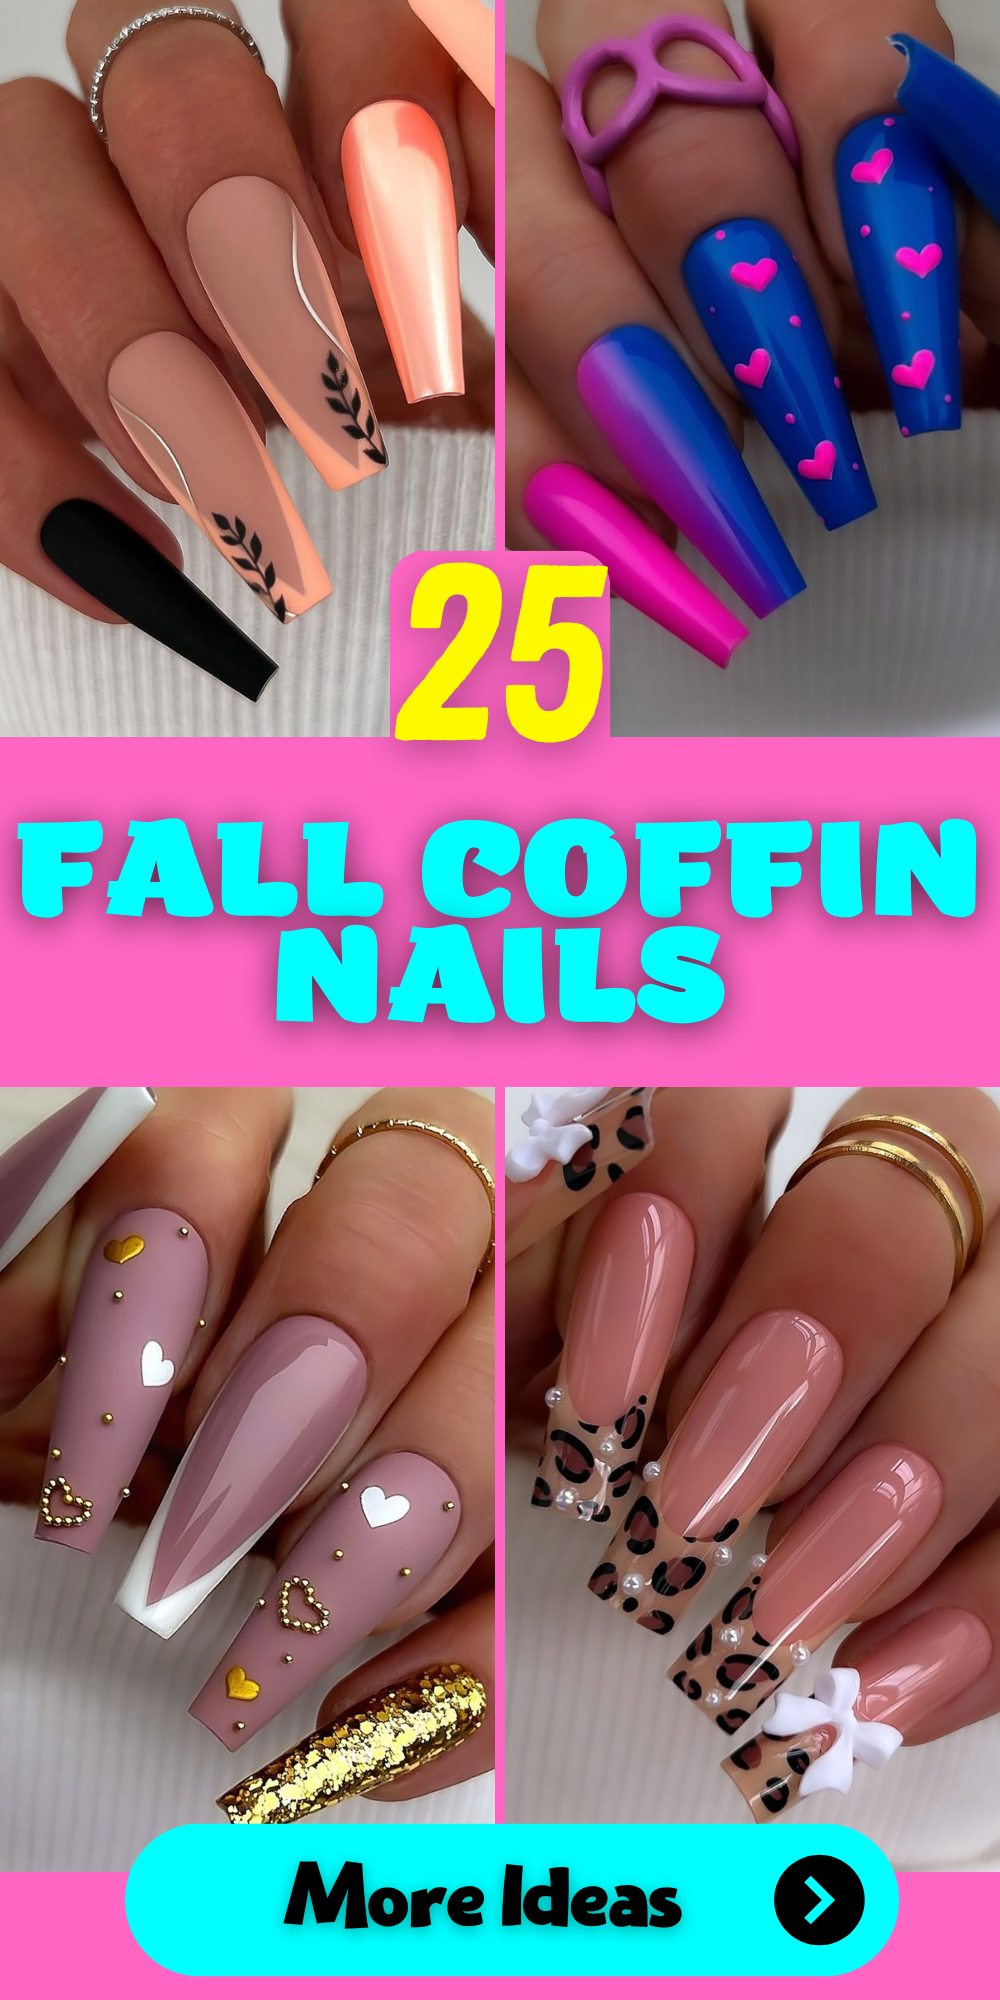
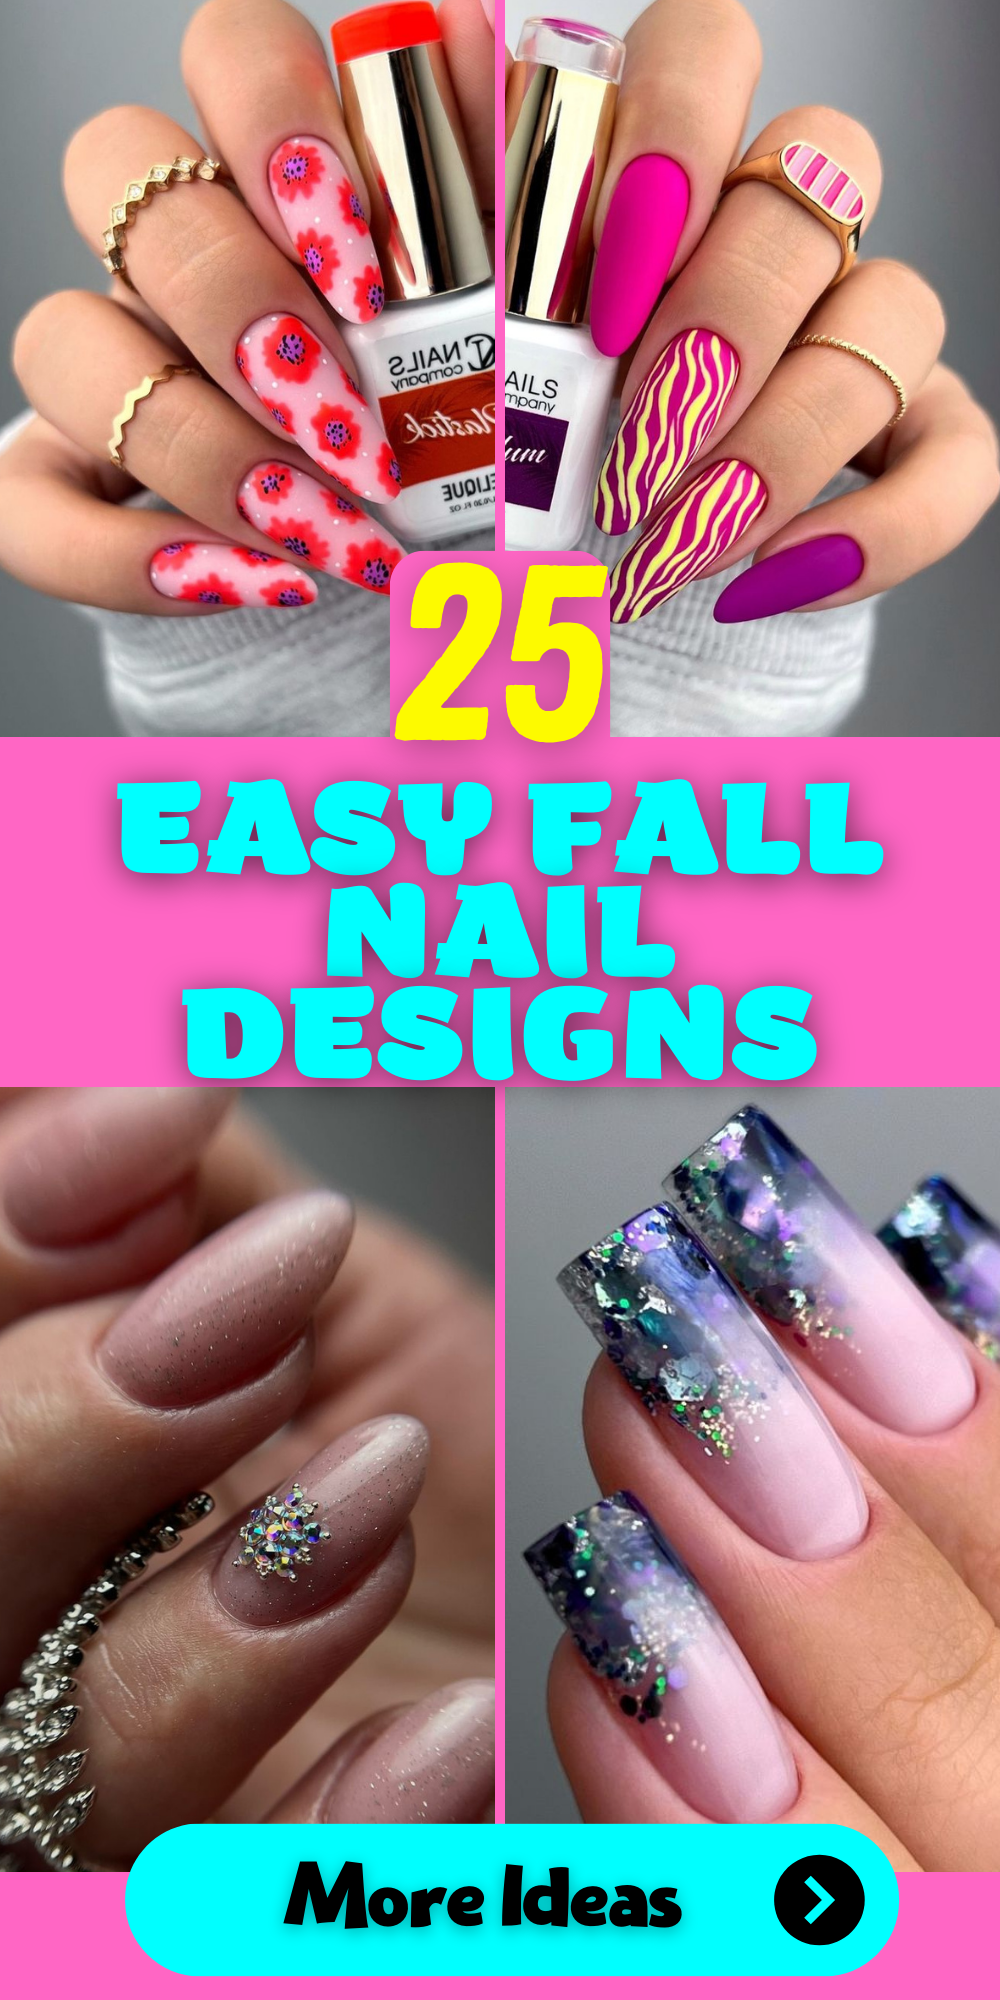
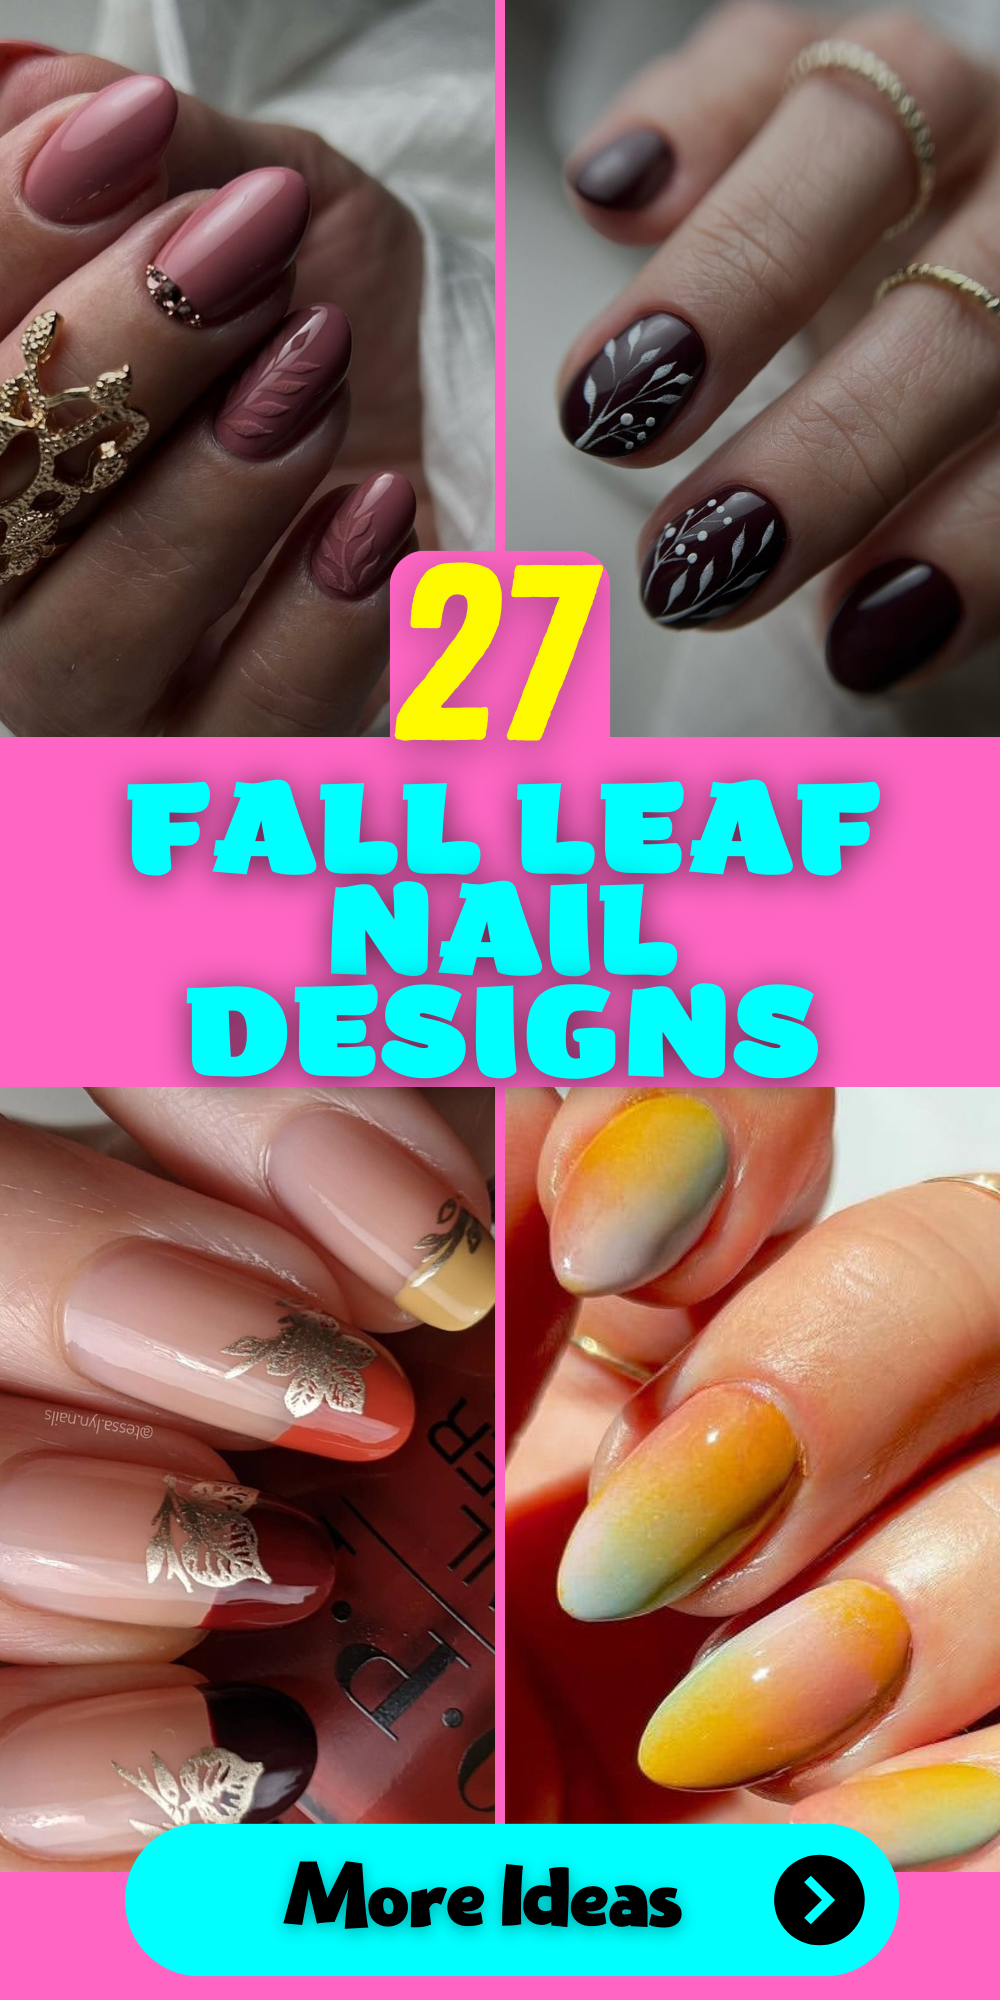
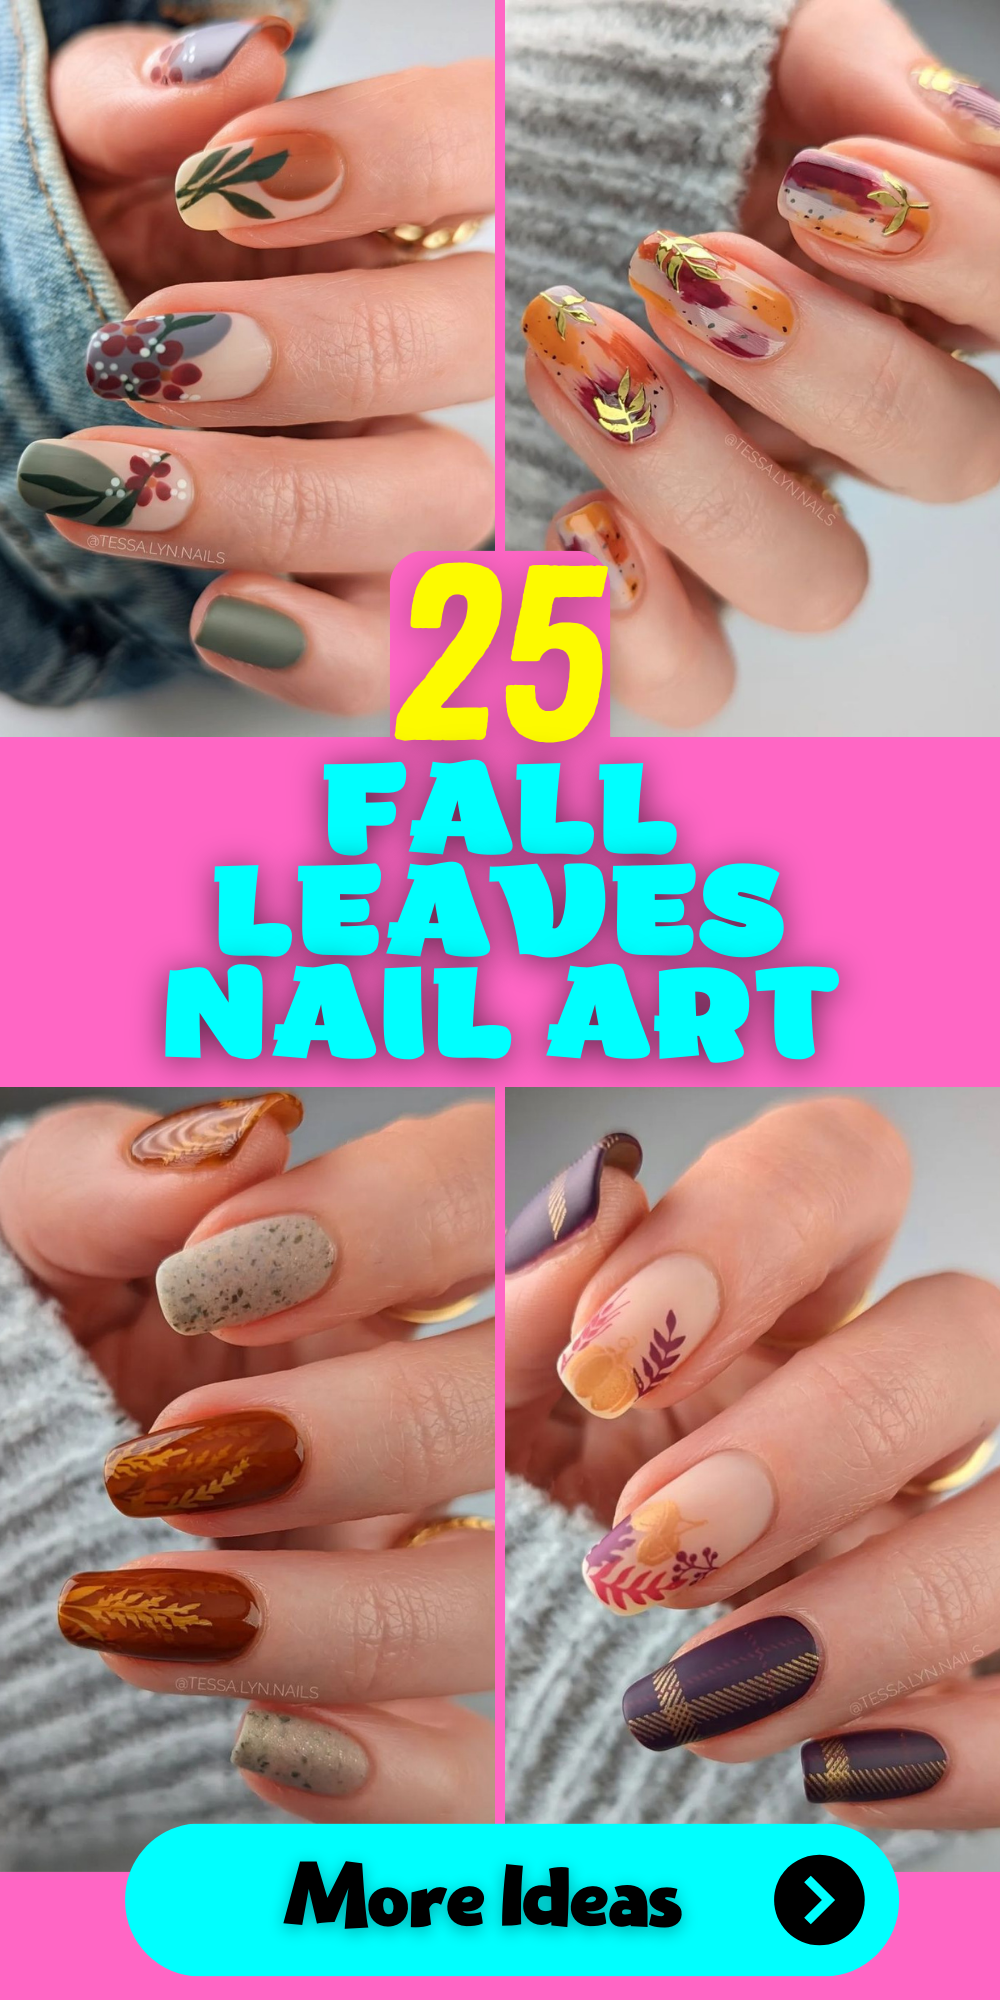
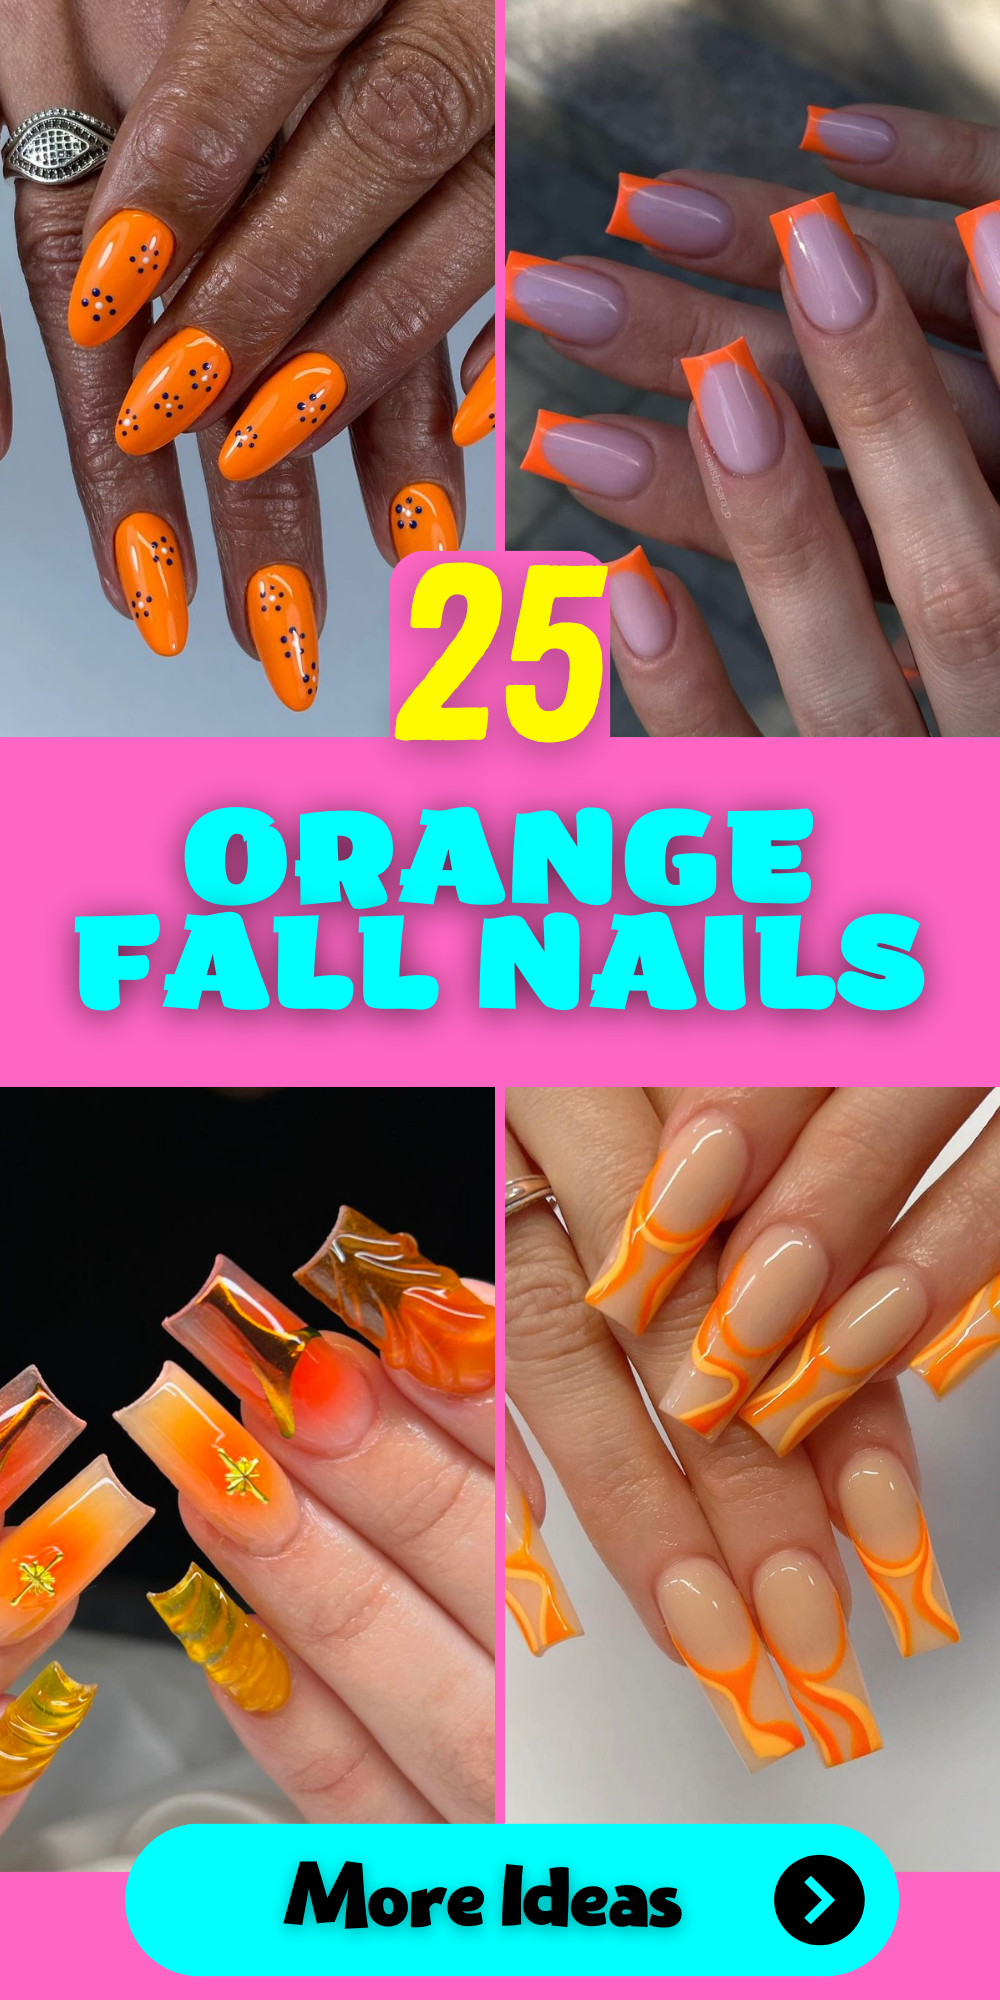
When the leaves start to turn, it’s the perfect time to switch up your nail game with some stunning fall nail designs. Whether you’re looking for simple styles or something more intricate, this guide has got you covered. From burgundy hues to short and cute styles, these autumn classy ideas will inspire your next manicure. Let’s dive into the best autumn nail ideas for this season.
Olive Elegance
As a professional manicurist, I can confidently say that olive green nails are an absolute must-try for the fall season. The deep, muted green is both sophisticated and versatile, making it perfect for any occasion. This particular design combines a matte and glossy finish, giving a unique twist to the traditional single-tone manicure. The subtle contrast between the textures adds depth and interest without being overpowering.
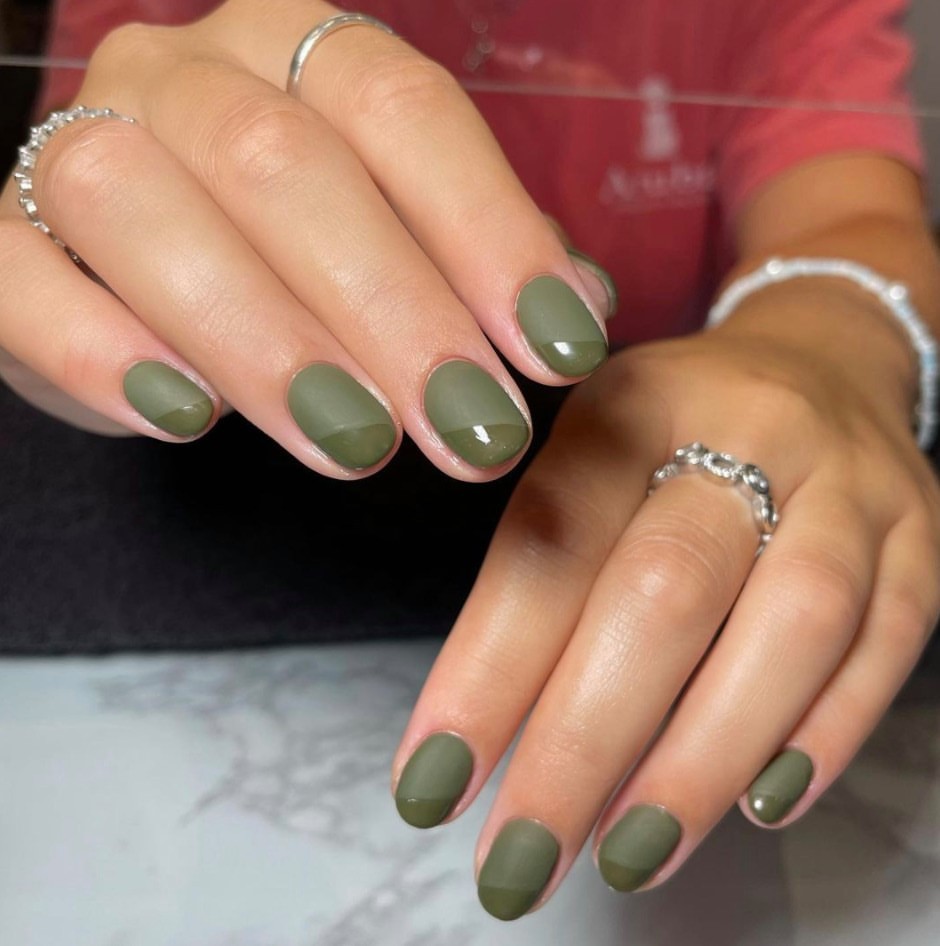
-
- Matte olive green polish (e.g., OPI Infinite Shine in “Olive for Green”)
- Glossy top coat (e.g., Seche Vite Dry Fast Top Coat)
- Matte top coat (e.g., Essie Matte About You)
Instructions:
-
- Start by applying a base coat to protect your nails.
- Apply two coats of the matte olive green polish, letting each layer dry completely.
- Once dry, use a thin brush to apply the glossy top coat in a diagonal pattern across the nail.
- Finish with a matte top coat on the rest of the nail to create the contrasting effect.
Dalmation French
If you’re in the mood for something playful yet chic, this Dalmation French design is perfect for you. The classic French manicure gets an adorable twist with black spots on a white tip. This cute design is perfect for short nails, giving them a fun and trendy look without being too over the top.
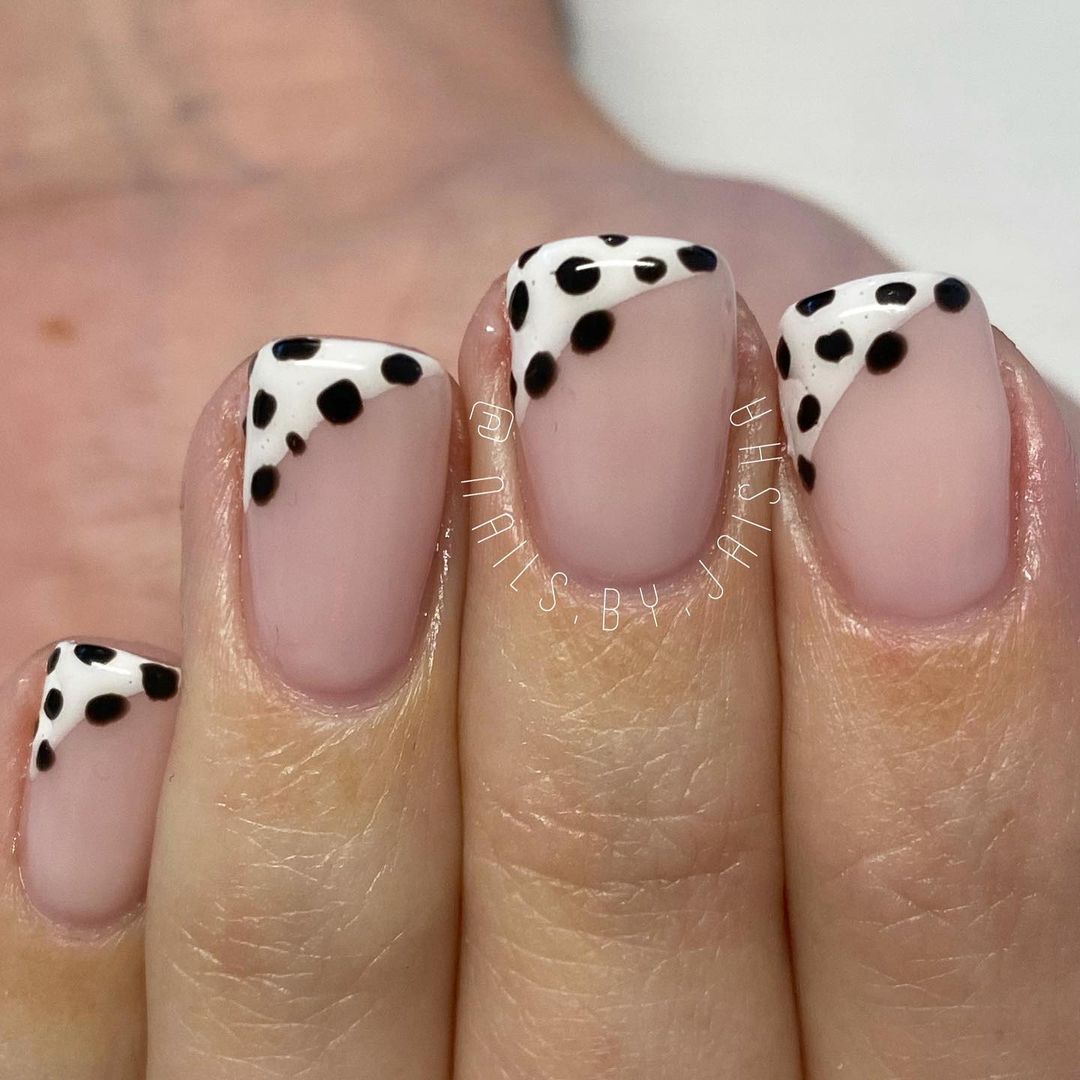
-
- White nail polish (e.g., Essie “Blanc”)
- Black nail polish (e.g., OPI “Black Onyx”)
- Dotting tool or a bobby pin
Instructions:
-
- Apply a base coat to protect your nails.
- Paint the tips of your nails white in a classic French manicure style.
- Use the dotting tool dipped in black polish to create random spots on the white tips.
- Finish with a clear top coat to seal the design and add shine.
Leopard Accent
For those who love a bit of fun and trendy flair, a leopard accent nail is the way to go. This design combines neutral tones with a bold leopard print, making it perfect for any fall outfit. The brown and nude base colors are ideal for the season, while the leopard print adds a touch of wildness.
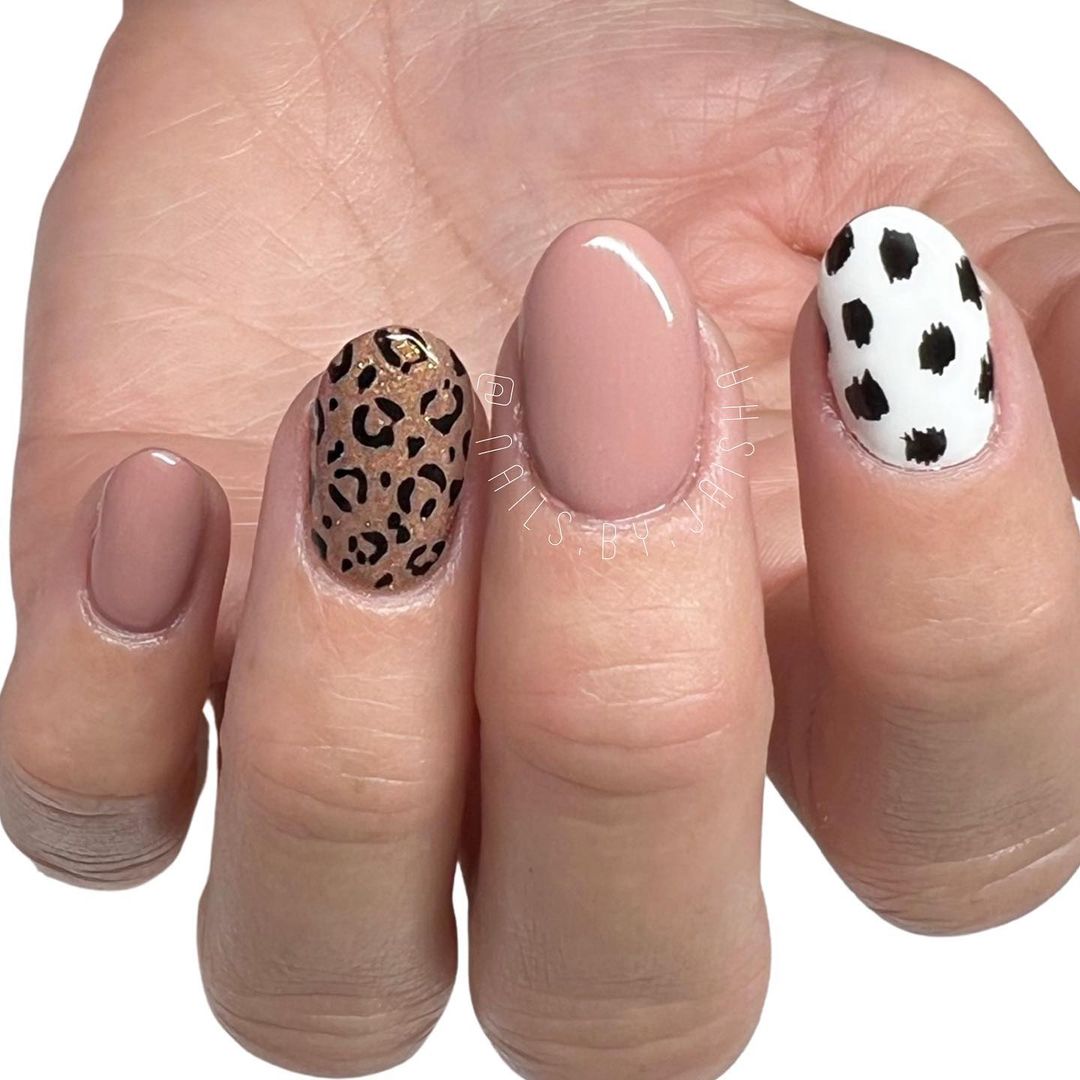
-
- Nude polish (e.g., Sally Hansen “Bare It All”)
- Brown polish (e.g., OPI “Espresso Your Inner Self”)
- Black polish for leopard spots (e.g., China Glaze “Liquid Leather”)
- Thin nail art brush
Instructions:
-
- Apply a base coat to protect your nails.
- Paint all nails with the nude polish and let it dry.
- On one accent nail, use the brown polish to create uneven spots.
- Outline the brown spots with black polish using a thin nail art brush.
- Finish with a clear top coat to seal the design.
Bold Blue and Zebra Accent
Blue is an often overlooked color for fall nail designs, but it makes a striking impact when paired with a bold accent. This manicure features a rich, matte blue polish on most nails, with two standout nails showcasing a fun zebra pattern. The combination of the solid blue and the animal print is both trendy and eye-catching, perfect for someone who loves to experiment with their look.
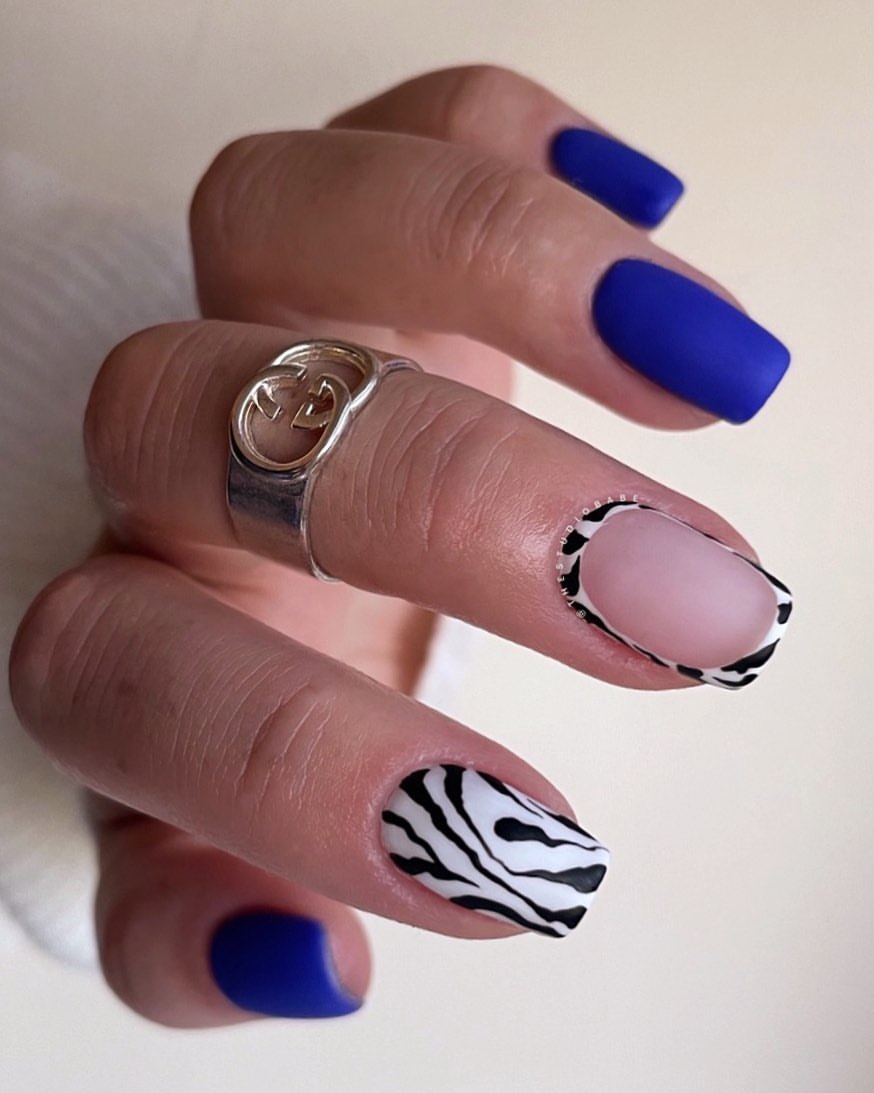
-
- Matte blue polish (e.g., Zoya “Ryan”)
- Black and white polishes for the zebra print (e.g., OPI “Black Onyx” and Essie “Blanc”)
- Thin nail art brush or striping tape
Instructions:
-
- Start with a base coat to protect your nails.
- Apply two coats of the matte blue polish, allowing each layer to dry completely.
- For the accent nails, paint a base of white polish and let it dry.
- Use a thin brush or striping tape to create the zebra stripes with black polish.
- Finish with a matte top coat to seal the design and maintain the matte finish.
Save Pin
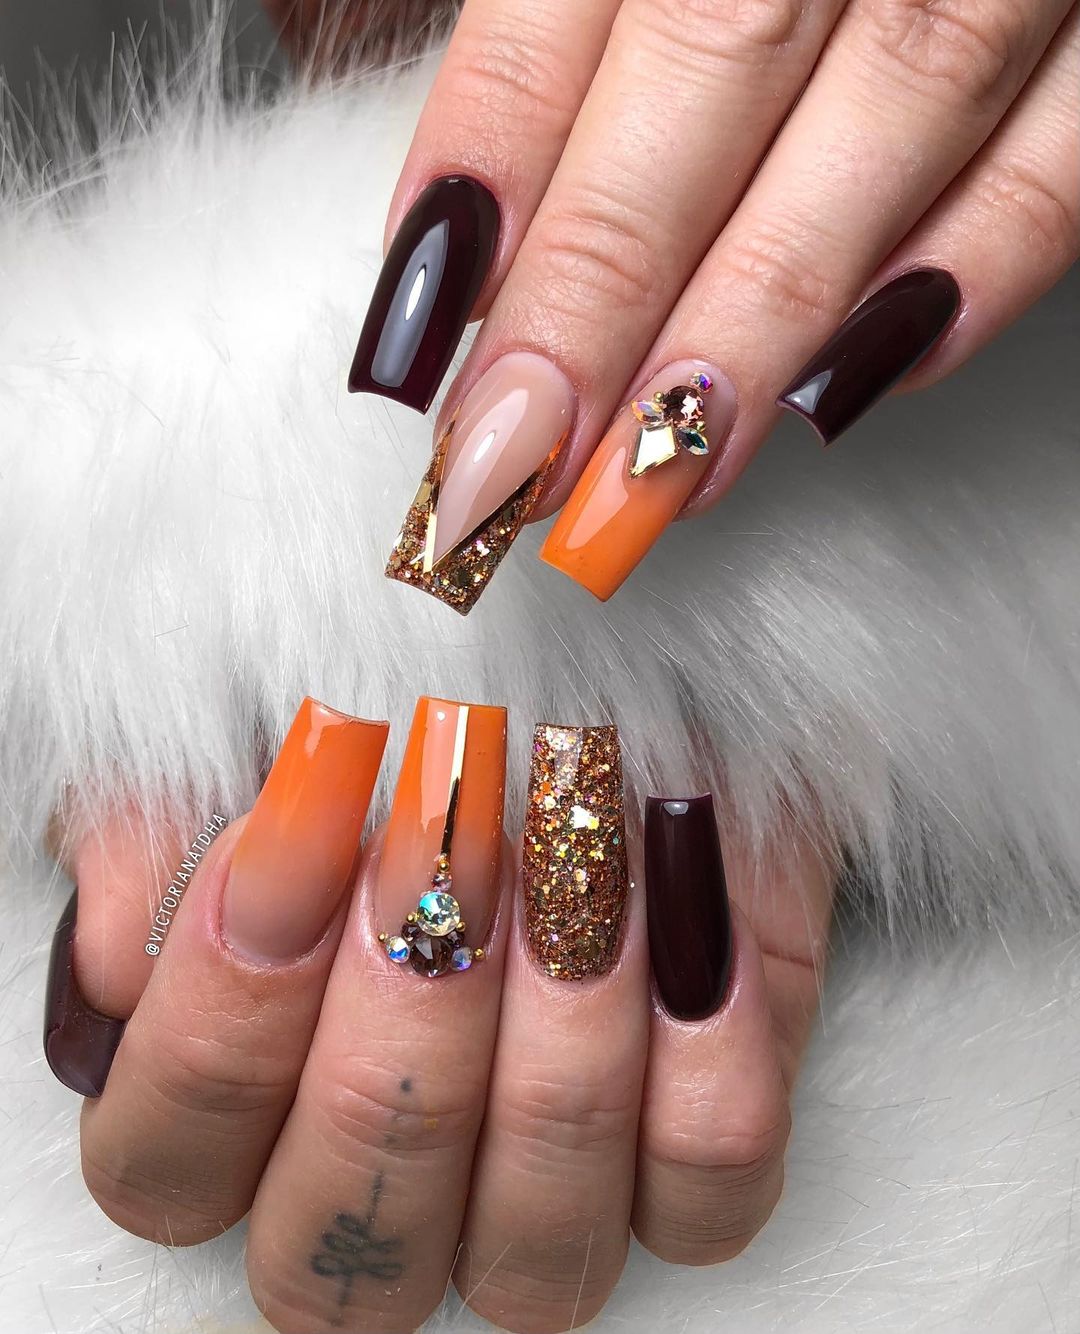
Autumn Glitter Ombre
This design is perfect for those who want to embrace the autumn vibes with a bit of sparkle. Featuring a gradient of deep burgundy to bright orange, accented with gold glitter and rhinestones, this manicure is all about autumn classy elegance. The coffin shape adds a modern touch, making it perfect for both special occasions and everyday wear.
-
- Burgundy polish (e.g., Essie “Bordeaux”)
- Orange polish (e.g., OPI “A Good Man-darin is Hard to Find”)
- Gold glitter polish (e.g., China Glaze “Golden Enchantment”)
- Rhinestones and nail glue
- Sponge for gradient effect
Instructions:
-
- Apply a base coat to all nails.
- Use the sponge to create a gradient effect with the burgundy and orange polishes.
- Apply the gold glitter polish to the tips, blending it slightly into the gradient.
- Add rhinestones using nail glue for extra sparkle.
- Seal with a glossy top coat to ensure longevity.
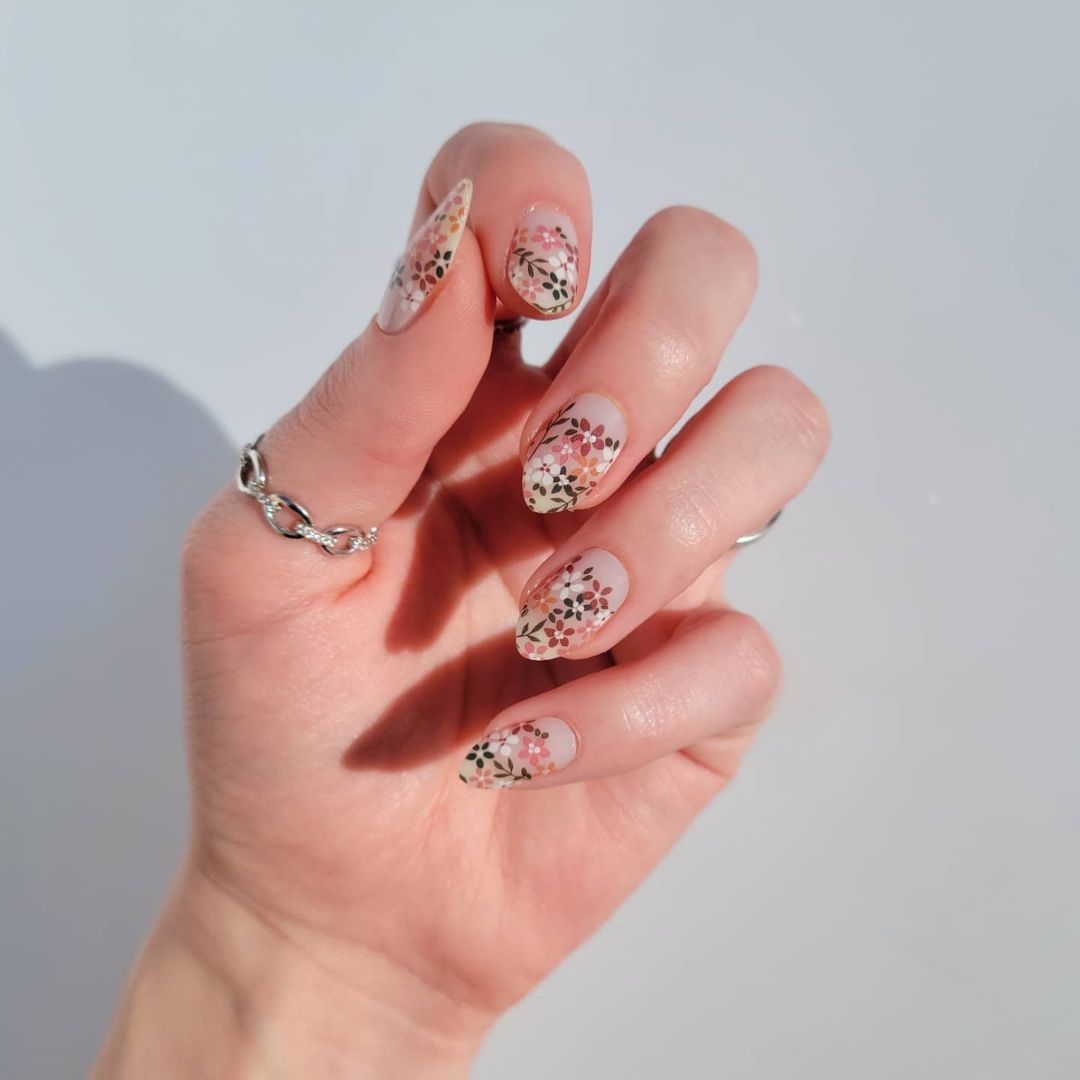
Floral Almond Delight
Floral designs aren’t just for spring; they can be a lovely choice for fall too. This delicate design features tiny, intricate flowers in autumnal colors on a nude base. The almond shape of the nails enhances the elegance of the design, making it perfect for a gel almond manicure.
-
- Nude base polish (e.g., OPI “Bubble Bath”)
- Assorted floral nail stickers or decals in fall colors
- Clear top coat
Instructions:
-
- Begin with a base coat to protect your nails.
- Apply two coats of the nude base polish and allow it to dry completely.
- Carefully place the floral stickers or decals on each nail, arranging them as desired.
- Seal the design with a clear top coat to ensure the stickers stay in place and to add shine.
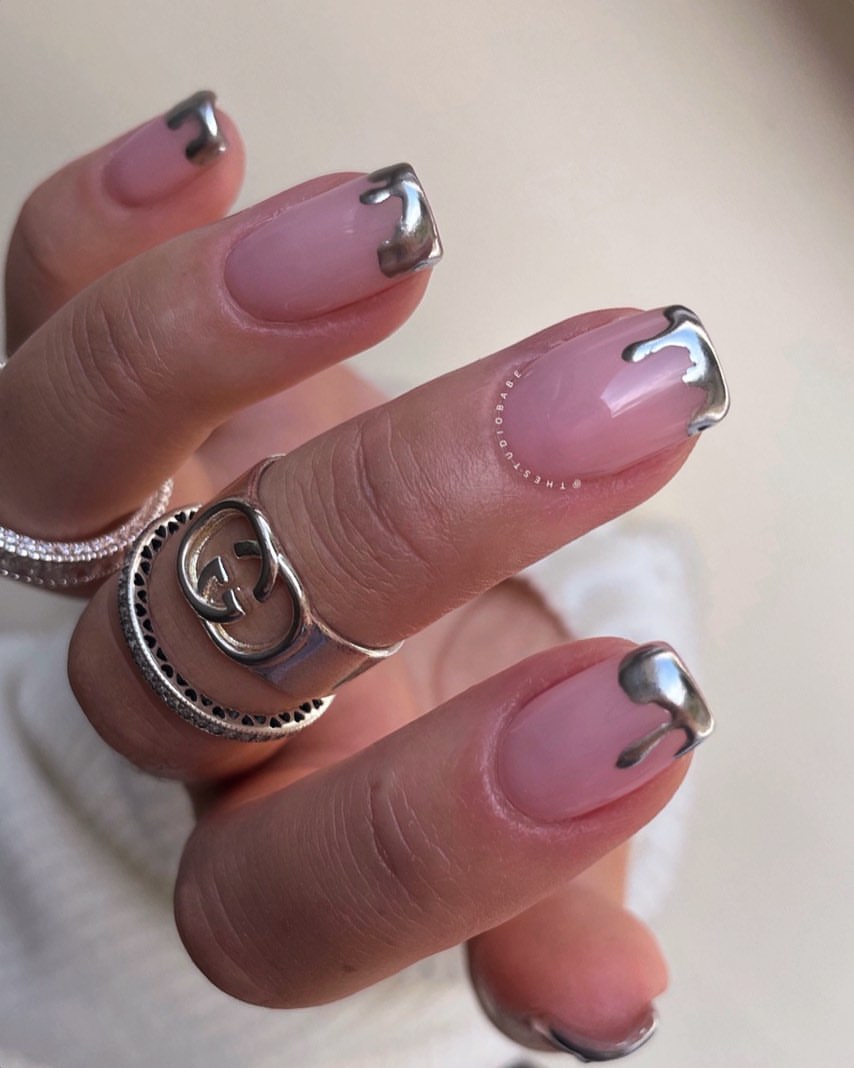
Metallic Drip Tips
Metallic drip tips offer a modern twist to the classic French manicure. This design features a nude base with silver metallic drips that add a futuristic vibe. The reflective silver polish against the nude backdrop creates a striking contrast, perfect for those looking to make a statement with their nails this fall.
-
- Nude base polish (e.g., OPI “Samoan Sand”)
- Silver metallic polish (e.g., Essie “No Place Like Chrome”)
- Thin nail art brush
Instructions:
-
- Begin with a base coat to protect your nails.
- Apply two coats of the nude base polish and let it dry completely.
- Using a thin brush, apply the silver polish in a dripping pattern from the tips downwards.
- Seal with a clear top coat to add shine and protect the design.
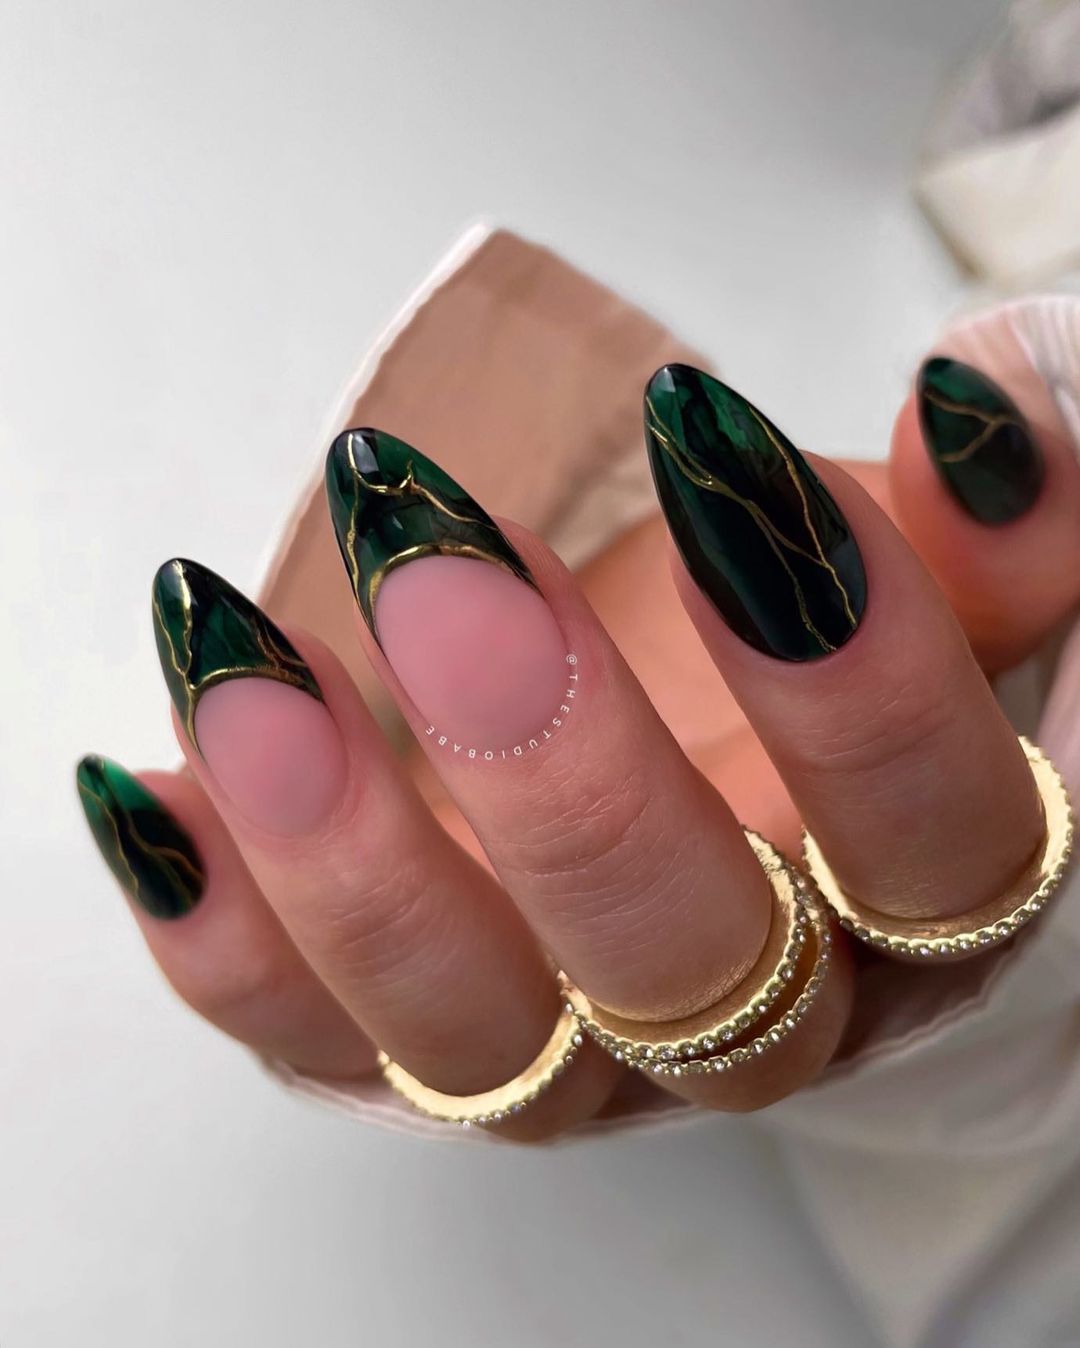
Green Marble Glam
This design brings the elegance of marble to your nails with a stunning green and gold combination. The deep green marble effect, highlighted with fine gold lines, makes for a sophisticated look that’s perfect for any fall occasion. The almond shape adds to the elegance, making your nails look longer and more refined.
-
- Deep green polish (e.g., OPI “Stay Off the Lawn”)
- Gold striping tape or fine gold polish
- Sponge for marble effect
Instructions:
-
- Apply a base coat to all nails.
- Use the sponge to dab the deep green polish onto the nails, creating a marble effect.
- Apply gold striping tape or use a thin brush with gold polish to add fine lines over the marble pattern.
- Finish with a clear top coat to seal the design.
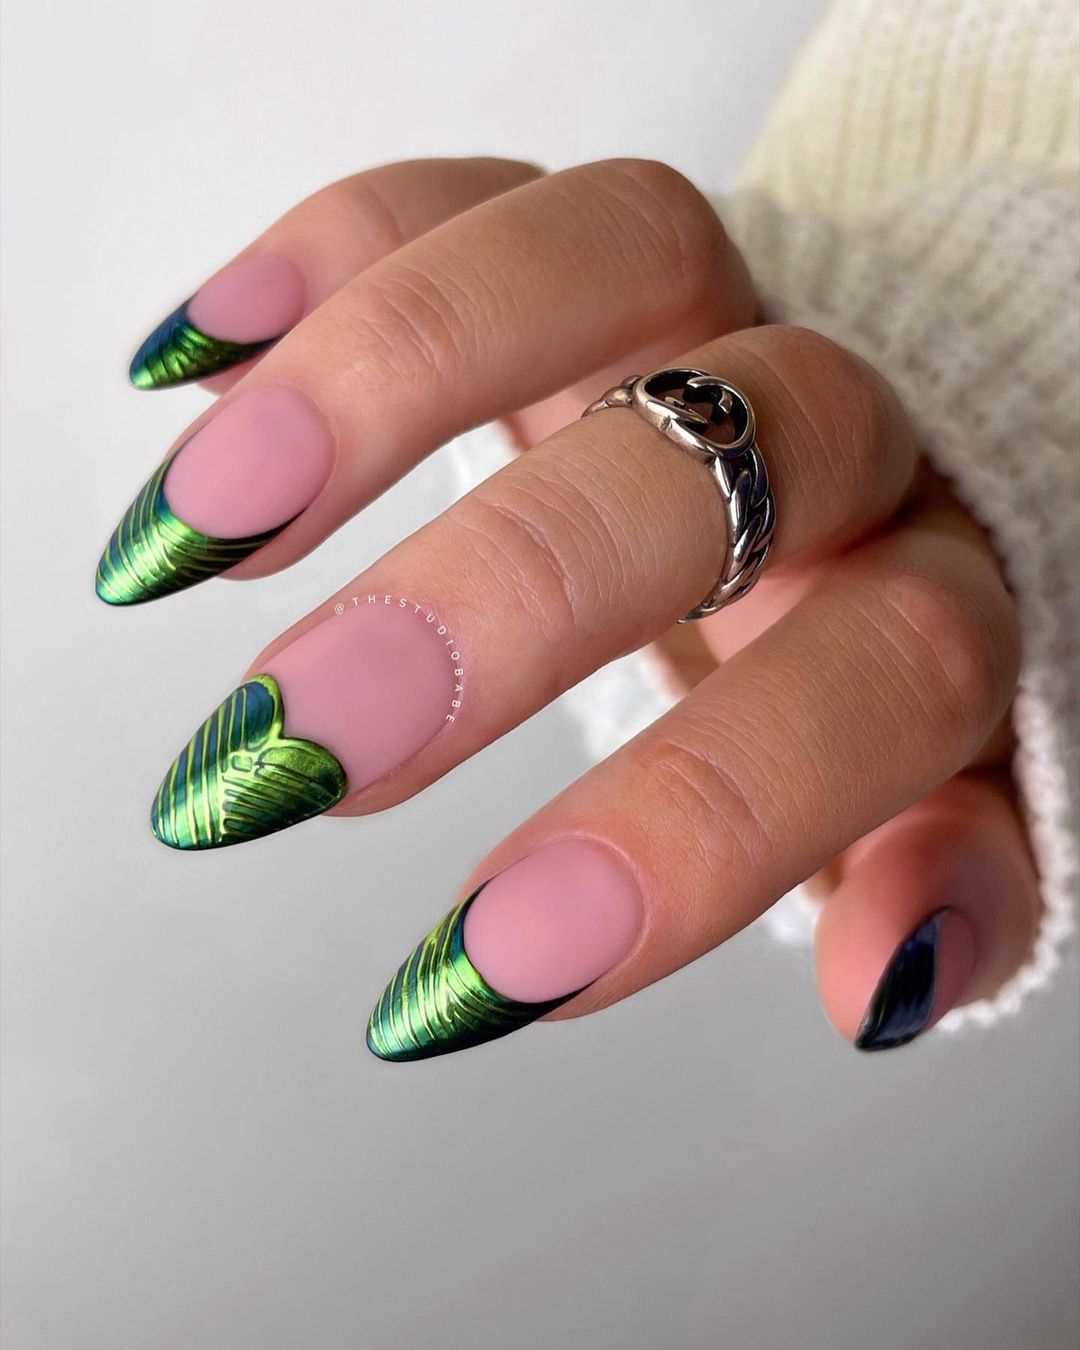
Neon Heart Tips
For a bold and unique look, try neon heart tips. This design features a nude base with bright green and blue neon tips shaped like hearts. The contrast between the soft nude and vibrant neon colors makes this manicure stand out, perfect for someone who loves fun and trendy designs.
-
- Nude base polish (e.g., Essie “Ballet Slippers”)
- Neon green and blue polishes (e.g., China Glaze “Celtic Sun” and “Blue Sparrow”)
- Thin nail art brush
Instructions:
-
- Start with a base coat to protect your nails.
- Apply two coats of the nude base polish and let it dry.
- Use the thin brush to paint heart-shaped tips with the neon green and blue polishes.
- Seal with a clear top coat to add shine and protect the design.
Save Pin
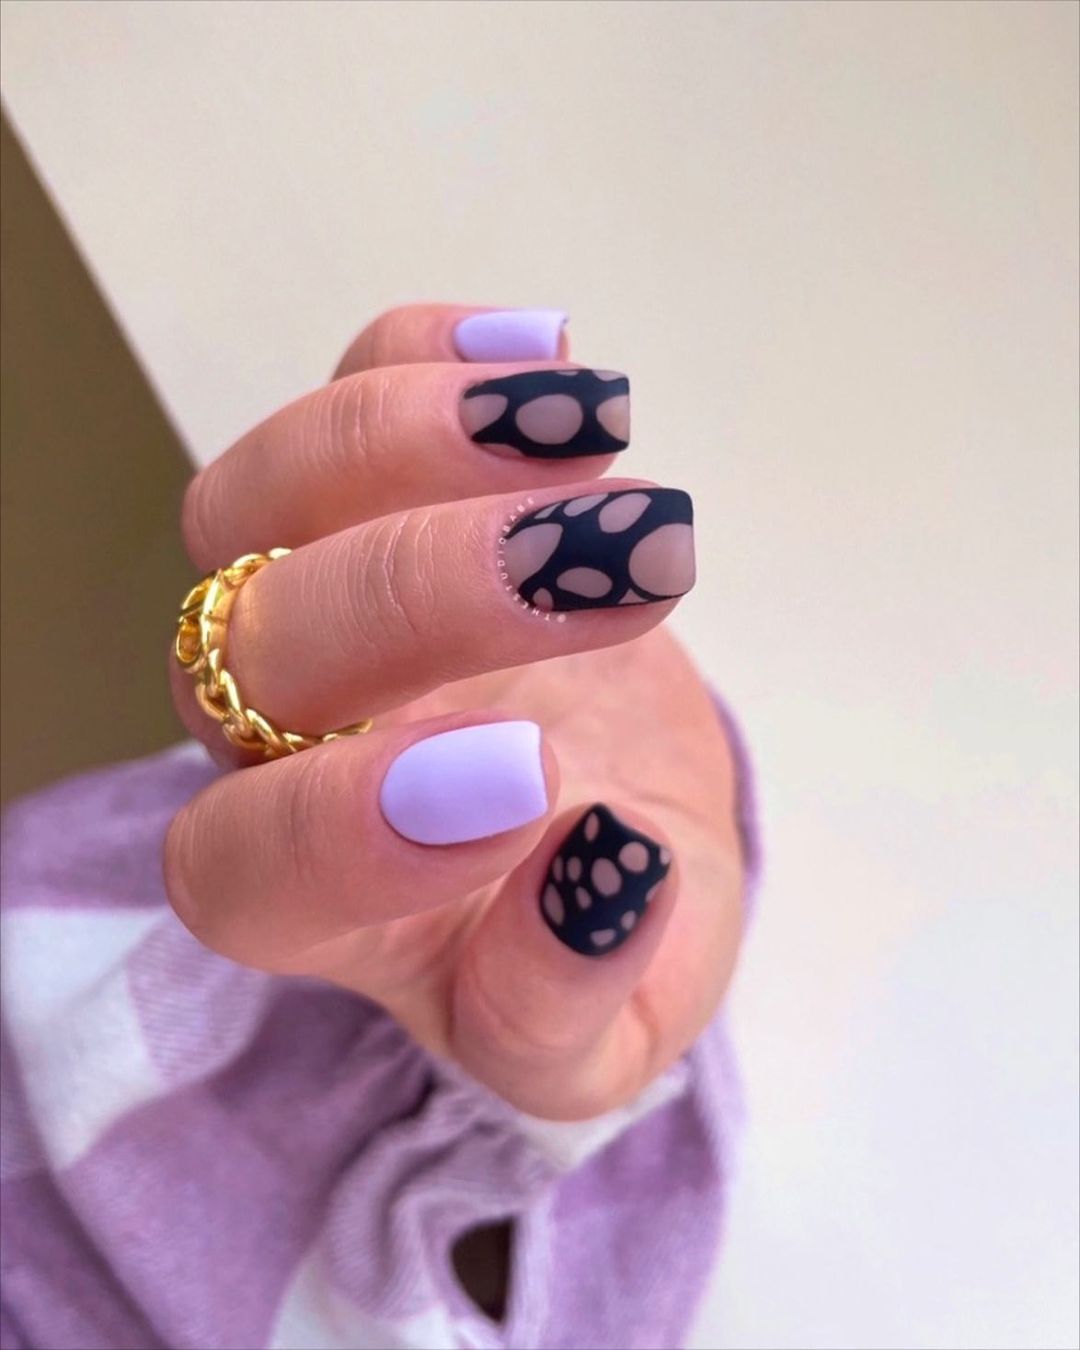
Lilac and Black Polka Dots
Combining soft lilac with bold black polka dots creates a playful yet chic look. The matte finish adds a modern touch to this cute and trendy design, making it ideal for short square nails. This manicure is both eye-catching and easy to achieve, perfect for a stylish autumn look.
-
- Lilac polish (e.g., Zoya “Julie”)
- Black polish for polka dots (e.g., OPI “Black Onyx”)
- Dotting tool or bobby pin
- Matte top coat
Instructions:
-
- Apply a base coat to all nails.
- Paint the nails with two coats of lilac polish and let them dry.
- Use the dotting tool dipped in black polish to create polka dots on an accent nail.
- Finish with a matte top coat to seal the design and add a modern finish.
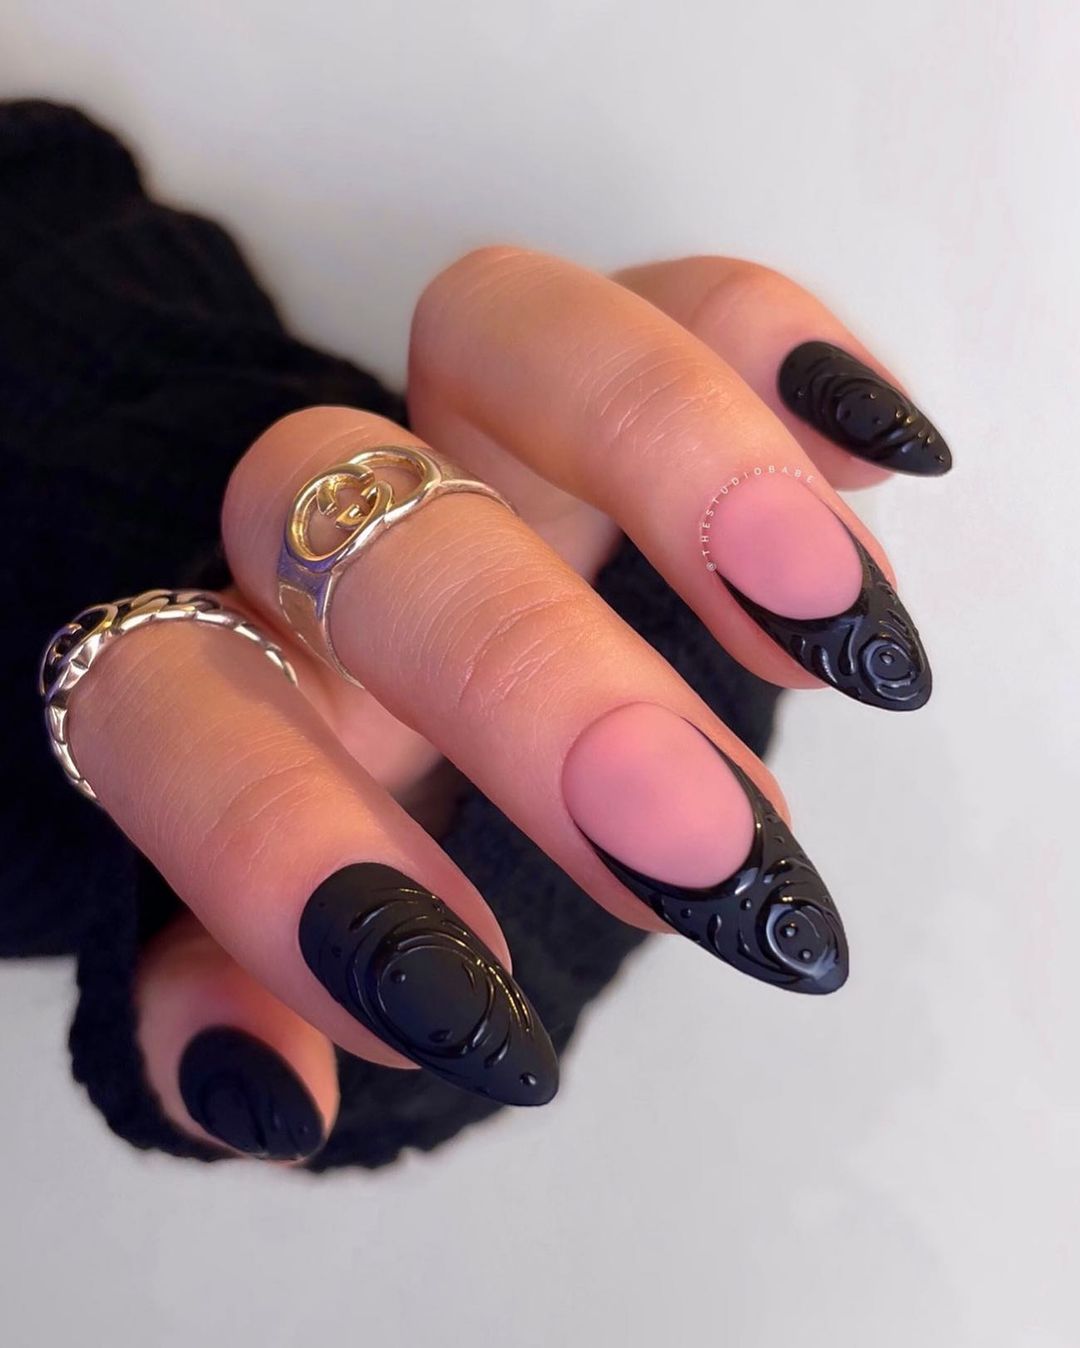
Black Lace Intricacy
This intricate black lace design is perfect for those who love detailed and elegant nail art. The almond shape nails feature a nude base with black lace-like patterns, adding a touch of sophistication and mystery. The lace effect is both intricate and stylish, making it ideal for special occasions.
-
- Nude base polish (e.g., OPI “Bubble Bath”)
- Black polish for lace design (e.g., Essie “Licorice”)
- Thin nail art brush
Instructions:
-
- Begin with a base coat to protect your nails.
- Apply two coats of the nude base polish and let it dry.
- Use the thin brush to carefully paint lace patterns with the black polish.
- Seal with a clear top coat to protect the intricate design.
Neon Swirls
For a fun and eye-catching look, neon swirls are the way to go. This design features vibrant green and lilac swirls over a nude base, creating a dynamic and playful manicure. The almond shape enhances the swirling pattern, making your nails look longer and more stylish.
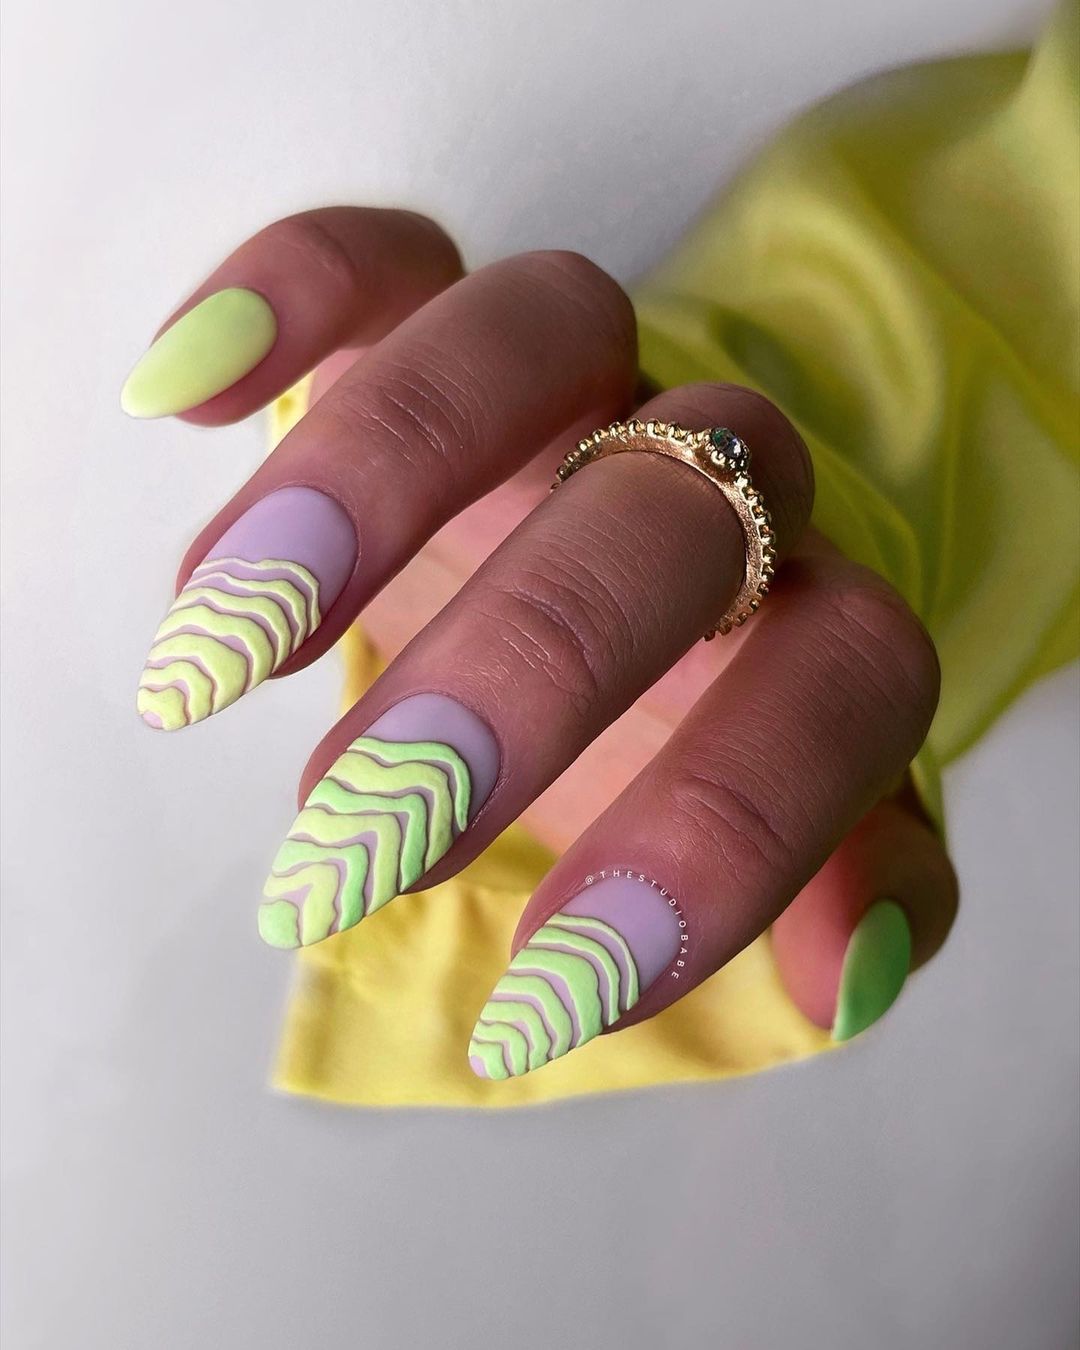
-
- Nude base polish (e.g., OPI “Put It In Neutral”)
- Neon green and lilac polishes (e.g., China Glaze “Lime After Lime” and “That’s Shore Bright”)
- Thin nail art brush
Instructions:
-
- Apply a base coat to all nails.
- Paint the nails with two coats of the nude base polish and let them dry.
- Use the thin brush to create swirling patterns with the neon green and lilac polishes.
- Seal with a clear top coat to add shine and protect the design.
Matte Black and Abstract Gold
This design combines matte black nails with an abstract gold and pink pattern, creating a bold and artistic look. The sleek black matte finish adds a touch of mystery, while the abstract pattern brings a modern and creative flair. Perfect for an elegant evening or a stylish day out, this design is both unique and sophisticated.

-
- Matte black polish (e.g., OPI “Black Onyx” with a matte top coat)
- Gold polish (e.g., Essie “Good as Gold”)
- Pink nude polish (e.g., Essie “Ballet Slippers”)
- Thin nail art brush
Instructions:
-
- Start with a base coat to protect your nails.
- Apply two coats of the matte black polish and let it dry.
- Use the thin brush to create abstract patterns with the gold and pink polishes.
- Finish with a matte top coat to seal the design and maintain the matte finish.
Pastel Moon and Clouds
This whimsical design features pastel shades with a dreamy moon and cloud accent. The matte finish enhances the softness of the pastels, creating a serene and ethereal look. Ideal for a calm and relaxed vibe, this nail art is perfect for anyone who loves a subtle yet enchanting design.
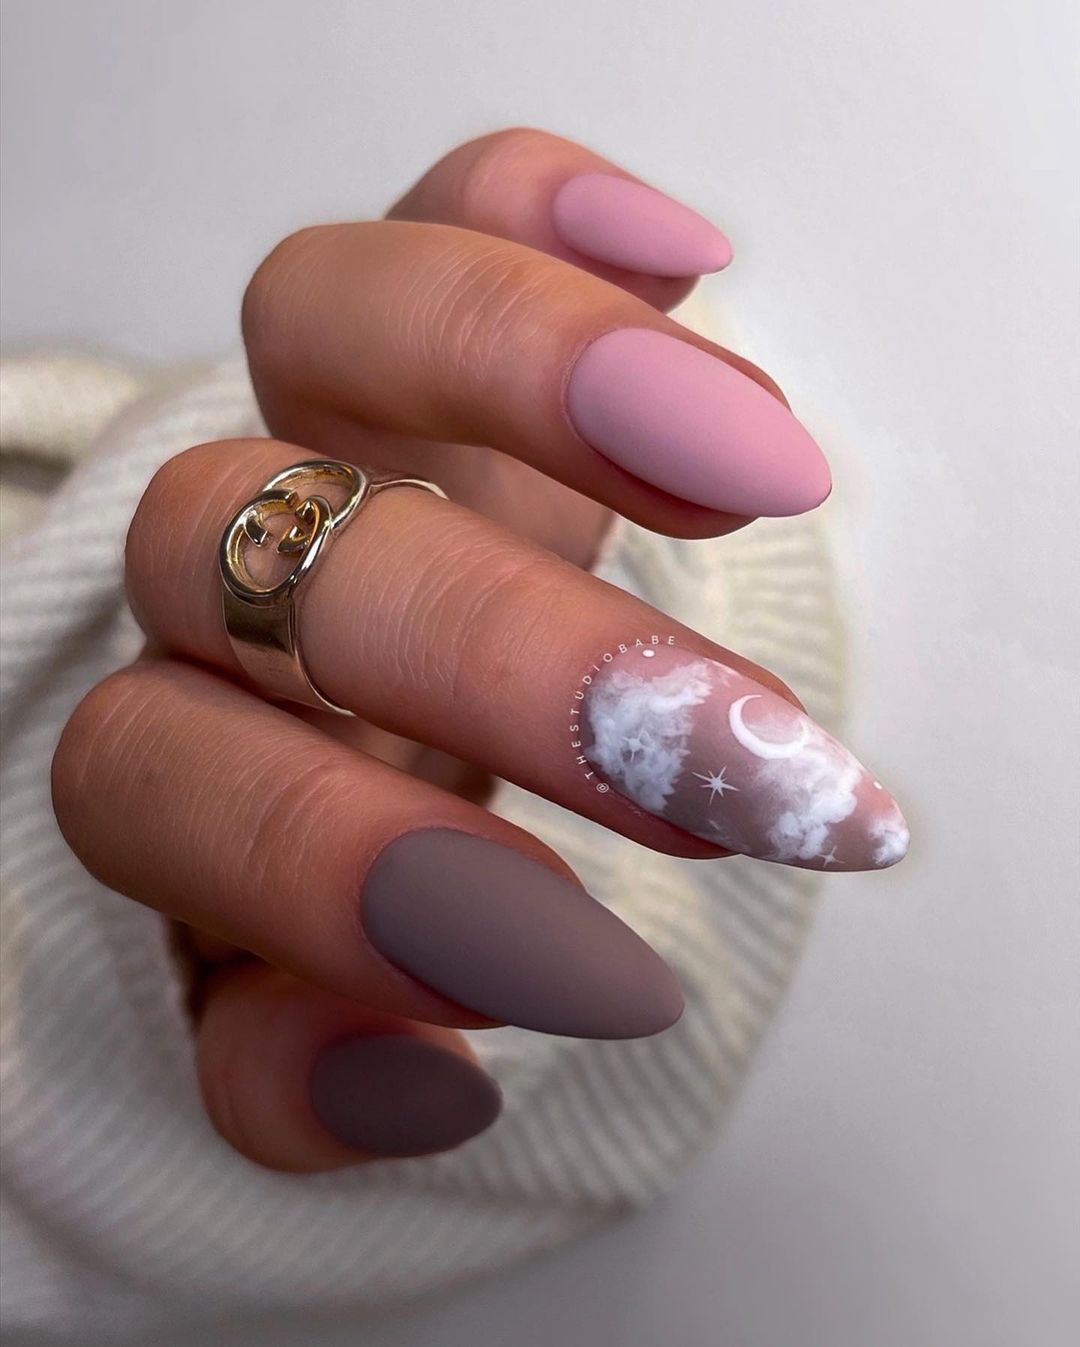
-
- Pastel pink polish (e.g., OPI “Mod About You”)
- Pastel grey polish (e.g., Essie “Chinchilly”)
- White polish for clouds (e.g., OPI “Alpine Snow”)
- Thin nail art brush and dotting tool
Instructions:
-
- Begin with a base coat to protect your nails.
- Apply the pastel pink and grey polishes, alternating between nails.
- Use the thin brush and dotting tool to paint the moon and clouds with the white polish.
- Finish with a matte top coat to seal the design and enhance the pastel colors.
Geometric Blue and Pink
This vibrant design features a mix of blue, pink, and black geometric patterns. The combination of shapes and colors creates a striking and modern look, perfect for those who love to experiment with bold designs. The almond shape adds elegance, making this manicure suitable for both casual and formal occasions.

-
- Blue polish (e.g., OPI “Rich Girls & Po-Boys”)
- Pink polish (e.g., Essie “Fiji”)
- Black polish (e.g., OPI “Black Onyx”)
- Thin nail art brush and striping tape
Instructions:
-
- Apply a base coat to all nails.
- Paint the nails with alternating blue and pink polishes.
- Use the thin brush and striping tape to create geometric patterns with the black polish.
- Finish with a glossy top coat to seal the design.
Wild Animal Print
Embrace your wild side with this animal print design featuring zebra and leopard patterns. The mix of black, white, and orange creates a fun and eye-catching look, perfect for fall. This design is ideal for those who love to stand out and make a statement with their nails.
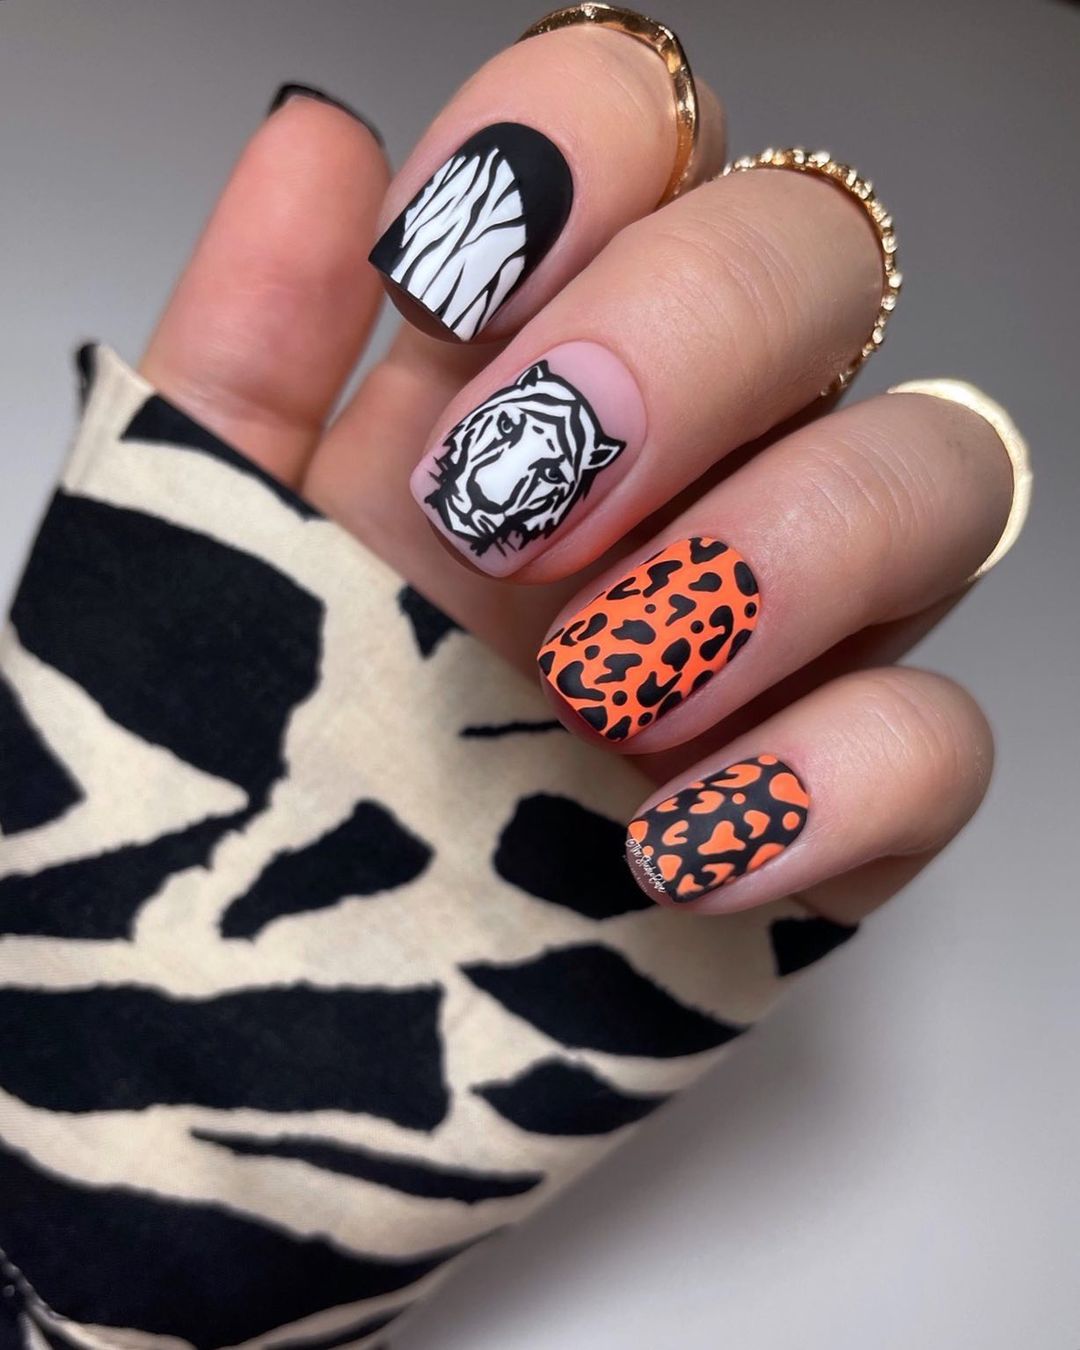
-
- Black polish (e.g., Essie “Licorice”)
- White polish (e.g., OPI “Alpine Snow”)
- Orange polish (e.g., OPI “A Good Man-darin is Hard to Find”)
- Thin nail art brush
Instructions:
-
- Apply a base coat to all nails.
- Paint the nails with a base of black, white, or orange polish, alternating between nails.
- Use the thin brush to create zebra and leopard patterns on the accent nails.
- Seal with a clear top coat to protect the design.
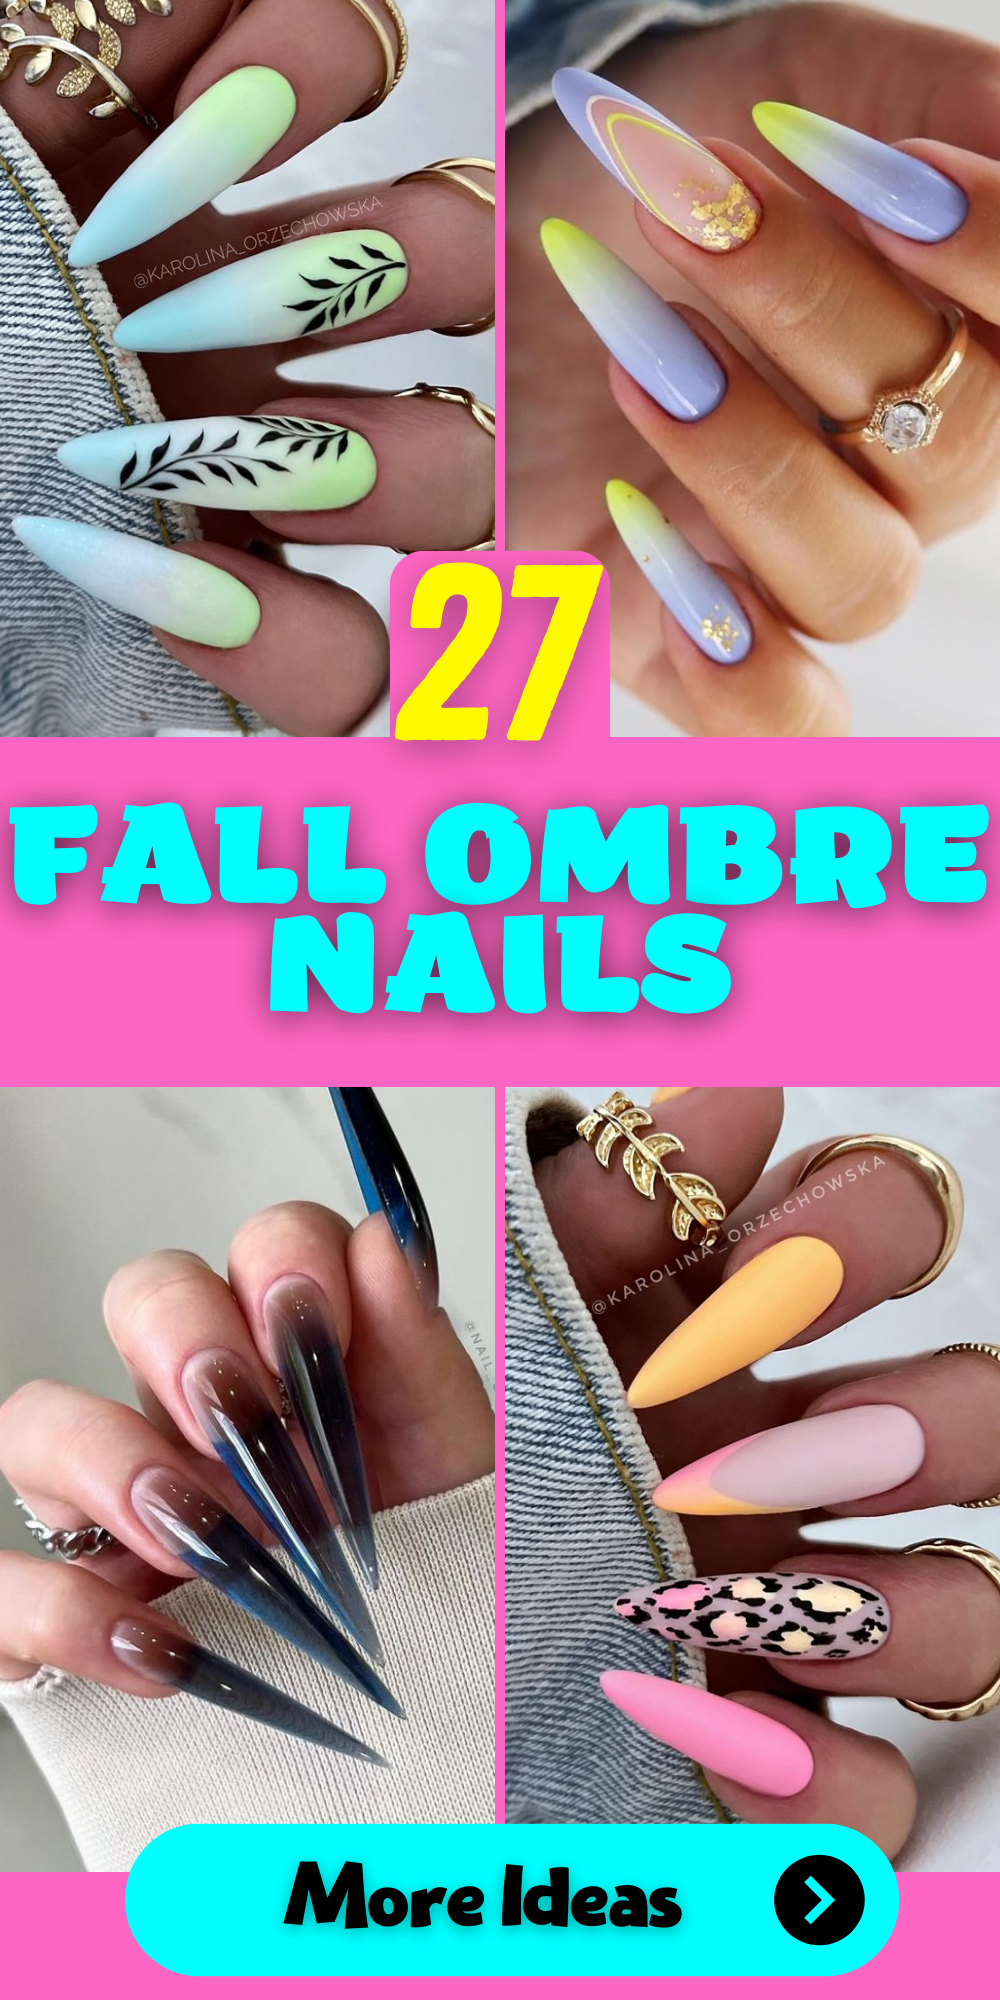
Gradient French Tips
This design features a modern twist on the classic French manicure with gradient tips. The subtle shift from nude to green creates a sophisticated and elegant look, perfect for any occasion. The pointed tips add a touch of edginess, making this design both timeless and trendy.
-
- Nude polish (e.g., OPI “Samoan Sand”)
- Green polish (e.g., Essie “Mint Candy Apple”)
- Sponge for gradient effect
Instructions:
-
- Begin with a base coat to protect your nails.
- Apply two coats of the nude polish and let it dry.
- Use the sponge to apply the green polish, creating a gradient effect from the tips down.
- Seal with a clear top coat to add shine and protect the design.
Elegant Green and Gold
This design combines deep green with gold accents, creating a luxurious and elegant look. The rich green color is perfect for fall, and the gold adds a touch of opulence. The almond shape enhances the sophistication, making this manicure ideal for special events or a glamorous day out.
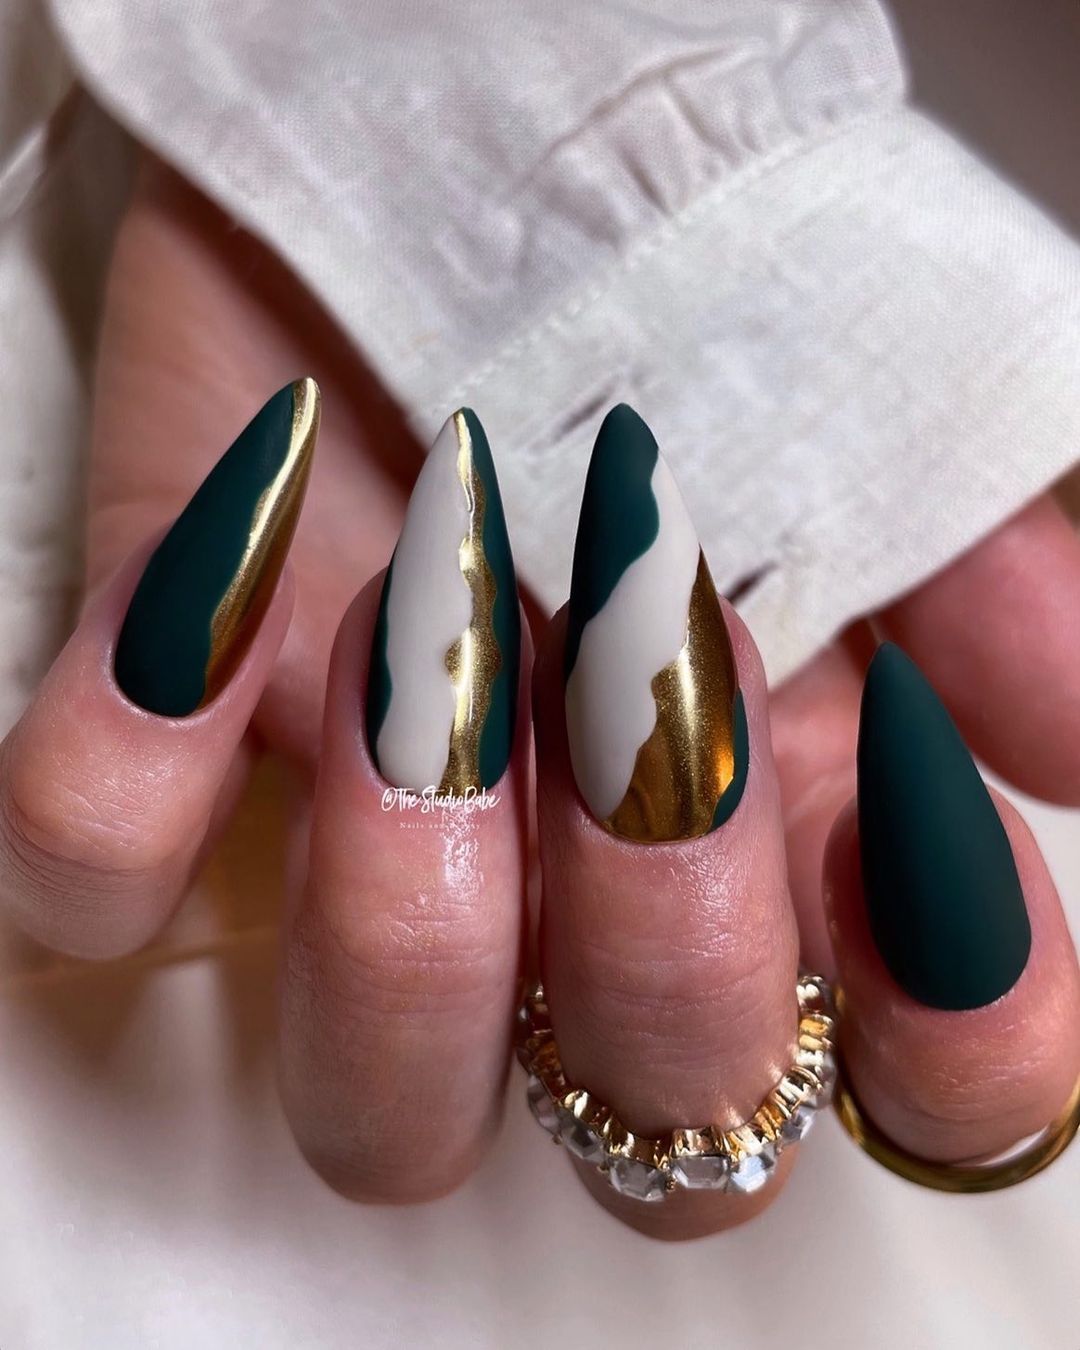
-
- Deep green polish (e.g., OPI “Stay Off the Lawn”)
- Gold polish (e.g., Essie “Good as Gold”)
- Thin nail art brush
Instructions:
-
- Apply a base coat to all nails.
- Paint the nails with two coats of the deep green polish and let it dry.
- Use the thin brush to add gold accents along the sides or in patterns.
- Seal with a clear top coat to protect the design and add shine.
Cosmic Burgundy
This stunning design features a cosmic theme with deep burgundy hues and white star accents. The blend of dark and light shades creates a mystical and captivating look. The elongated almond shape adds a touch of elegance, making this design perfect for a night out or any special occasion.
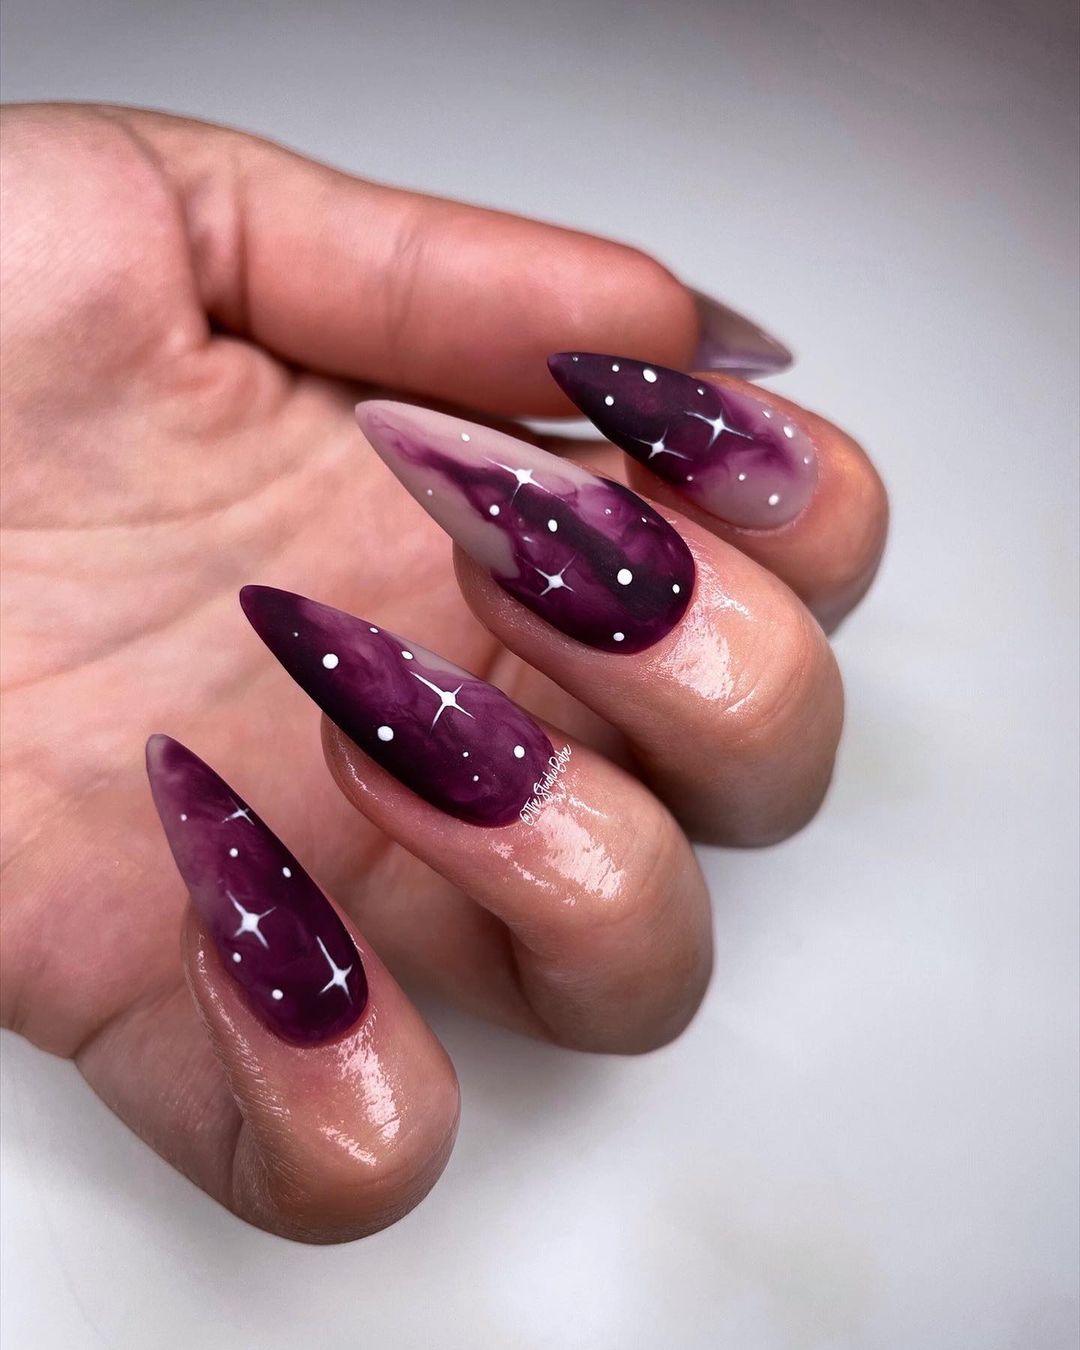
-
- Burgundy polish (e.g., Essie “Bordeaux”)
- White polish for stars (e.g., OPI “Alpine Snow”)
- Thin nail art brush and dotting tool
Instructions:
-
- Start with a base coat to protect your nails.
- Apply two coats of the burgundy polish and let it dry.
- Use the thin brush and dotting tool to paint stars and dots with the white polish.
- Finish with a clear top coat to seal the design and add shine.
Glittering Stripes
This design combines nude tones with glittering silver stripes for a sophisticated and glamorous look. The pointed tips and elegant stripes create a chic and modern style, ideal for both formal events and everyday wear. The added glitter brings a festive touch to the overall design.
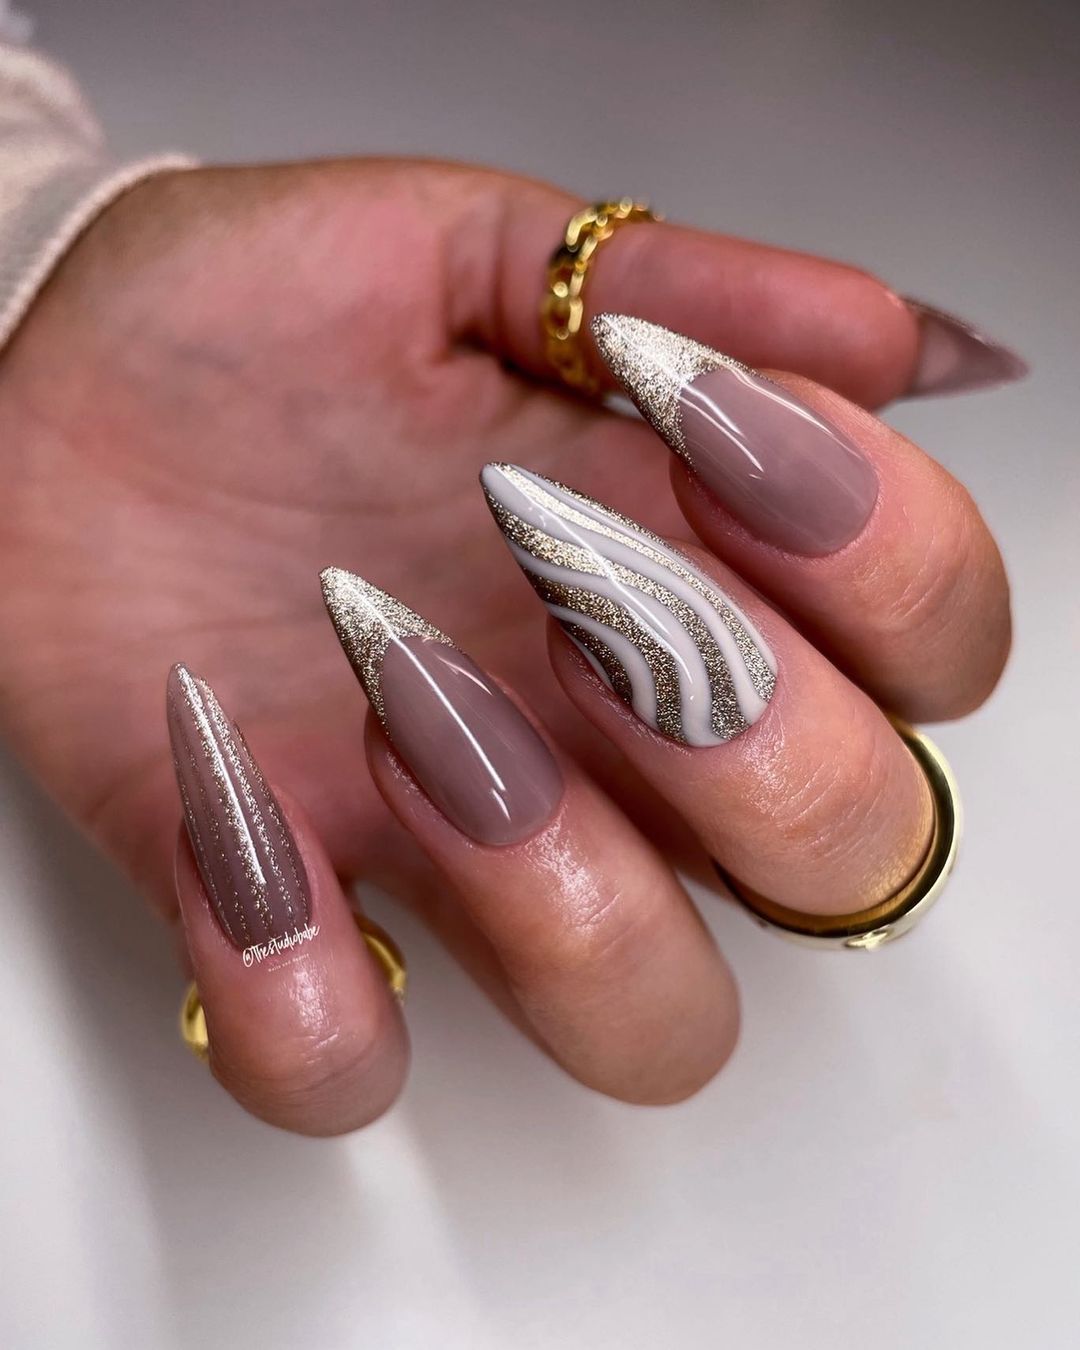
-
- Nude base polish (e.g., OPI “Dulce de Leche”)
- Silver glitter polish (e.g., China Glaze “Glistening Snow”)
- Thin nail art brush and striping tape
Instructions:
-
- Apply a base coat to all nails.
- Paint the nails with two coats of the nude polish and let them dry.
- Use the thin brush and striping tape to create glittering stripes with the silver polish.
- Seal with a clear top coat to protect the design.
Pink and Black Leopard Print
Leopard print nails are always in style, and this design features a bold black and white pattern over a soft pink base. The contrast between the colors makes this manicure eye-catching and fashionable, perfect for those who love a trendy and fun look.
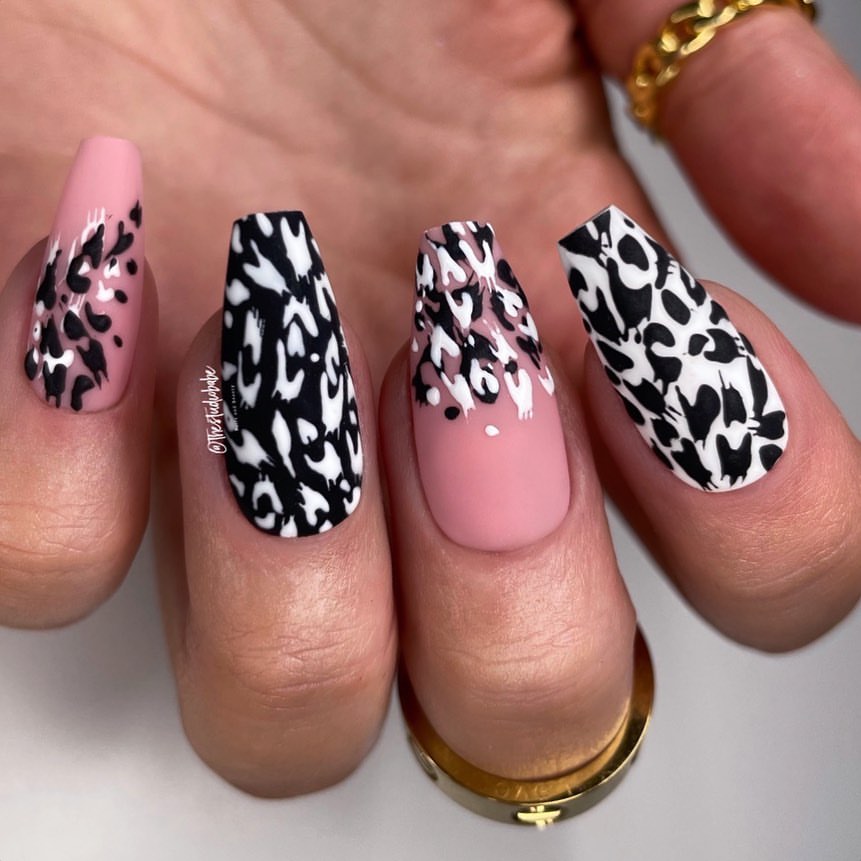
-
- Pink polish (e.g., Essie “Ballet Slippers”)
- Black and white polishes for leopard spots (e.g., OPI “Black Onyx” and Essie “Blanc”)
- Thin nail art brush
Instructions:
-
- Apply a base coat to protect your nails.
- Paint the nails with two coats of the pink polish and let them dry.
- Use the thin brush to create leopard spots with the black and white polishes.
- Finish with a clear top coat to seal the design.
Autumn Floral Tips
This charming design features autumnal colors with delicate floral accents. The combination of warm browns and oranges with cute flower details makes this manicure perfect for the fall season. The rounded shape adds a soft and elegant touch to the overall look.
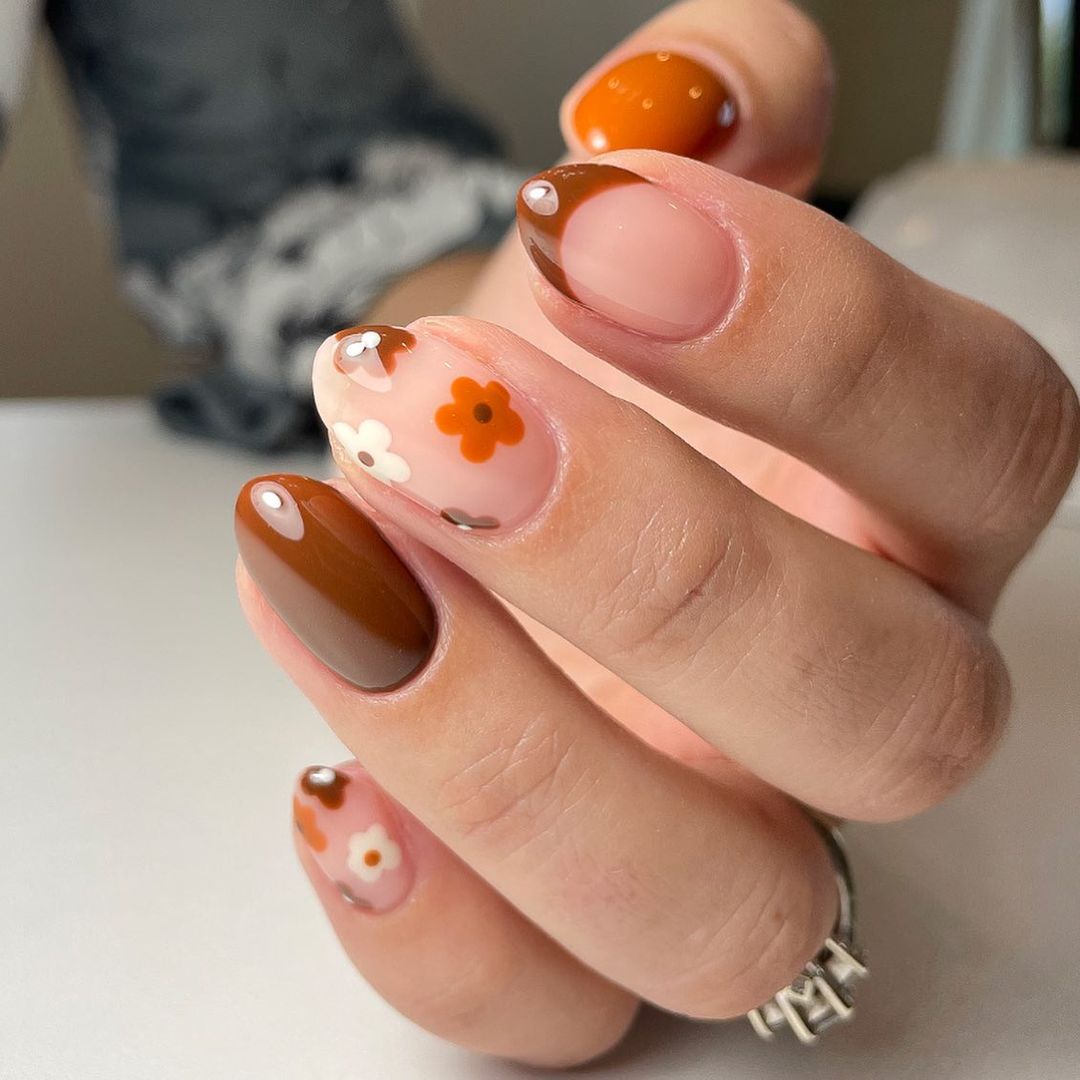
-
- Brown polish (e.g., Essie “Wicked”)
- Orange polish (e.g., OPI “A Good Man-darin is Hard to Find”)
- White polish for flowers (e.g., OPI “Alpine Snow”)
- Thin nail art brush and dotting tool
Instructions:
-
- Apply a base coat to protect your nails.
- Paint the tips with alternating brown and orange polishes.
- Use the thin brush and dotting tool to add floral details with the white polish.
- Seal with a clear top coat to protect the design.
Golden Floral Accents
This design features golden floral accents over a nude base, creating a delicate and sophisticated look. The combination of pastel flowers and golden outlines adds a touch of elegance and charm, making it perfect for any occasion.
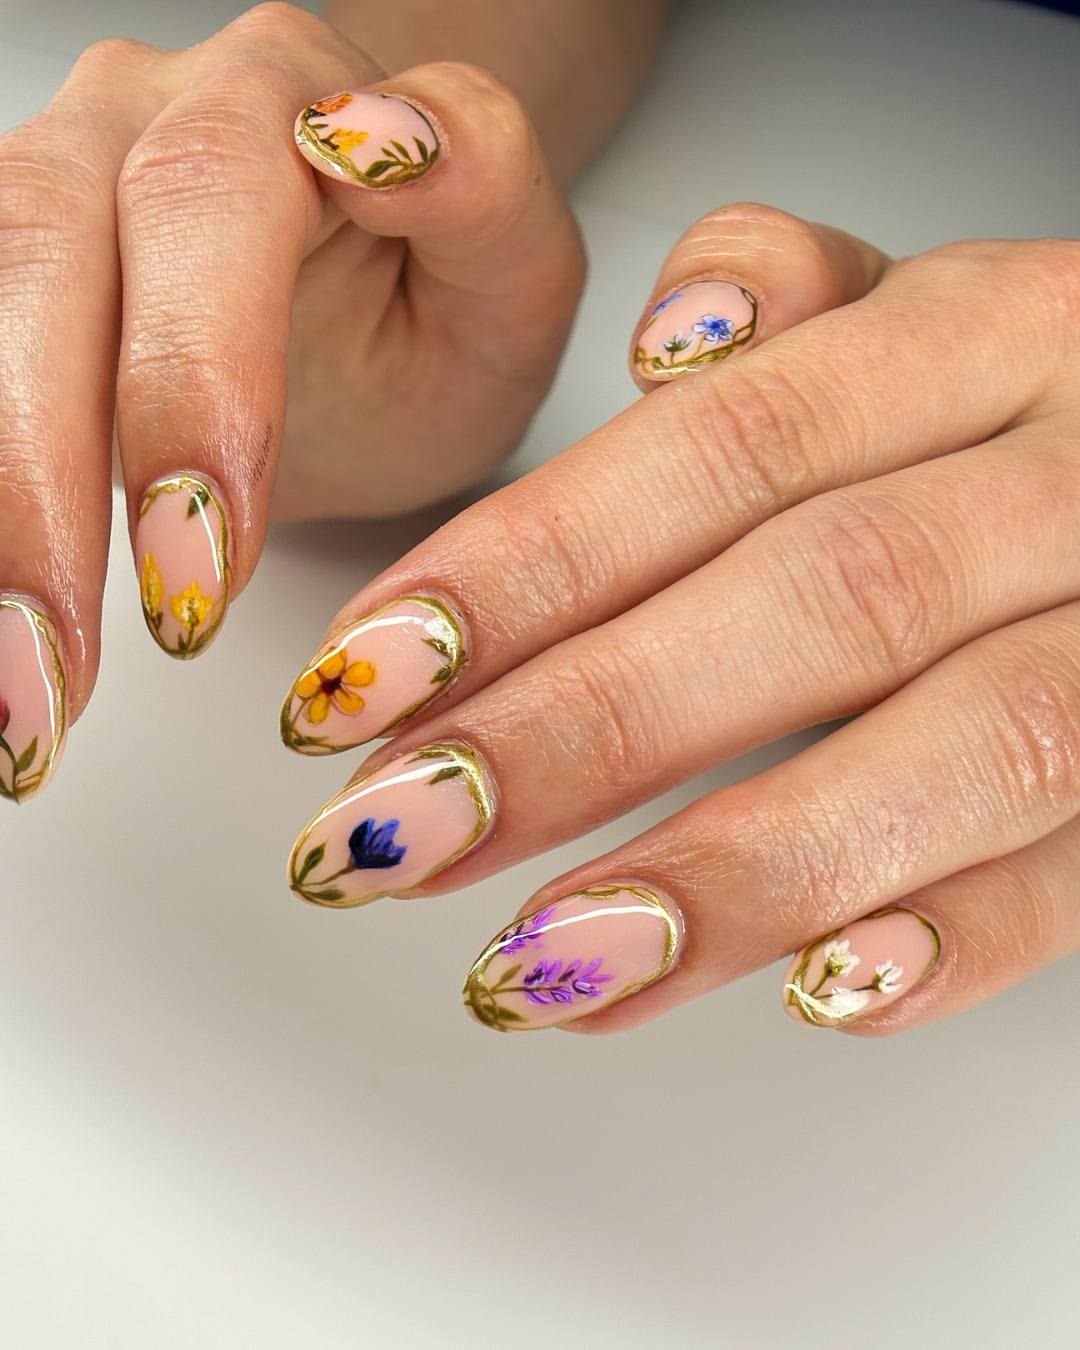
-
- Nude base polish (e.g., Essie “Ballet Slippers”)
- Pastel polishes for flowers (e.g., Essie “Mint Candy Apple” and “Fiji”)
- Gold polish for outlines (e.g., Essie “Good as Gold”)
- Thin nail art brush
Instructions:
-
- Begin with a base coat to protect your nails.
- Apply two coats of the nude base polish and let it dry.
- Use the thin brush to paint flowers with pastel polishes and outline them with the gold polish.
- Seal with a clear top coat to protect the design and add shine.
Black Starry Sky
This design features black star accents over a nude base, creating a simple yet striking look. The addition of small rhinestones adds a touch of sparkle, making this design perfect for a night out or a special event. The almond shape enhances the elegance of the overall look.
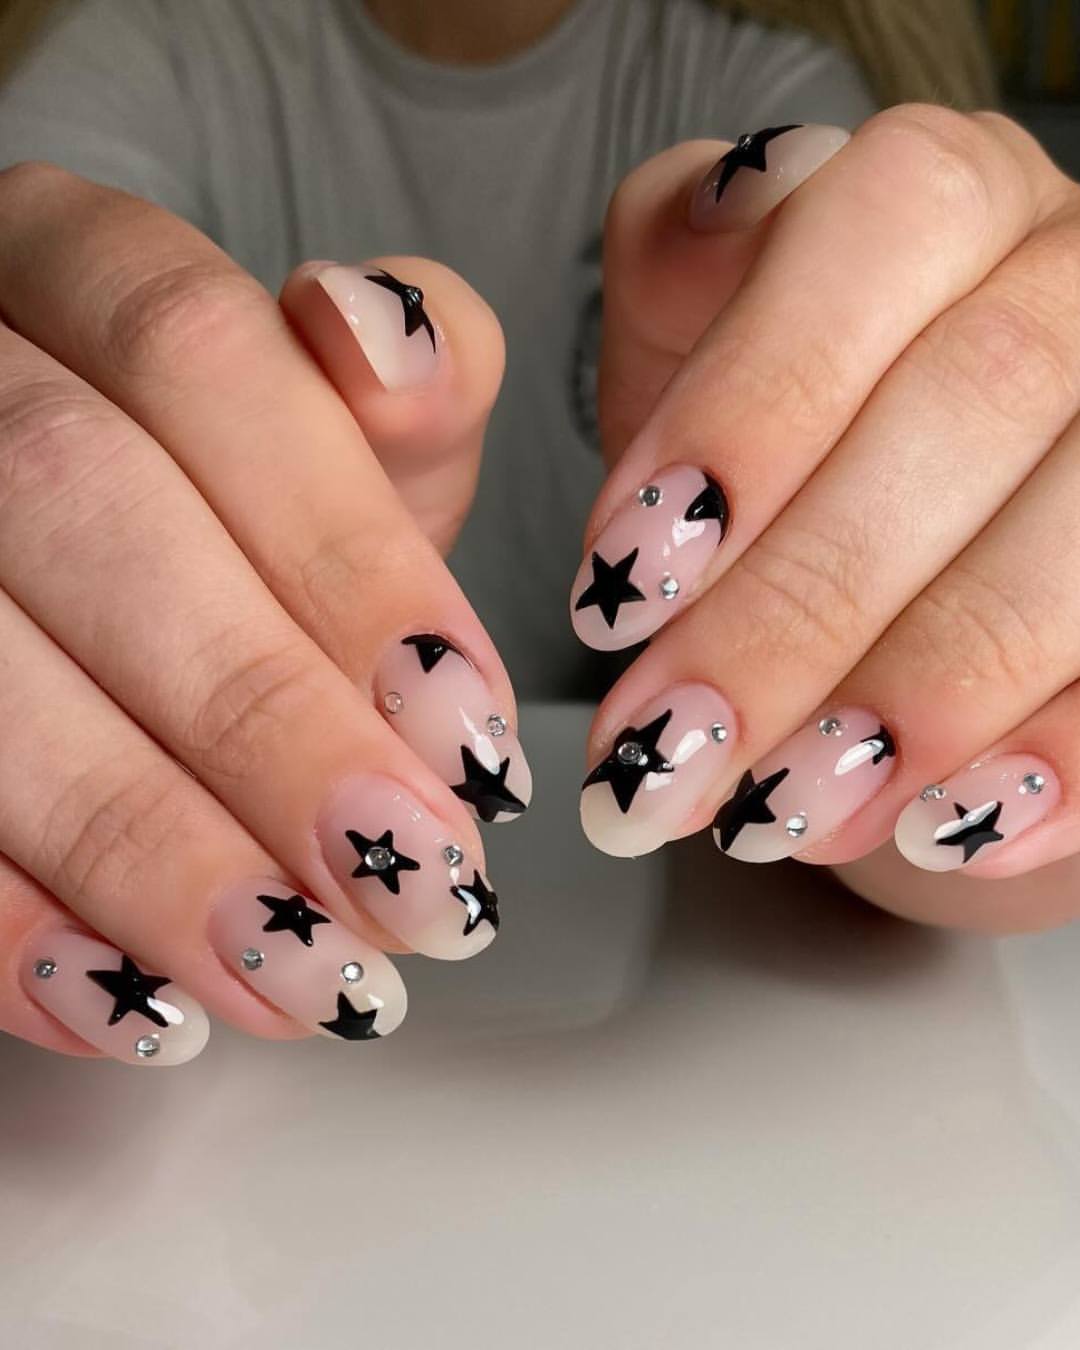
-
- Nude base polish (e.g., OPI “Put It In Neutral”)
- Black polish for stars (e.g., Essie “Licorice”)
- Rhinestones and nail glue
- Thin nail art brush and dotting tool
Instructions:
-
- Apply a base coat to all nails.
- Paint the nails with two coats of the nude polish and let them dry.
- Use the thin brush and dotting tool to create star patterns with the black polish.
- Add rhinestones using nail glue for extra sparkle.
- Seal with a clear top coat to protect the design and add shine.
Blue and Orange Abstract Art
This vibrant nail design features a mix of blue and orange abstract patterns on a white base, creating a striking and artistic look. The bold colors and intricate patterns make this design perfect for someone who loves a playful and creative style. The almond shape adds elegance, making this manicure suitable for both casual and formal settings.
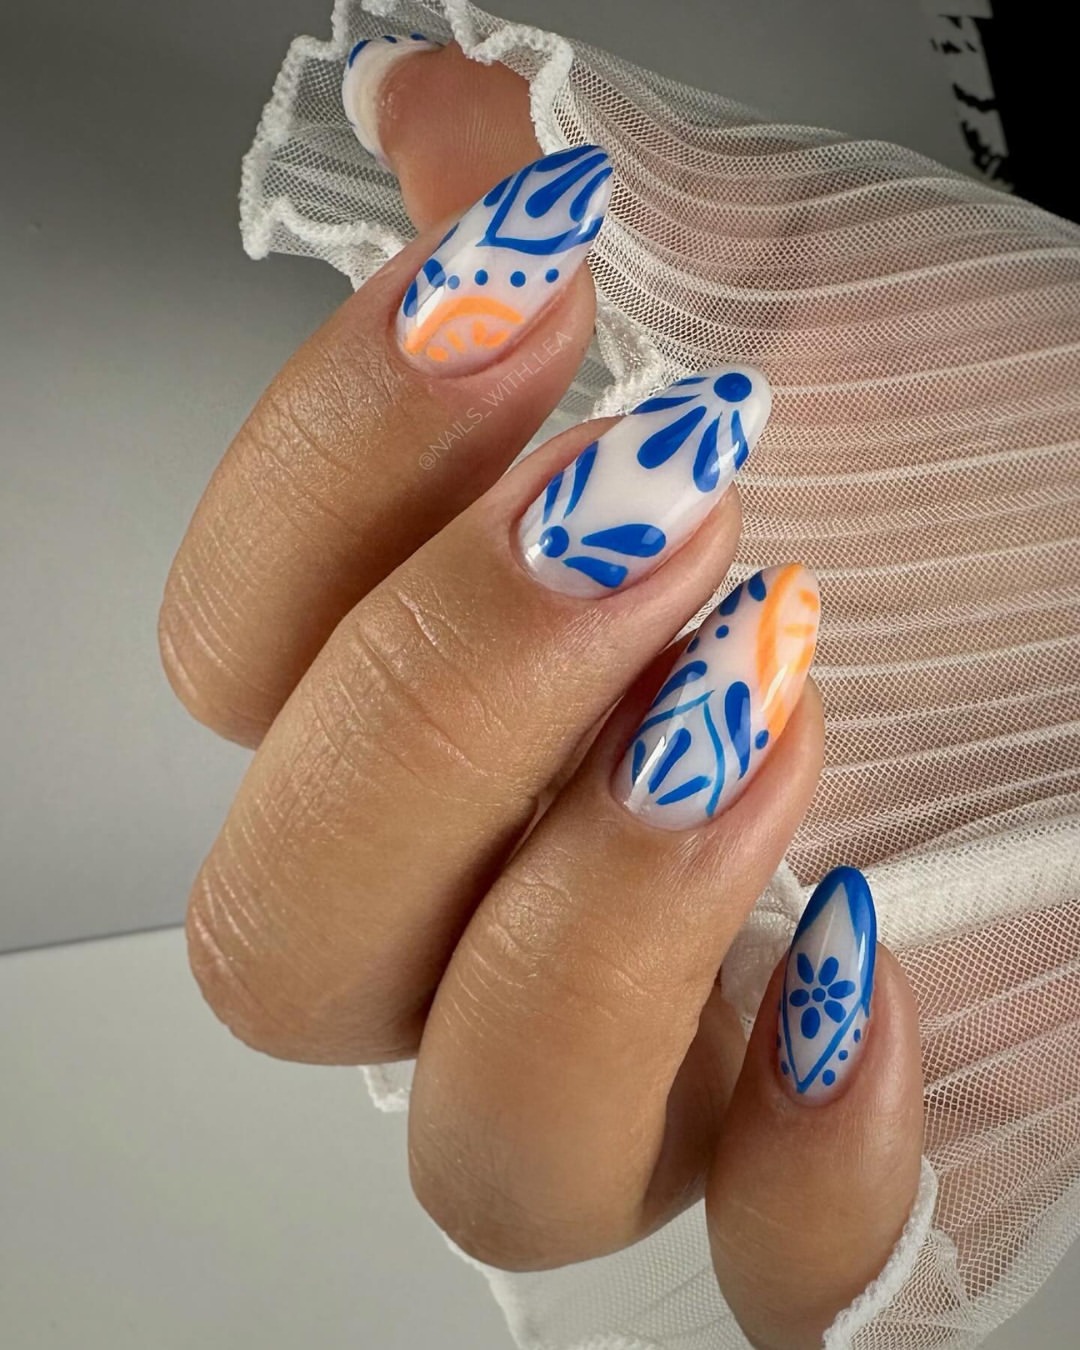
-
- White base polish (e.g., OPI “Alpine Snow”)
- Blue polish (e.g., Essie “Butler Please”)
- Orange polish (e.g., OPI “A Roll in The Hague”)
- Thin nail art brush
Instructions:
-
- Start with a base coat to protect your nails.
- Apply two coats of the white polish and let it dry completely.
- Use the thin brush to create abstract patterns with the blue and orange polishes.
- Finish with a clear top coat to seal the design and add shine.
FAQ
Q: How can I make my fall nail designs last longer?A: Always start with a good base coat and finish with a high-quality top coat. Avoid exposing your nails to harsh chemicals and wear gloves when doing household chores.
Q: Are there specific nail shapes that work best for fall designs?A: Gel almond, gel short almond, and gel short square shapes are popular choices as they provide a good canvas for intricate designs and are sturdy enough to withstand the cooler weather.
Q: What are some quick and easy fall nail designs I can try at home?A: Simple designs like plaid patterns, dark burgundy, and natural shades are perfect for beginners. You can also try maroon and blue nails for a trendy look.
These fall nail designs are sure to make your nails stand out this season. From elegant and autumn classy styles to fun and trendy accents, there’s something for everyone. So grab your polish and get creative!
Save Pin