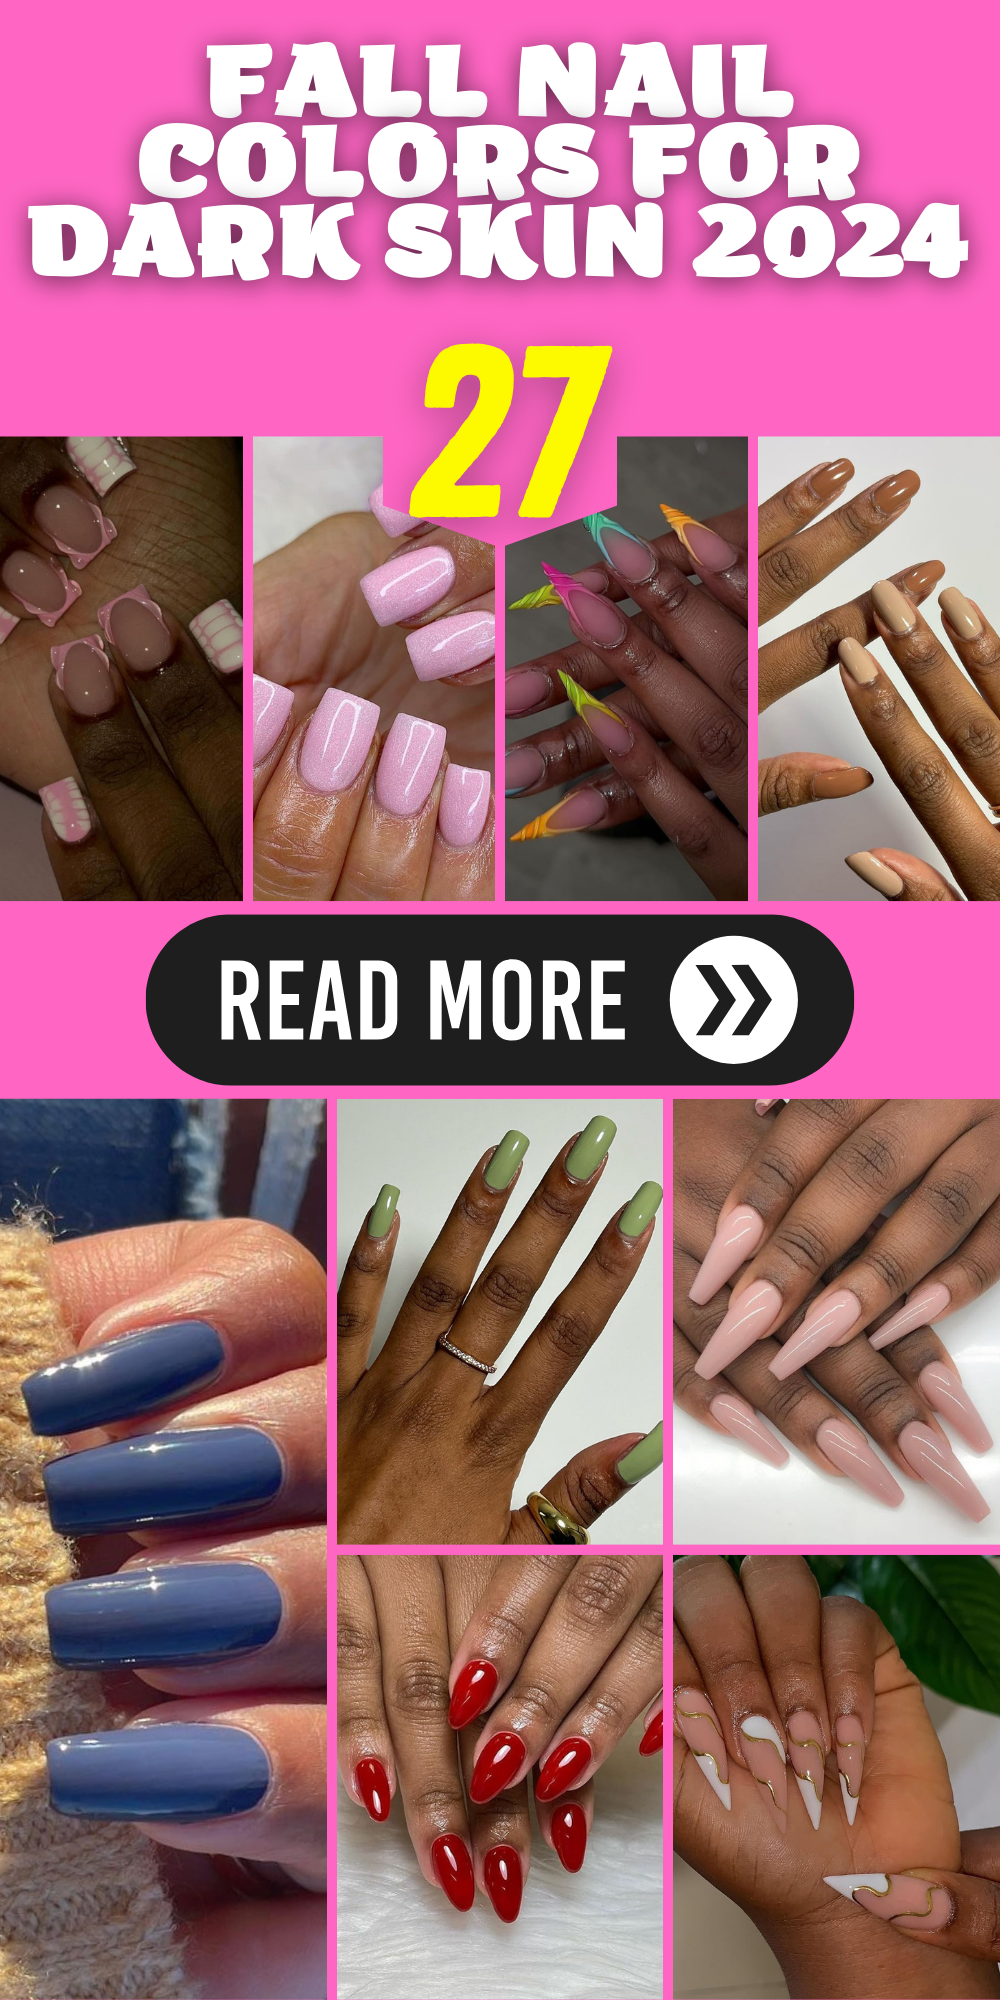
As the leaves turn and the air cools, our nail polish choices shift to reflect the rich and cozy vibes of autumn. But what fall nail colors look best on dark skin? From bold hues to subtle shades, there’s a perfect fall nail color for everyone. In this article, we’ll explore stunning nail designs that are especially flattering on darker skin tones. Ready to find your next favorite manicure? Let’s dive into the best fall nail colors for dark skin, with detailed descriptions and professional insights on each look.
Tortoiseshell Tips
This tortoiseshell design is a timeless classic that exudes elegance and sophistication. The rich blend of browns, blacks, and creams creates a stunning contrast that looks especially beautiful on dark skin tones. The almond shape adds a touch of chic, while the glossy finish ensures a polished look.

Consumables:
-
- Base coat: Essie First Base
- Brown polish: OPI’s “How Great Is Your Dane?”
- Black polish: Sally Hansen’s “Black Out”
- Cream polish: Zoya’s “Jacqueline”
- Top coat: Seche Vite Dry Fast Top Coat
Creating the Look at Home:
-
- Apply a base coat to protect your natural nails.
- Paint your nails with a cream base color and let it dry completely.
- Using a small brush, create random patches with the brown polish.
- Add smaller patches of black polish over the brown.
- Finish with a top coat to seal the design and add shine.
Chocolate Brown Coffin Nails
Rich and decadent, chocolate brown nails are a staple for fall. This deep hue complements dark skin beautifully and can be worn in various styles. Here, the long coffin shape adds a dramatic flair that’s perfect for those who love a bold look.
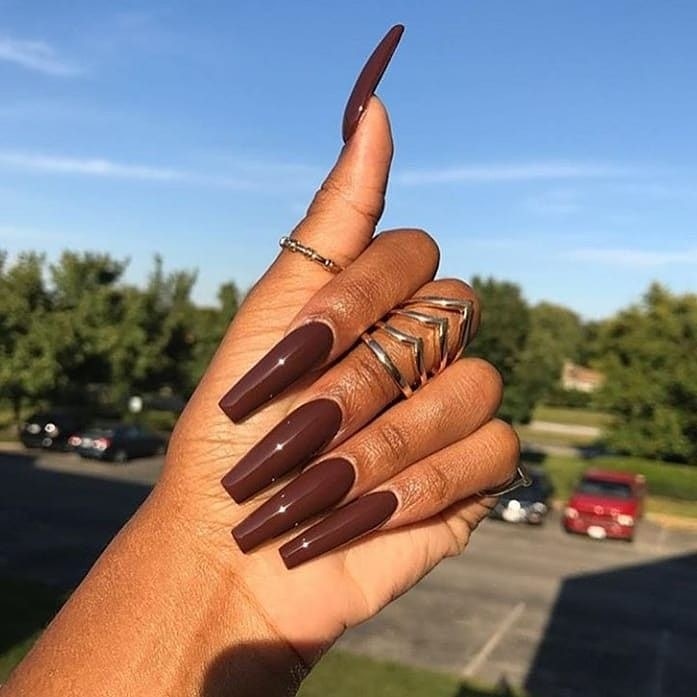
Consumables:
-
- Base coat: Orly Bonder Base Coat
- Brown polish: Essie’s “Wicked”
- Top coat: Sally Hansen Miracle Gel Top Coat
Creating the Look at Home:
-
- Start with a base coat to ensure longevity.
- Apply two coats of the chocolate brown polish, allowing each layer to dry.
- Finish with a glossy top coat for added durability and shine.
Muted Teal Round Nails
For a soft yet striking look, muted teal nails are an excellent choice. The cool tone of the teal contrasts beautifully with dark skin, creating a subtle yet eye-catching manicure. The short, round shape keeps the look understated and chic.
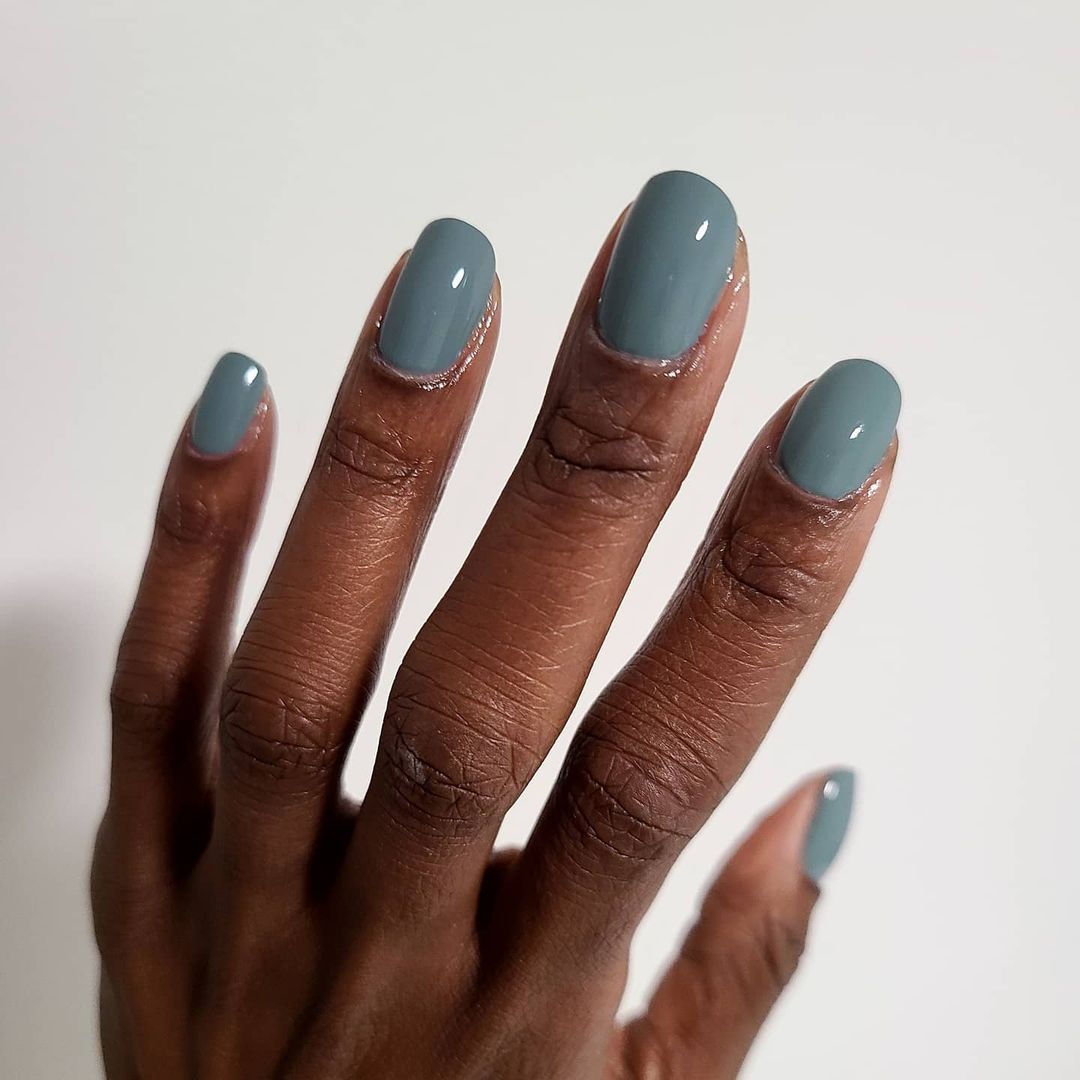
Consumables:
-
- Base coat: Deborah Lippmann Gel Lab Pro Base Coat
- Teal polish: OPI’s “Suzi Says Feng Shui”
- Top coat: CND Vinylux Weekly Top Coat
Creating the Look at Home:
-
- Apply a base coat to prevent staining and extend the life of your manicure.
- Paint your nails with two coats of teal polish, letting each coat dry thoroughly.
- Seal with a top coat to enhance the color and add a glossy finish.
Black French Tips
This modern twist on the classic French manicure features sleek black tips that stand out beautifully against a nude base. The square shape adds a contemporary edge, making this design both elegant and trendy. The glossy finish enhances the overall look, making it perfect for both everyday wear and special occasions.
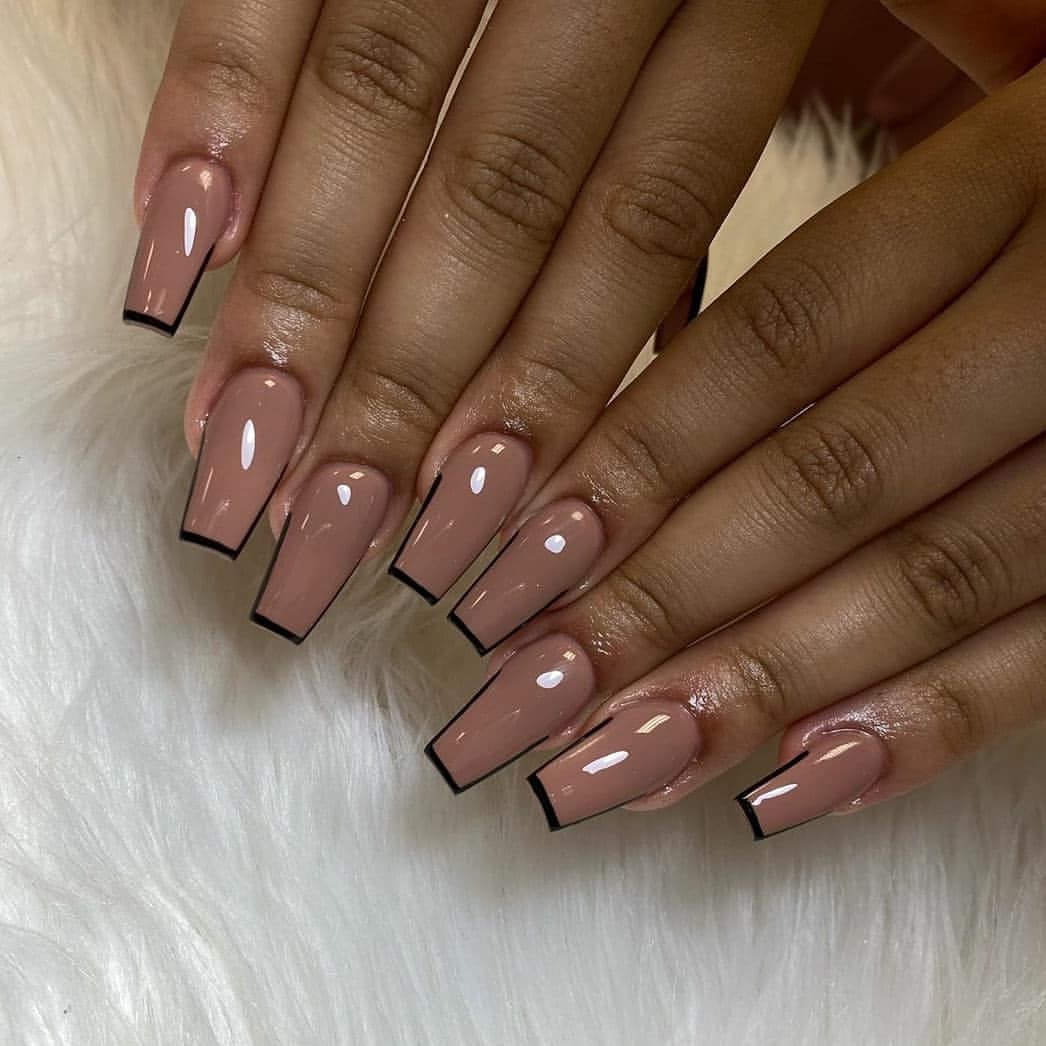
Consumables:
-
- Base coat: Essie First Base
- Nude polish: OPI’s “Dulce de Leche”
- Black polish: Sally Hansen’s “Black Out”
- Top coat: Seche Vite Dry Fast Top Coat
Creating the Look at Home:
-
- Apply a base coat to protect your natural nails.
- Paint your nails with the nude polish and let it dry completely.
- Use a striping brush or nail tape to create precise black tips.
- Finish with a top coat to seal the design and add shine.
Save Pin

Golden Glam
Embrace the fall season with these stunning golden nails. The metallic shimmer catches the light beautifully, making your nails look like they’re dipped in liquid gold. This design is perfect for adding a touch of luxury to your look and is especially flattering on darker skin tones.
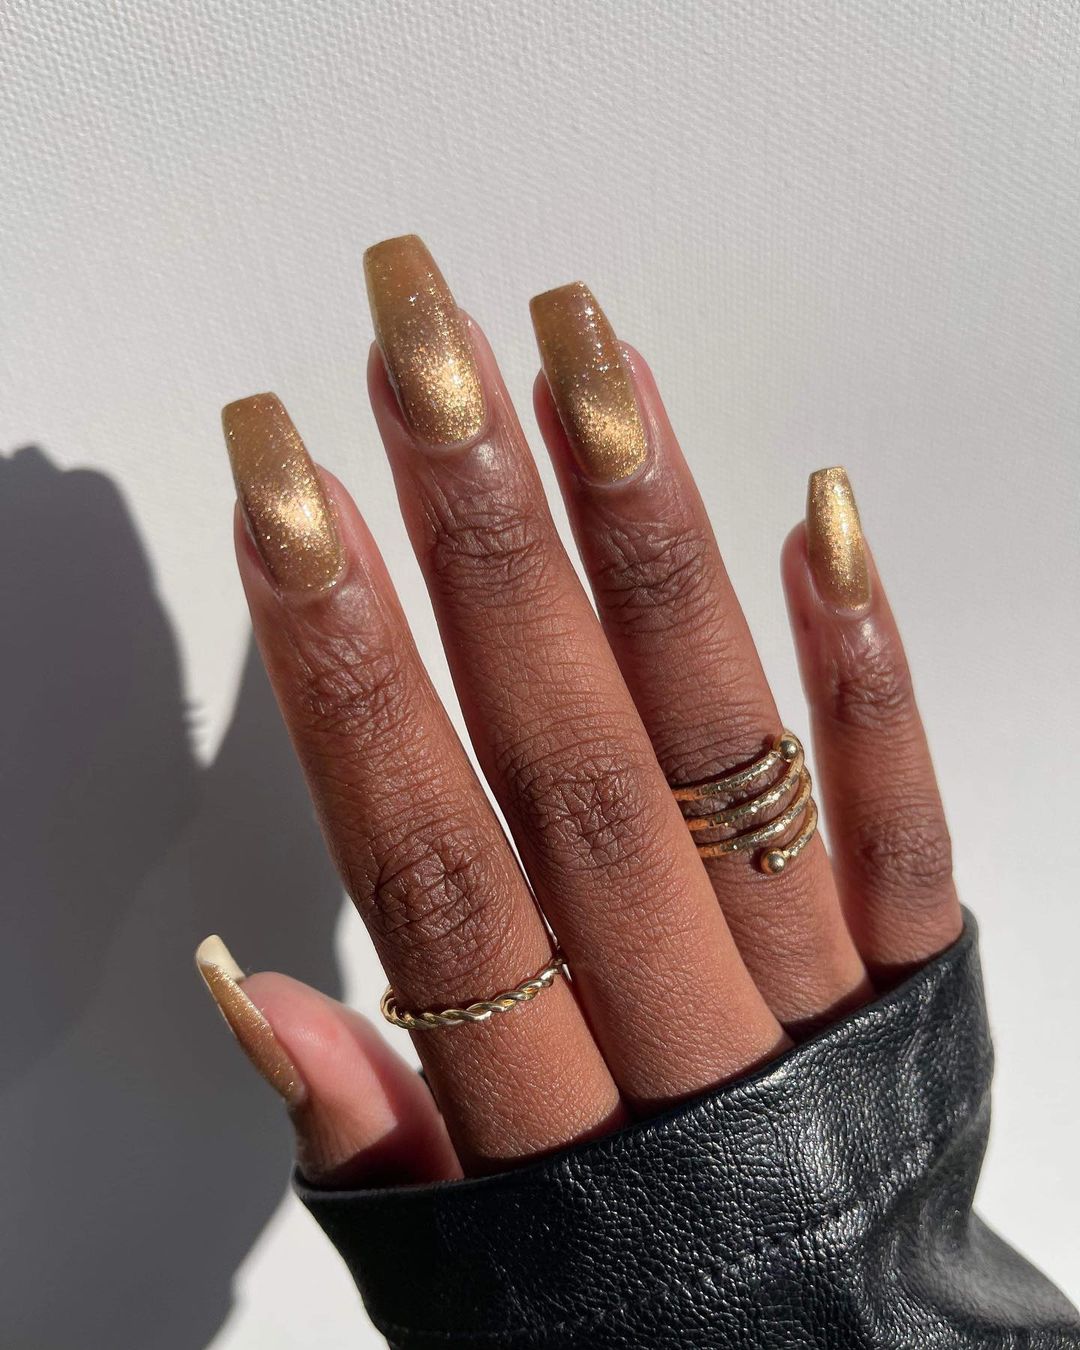
Consumables:
-
- Base coat: Orly Bonder Base Coat
- Gold polish: Essie’s “Good as Gold”
- Top coat: Sally Hansen Miracle Gel Top Coat
Creating the Look at Home:
-
- Start with a base coat to ensure longevity.
- Apply two coats of the gold polish, allowing each layer to dry.
- Finish with a glossy top coat for added durability and shine.
Holographic Sparkle
For a bold and eye-catching look, these holographic nails are a must-try. The multi-dimensional shimmer creates a mesmerizing effect that changes with the light. This design is ideal for those who love a bit of sparkle and want to make a statement with their manicure.
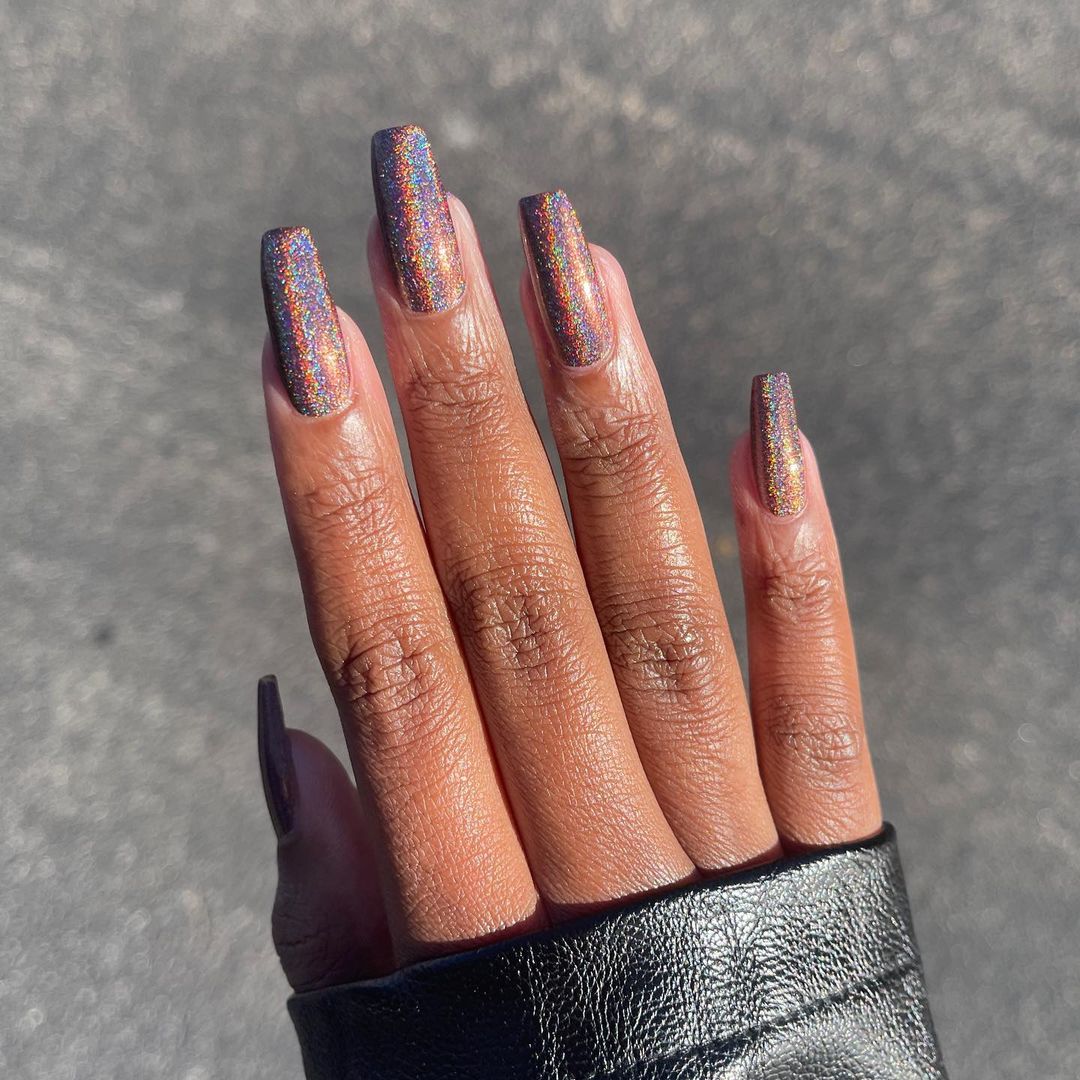
Consumables:
-
- Base coat: Deborah Lippmann Gel Lab Pro Base Coat
- Holographic polish: ILNP’s “Mega”
- Top coat: CND Vinylux Weekly Top Coat
Creating the Look at Home:
-
- Apply a base coat to prevent staining and extend the life of your manicure.
- Paint your nails with two coats of the holographic polish, letting each coat dry thoroughly.
- Seal with a top coat to enhance the color and add a glossy finish.
Deep Blue Elegance
These nails feature a rich, deep blue color that exudes sophistication and grace. The long square shape provides a sleek and modern look, making it an ideal choice for both casual and formal occasions. This deep blue hue is especially flattering on dark skin tones, providing a beautiful contrast that makes the color pop.
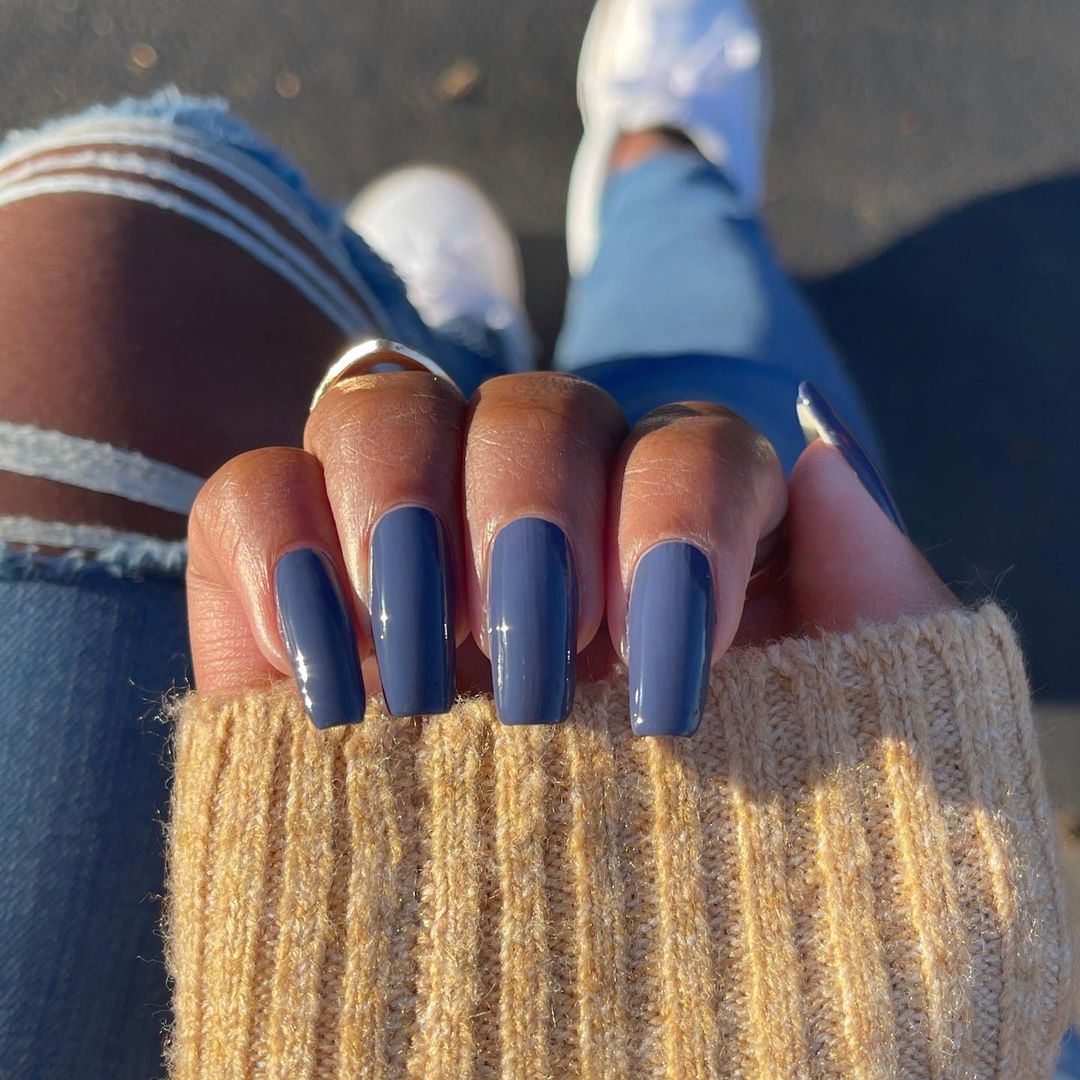
Consumables:
-
- Base coat: Essie First Base
- Blue polish: OPI’s “Russian Navy”
- Top coat: Seche Vite Dry Fast Top Coat
Creating the Look at Home:
-
- Apply a base coat to protect your natural nails.
- Paint your nails with the blue polish and let it dry completely.
- Finish with a top coat to seal the design and add a glossy finish.
Nude Duo
This nail design features a combination of two nude tones, creating a sophisticated and understated look. The use of different shades adds depth and interest, making this manicure both versatile and stylish. The short, rounded shape ensures that this design is suitable for any occasion, from professional settings to casual outings.
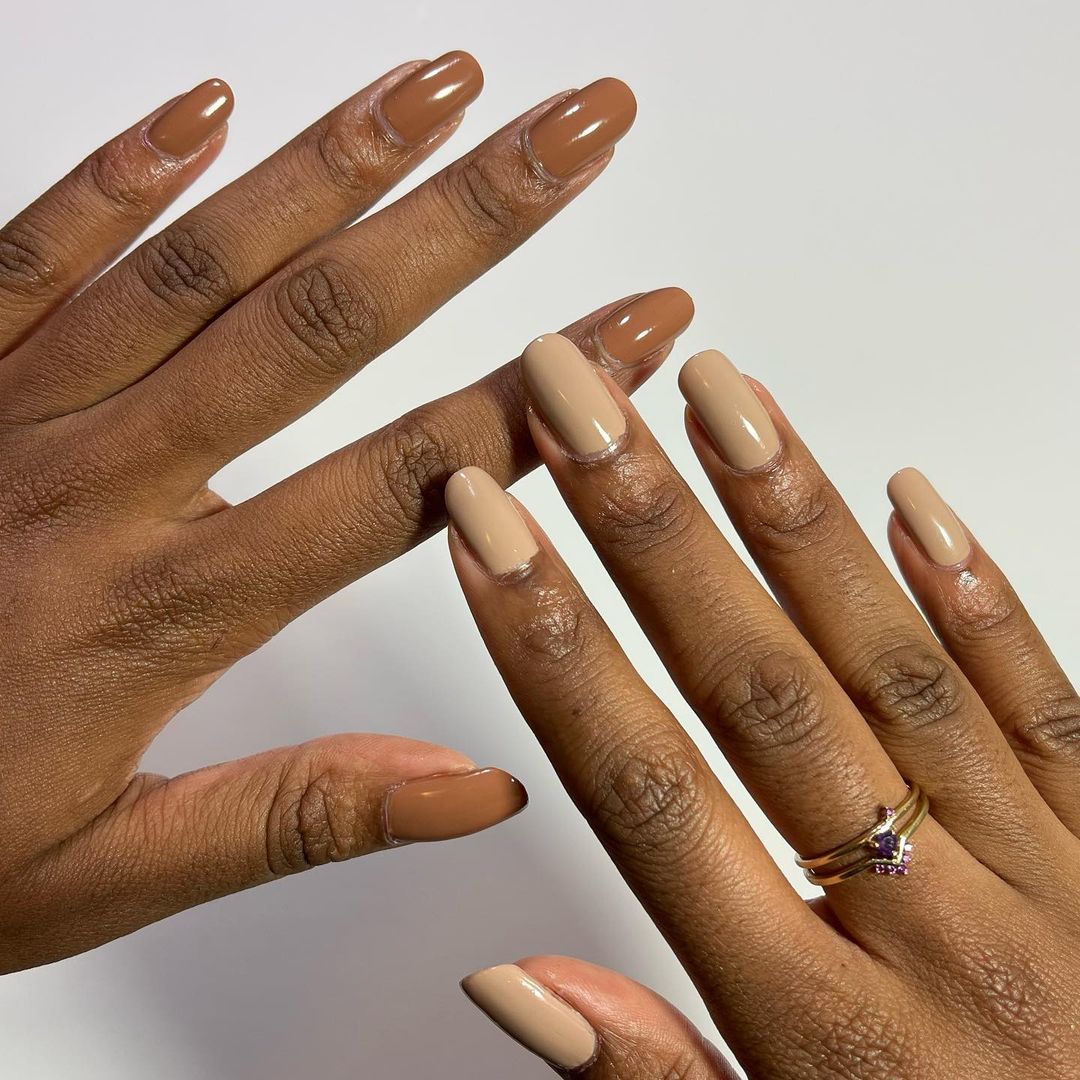
Consumables:
-
- Base coat: Orly Bonder Base Coat
- Light nude polish: Essie’s “Sand Tropez”
- Dark nude polish: OPI’s “Dulce de Leche”
- Top coat: Sally Hansen Miracle Gel Top Coat
Creating the Look at Home:
-
- Start with a base coat to ensure longevity.
- Apply the light nude polish to half of your nails and the dark nude polish to the other half, allowing each layer to dry.
- Finish with a glossy top coat for added durability and shine.
Multicolor Magic
For a vibrant and playful look, these multicolor nails are perfect. The gradient effect with multiple colors creates a fun and dynamic design that is sure to catch the eye. This manicure is ideal for those who love to experiment with bold and bright hues, making it a standout choice for fall.
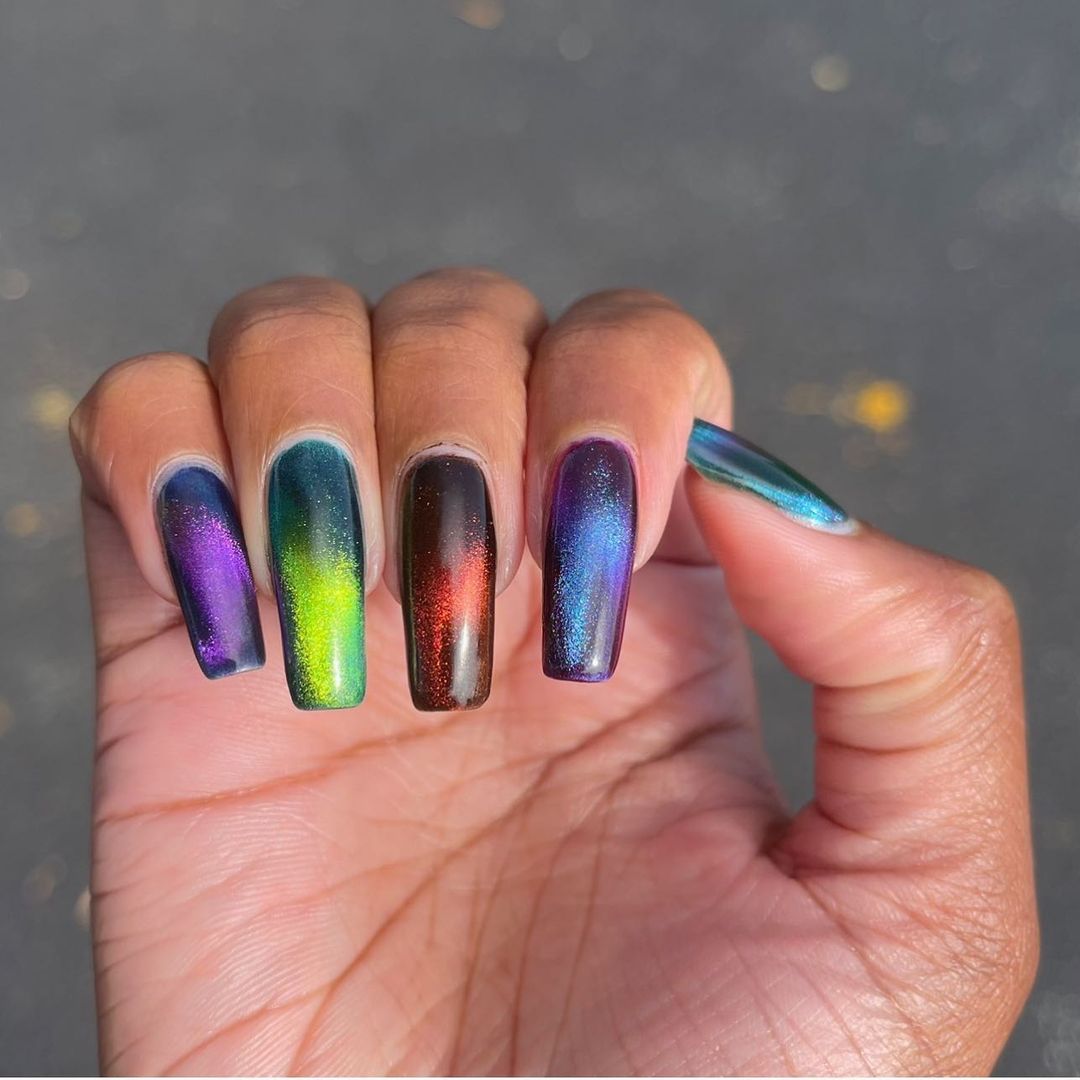
Consumables:
-
- Base coat: Deborah Lippmann Gel Lab Pro Base Coat
- Various colored polishes: ILNP’s “Reminisce,” “Luna,” and “Birefringence”
- Top coat: CND Vinylux Weekly Top Coat
Creating the Look at Home:
-
- Apply a base coat to prevent staining and extend the life of your manicure.
- Paint your nails with the different colored polishes, creating a gradient effect on each nail.
- Seal with a top coat to enhance the color and add a glossy finish.
Save Pin
Classic Red
Nothing beats the timeless appeal of classic red nails. This bright and bold color is a staple for any season, but it looks particularly stunning in the fall. The almond shape adds a touch of elegance, making this manicure both classy and chic.
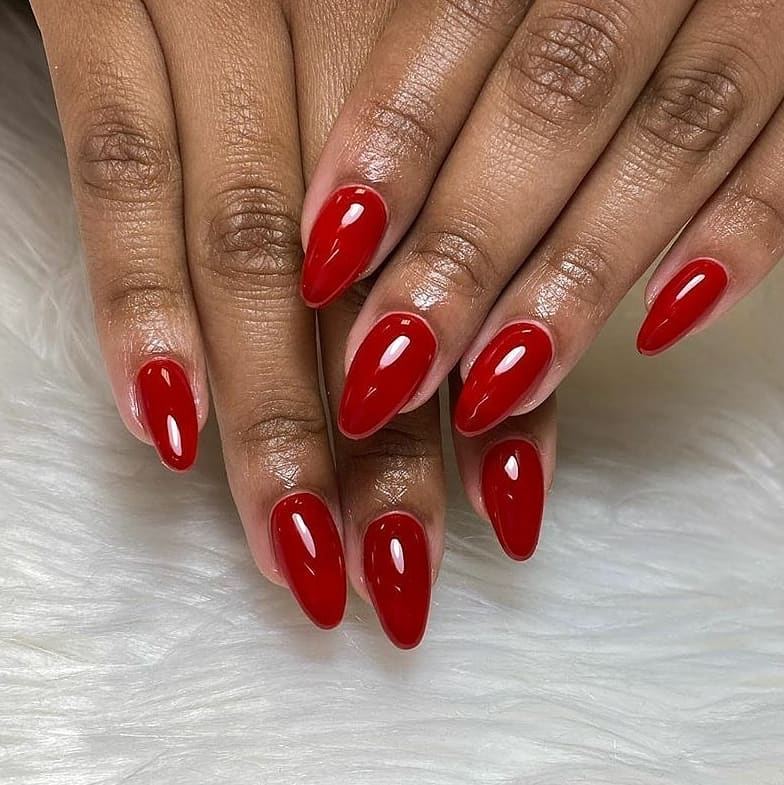
Consumables:
-
- Base coat: Essie First Base
- Red polish: OPI’s “Big Apple Red”
- Top coat: Seche Vite Dry Fast Top Coat
Creating the Look at Home:
-
- Apply a base coat to protect your natural nails.
- Paint your nails with two coats of red polish, letting each coat dry thoroughly.
- Finish with a top coat to seal the design and add a glossy finish.
Nude Coffin Nails
These nude coffin nails are the epitome of elegance and simplicity. The nude shade complements dark skin beautifully, creating a seamless and polished look. The long coffin shape adds a modern twist, making this design perfect for any occasion.
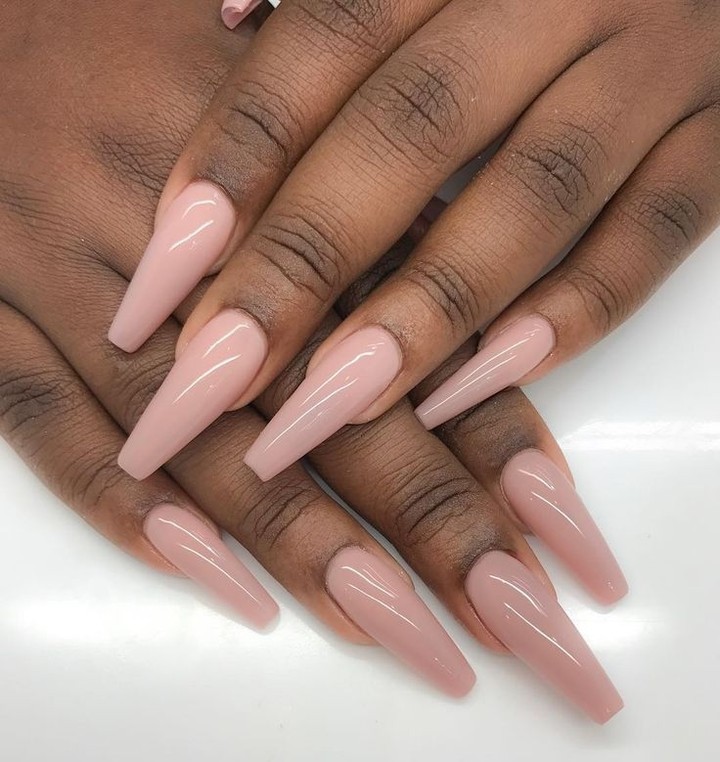
Consumables:
-
- Base coat: Orly Bonder Base Coat
- Nude polish: Essie’s “Bare with Me”
- Top coat: Sally Hansen Miracle Gel Top Coat
Creating the Look at Home:
-
- Start with a base coat to ensure longevity.
- Apply two coats of the nude polish, allowing each layer to dry.
- Finish with a glossy top coat for added durability and shine.
Sage Green Chic
Sage green nails offer a subtle yet striking look that’s perfect for fall. This soft and earthy tone is both calming and stylish, making it a great choice for those who prefer a more understated manicure. The medium square shape keeps the look clean and modern.
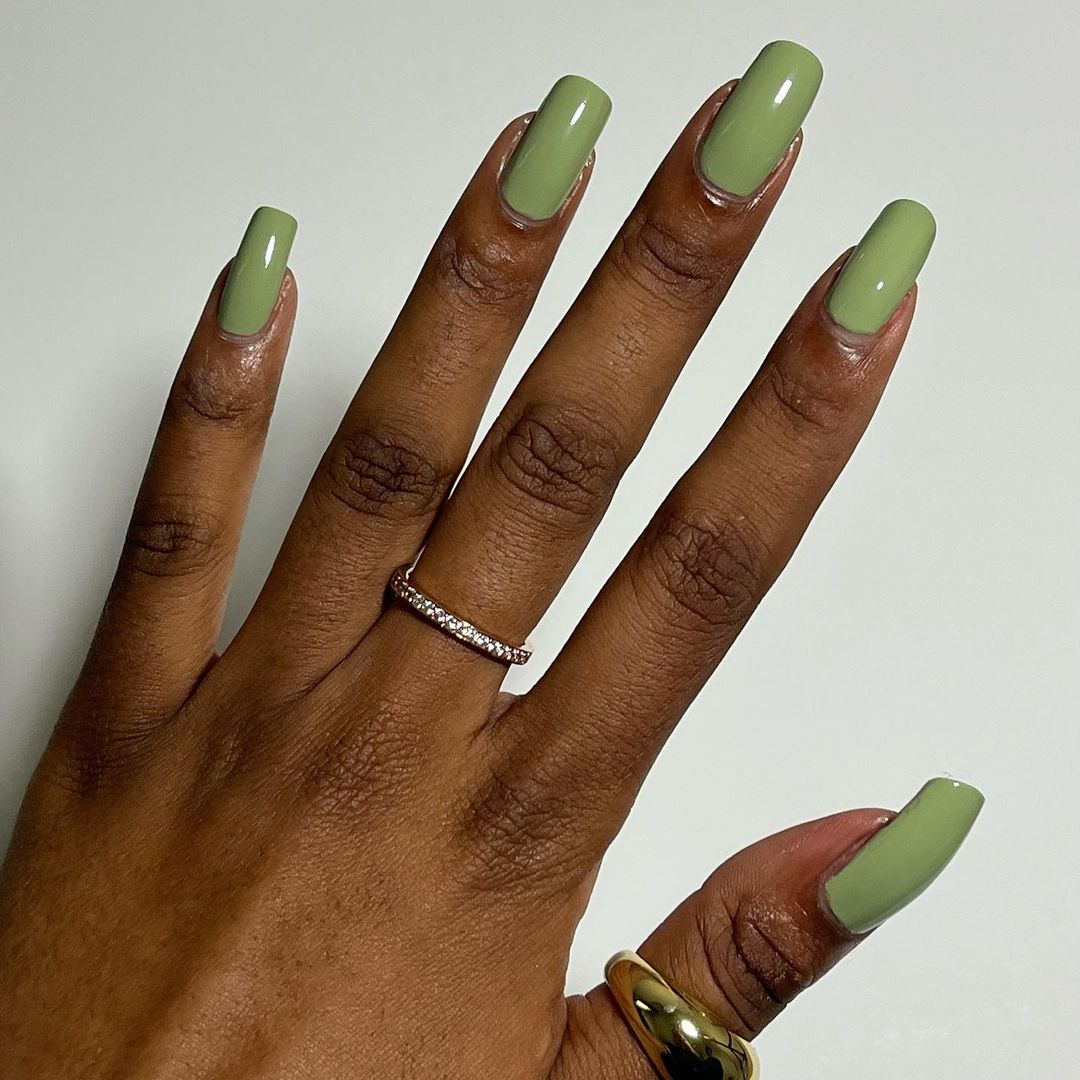
Consumables:
-
- Base coat: Deborah Lippmann Gel Lab Pro Base Coat
- Sage green polish: OPI’s “Sage Simulation”
- Top coat: CND Vinylux Weekly Top Coat
Creating the Look at Home:
-
- Apply a base coat to prevent staining and extend the life of your manicure.
- Paint your nails with two coats of the sage green polish, letting each coat dry thoroughly.
- Seal with a top coat to enhance the color and add a glossy finish.
Elegant White Almond Nails
These elegant white almond nails are a classic choice for a sophisticated look. The clean white color is accentuated by delicate rhinestone accents, adding a touch of glamour without being overwhelming. This manicure is perfect for formal events or whenever you want a chic, understated look.
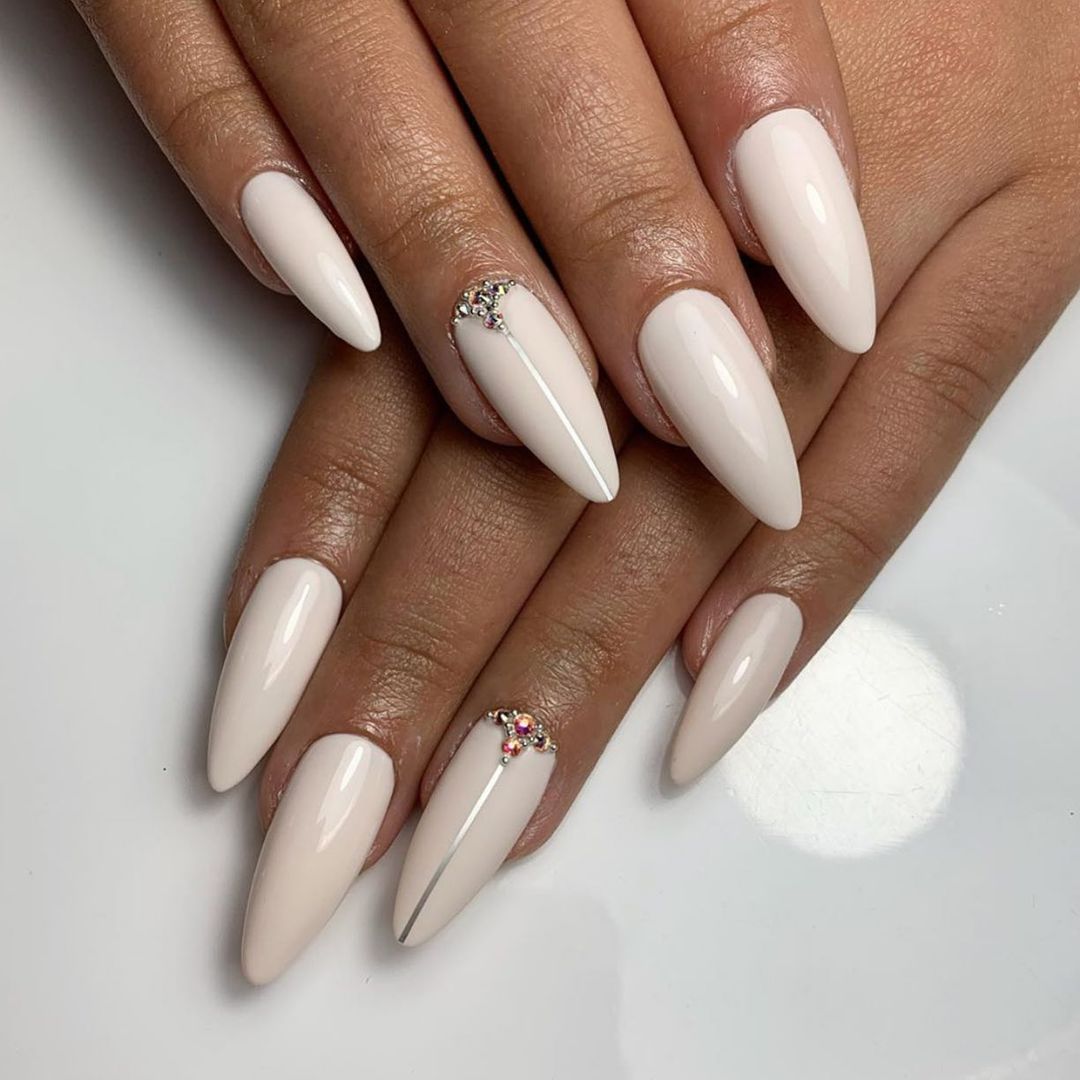
Consumables:
-
- Base coat: Essie First Base
- White polish: OPI’s “Alpine Snow”
- Rhinestones: Swarovski Flatback Crystals
- Top coat: Seche Vite Dry Fast Top Coat
Creating the Look at Home:
-
- Apply a base coat to protect your natural nails.
- Paint your nails with the white polish and let it dry completely.
- Use nail glue to attach rhinestones in a desired pattern.
- Finish with a top coat to seal the design and add a glossy finish.
Shimmering Emerald Green
These shimmering emerald green nails are perfect for adding a touch of luxury to your fall look. The rich green color is both vibrant and elegant, making it a great choice for any occasion. The oval shape keeps the look soft and feminine, while the shimmer finish adds a glamorous touch.
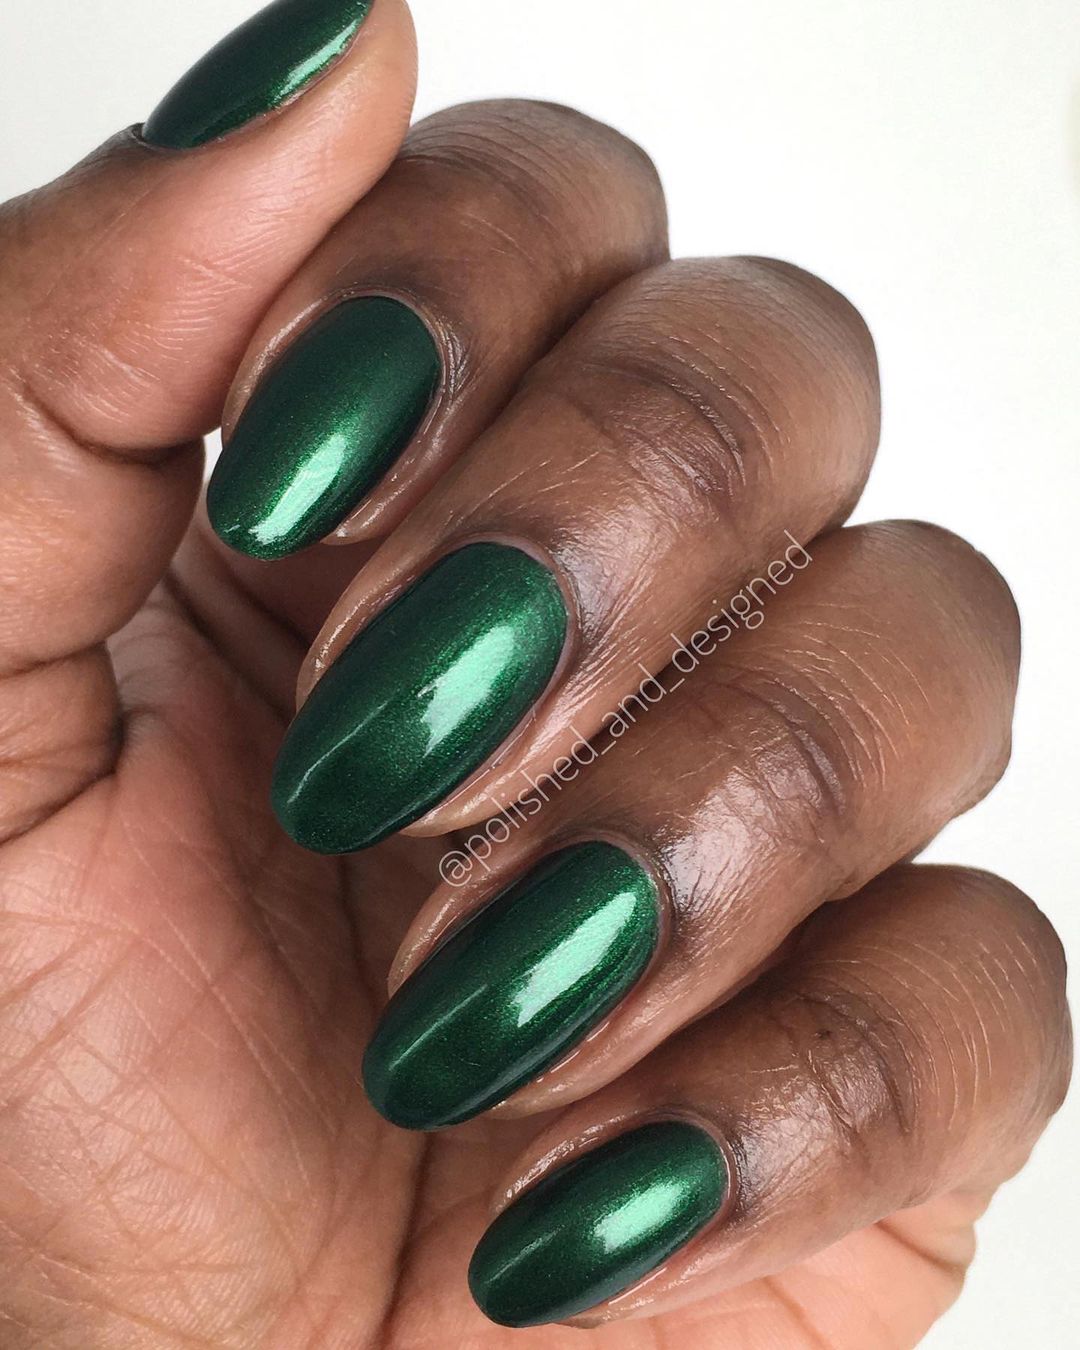
Consumables:
-
- Base coat: Orly Bonder Base Coat
- Green polish: Essie’s “Off Tropic”
- Shimmer top coat: Sally Hansen Miracle Gel Shiny Top Coat
Creating the Look at Home:
-
- Start with a base coat to ensure longevity.
- Apply two coats of the green polish, allowing each layer to dry.
- Finish with a shimmer top coat for added sparkle and shine.
Bold Pink Swirls
These bold pink swirl nails are a fun and eye-catching choice for those who love to make a statement. The vibrant pink color is accentuated by intricate swirl designs, creating a dynamic and playful look. The long coffin shape adds to the dramatic effect, making these nails perfect for a night out.
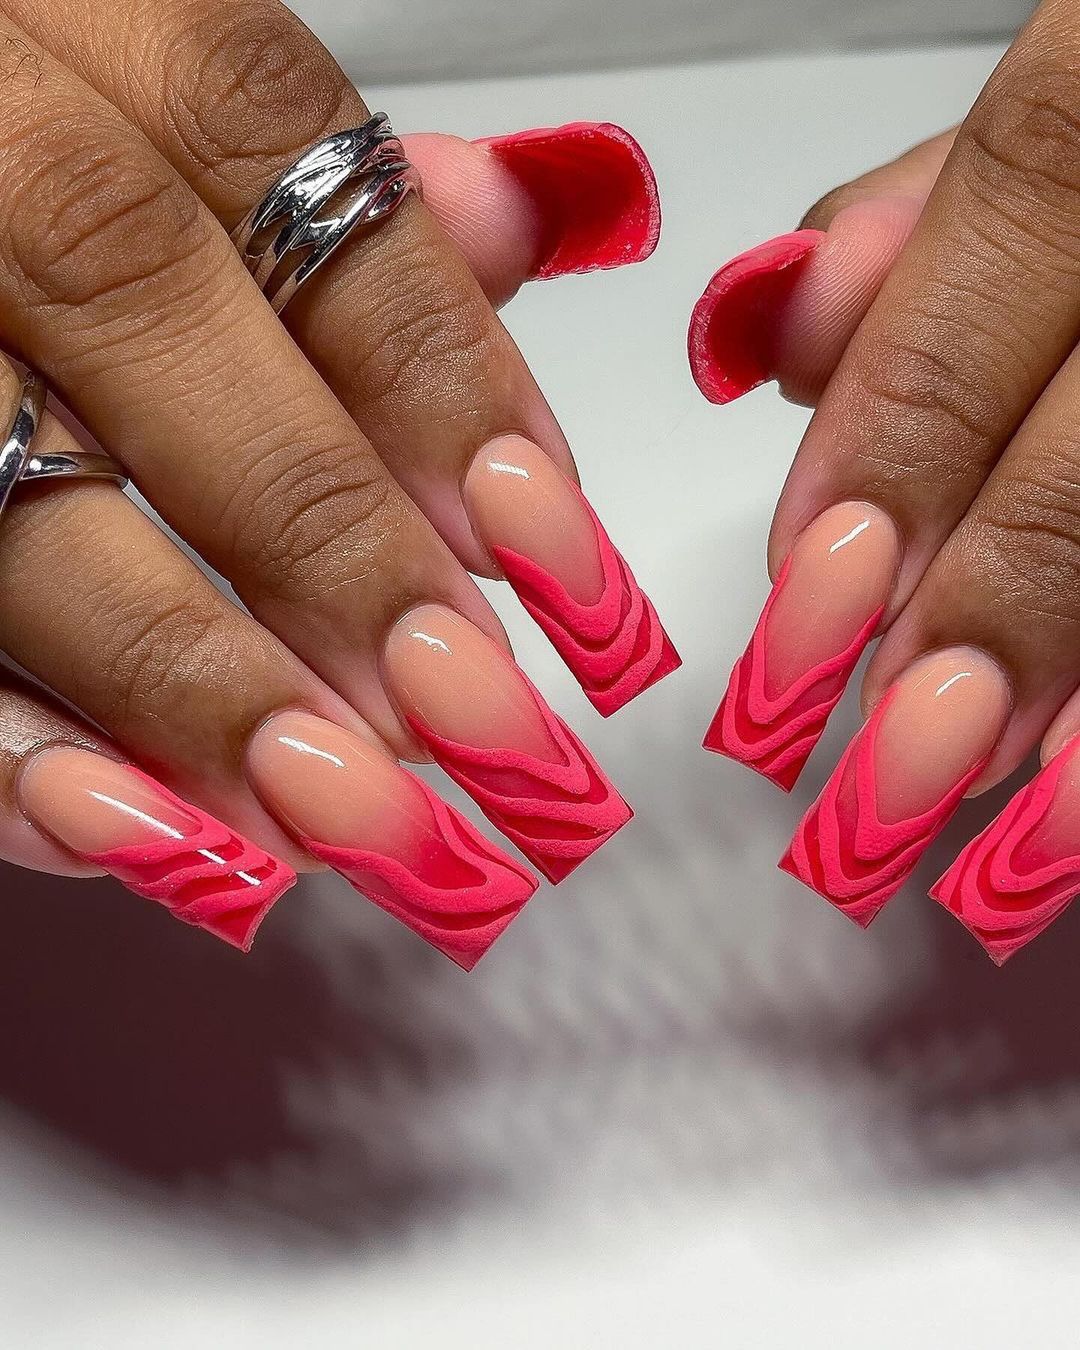
Consumables:
-
- Base coat: Deborah Lippmann Gel Lab Pro Base Coat
- Pink polish: OPI’s “Pink Flamenco”
- Nail art brush: Winstonia Fine Detail Brush
- Top coat: CND Vinylux Weekly Top Coat
Creating the Look at Home:
-
- Apply a base coat to prevent staining and extend the life of your manicure.
- Paint your nails with the pink polish and let it dry completely.
- Use a nail art brush to create swirl designs with a contrasting pink shade.
- Seal with a top coat to enhance the color and add a glossy finish.
Edgy Neon Accents
These edgy nails feature a combination of neon accents and intricate designs, making them perfect for those who love bold and unique looks. The long square shape provides a modern canvas for the detailed artwork, including flames, stars, and rhinestone embellishments.
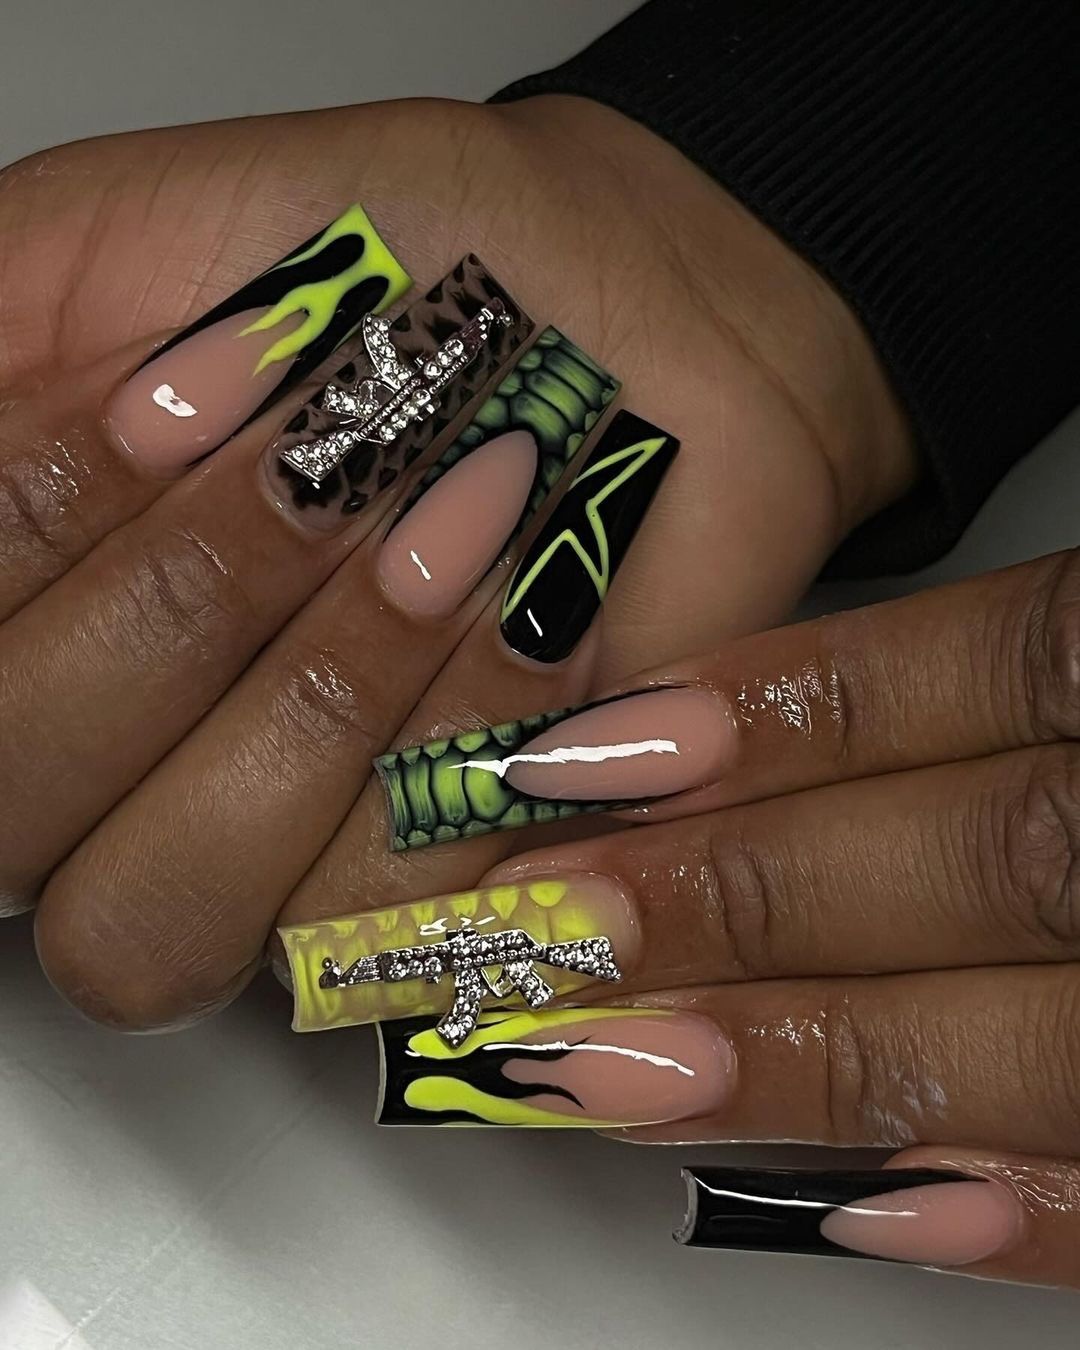
Consumables:
-
- Base coat: Essie First Base
- Black polish: Sally Hansen’s “Black Out”
- Neon polishes: China Glaze’s “Celtic Sun” and “Pool Party”
- Rhinestones: Swarovski Flatback Crystals
- Top coat: Seche Vite Dry Fast Top Coat
Creating the Look at Home:
-
- Apply a base coat to protect your natural nails.
- Paint your nails with the black polish and let it dry completely.
- Use a nail art brush to create neon designs and attach rhinestones with nail glue.
- Finish with a top coat to seal the design and add a glossy finish.
Fiery Ombre
These fiery ombre nails feature a gradient of warm colors, creating a striking and dynamic look. The transition from red to orange is smooth and eye-catching, perfect for capturing the essence of autumn. The long coffin shape adds a touch of elegance to this bold design.
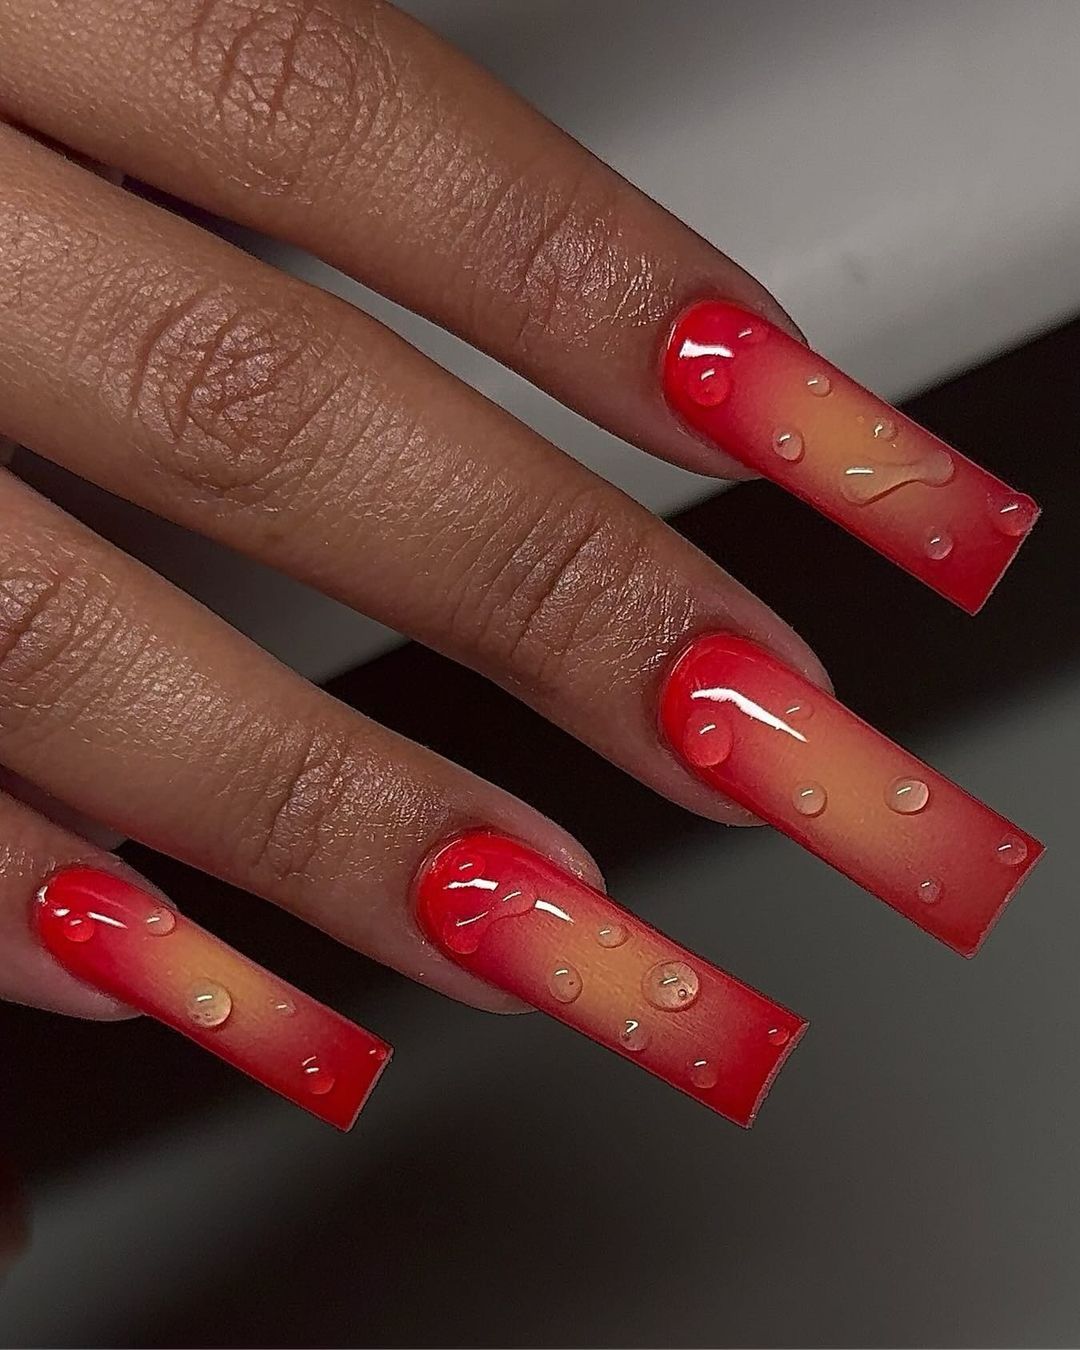
Consumables:
-
- Base coat: Orly Bonder Base Coat
- Red polish: Essie’s “A List”
- Orange polish: OPI’s “A Good Man-darin is Hard to Find”
- Sponge: Beautyblender Makeup Sponge
- Top coat: Sally Hansen Miracle Gel Shiny Top Coat
Creating the Look at Home:
-
- Start with a base coat to ensure longevity.
- Apply the red polish as a base and let it dry completely.
- Use a makeup sponge to dab the orange polish at the tips, creating a gradient effect.
- Finish with a top coat for added durability and shine.
Blue French Tips
These blue French tip nails are a modern twist on the classic French manicure. The sharp contrast between the nude base and bright blue tips creates a bold and stylish look. The stiletto shape adds an edgy touch, making this design perfect for fashion-forward individuals.
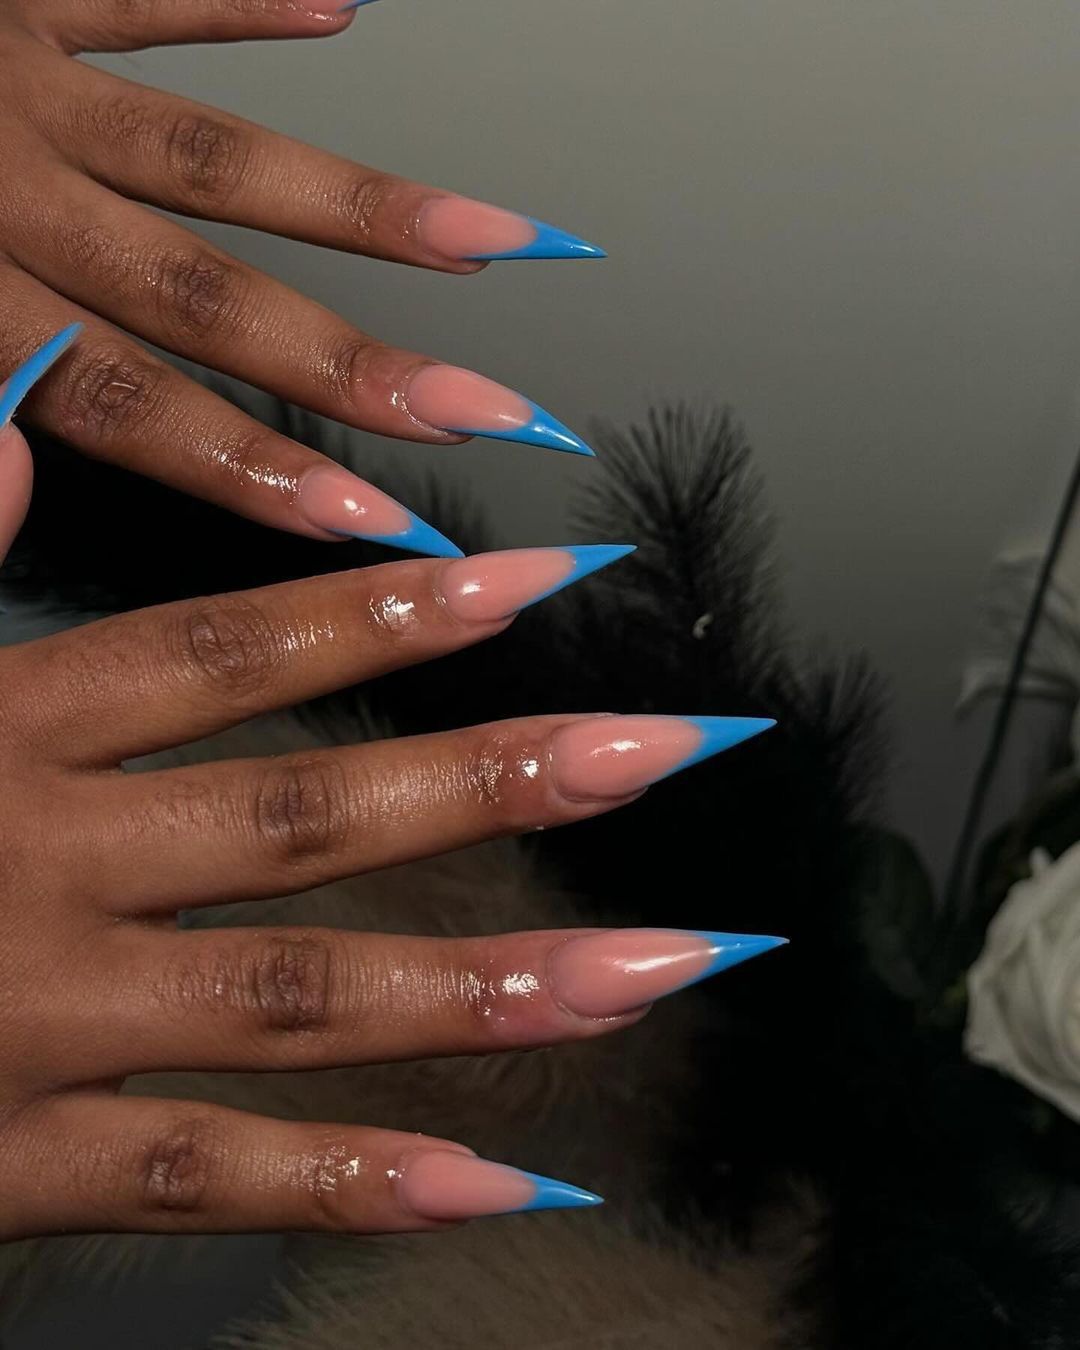
Consumables:
-
- Base coat: Deborah Lippmann Gel Lab Pro Base Coat
- Nude polish: Essie’s “Mademoiselle”
- Blue polish: OPI’s “Mi Casa Es Blue Casa”
- Top coat: CND Vinylux Weekly Top Coat
Creating the Look at Home:
-
- Apply a base coat to prevent staining and extend the life of your manicure.
- Paint your nails with the nude polish and let it dry completely.
- Use nail tape or a striping brush to create precise blue tips.
- Seal with a top coat to enhance the color and add a glossy finish.
Blue and White 3D Floral Design
This intricate design combines various shades of blue and white, creating a stunning 3D floral effect. The detailed flowers and textured elements make these nails a true work of art. The long stiletto shape adds drama, making these nails perfect for special occasions where you want to make a statement.
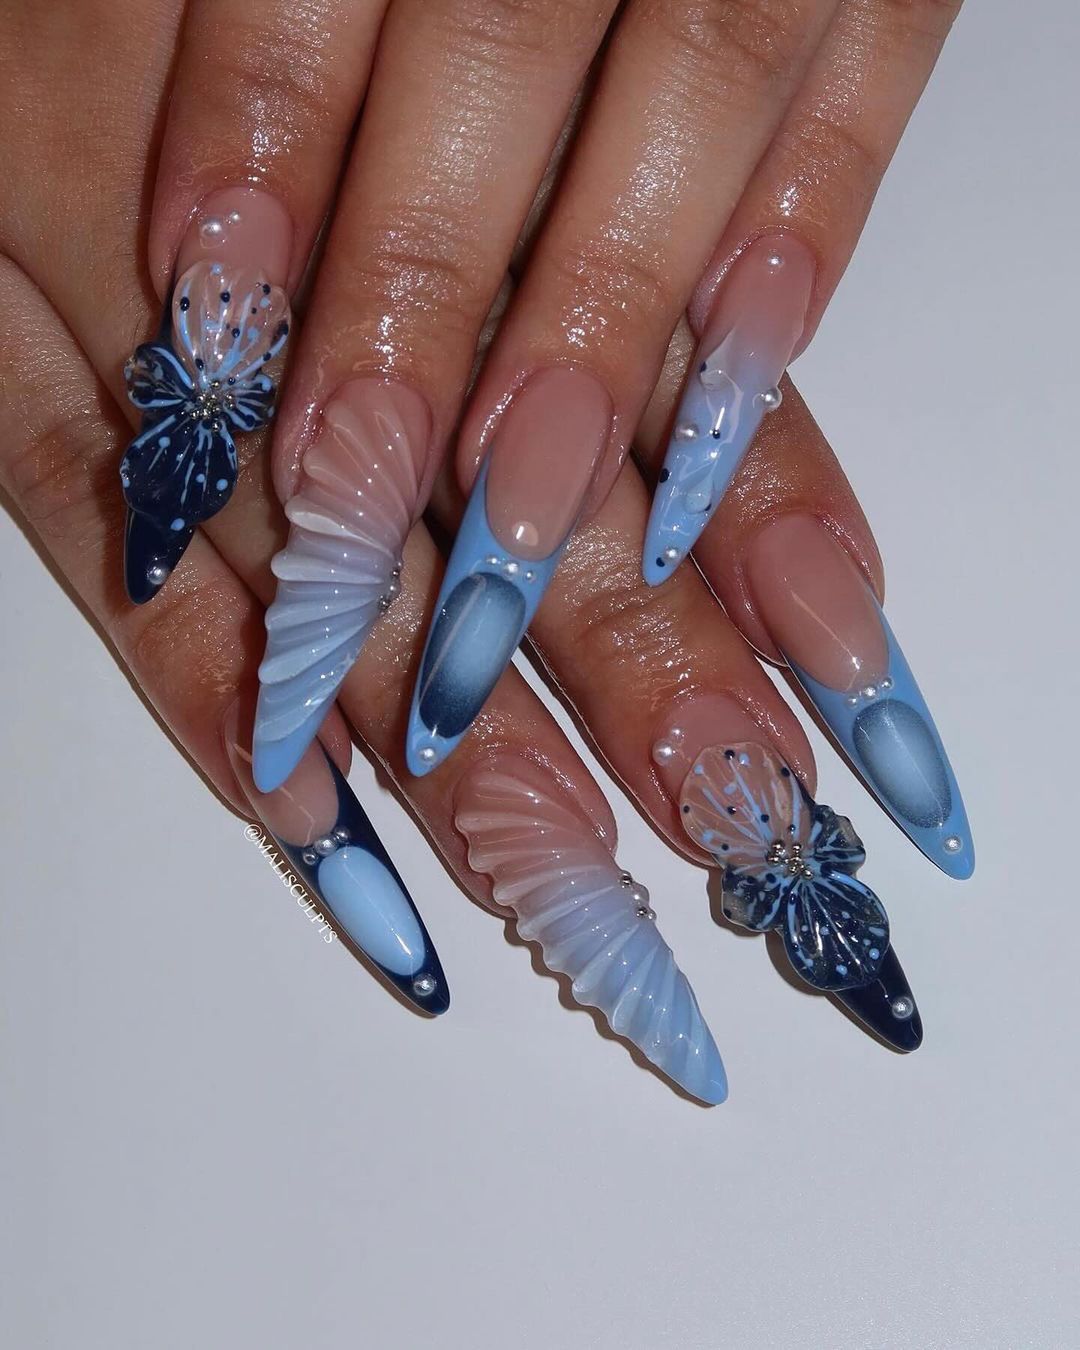
Consumables:
-
- Base coat: Essie First Base
- Nude polish: OPI’s “Bubble Bath”
- Blue polish: Essie’s “Butler Please”
- White polish: Sally Hansen’s “White On”
- 3D gel: Kiara Sky 3D Gel
- Rhinestones: Swarovski Flatback Crystals
- Top coat: Seche Vite Dry Fast Top Coat
Creating the Look at Home:
-
- Apply a base coat to protect your natural nails.
- Paint your nails with the nude polish and let it dry completely.
- Use the blue and white polishes to create the floral designs.
- Sculpt 3D elements with the 3D gel and add rhinestones.
- Finish with a top coat to seal the design and add a glossy finish.
White and Gold Waves
These nails feature a chic combination of white and gold wavy designs on a nude base. The long stiletto shape enhances the elegance and sophistication of this manicure. The gold accents add a touch of luxury, making these nails suitable for both formal and festive occasions.
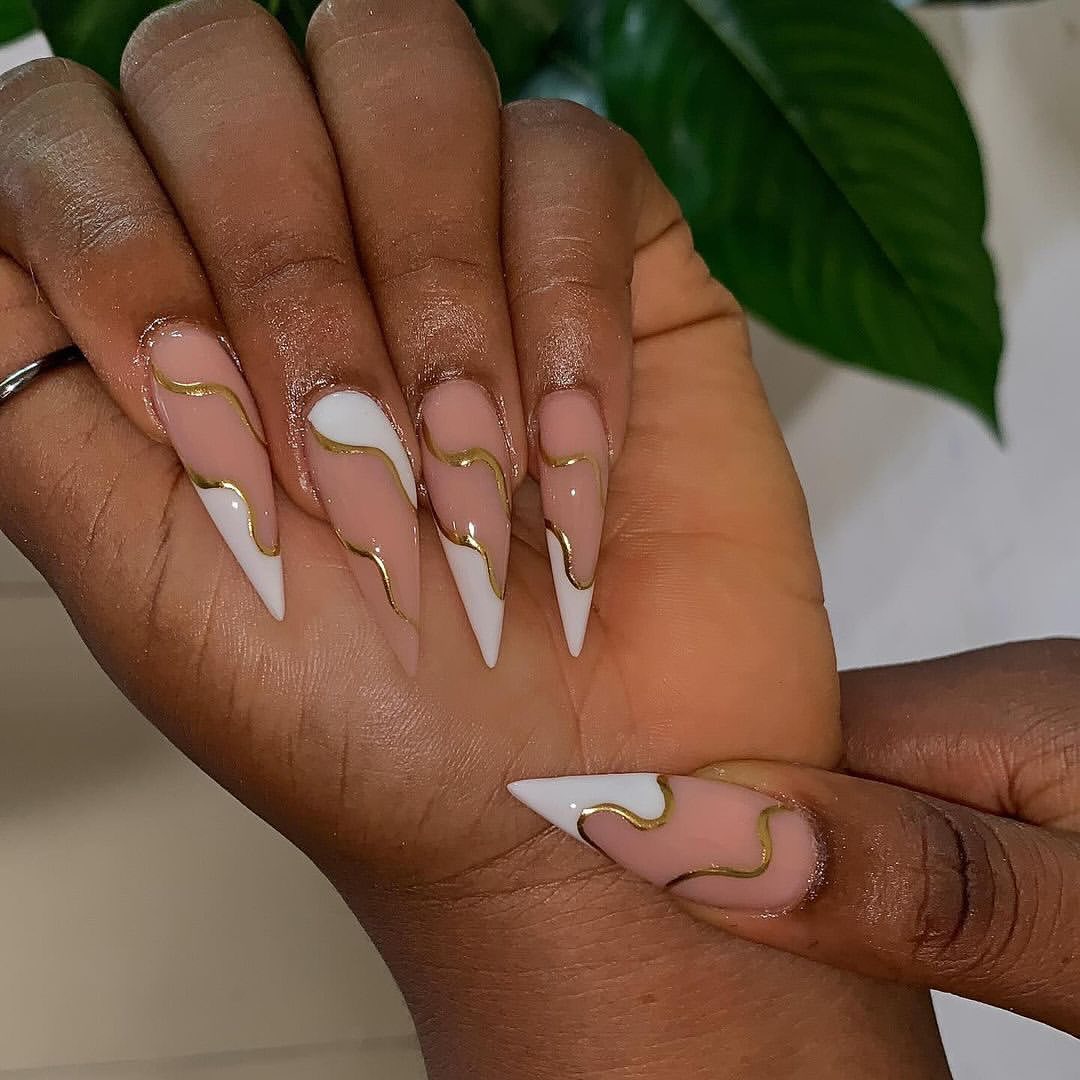
Consumables:
-
- Base coat: Orly Bonder Base Coat
- Nude polish: Essie’s “Mademoiselle”
- White polish: OPI’s “Alpine Snow”
- Gold polish: Sally Hansen’s “Golden-I”
- Nail art brush: Winstonia Fine Detail Brush
- Top coat: Sally Hansen Miracle Gel Shiny Top Coat
Creating the Look at Home:
-
- Start with a base coat to ensure longevity.
- Apply the nude polish and let it dry completely.
- Use the white and gold polishes to create wavy designs with a fine detail brush.
- Finish with a top coat for added durability and shine.
Neon Orange Marble
These neon orange marble nails are vibrant and eye-catching. The bright orange color combined with the marbled effect creates a dynamic look that is perfect for those who love bold designs. The long coffin shape adds to the dramatic flair, making these nails ideal for making a statement.
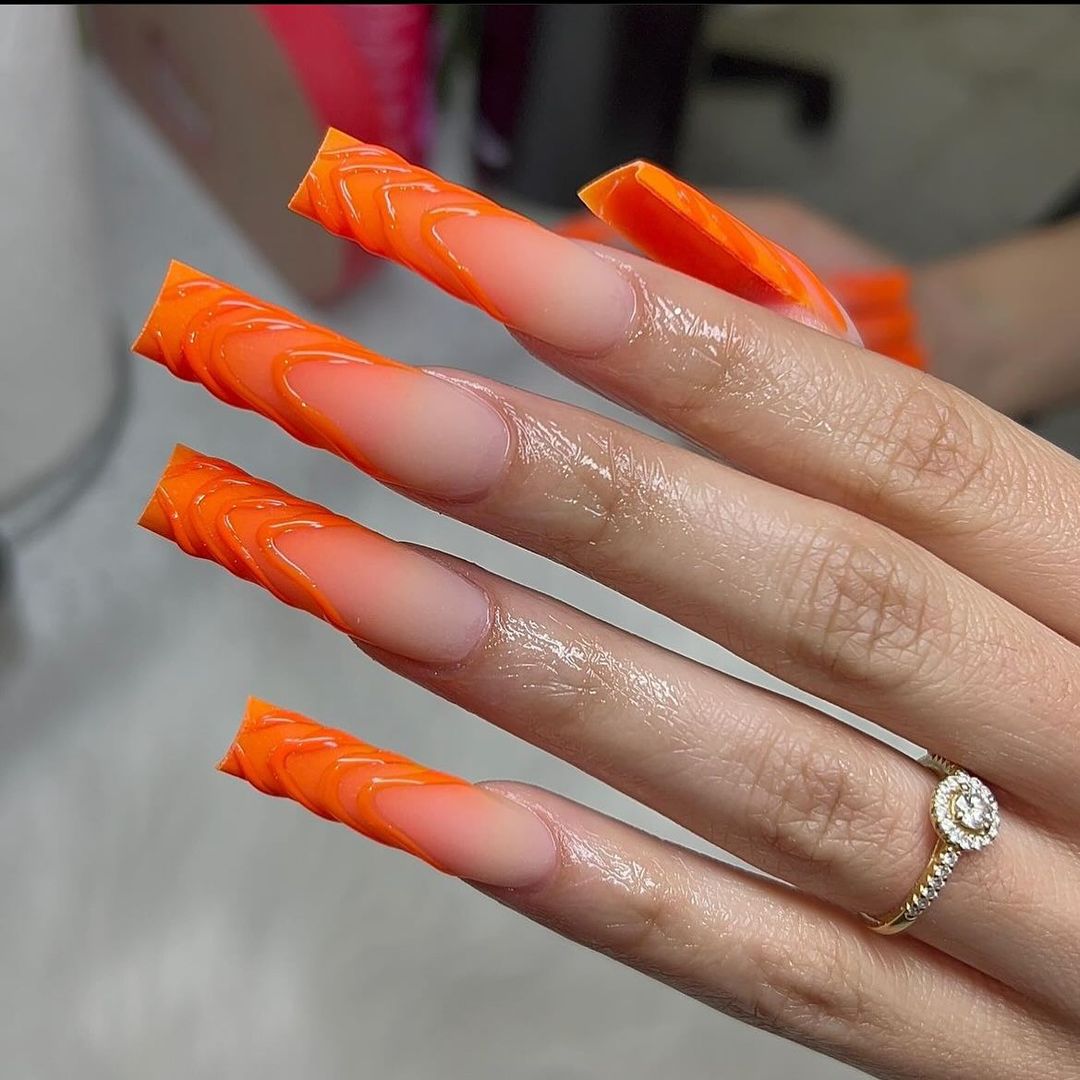
Consumables:
-
- Base coat: Deborah Lippmann Gel Lab Pro Base Coat
- Nude polish: OPI’s “Samoan Sand”
- Orange polish: China Glaze’s “Orange Knockout”
- Nail art brush: Winstonia Fine Detail Brush
- Top coat: CND Vinylux Weekly Top Coat
Creating the Look at Home:
-
- Apply a base coat to prevent staining and extend the life of your manicure.
- Paint your nails with the nude polish and let it dry completely.
- Use the orange polish and a fine detail brush to create the marble effect.
- Seal with a top coat to enhance the color and add a glossy finish.
Yellow and Gold French Tips
These nails feature a modern take on the classic French manicure with bright yellow tips outlined in gold. The combination of yellow and gold adds a playful and luxurious touch to this design. The short square shape keeps the look clean and sophisticated.
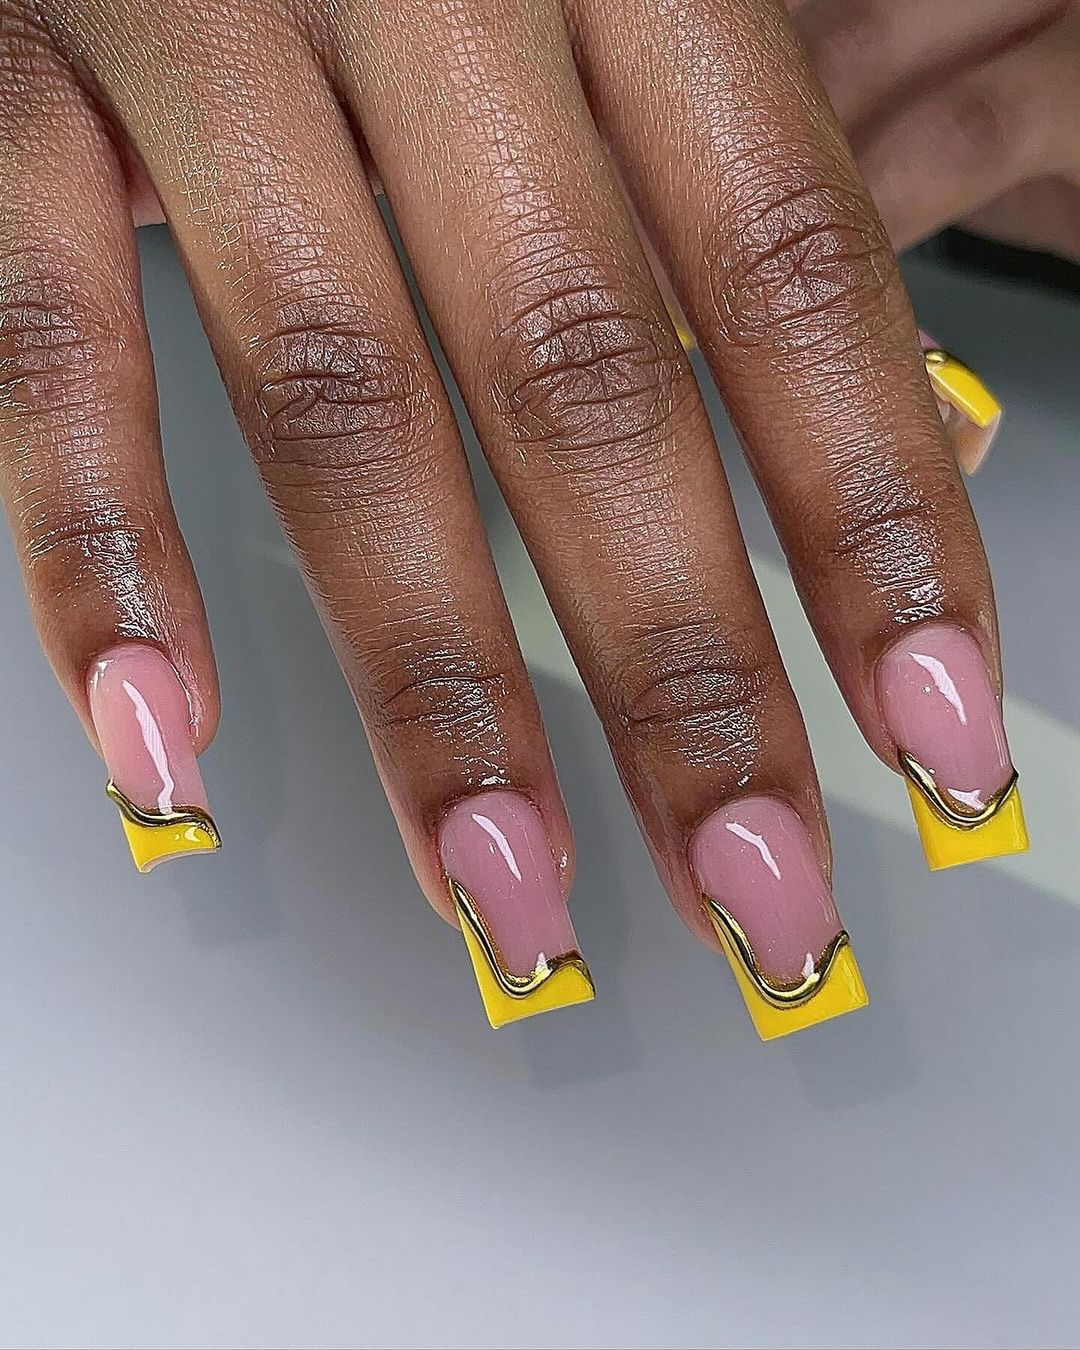
Consumables:
-
- Base coat: Essie First Base
- Nude polish: OPI’s “Bubble Bath”
- Yellow polish: Essie’s “Hay There”
- Gold polish: Sally Hansen’s “Golden-I”
- Nail art brush: Winstonia Fine Detail Brush
- Top coat: Seche Vite Dry Fast Top Coat
Creating the Look at Home:
-
- Apply a base coat to protect your natural nails.
- Paint your nails with the nude polish and let it dry completely.
- Use the yellow polish to create French tips and outline them with gold using a fine detail brush.
- Finish with a top coat to seal the design and add a glossy finish.
Pink 3D Bows
These adorable pink nails feature 3D bow designs that add a cute and playful element. The soft pink color is perfect for a feminine and delicate look. The short square shape ensures that this design is both practical and stylish.
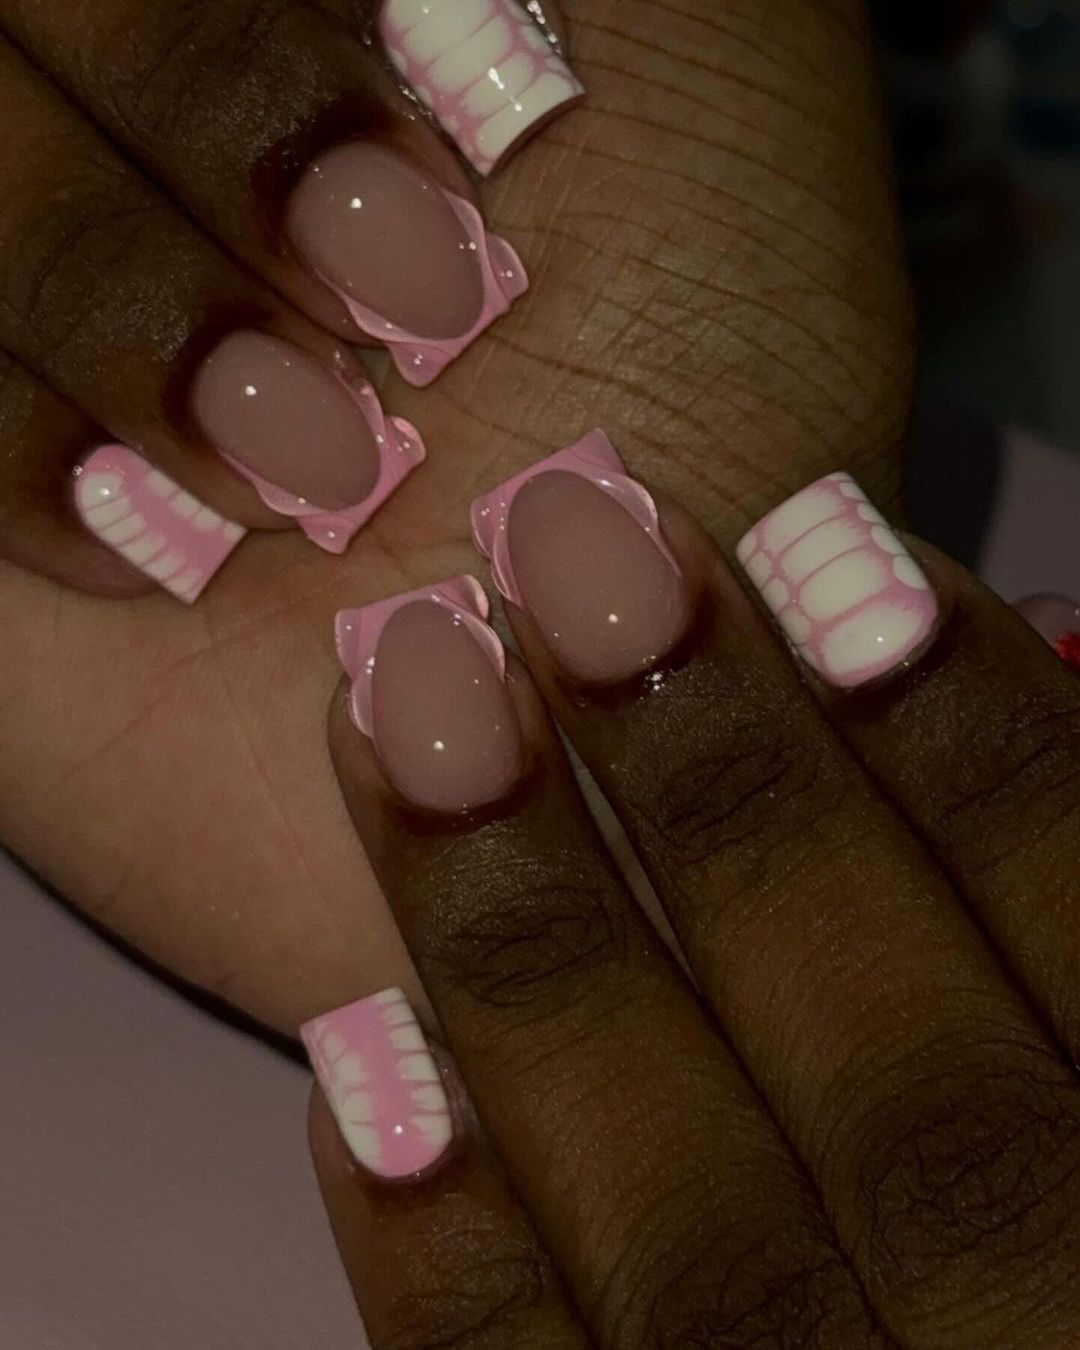
Consumables:
-
- Base coat: Orly Bonder Base Coat
- Nude polish: Essie’s “Ballet Slippers”
- Pink polish: OPI’s “Pink Friday”
- 3D gel: Kiara Sky 3D Gel
- Top coat: Sally Hansen Miracle Gel Shiny Top Coat
Creating the Look at Home:
-
- Start with a base coat to ensure longevity.
- Apply the nude polish and let it dry completely.
- Use the pink polish to create 3D bow designs with the 3D gel.
- Finish with a top coat for added durability and shine.
Neon Edged Stilettos
These neon-edged stiletto nails are perfect for those who love bold and vibrant designs. The bright neon colors create a striking contrast against the nude base, making these nails a standout choice for any occasion. The stiletto shape adds an edgy and dramatic flair.
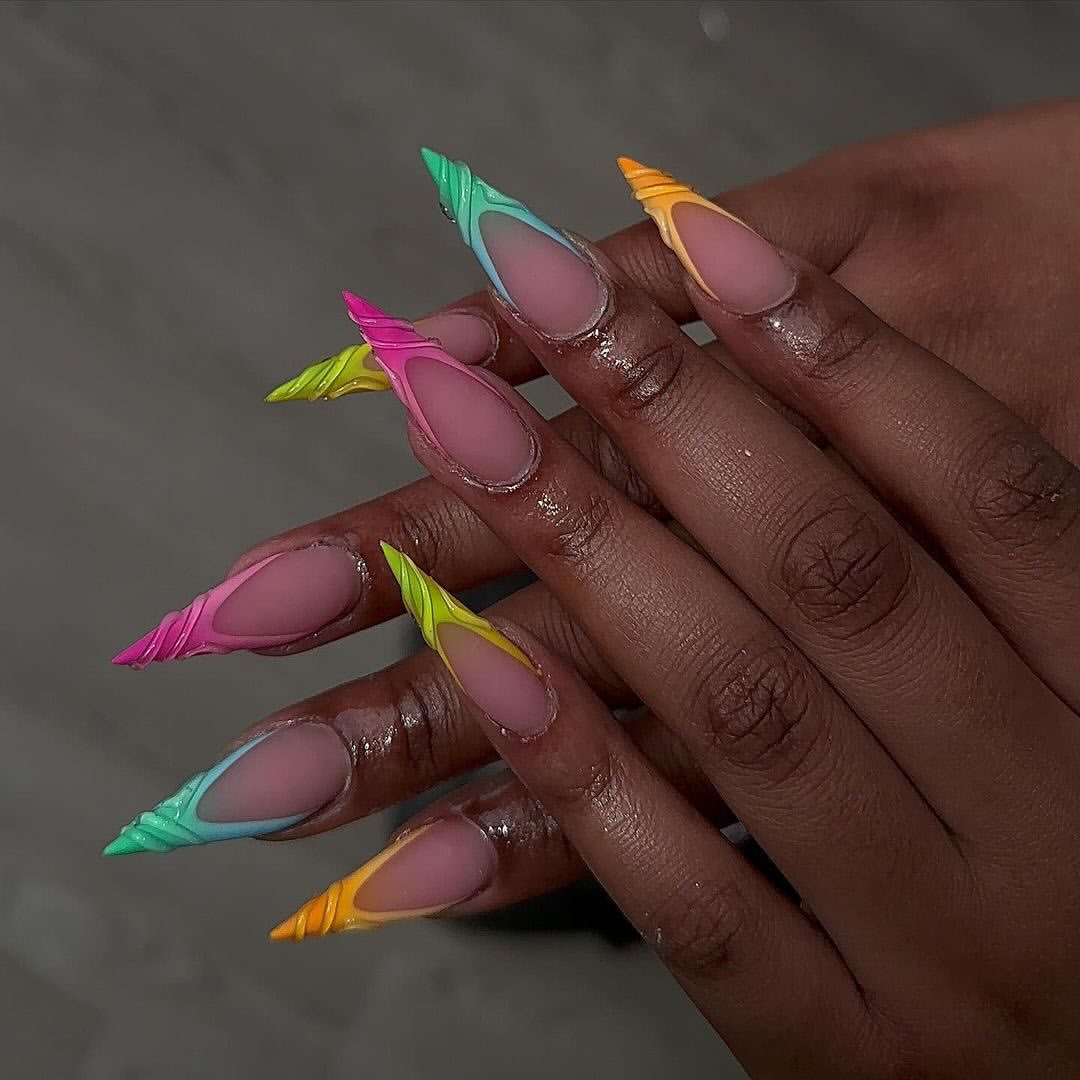
Consumables:
-
- Base coat: Deborah Lippmann Gel Lab Pro Base Coat
- Nude polish: OPI’s “Samoan Sand”
- Neon polishes: China Glaze’s “Celtic Sun,” “Pool Party,” “Flip Flop Fantasy”
- Nail art brush: Winstonia Fine Detail Brush
- Top coat: CND Vinylux Weekly Top Coat
Creating the Look at Home:
-
- Apply a base coat to prevent staining and extend the life of your manicure.
- Paint your nails with the nude polish and let it dry completely.
- Use the neon polishes to create the edge designs with a fine detail brush.
- Seal with a top coat to enhance the color and add a glossy finish.
Soft Pink Shimmer
These soft pink shimmer nails are perfect for a subtle yet elegant look. The delicate pink hue with a hint of shimmer adds a touch of femininity and sophistication. The short square shape makes them practical for everyday wear while still looking chic.
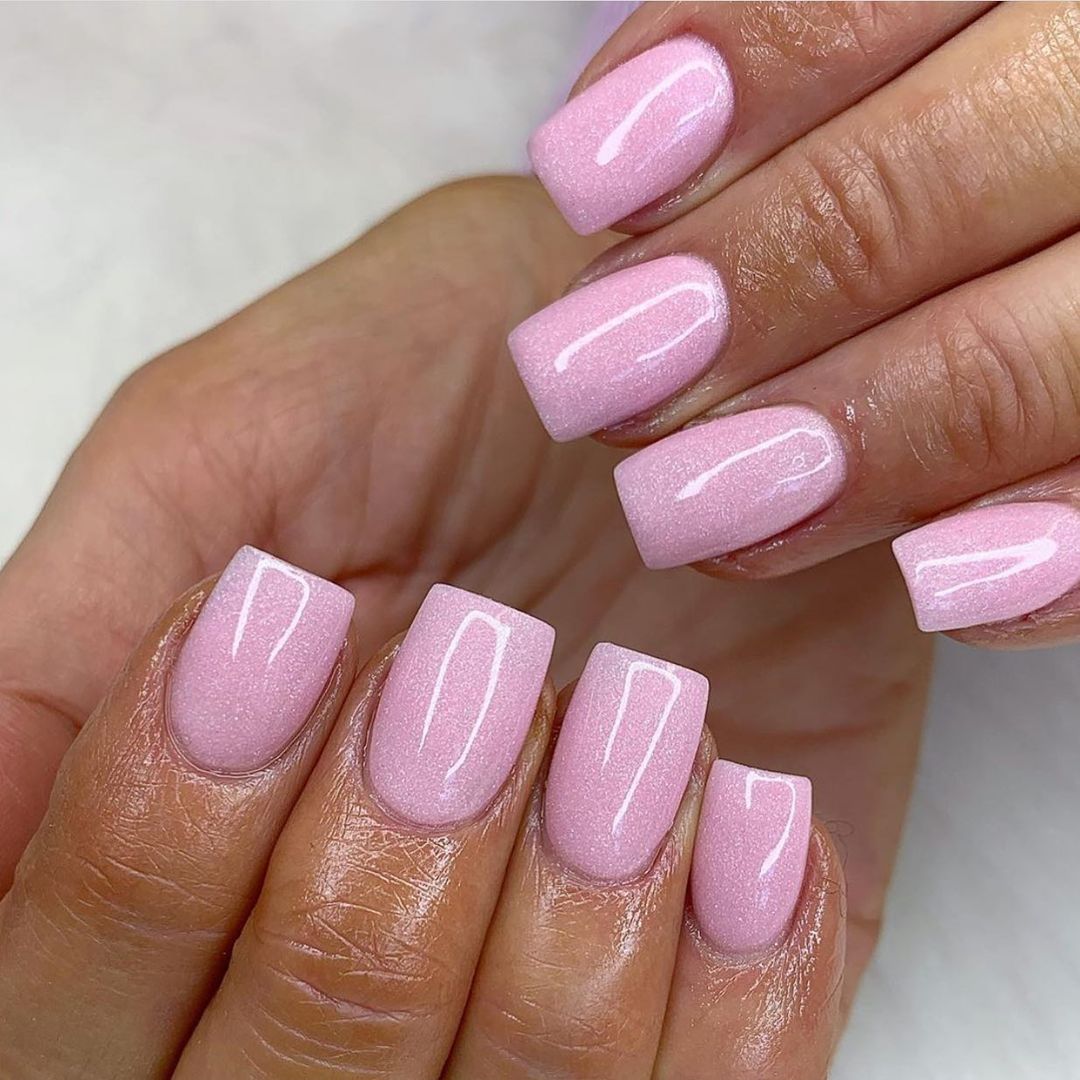
Consumables:
-
- Base coat: Essie First Base
- Pink shimmer polish: OPI’s “Princesses Rule!”
- Top coat: Seche Vite Dry Fast Top Coat
Creating the Look at Home:
-
- Apply a base coat to protect your natural nails.
- Paint your nails with two coats of the pink shimmer polish, allowing each layer to dry.
- Finish with a top coat to seal the design and add a glossy finish.
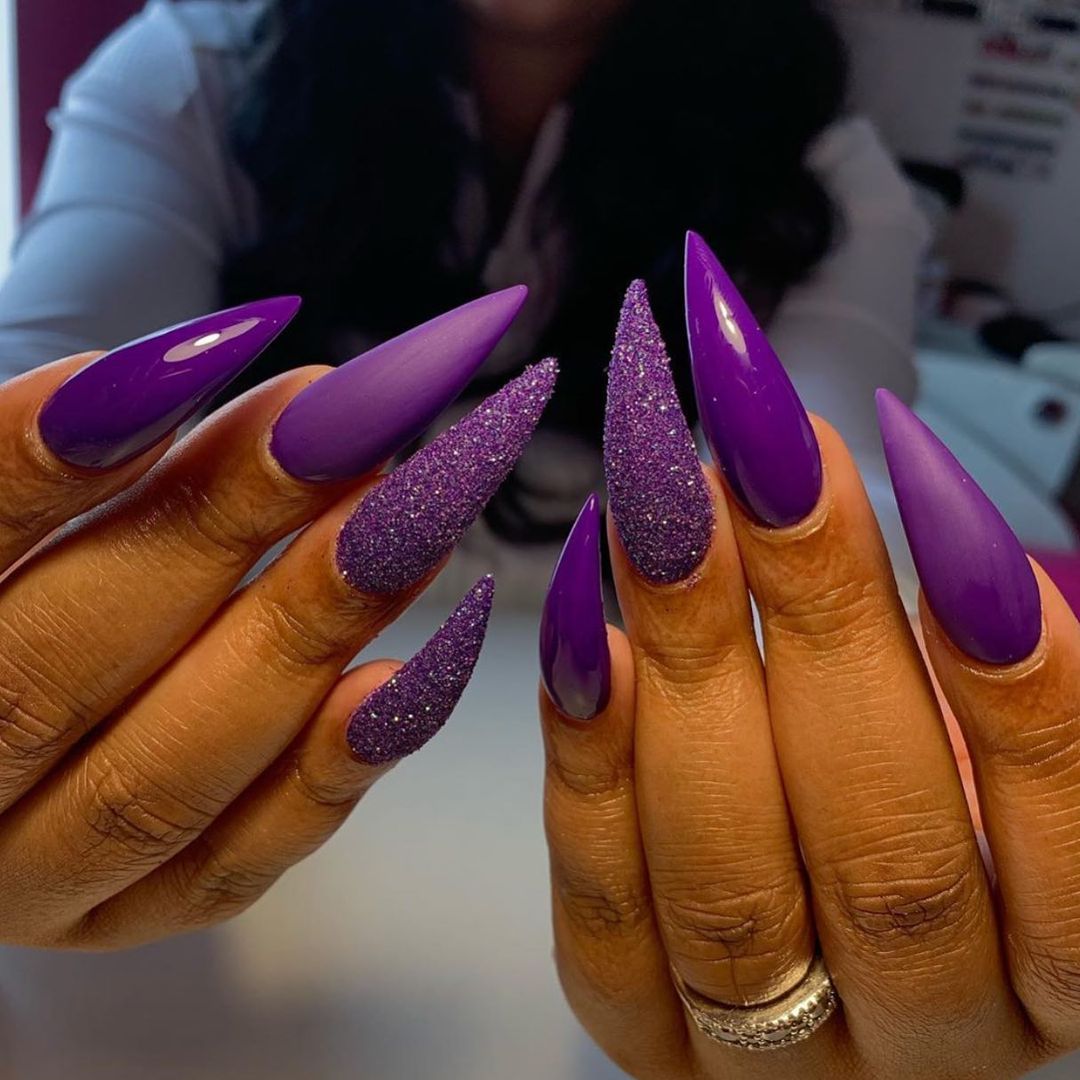
Royal Purple Glam
These royal purple nails are perfect for making a bold statement. The combination of matte and glitter finishes in various shades of purple adds depth and glamour to the look. The long stiletto shape enhances the dramatic effect, making these nails ideal for special occasions.
Consumables:
-
- Base coat: Orly Bonder Base Coat
- Matte purple polish: Essie’s “The Fuchsia of Art”
- Glitter purple polish: China Glaze’s “Queen, Please!”
- Shiny purple polish: OPI’s “Do You Lilac It?”
- Top coat: Sally Hansen Miracle Gel Shiny Top Coat
Creating the Look at Home:
-
- Start with a base coat to ensure longevity.
- Apply the matte purple polish to some nails and the shiny purple polish to others, allowing each layer to dry.
- Use the glitter purple polish on accent nails for added sparkle.
- Finish with a top coat for added durability and shine.
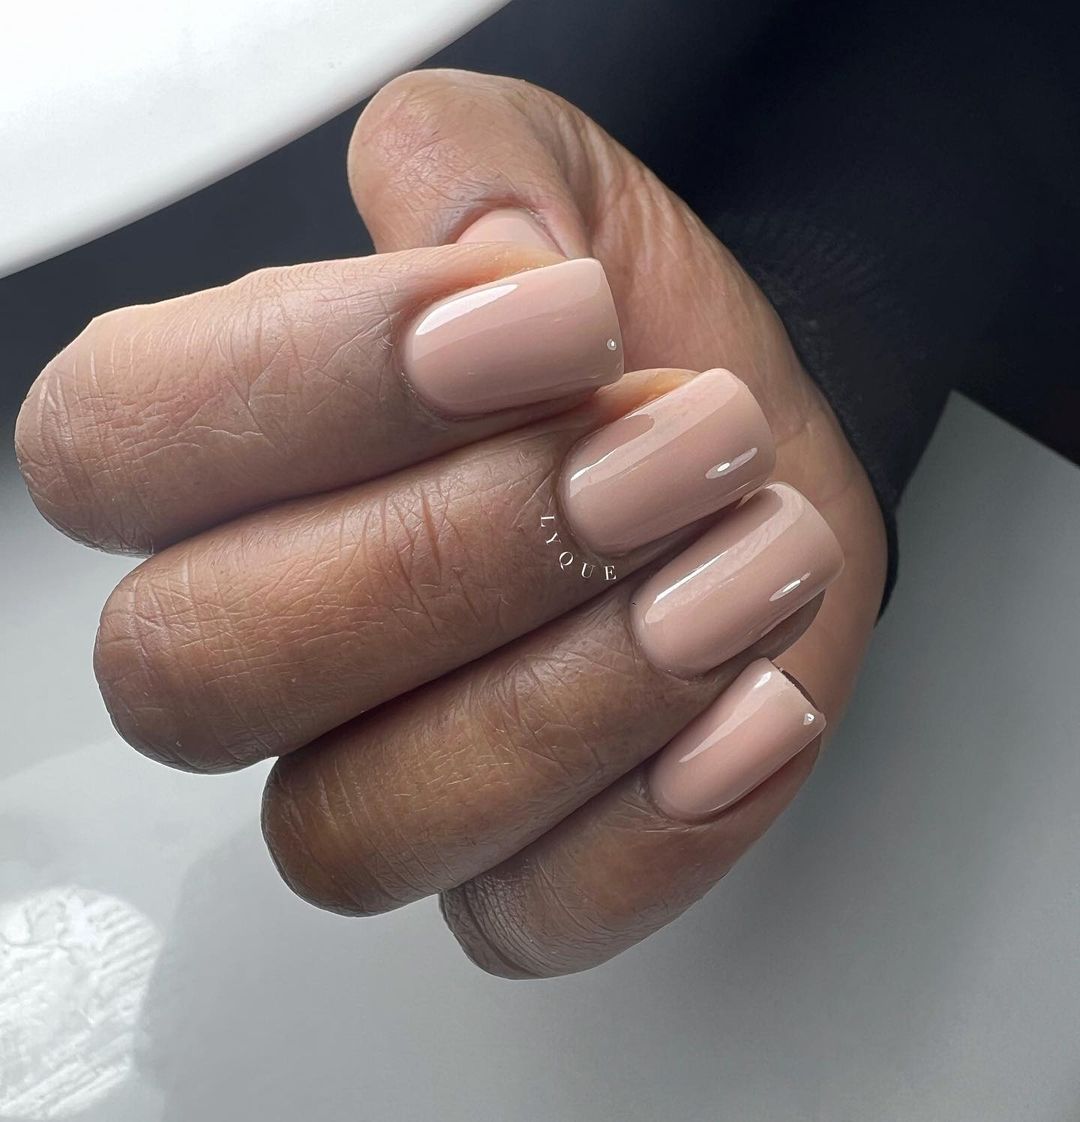
Classic Nude
These classic nude nails are the epitome of elegance and simplicity. The nude shade complements dark skin beautifully, creating a seamless and polished look. The short square shape makes these nails suitable for any occasion, from professional settings to casual outings.
Consumables:
-
- Base coat: Deborah Lippmann Gel Lab Pro Base Coat
- Nude polish: Essie’s “Bare with Me”
- Top coat: CND Vinylux Weekly Top Coat
Creating the Look at Home:
-
- Apply a base coat to prevent staining and extend the life of your manicure.
- Paint your nails with two coats of the nude polish, allowing each layer to dry.
- Seal with a top coat to enhance the color and add a glossy finish.
FAQ
Q: What are the best fall nail colors for dark skin? A: Rich, deep tones like chocolate brown, muted teal, and tortoiseshell designs are some of the best fall nail colors for dark skin.
Q: How can I make my manicure last longer? A: Using a quality base and top coat, and allowing each layer of polish to dry completely before applying the next, can help extend the life of your manicure.
Q: Are there any specific nail shapes that are trending for fall? A: Yes, shapes like almond, coffin, and round are very popular this fall.
Q: Can I achieve salon-quality nails at home? A: Absolutely! With the right tools and products, you can create stunning nail designs at home. Follow the detailed instructions and use recommended products for the best results.
Q: What are some tips for a perfect at-home pedicure? A: Start with a soak and exfoliation, use a base coat, apply your chosen polish in thin layers, and finish with a top coat. Moisturize your feet to keep them soft and smooth.
By following these tips and exploring these stunning fall nail colors, you’re sure to find the perfect manicure to complement your dark skin tone. Enjoy experimenting with these beautiful, autumnal designs!
Save Pin
