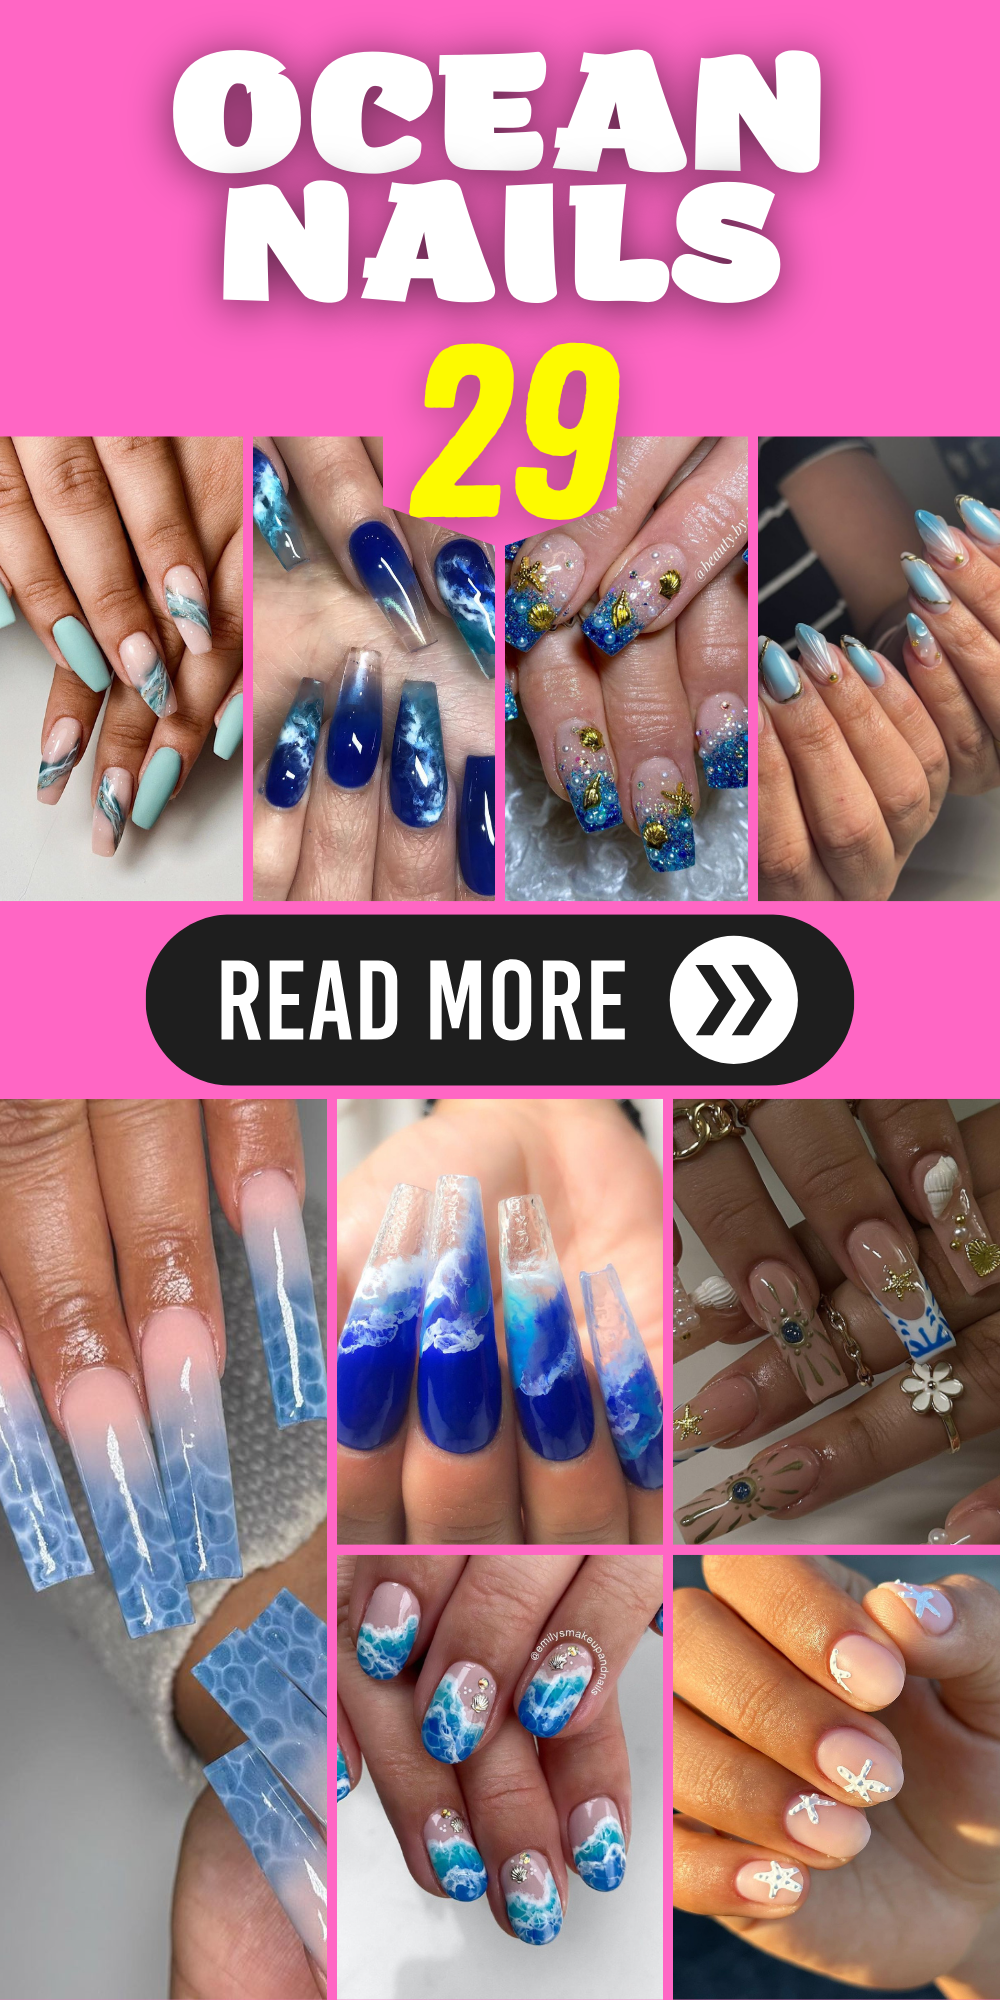
Are you drawn to the ocean’s mystique and beauty and want to encapsulate its essence in your nail art? Whether gearing up for a beach vacation or simply infusing your daily look with some creative flair, ocean-themed nails offer a whimsical yet sophisticated style. But what elements make ocean nails stand out? How can you integrate the serene vibes of the sea and vibrant blue tones into your nail art? Let’s explore some breathtaking designs that capture the ocean’s spirit and how you can recreate them at home.
Exploring Oceanic Elegance: A Dive into Deep Blue
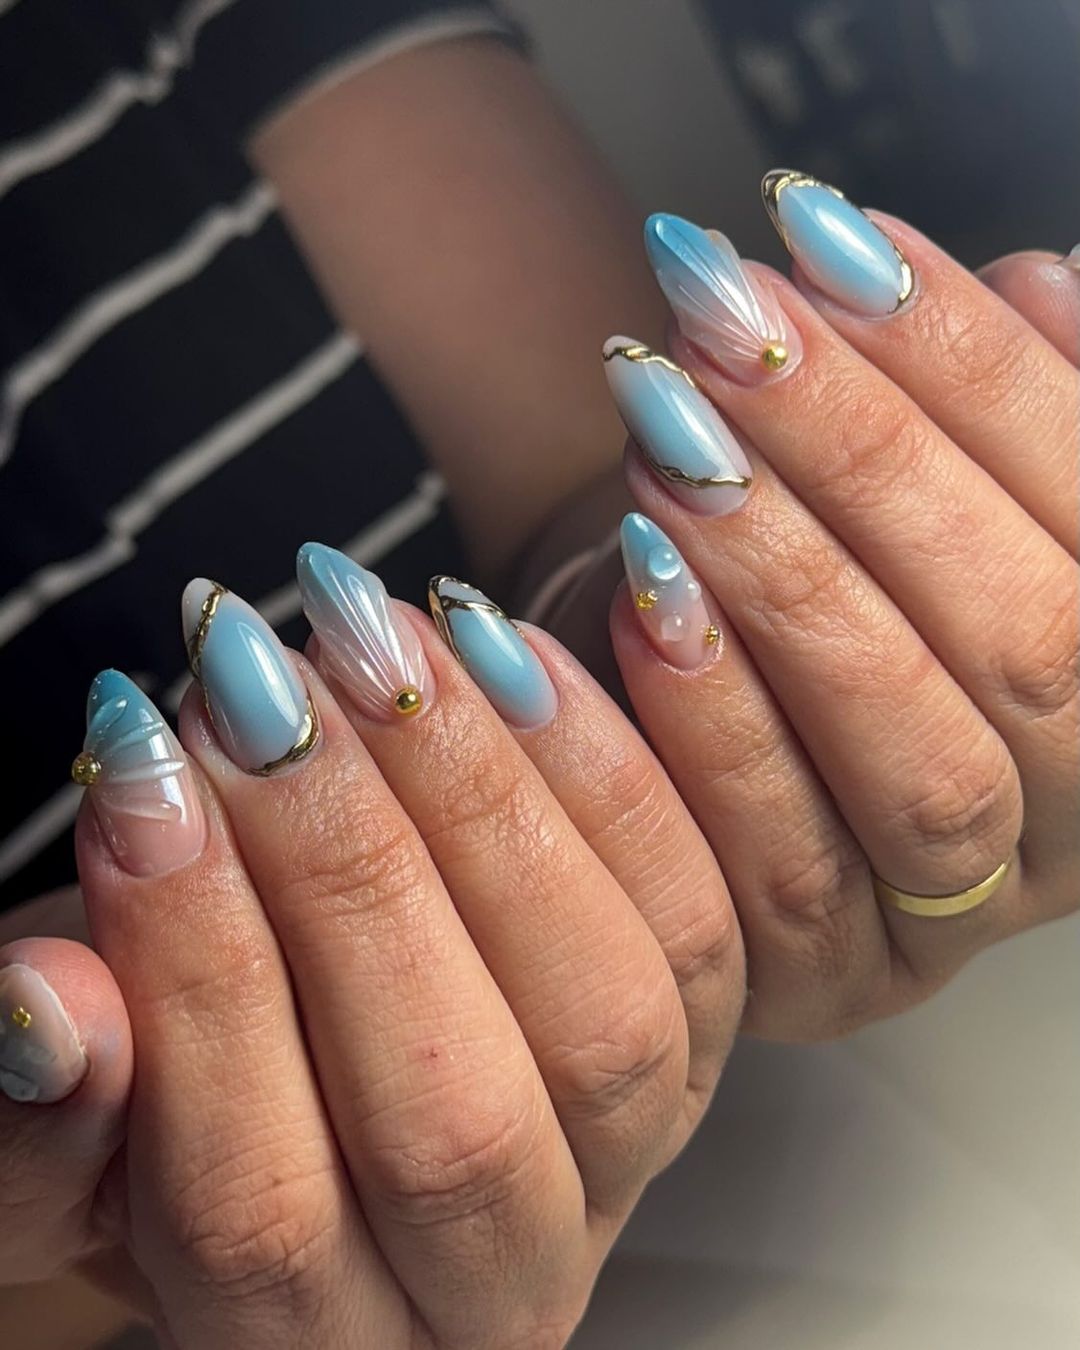
Imagine your nails reflecting the deep, mysterious blue of the ocean. This design uses a gradient of blues to mimic the sea’s vastness, interspersed with sparkles that resemble sunlight dancing on water. The inclusion of sea beach waves pattern adds a dynamic movement, suggesting the gentle flow of ocean waves. As a professional manicurist, I find the blend of deep and light blues, combined with the art tutorial techniques used here, particularly effective for evoking water’s soothing qualities.
-
- Base Coat: Seche Vite Clear Base
- Blue Polish: OPI Fiji
- Glitter Polish: Essie’s Set in Stones
- Top Coat: Sally Hansen Miracle Gel Top Coat
- Thin Brush for detailed art
This selection ensures a lasting finish, allowing the beauty of the oceanic theme to shine through day after day.
Start with a clear base coat to protect your nails. Gradually layer shades of blue, creating a gradient effect from the darkest at the base to the lightest at the tips. Utilize a sponge to blend the colors seamlessly. Once the gradient is set, use a thin brush to draw delicate waves in white. Accentuate these waves with a glitter top coat for a sparkling effect, reminiscent of the ocean glittering under the sun, and finalize with a durable top coat.
Capturing the Vibrancy of Coral Reefs
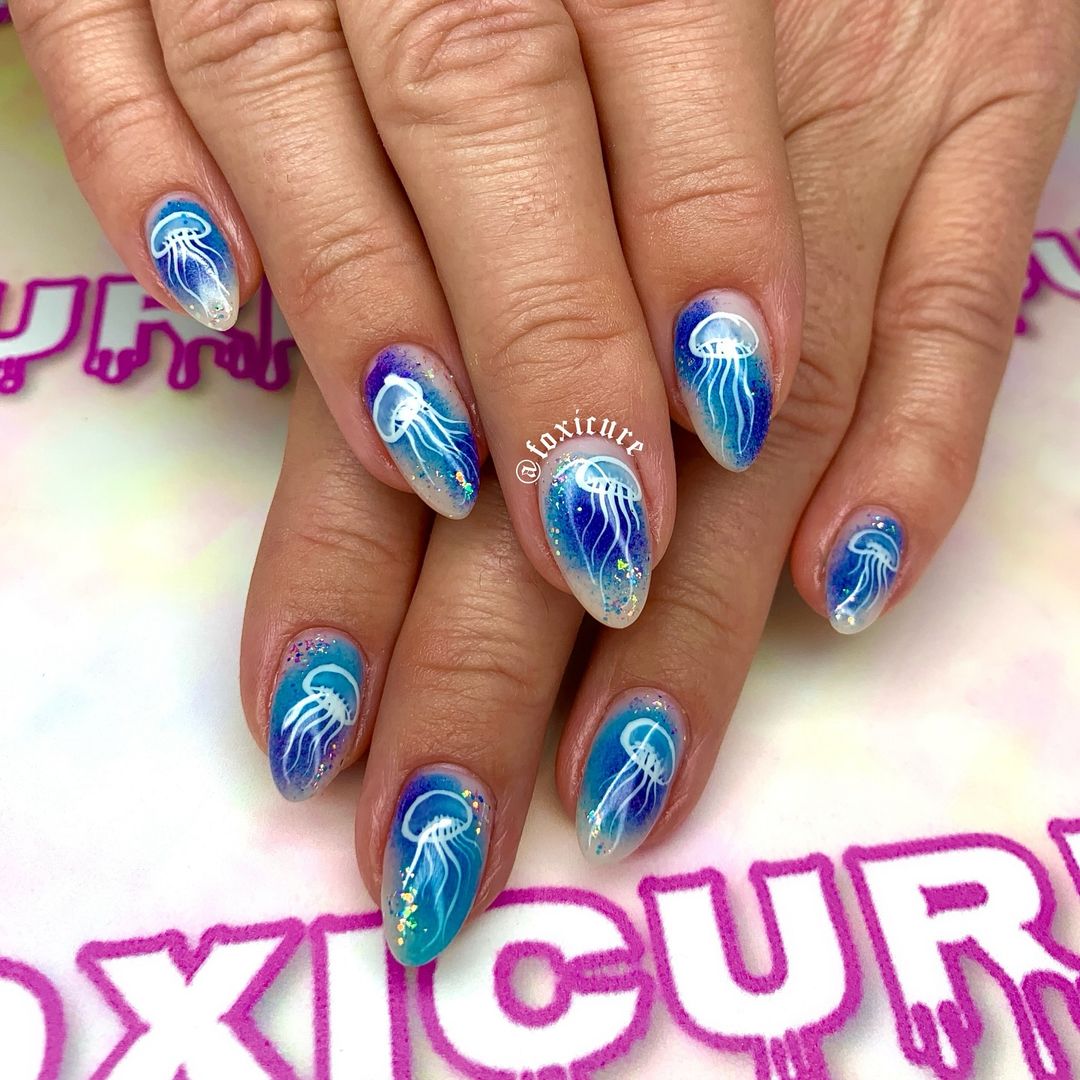
This design captures the vivid and bustling life of coral reefs. Bright coral tones against a clear base allow the lively colors of underwater flora and fauna to pop. The addition of 3d elements not only enhances the visual appeal but also adds a tactile dimension that simulates the texture of real coral. This thoughtful design uses color contrasts and textures to depict the diverse and vibrant life beneath the sea surface.
-
- Base Coat: CND Stickey Base Coat
- Coral Polish: Essie Coral Reef
- 3D Acrylic Powder: Mia Secret White
- Mold for 3D designs: Generic Silicone Mold
- Top Coat: INM Out the Door Top Coat
The precise application and high-quality products are key to achieving the detailed and lively look typical of coral designs.
Prepare your nails with a base coat followed by a layer of vivid coral polish. Mix your acrylic powder with a monomer to create a pliable mixture, then press it into a silicone mold to form 3D coral shapes. Once hardened, attach these pieces to your nails with a bit of nail glue. Finish with a robust top coat to ensure everything stays beautifully intact.
Oceanic Tranquility
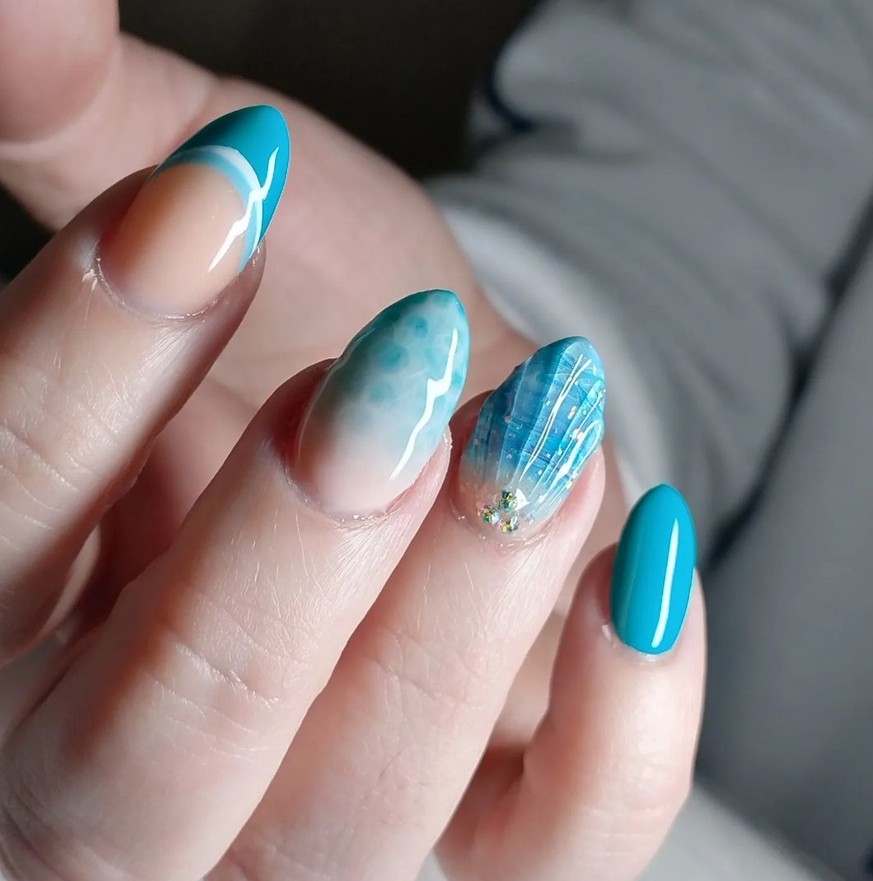
This nail design captures the essence of the ocean with a variety of styles on each nail, evoking different aspects of the sea. From the clear blue of the open waters to the textured appearance of ocean waves, each nail is a piece of art showcasing the versatility and beauty of the sea.
-
- Base Coat: to protect the nail.
- Teal Polish: for a vibrant ocean base.
- White Polish: for wave accents.
- Sponge and Thin Brush: for texture and detail.
- Glossy Top Coat: to seal and enhance the design.
The combination of techniques used here, from sponging to detailed brushwork, creates a dynamic representation of ocean elements, perfect for those who love the sea’s natural diversity.
Palm Silhouettes Against Sunset Skies
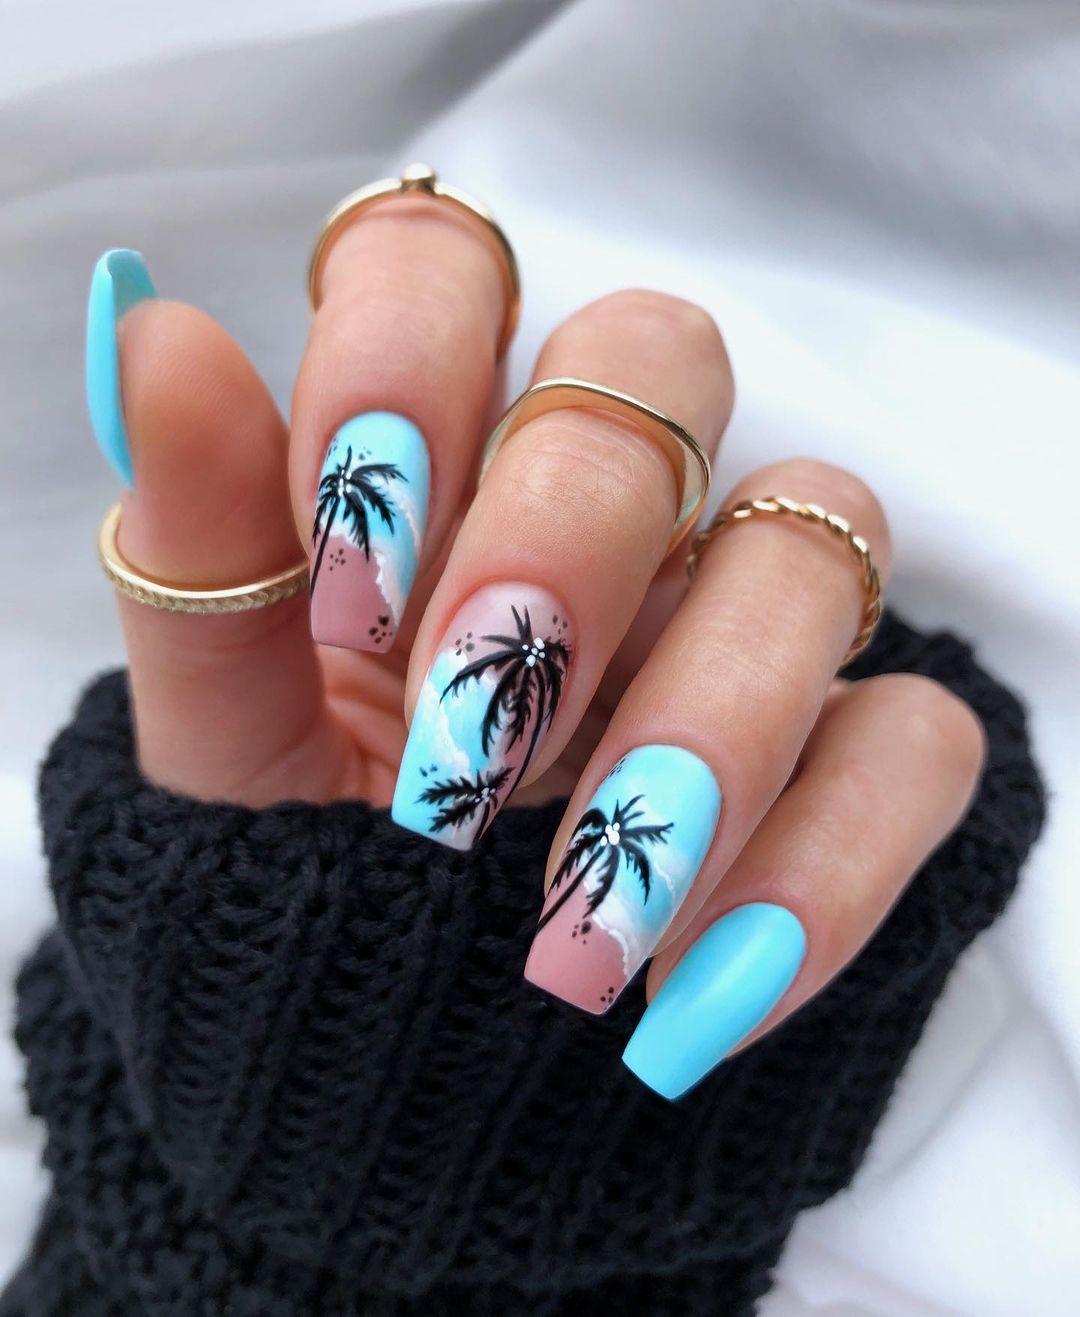
The nails showcase a serene beachscape at sunset, featuring soft gradients of sky blue and pink with detailed black palm silhouettes that conjure images of a quiet evening by the sea. The design artfully combines summer vibes with ocean nails, using blue and pink as a canvas for the stark black palm trees. This choice not only highlights the theme of sea summer but also emphasizes the calm and tranquil moments of a sunset at the beach.
-
- Base Coat: OPI Natural Nail Base Coat
- Sky Blue Polish: China Glaze “Too Yacht to Handle”
- Pink Polish: Essie “Muchi, Muchi”
- Black Acrylic Paint for detailed trees
- Detailing Brush
- Top Coat: Seche Vite Dry Fast Top Coat
These products are essential for achieving a smooth gradient and precise, intricate details that make the design stand out.
Start with a protective base coat to safeguard your nails. Apply the sky blue polish as a base layer. While it’s still tacky, lightly sponge on the pink polish towards the tips to create a seamless gradient resembling the sunset. Once dry, use a fine detailing brush dipped in black acrylic paint to draw palm silhouettes. Each stroke should be thin and precise to mimic the delicate fronds of the palms. Finish with a fast-drying top coat to encapsulate the art and enhance the overall shine.
Save Pin
Sea Waves in Acrylic
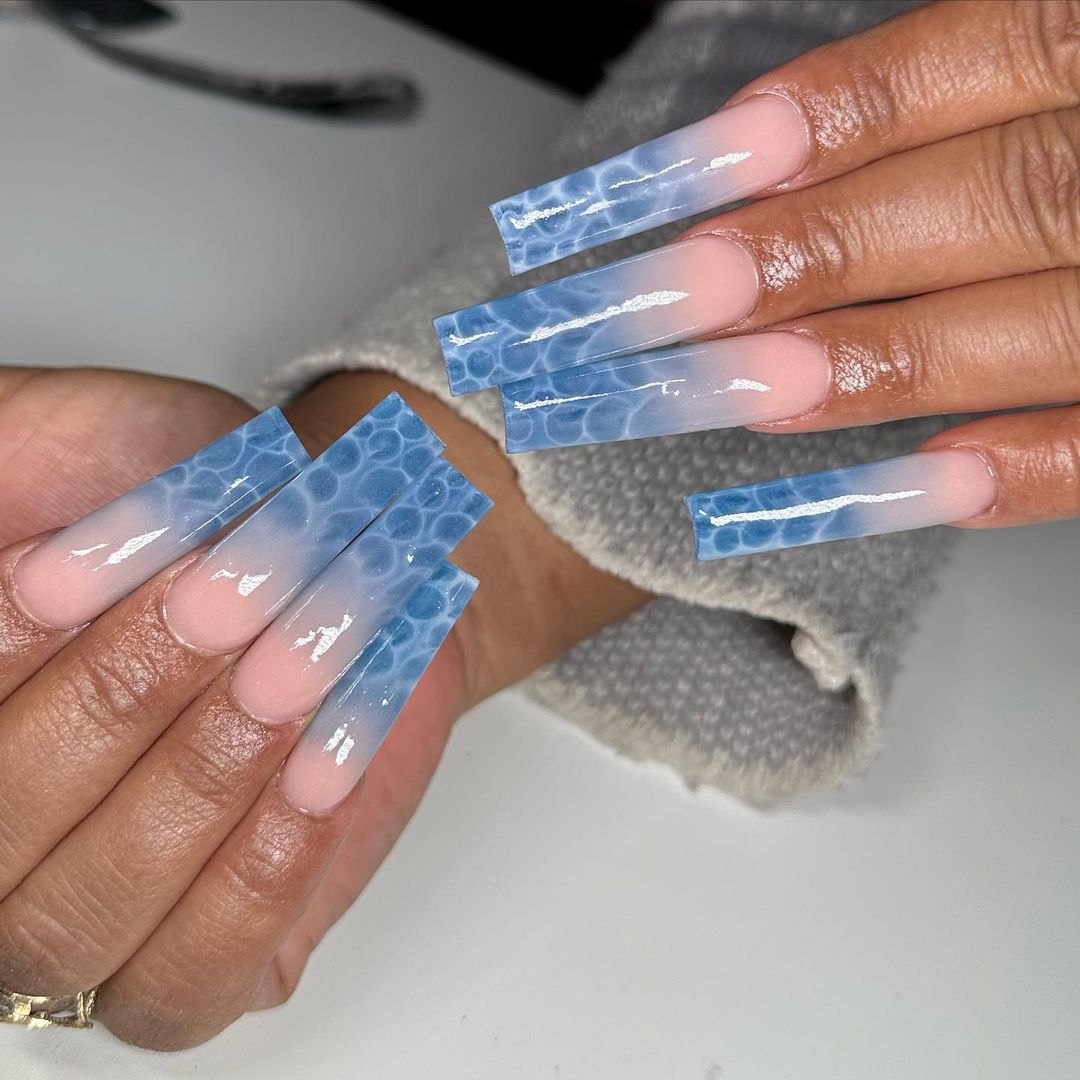
These nails perfectly capture the look of gentle waves using a translucent acrylic technique that gives a three-dimensional appearance of water rippling over a sandy beach. The design uses varying shades of blue to depict the depth and movement of sea waves, with white highlights that mimic the frothy tips of waves. This design is ideal for those who appreciate art sea the beach and want to carry a piece of the ocean’s dynamic nature with them.
-
- Clear Acrylic Powder
- Blue Tinted Acrylic Powder
- Monomer
- Wave Mold or Hand-sculpting Tools
- Top Coat: Glossy Finish
The combination of clear and blue acrylics is crucial for achieving the layered, lifelike appearance of moving water.
Prepare your nails with a clear base. Mix blue and clear acrylic powders with monomer to achieve the desired shade of ocean blue. Pour or sculpt the mixture into wave-like shapes, either using a mold or freehand with acrylic sculpting tools. Carefully place and shape the acrylic on the nails, ensuring each wave crest and trough is distinct. Allow the acrylic to set completely before applying a glossy top coat for a wet, fresh-from-the-ocean look.
Deep Ocean Currents
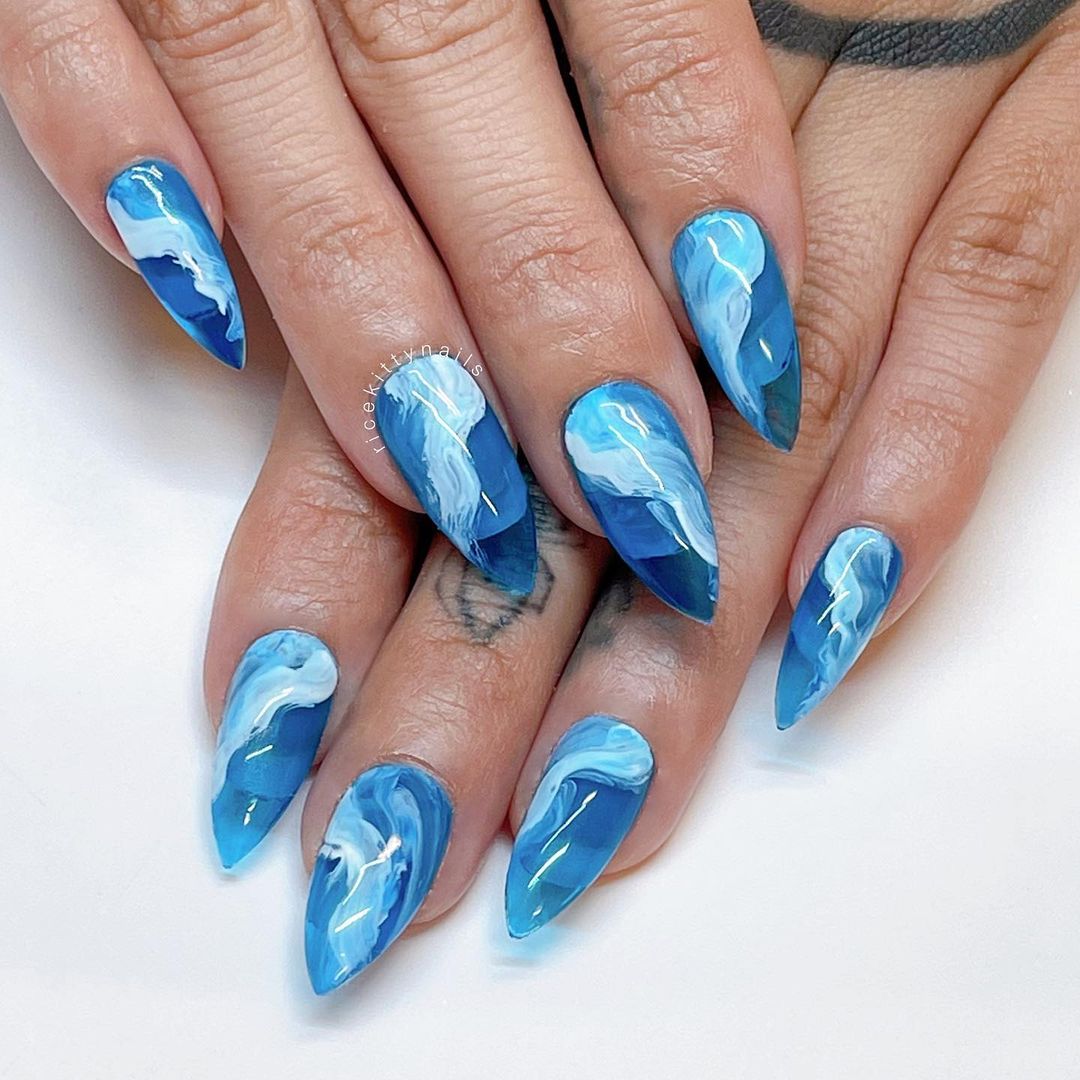
This nail art design is reminiscent of deep ocean currents, utilizing swirling patterns of different blues to represent the mysterious, swirling waters of the deep sea. The technique involves marble and acrylic to create a fluid, dynamic look that’s both bold and captivating. The design’s depth and movement offer a modern take on ocean nails, perfect for someone looking to make a statement.
-
- Base Coat: Orly Bonder Rubberized Basecoat
- Dark Blue Polish: Sally Hansen “Blue Me Away”
- Light Blue Polish: Revlon “Dreamer”
- Marbling Tool or Toothpick
- Top Coat: INM Out the Door Super Fast Drying Top Coat
The layering of dark and light blues, combined with a skilled marbling technique, captures the essence of ocean currents.
Apply a base coat to protect your nails and ensure a longer-lasting finish. Paint your nails with the dark blue polish. While still wet, add drops of light blue polish and use a marbling tool or toothpick to swirl the colors together, creating organic, flowing patterns that mimic ocean currents. Work quickly to ensure the polishes blend smoothly while still wet. Seal your design with a high-quality top coat to maintain the design’s depth and dynamic appearance.
Starfish Whimsy and Ocean Blues
This charming nail design pairs soft pastels with vivid ocean blue marbling, adorned with white starfish motifs that evoke a playful beach day. The clever use of sea blue and pink hues, along with starfish designs, creates a fun yet sophisticated look. The designs simple yet enchanting, making it perfect for those looking for a subtle nod to oceanic life without overt complexity.
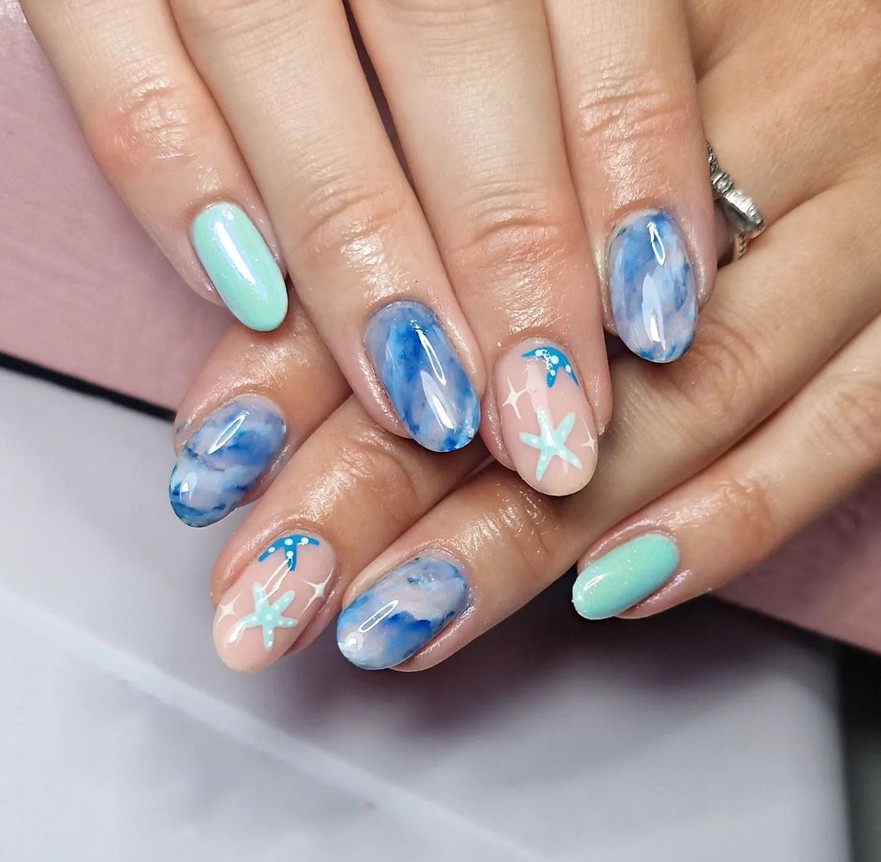
-
- Base Coat: Essie First Base
- Pastel Blue Polish: Sally Hansen “Babe Blue”
- Pastel Pink Polish: OPI “Pink Softly”
- White Paint for Starfish
- Marbling Tool
- Glossy Top Coat: Revlon Extra Life No Chip Top Coat
These selections offer the ideal foundation and finish for a delicate and detailed design that is as durable as it is delightful.
Apply a base coat to ensure your nails are well protected. For the marbling effect, alternate strokes of pastel blue and pink on the nail, then use a marbling tool to gently swirl these colors together. Once dry, use a fine brush to hand-paint starfish motifs in white on select nails. Finish with a glossy top coat to enhance the colors and ensure your manicure lasts as long as your summer adventures.
Coastal Waves and Golden Sands
These nails showcase a sophisticated interpretation of the shoreline where the ocean meets the sand. The design features a transparent base with blue watercolor effects representing the gentle waves, capped with a golden glitter line mimicking the sandy beach. This nail art is a testament to the serene beauty of sea beach waves and the luxurious sparkle of summer sun on the sand, ideal for anyone who appreciates designs beaches with an elegant touch.
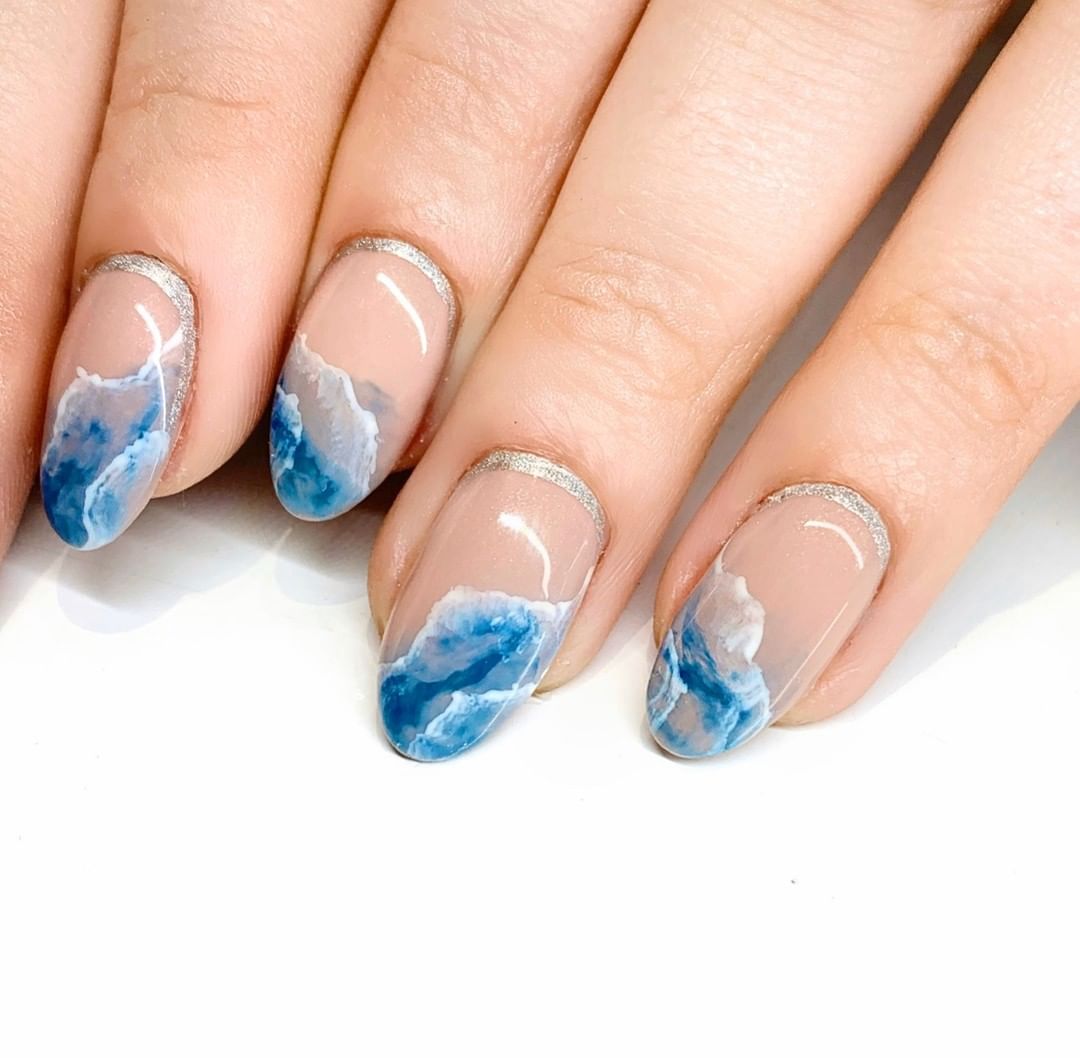
-
- Clear Base Coat: Zoya Anchor Base Coat
- Watercolor Blue Paint
- Fine Glitter in Gold
- Fine Liner Brush
- Top Coat: OPI Glossy Top Coat
The watercolor technique requires a delicate balance of paint and water to achieve the transparent, flowing look of water, while the glitter line adds a touch of luxury.
Begin with a clear base coat to prep the nails. Apply a light wash of blue watercolor paint, letting it flow slightly to resemble the movement of water. Once dry, use a fine liner brush to apply a precise line of gold glitter at the tip of each nail, symbolizing the shimmering sand. Seal your artwork with a glossy top coat for a smooth finish and lasting wear.
Underwater Coral Adventure
This nail design dives into the depths of the ocean to explore the vibrant life of coral reefs. Using a base of clear polish, each nail features a unique element of the reef, from coral formations to the textures of the seabed, rendered in bright colors and detailed accents. The designs nailart captures the essence of an aquarium and brings the underwater wonderland to your fingertips.
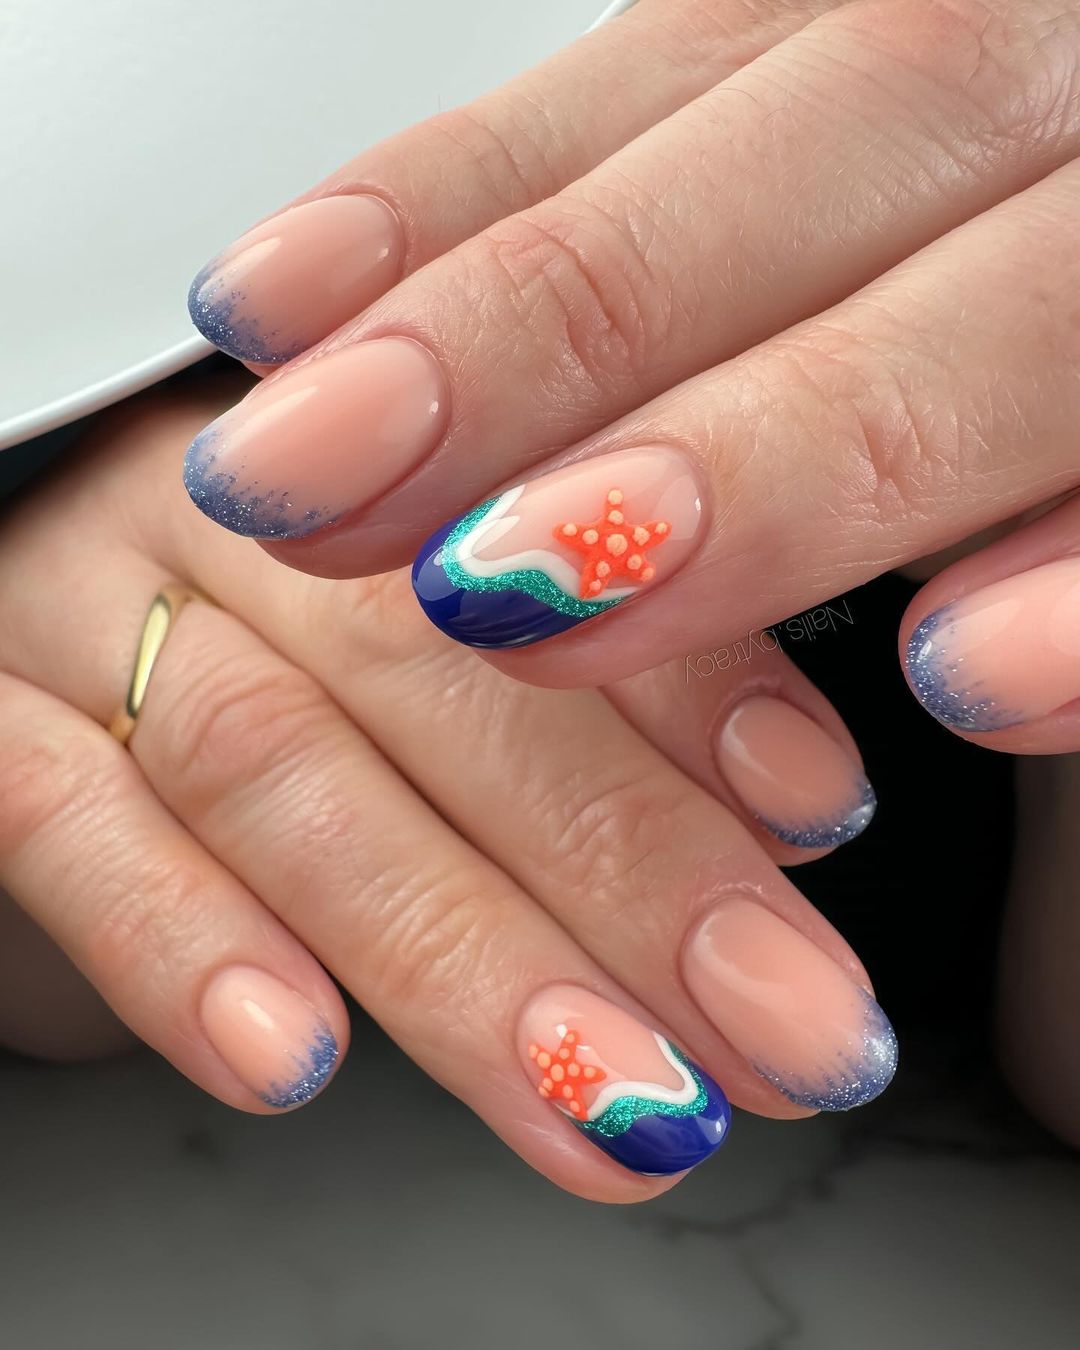
-
- Base Coat: Butter London Nail Foundation
- Colored Acrylics: Various Shades for Coral
- Detailing Brushes
- Glitter Accents
- Top Coat: Chanel Le Gel Coat
These materials allow for precision in detail and a vibrant, glossy finish that enhances the multidimensional look of the nail art.
Start with a clear base coat to create a ‘glassy’ look. Sculpt small coral designs using colored acrylics, placing them thoughtfully across the nails. Add highlights with glitter accents to emulate the reflective quality of water. Use detailing brushes to refine the shapes and ensure each element stands out. Finish with a high-quality top coat to protect your design and add a wet-look shine that mirrors the ocean’s surface.
Save Pin
Frothy Waves and Golden Shores
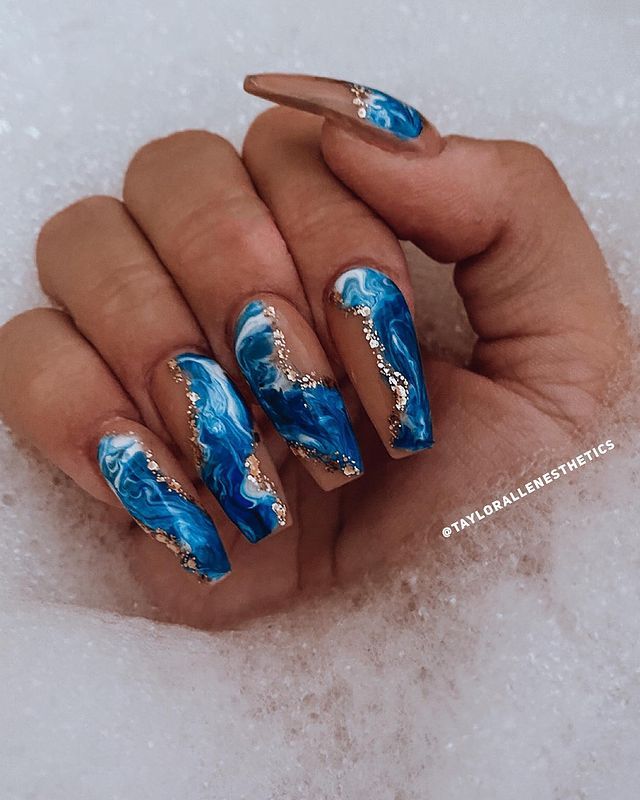
This design captures the dynamic essence of ocean waves through a breathtaking blend of swirling blues and whites, highlighted by strategic golden accents that emulate the sparkling sands. The deep blue tones intertwined with lighter swirls provide a stunning representation of the sea’s natural movements, ideal for those drawn to designs sea and summer aesthetics.
-
- Base Coat: Essie All in One Base
- Swirling Blues: OPI “Can’t Find My Czechbook” and Essie “Bikini So Teeny”
- White Polish: Sally Hansen “White On”
- Gold Leaf or Gold Glitter
- Detail Brush
- Top Coat: OPI Glossy Finish Top Coat
The combination of deep and light blues with the sparkling gold adds a touch of luxury, making this design both opulent and wearable.
Begin with a solid base coat to protect your nails. Apply a base of light blue polish and while still slightly tacky, add streaks of darker blue and white polish. Use a fine brush or a toothpick to gently swirl these colors together to mimic the ocean’s waves. Before the design sets, add small pieces of gold leaf or glitter along the swirls to represent the sandy shores catching the sunlight. Finish with a glossy top coat to ensure the design shines and remains durable through your daily activities.
Underwater Seascapes with Marine Life
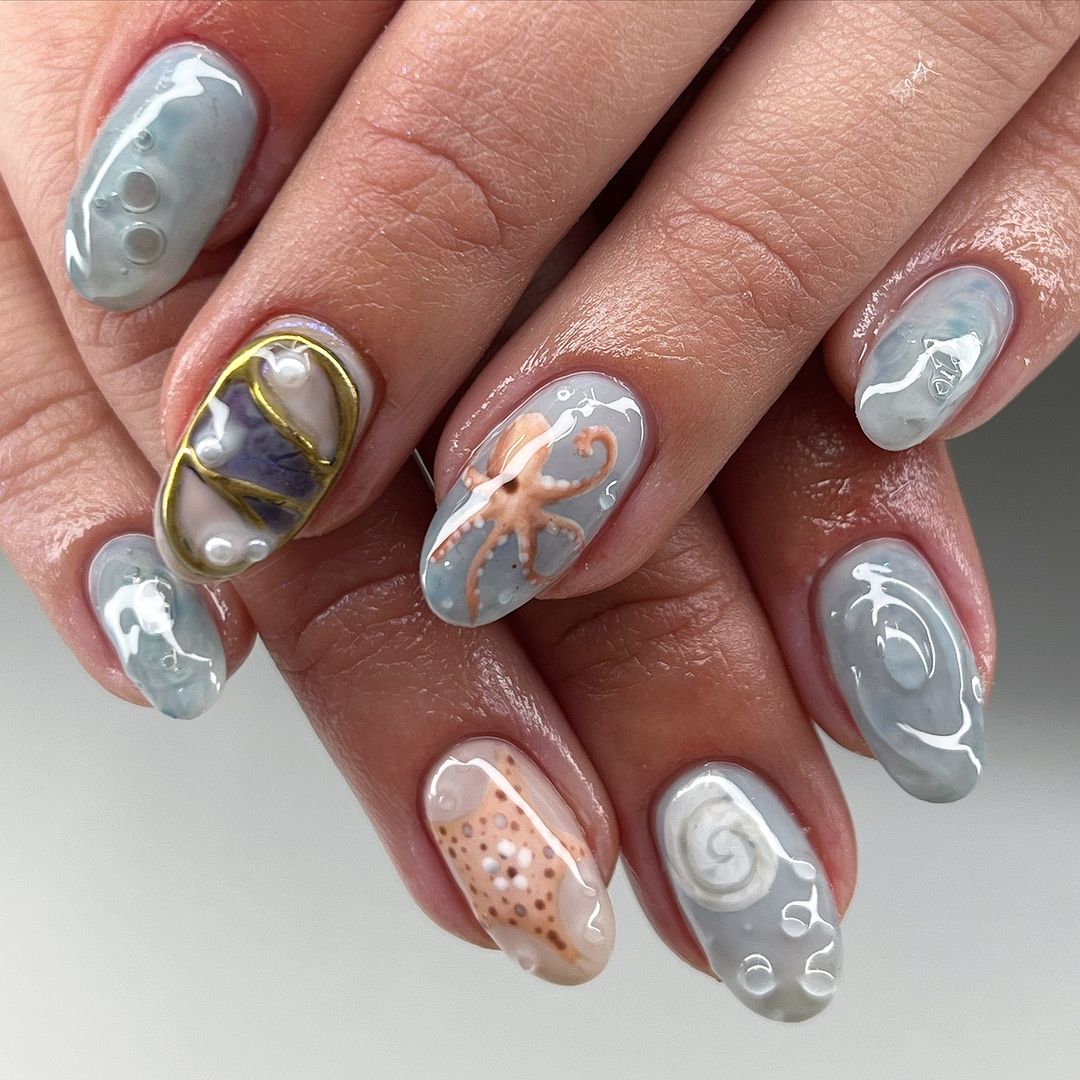
In this sophisticated nail art, the allure of the underwater world is brought to life through detailed depictions of marine life and sea elements. Each nail serves as a canvas showcasing different sea creatures and textures from the ocean bed, rendered in soft grays and blues with hints of orange for coral formations. This design is perfect for those who love aquarium and art sea blue themes, providing a subtle yet intricate nod to ocean biodiversity.
-
- Base Coat: Orly Rubberized Base
- Gray and Blue Acrylic Paints
- Orange Polish for Coral Accents: Essie “Tart Deco”
- Fine Detailing Brushes
- Matte Top Coat: Matte Finish for a Natural Look
The use of matte finish enhances the artistic elements by reducing shine and allowing the colors and designs to stand out more naturally.
Prepare your nails with a base coat. Use a light gray as the foundation color. With fine brushes, paint detailed marine life such as octopi, seashells, and swirls representing water currents. Add accents in blue to depict water and orange for corals or starfish. The key to this design is precision and patience, allowing each detail to be perfectly placed and painted. Once completed, apply a matte top coat to give the design a realistic underwater feel.
Miniature Ocean Views in Nail Art
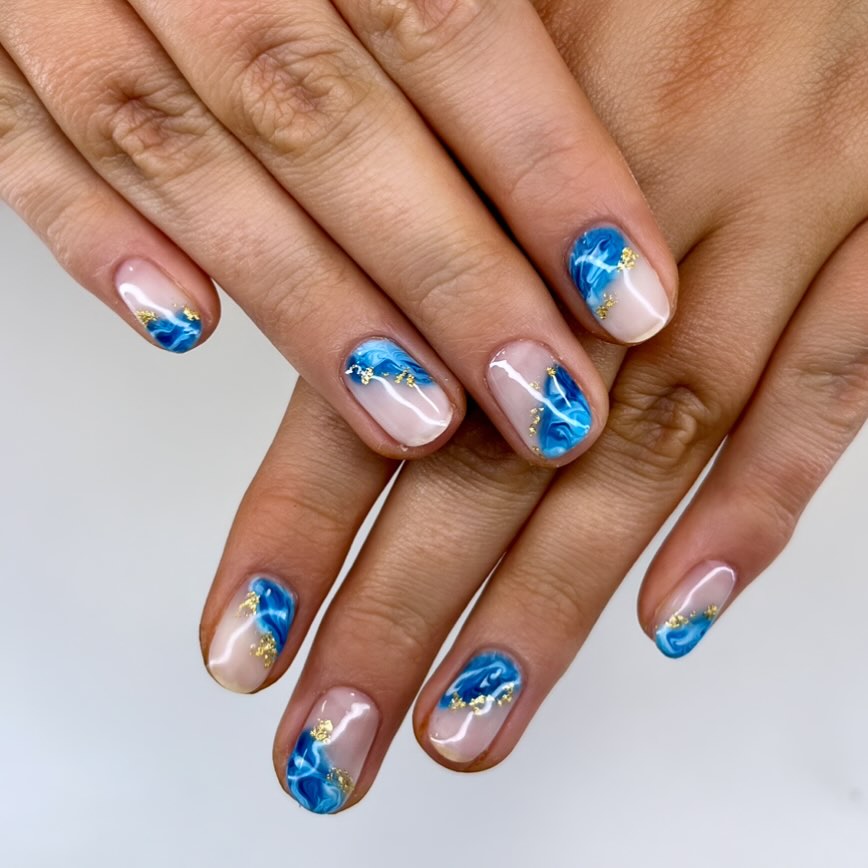
This nail design encapsulates the vibrant beauty of the ocean with miniature scenes of blue seas and golden beaches encapsulated within each nail. The strategic use of clear spaces combined with vivid blue and gold accents creates a glassy effect, making each nail look like a tiny window into the ocean. This design is perfect for those who adore sea beach waves and design ideas that combine minimalism with impactful artistic expression.
-
- Base Coat: Deborah Lippmann Hard Rock Base and Top Coat
- Blue Gel Paint
- Gold Foil
- Glass Effect Top Coat: Seche Vite Dry Fast Top Coat
The glass effect top coat is crucial for achieving that glossy, see-through look that makes the ocean scenes pop vividly against the natural nail base.
Start with a protective base coat. Strategically paint parts of the nails with shades of blue to represent the ocean. Use gold foil to add small accents that mimic the shimmer of sand under sunlight. The placement should be thoughtful, with clear spaces left to create a ‘window’ effect. Once the painting is complete, seal the design with a glass effect top coat to enhance the depth and clarity of the miniature scenes, making each nail a unique piece of oceanic art.
Extravagant Underwater Jewels
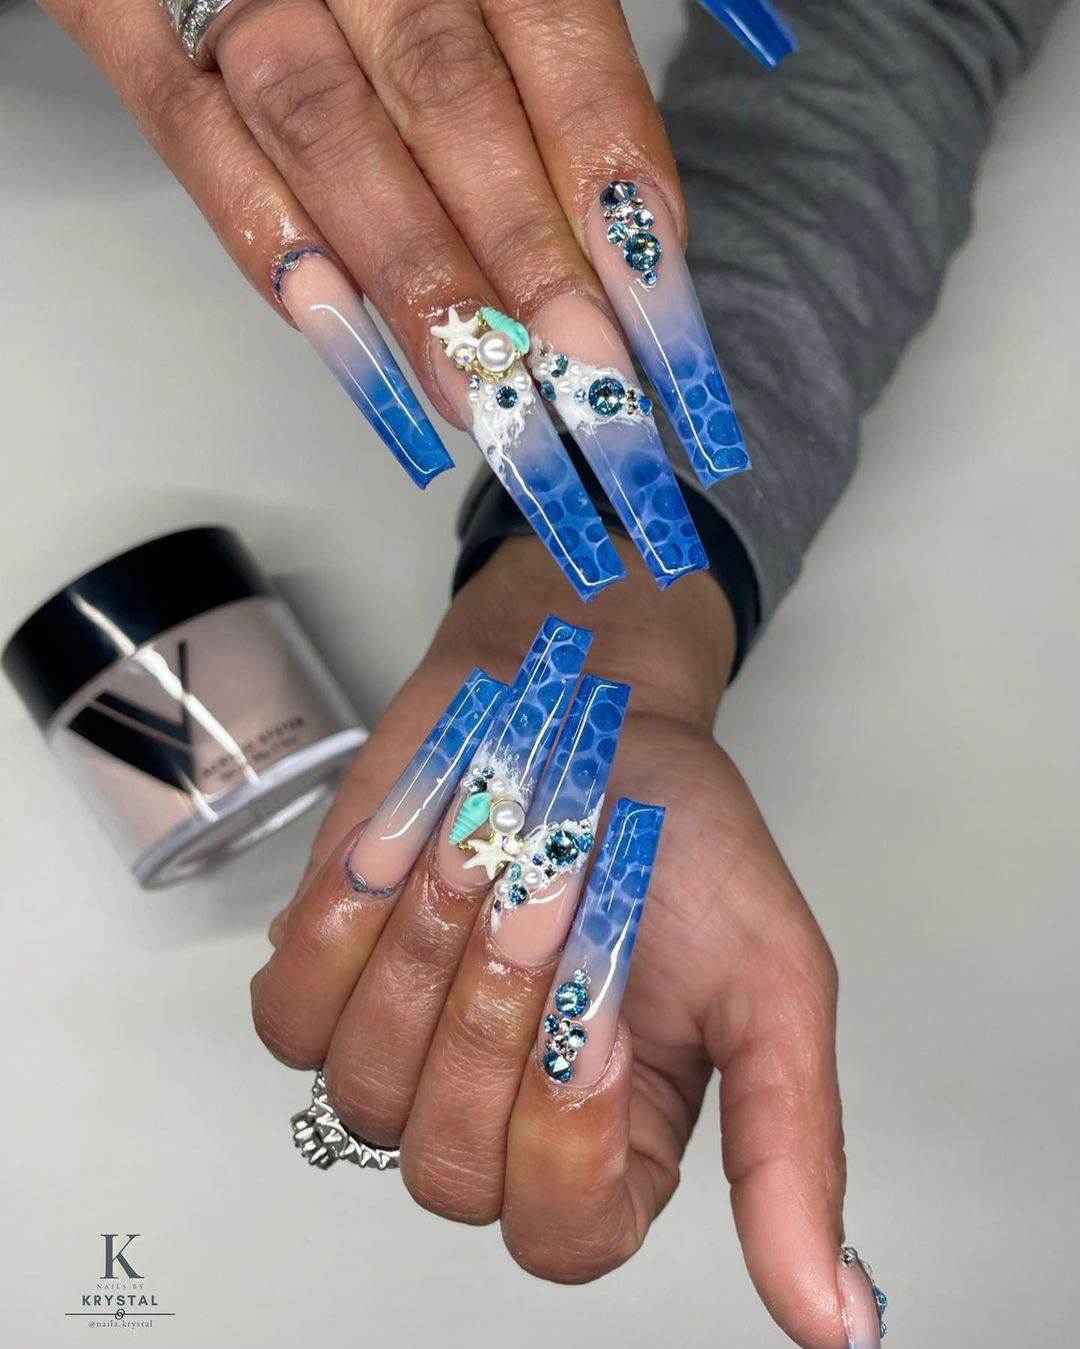
This nail design is a stunning representation of underwater treasures, combining transparent acrylic with intricate bead and jewel embellishments. Mimicking the clear waters of the ocean, each nail serves as a display case for a rich array of oceanic colors and textures, highlighted by pearls and rhinestones that resemble precious sea gems. This design is perfect for those who appreciate bling and art sea blue themes, infusing luxury into oceanic inspirations.
-
- Clear Acrylic Nails
- Blue and White Acrylic Paint
- Assorted Beads, Pearls, and Rhinestones
- Strong Adhesive for Embellishments
- High-Gloss Top Coat: to ensure a shiny, durable finish
This combination of clear acrylic and lavish decorations encapsulates the opulent life beneath the sea, creating a sense of depth and luxury.
Begin with the application of clear acrylic nails as your base. Use blue and white acrylic paint to create a soft, water-like background. Carefully select various beads, pearls, and rhinestones, and arrange them on the nails while the paint is still slightly tacky to ensure they adhere well. Once the arrangement is complete, secure the embellishments with a strong adhesive and seal everything with a high-gloss top coat to protect your design and add an extra layer of shine.
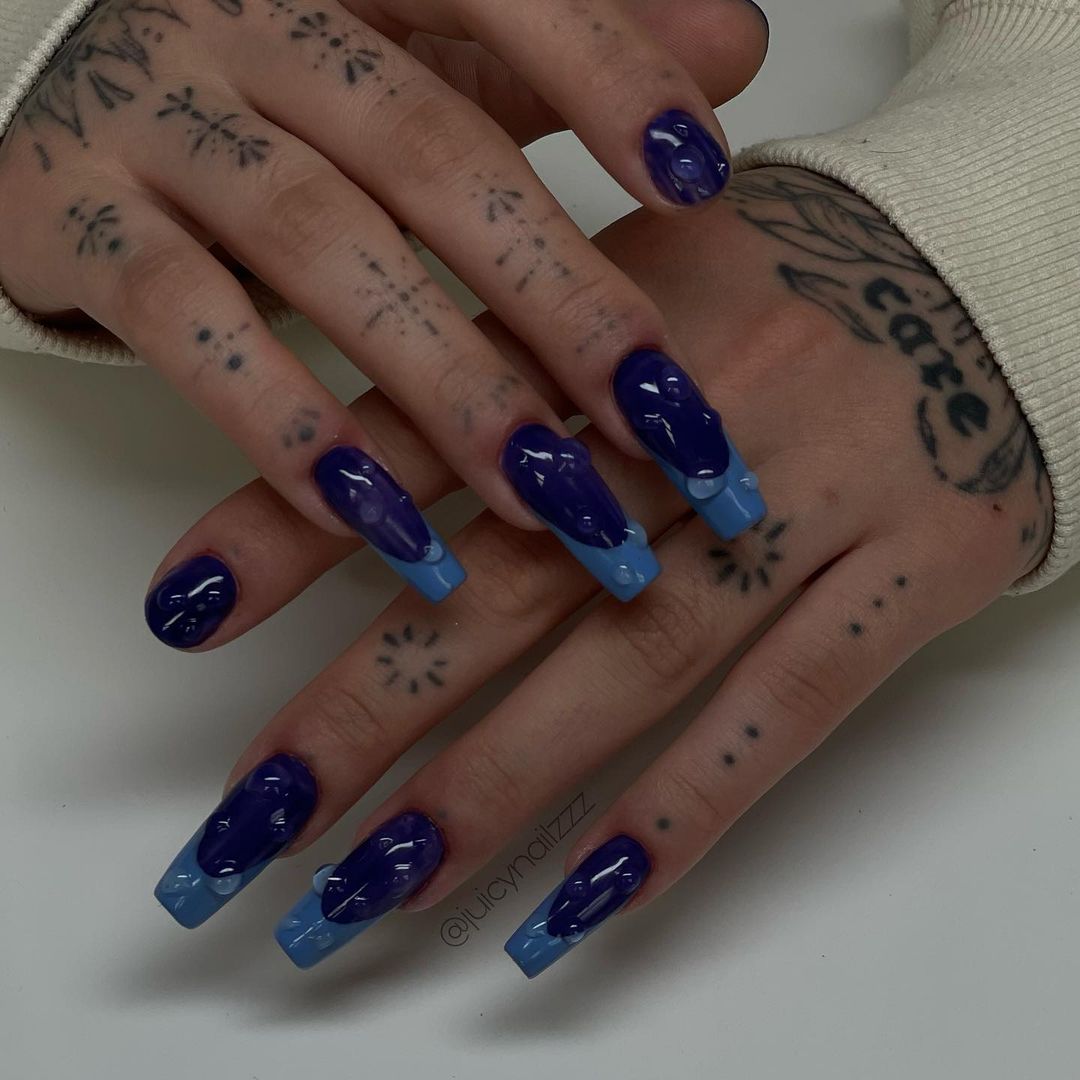
Deep Sea Mystery
Featuring a deep blue color palette, this nail design delves into the darker, more mysterious aspects of the ocean. The use of a gradient from dark to light blue represents the ocean’s vast depths, while the glossy finish gives the appearance of water’s natural sheen. This look is perfect for lovers of the designs sea and those who gravitate towards more dramatic, impactful nail art.
-
- Base Coat: to protect the nail
- Dark Blue Polish: Essie “After School Boy Blazer”
- Light Blue Polish: Essie “Bikini So Teeny”
- Sponge for Gradient Effect
- Glossy Top Coat: for a seamless finish
The gradient technique is pivotal in achieving the deep sea effect, offering a visual transition from the ocean surface to its mysterious depths.
Start by applying a base coat to protect your nails. Apply the dark blue polish at the tip of your nails, gradually blending into the lighter blue towards the cuticle using a sponge to create a smooth gradient effect. This technique mimics the natural light filtration in the ocean, where the deeper you go, the darker it gets. Finish with a glossy top coat to enhance the depth of the colors and provide a wet-look finish, reminiscent of the deep sea.
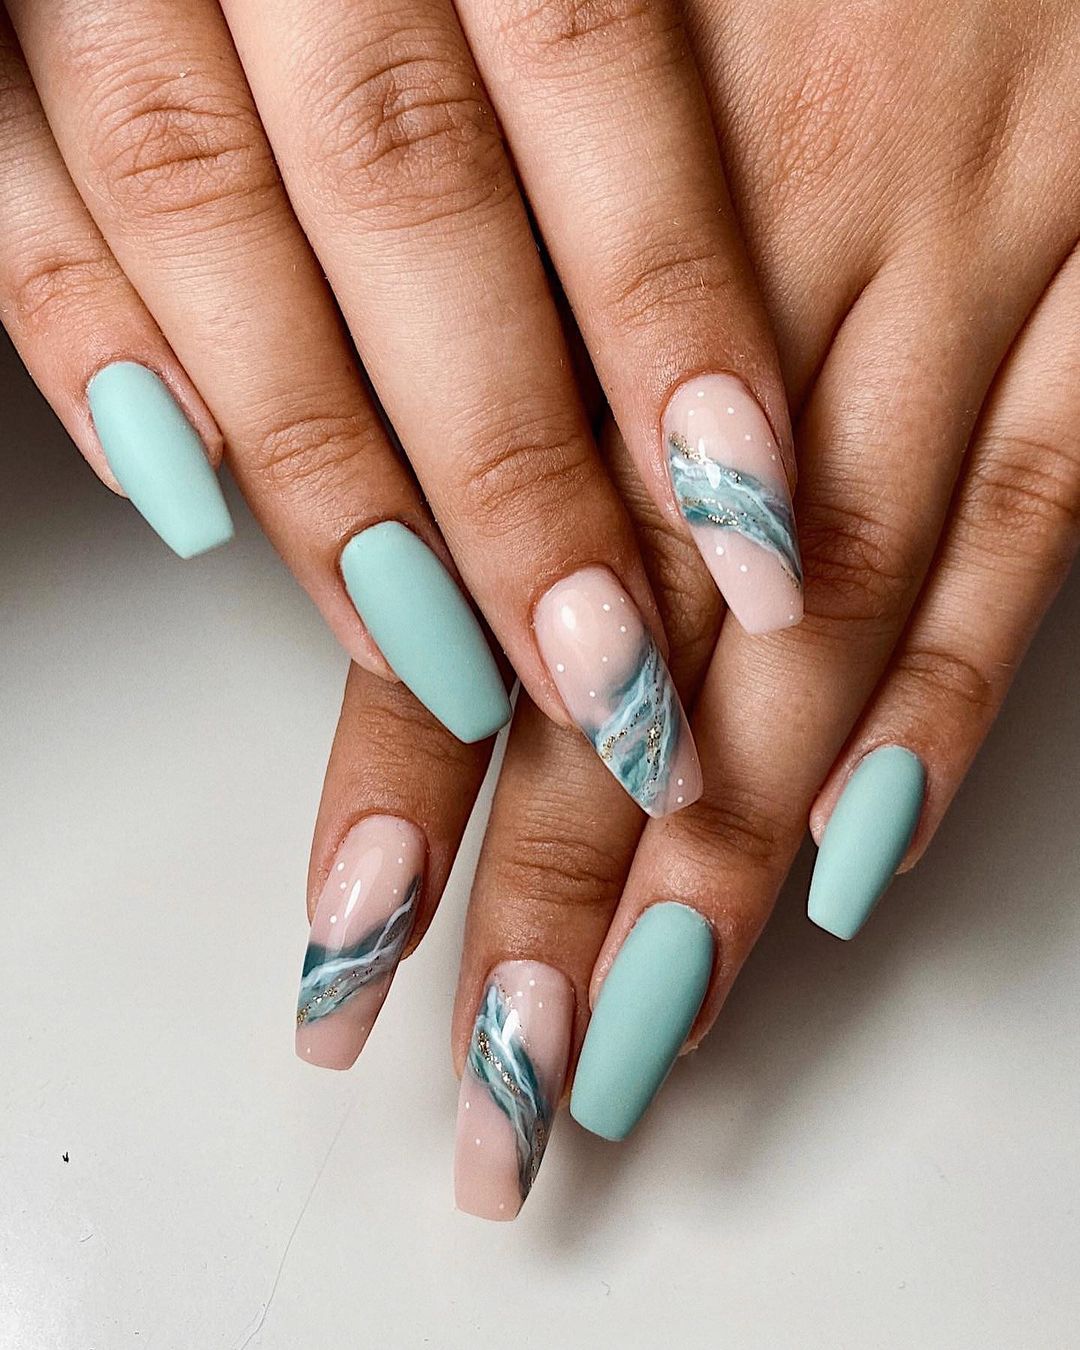
Serene Ocean Swirls
This design combines soft pastel blues with subtle swirls of white to emulate gentle ocean currents. The serene color palette and fluid designs offer a tranquil depiction of the sea, making it an excellent choice for those seeking simple yet beautiful ocean nails. This style is particularly suited for everyday wear, offering a hint of the ocean’s calming effects.
-
- Pastel Blue Polish: OPI “It’s a Boy!”
- White Polish: for creating swirls
- Detail Brush: for precise swirl application
- Matte Top Coat: for a contemporary finish
The matte finish provides a modern twist to this otherwise classic ocean-inspired look, softening the overall appearance and enhancing the visual texture of the swirls.
Prepare your nails with a base coat followed by a layer of pastel blue polish. Once the base color is dry, use a fine detail brush to apply white polish in swirling patterns, mimicking the movement of water. The key here is to keep the swirls light and airy to maintain the design’s calming feel. Finish with a matte top coat to soften the sheen and give your nails a contemporary look that is both chic and wearable.
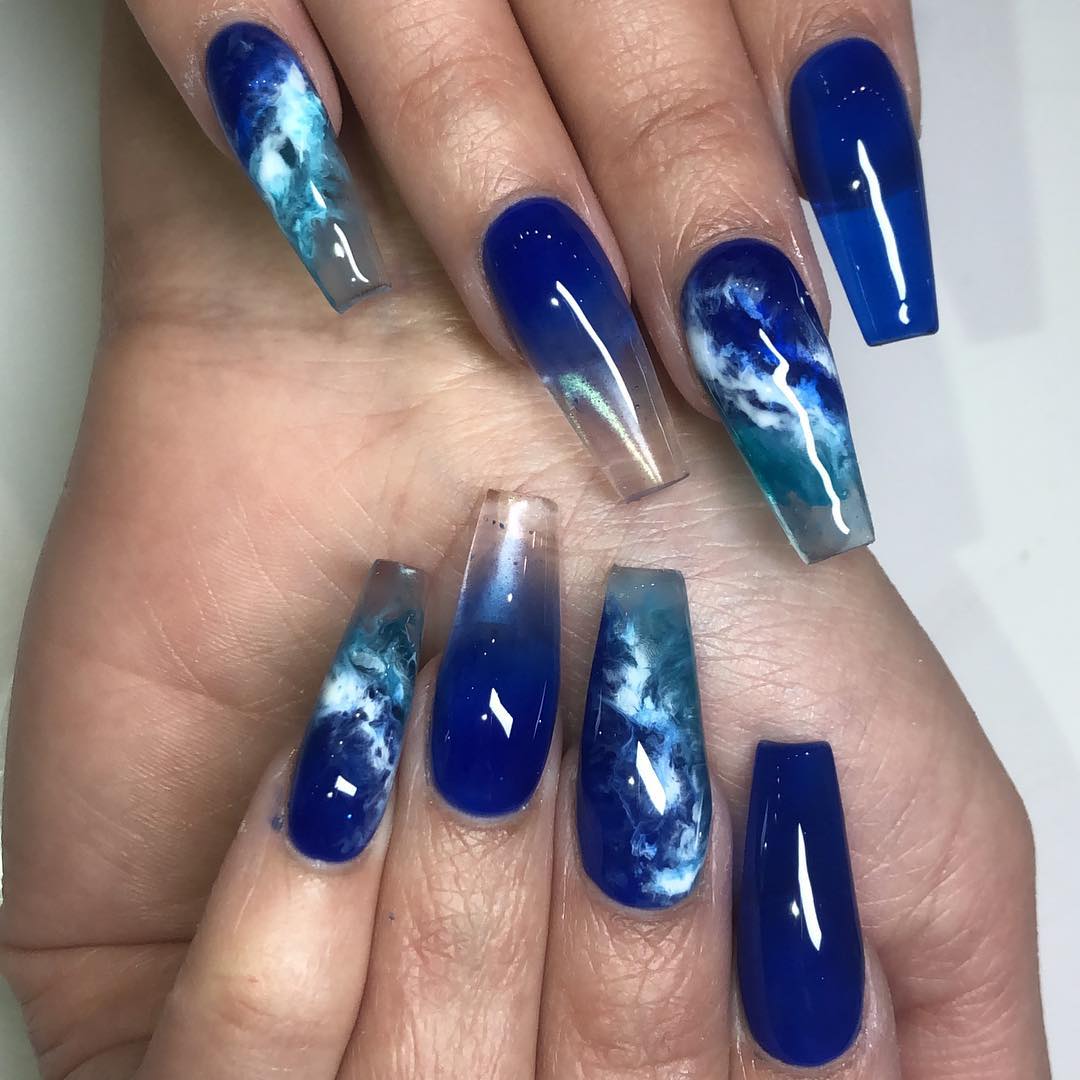
Deep Ocean Currents
This design captures the essence of the ocean’s mysterious deep currents with swirling patterns of white and dark blues. Each nail is like a unique snapshot of the turbulent seas, showing the natural movement and flow of water. Perfect for those drawn to the dramatic, dynamic beauty of the ocean.
-
- Base Coat: Protects the natural nail.
- Dark Blue Polish: Sally Hansen “Navy Fleet.”
- White Polish: Sally Hansen “White On.”
- Top Coat: Glossy for a water-like finish.
- Sponge: For the blending effect.
The blending technique using a sponge creates an authentic looking interaction between the colors, mirroring the chaotic yet beautiful deep-sea currents.
Begin with a base coat to protect your nails. Apply a dark blue base layer, and while it’s still tacky, dab on white polish with a sponge. Softly blend the white into the blue to create natural swirls. Once satisfied, apply a top coat for a glossy, oceanic finish.
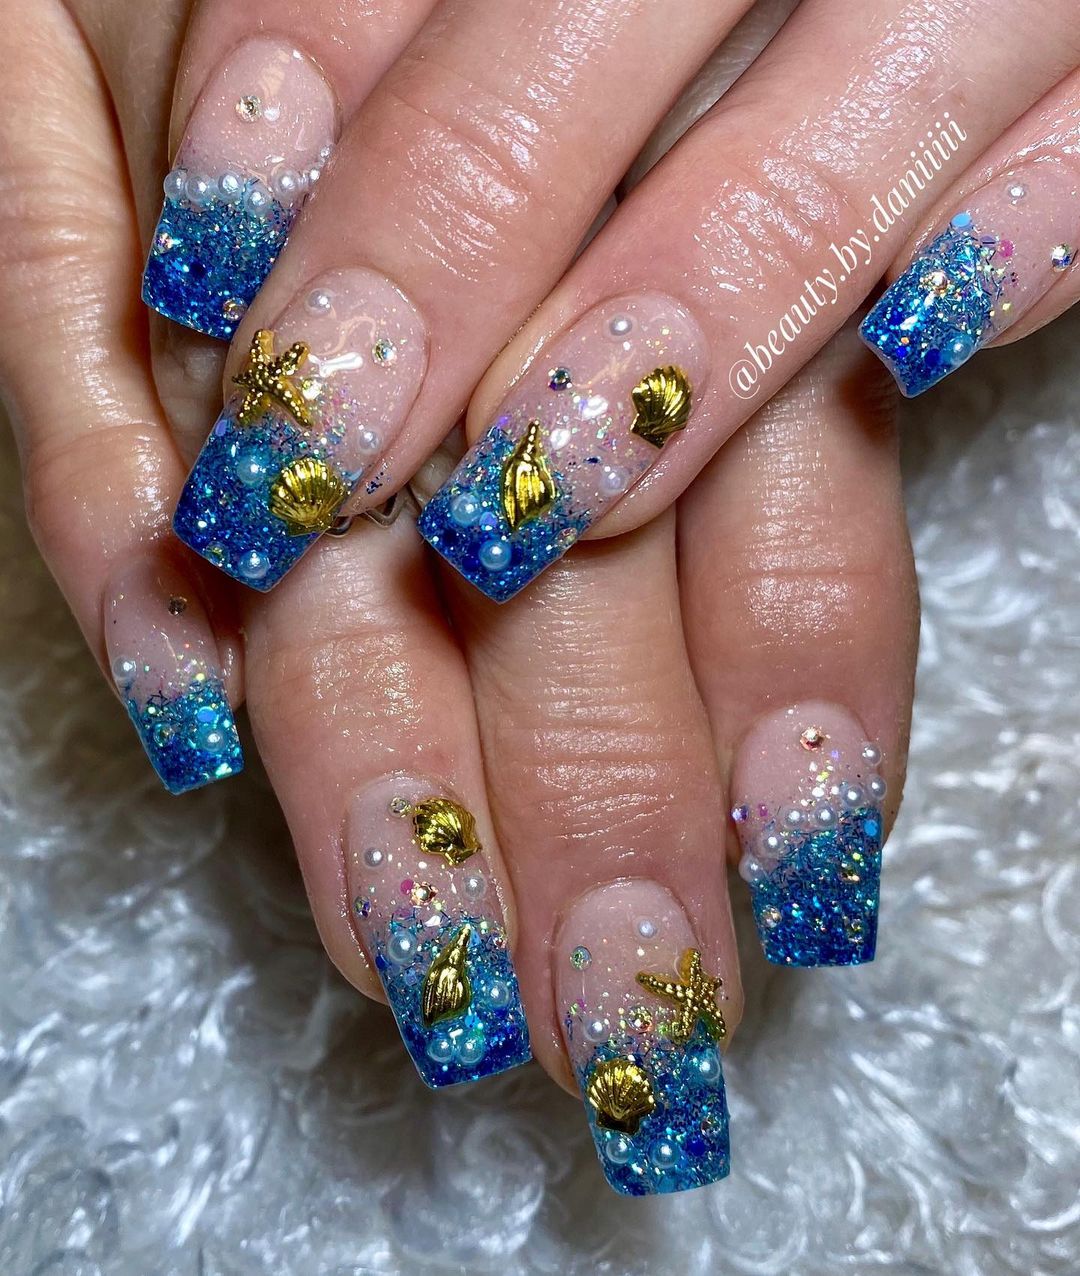
Marine Elegance
This design combines a rich blue base with a dazzling sprinkle of sea life charms, including starfish, shells, and beads. The use of clear and blue acrylic creates a dimensional look that resembles the ocean’s surface, while the decorative elements add a touch of nautical charm.
-
- Blue Acrylic Powder
- Clear Acrylic Powder
- Sea Life Charms: Starfish, Shells, and Pearls.
- Embedding Gel: For securing the charms.
- High Shine Top Coat: Ensures longevity and enhances depth.
This luxurious look is perfect for those who enjoy a bold statement, capturing the vivid life and richness of the sea on each nail.
Start by sculpting your nails with a mixture of blue and clear acrylics to achieve a sea-like transparency. Before the acrylic sets, gently press the charms into the desired positions. Secure everything with an embedding gel, ensuring that the charms are well-anchored. Finish with a high-shine top coat to protect your design and add to the underwater effect.
Tranquil Beachfront
This design features a serene blend of sky and sea blues with added starfish and shell embellishments, reminiscent of a peaceful beachfront. The soft transition from sandy textures to clear blue waters evokes a tranquil seaside escape.
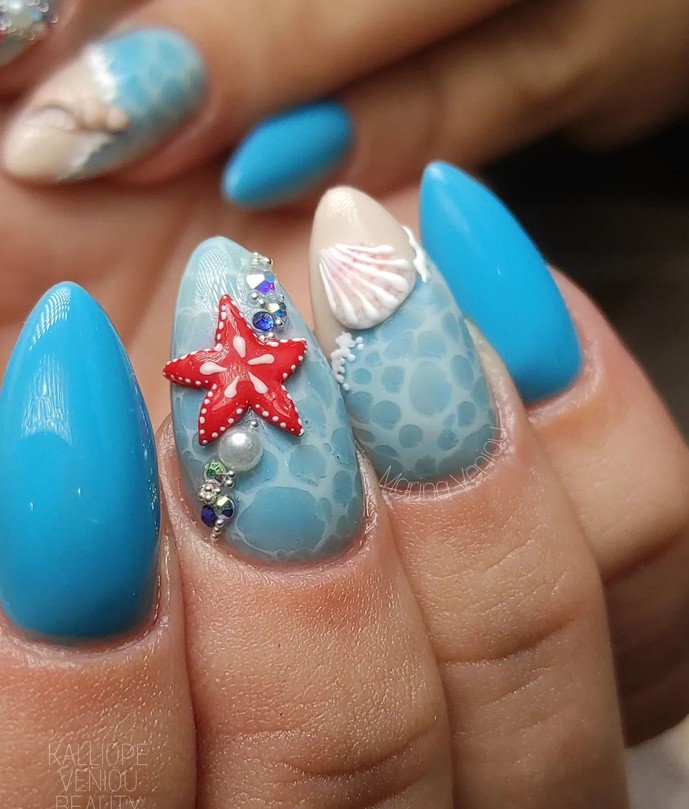
-
- Base Coat: For nail protection.
- Sky Blue and Sea Blue Polish: For the gradient effect.
- Small Embellishments: Starfish and shells.
- Matte Top Coat: To soften the overall appearance.
Ideal for anyone wishing to carry a piece of the calm sea with them, this design offers a peaceful reminder of the beach’s soothing sights.
Apply a base coat, then create a gradient with sky blue at the cuticle blending into sea blue at the tips. While the polish is still tacky, carefully place the starfish and shell embellishments. Secure the design with a matte top coat for a contemporary finish that enhances the muted, tranquil theme of the seaside.
Cosmic Ocean Vibe
This nail design evokes a cosmic take on oceanic colors, merging deep blues and purples with a touch of teal and pink. Each nail appears as a unique celestial body, reflecting the mysterious depths of both the ocean and the night sky. Ideal for those who are drawn to a more mystical, fantasy-inspired look.
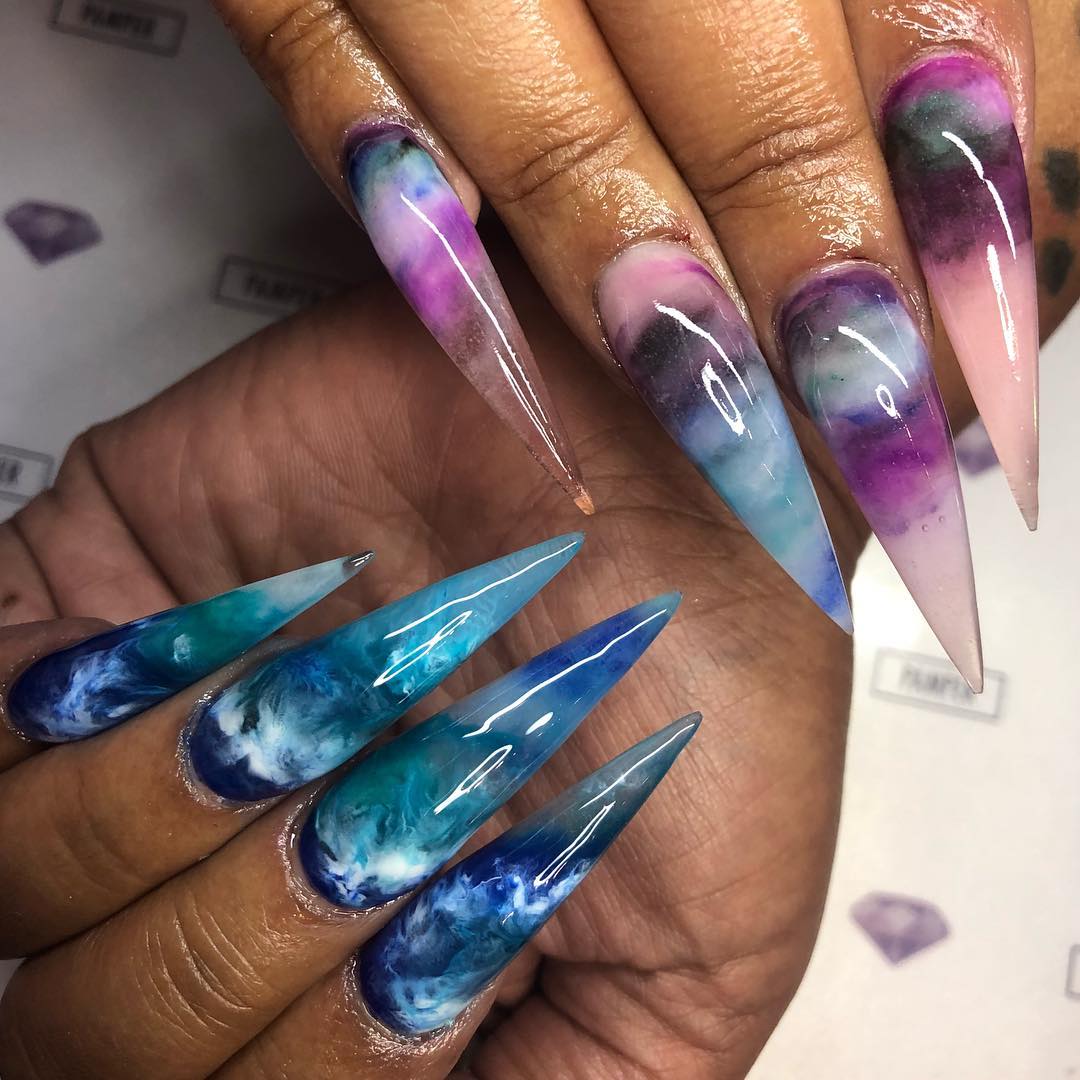
-
- Base Coat: for nail protection.
- Blue, Purple, and Teal Polishes: for the cosmic effect.
- Pink Highlights: for a touch of warmth.
- Top Coat: High-gloss to enhance the deep colors.
The blending of these vivid colors creates a nebula-like effect, mimicking the ethereal beauty of the cosmos.
Apply a base coat to protect your nails. Begin with a dark blue base, and while wet, dab on purple, teal, and pink polishes. Use a fine brush or sponge to blend these colors softly, creating a nebulous, interstellar appearance. Finish with a high-gloss top coat to give the nails a shiny, deep-water look that catches the light like the surface of a distant planet.
Tranquil Sea Florals
In this design, serene blue hues form the backdrop for delicate white floral patterns, offering a peaceful and refreshing look. The translucent blue creates a soft, water-colored effect, making it a perfect canvas for the white floral accents that add a romantic, feminine touch.
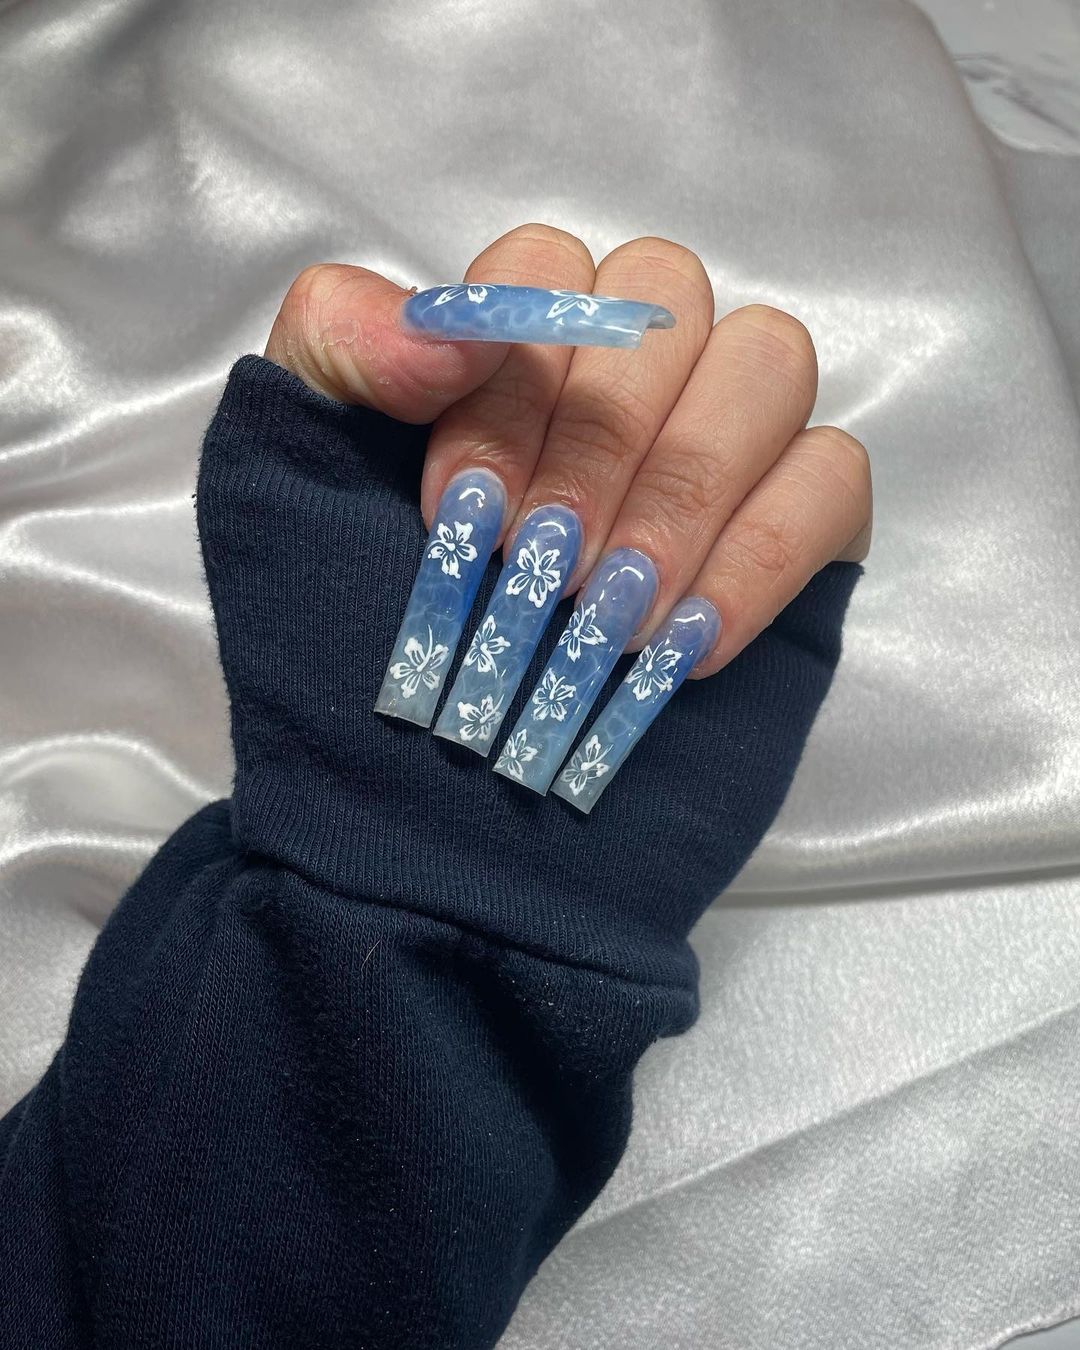
-
- Base Coat: to protect the natural nail.
- Translucent Blue Polish: for a soft background.
- White Polish: for the floral designs.
- Detailing Brush: for precise application.
- Top Coat: Matte finish for a contemporary look.
The matte top coat is particularly effective here, softening the overall appearance and focusing attention on the delicate white flowers.
Start with a base coat. Apply a light layer of translucent blue polish. Once dry, use a detailing brush to paint small, white florals. Focus on creating soft, subtle patterns that evoke the calm of a gentle sea breeze. Finish with a matte top coat to reduce shine and enhance the softness of the overall design, perfect for a day at the beach or a casual summer outing.
Ocean’s Edge Miniature Waves
This design features miniature depictions of ocean waves, combining clear and blue acrylic to create a realistic wave effect at the tips of the nails. Accented with tiny seashells and starfish, this look brings the beach directly to your fingertips.
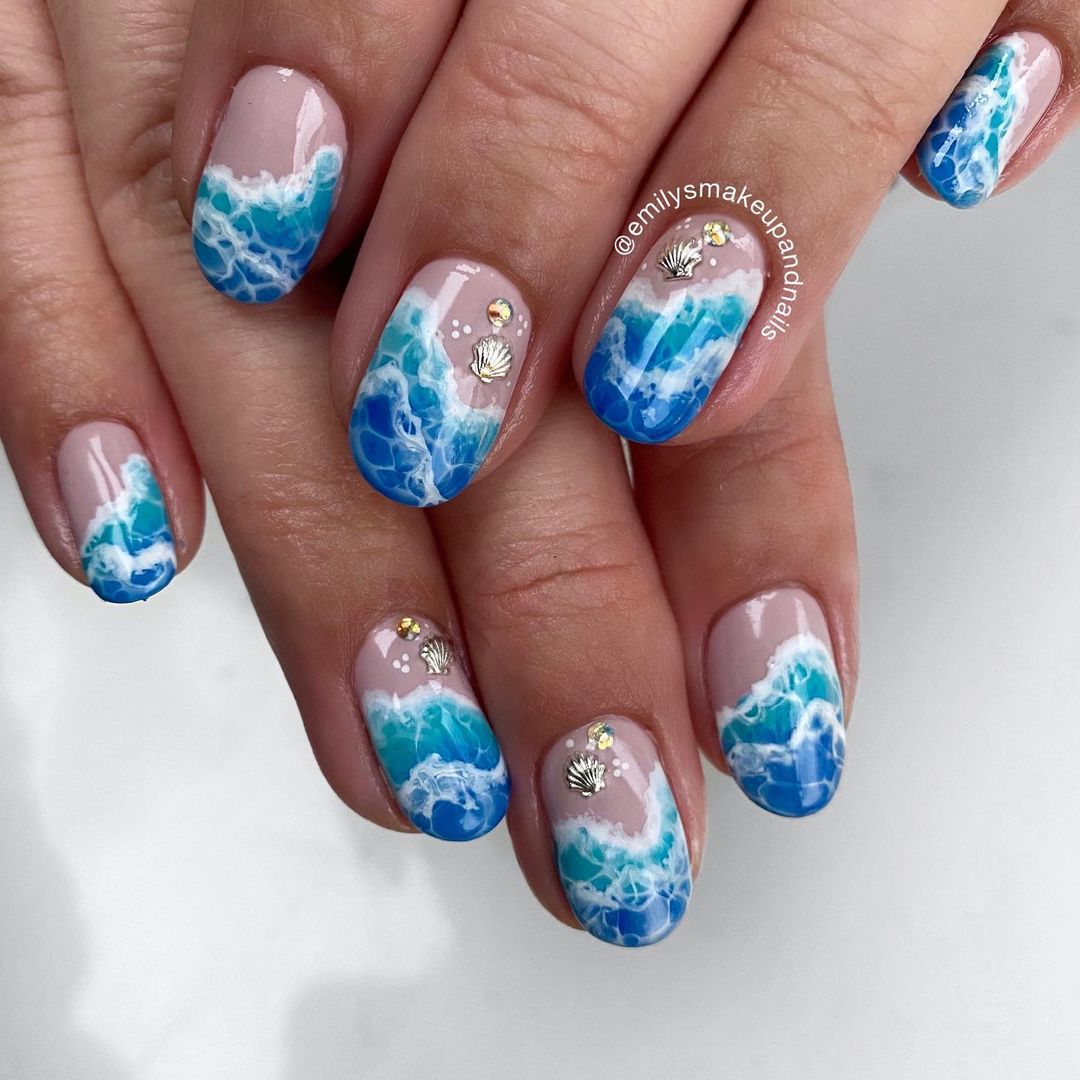
-
- Base Coat: Clear polish.
- Blue Acrylic or Gel: For wave simulation.
- Miniature Seashells and Starfish: For decoration.
- Top Coat: To seal and protect the design.
This design is ideal for anyone looking to carry a piece of the ocean with them, offering a playful yet elegant nod to beach life.
Apply a base coat of clear polish. At the tips, layer blue acrylic or gel in a wave-like pattern, building up slightly to give a three-dimensional appearance. While still tacky, place miniature seashells and starfish along the wave crests for added texture and interest. Once set, apply a top coat to ensure the longevity of the design and keep your oceanic tips looking fresh and vibrant.
Ethereal Ocean Depths
This design blends swirling hues of blue and gray, mimicking the serene yet mysterious depths of the ocean. The subtle interplay of colors along with the high-gloss finish gives each nail the appearance of being submerged in deep water, reflecting the light as if under the sea. It’s perfect for anyone who wishes to combine elegance with a touch of oceanic mystique.
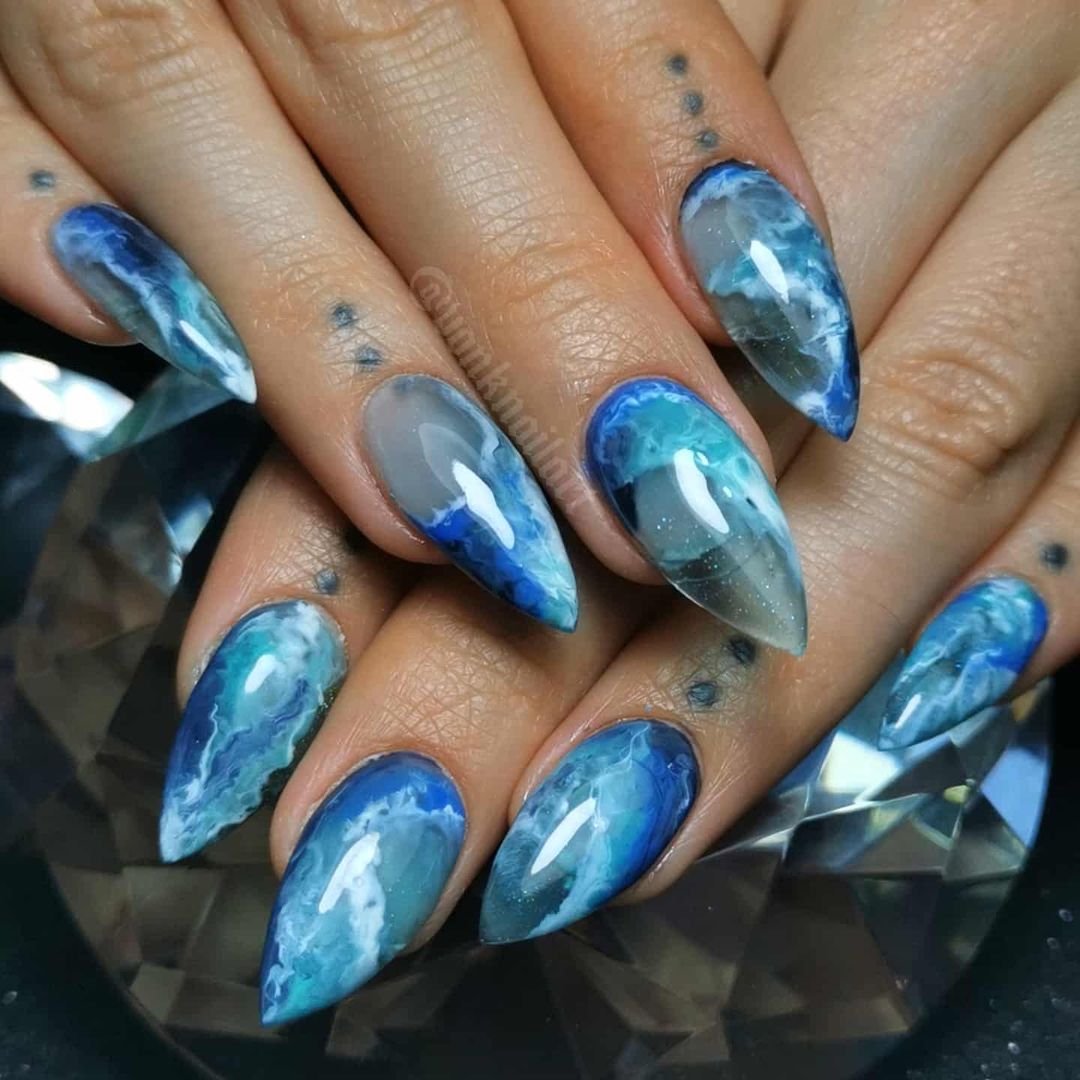
-
- Base Coat: for nail protection.
- Blue and Gray Polishes: for depth and shadow.
- Swirling Tool or Brush: to create fluid patterns.
- Top Coat: High-gloss to simulate water’s surface.
The technique involves layering light and dark hues and then swirling them gently to create a liquid effect, reminiscent of water moving in the ocean’s depths.
Start with a protective base coat. Apply a dark blue polish as the base layer, and while still wet, add touches of gray. Use a swirling tool or a fine brush to gently mix the colors on the nail, creating a fluid, dynamic pattern. Finish with a high-gloss top coat to enhance the depth and give the appearance of a smooth, watery surface.
Vivid Blue Waves
This nail art captures the powerful motion of ocean waves. Using shades of vibrant blue and white, each nail is crafted to represent the frothy, cresting waves of the sea. The added texture and layering effects make this design come alive, perfect for anyone who loves the sea’s wild, untamed nature.
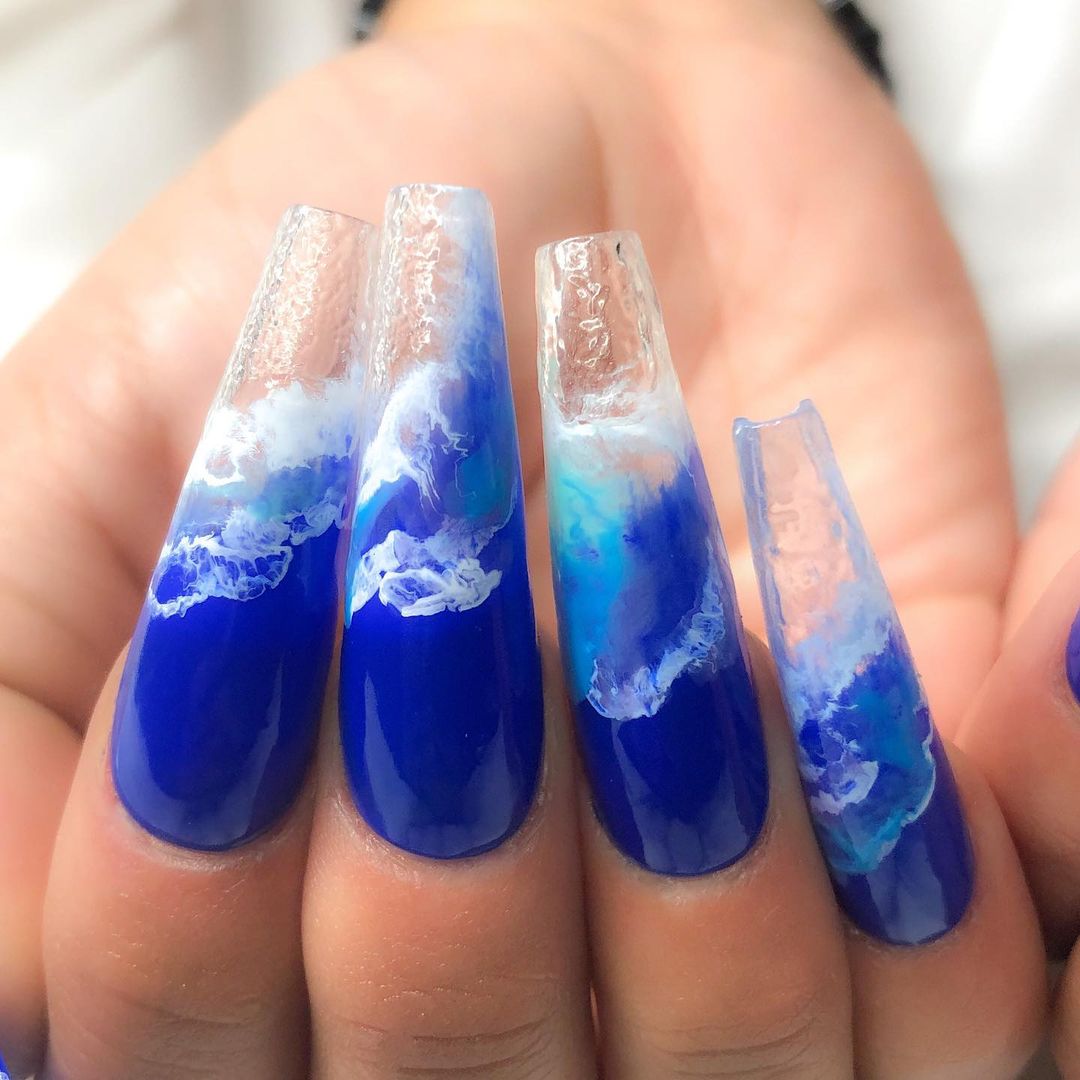
-
- Base Coat: Ensures longevity.
- Vibrant Blue Polish: Main color theme.
- White Polish: For the crests of the waves.
- Texture Medium: To add three-dimensionality.
- Glossy Top Coat: Seals and protects the design.
Creating this look involves applying a base of vibrant blue, then layering white polish in wave patterns, and finally adding a texture medium to mimic the frothy whitecaps of sea waves.
Apply a base coat to protect your nails. Paint a vibrant blue base, and while it’s drying, use white polish to dab on the crests of the waves. Add a texture medium over the white to enhance the three-dimensional effect. Finish with a glossy top coat to seal in the design and provide a shiny, wet look.
Tranquil Seafoam
This design features soft, translucent blue polished combined with white to mimic the gentle foaming of sea waves against the shore. It’s a more subdued and delicate approach to ocean-themed nail art, ideal for those who prefer understated elegance.
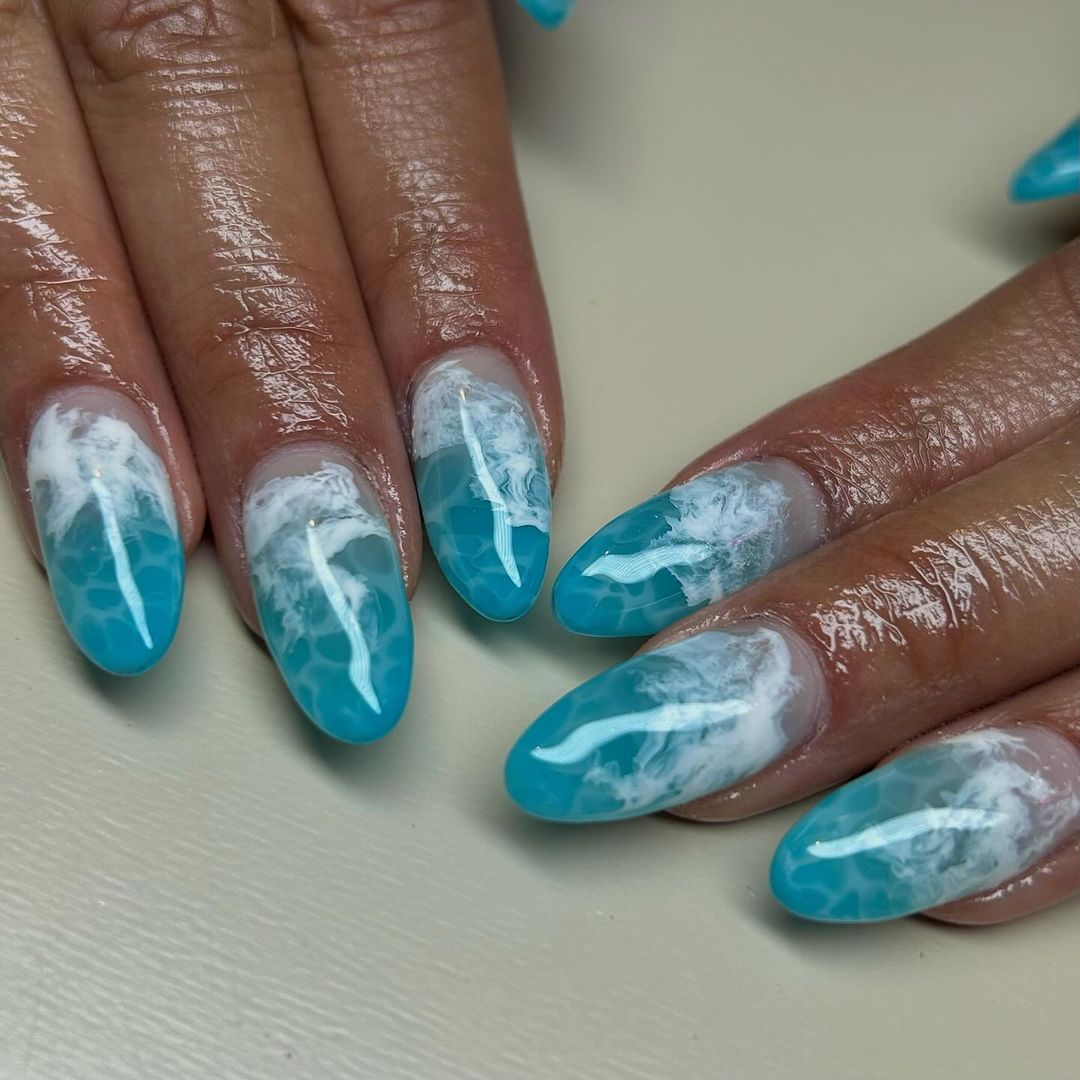
-
- Base Coat: to protect the nail.
- Translucent Blue Polish: for a soft background.
- White Polish: to create the foam effect.
- Sponge or Detailing Brush: for texture.
- Matte Top Coat: for a sophisticated finish.
The method involves applying a translucent blue base, then using a sponge or brush to lightly dab white polish at the tips, creating a soft, foamy look. A matte top coat is used to finish, enhancing the muted, elegant vibe of seafoam.
Start with a base coat for durability. Apply a light layer of translucent blue polish as the base. Using a sponge or detailing brush, apply white polish lightly at the nail tips to simulate foam. Use a dabbing motion to keep the texture soft and airy. Finish with a matte top coat to reduce shine and give a sophisticated, beachy feel to the nails.
Deep Blue Cell Patterns
This nail art uses a deep blue color palette to create cell-like patterns, which mimic the intricate, microscopic life found in ocean waters. The shades of blue vary in intensity, creating depth and interest, perfect for those fascinated by the scientific beauty of marine biology.
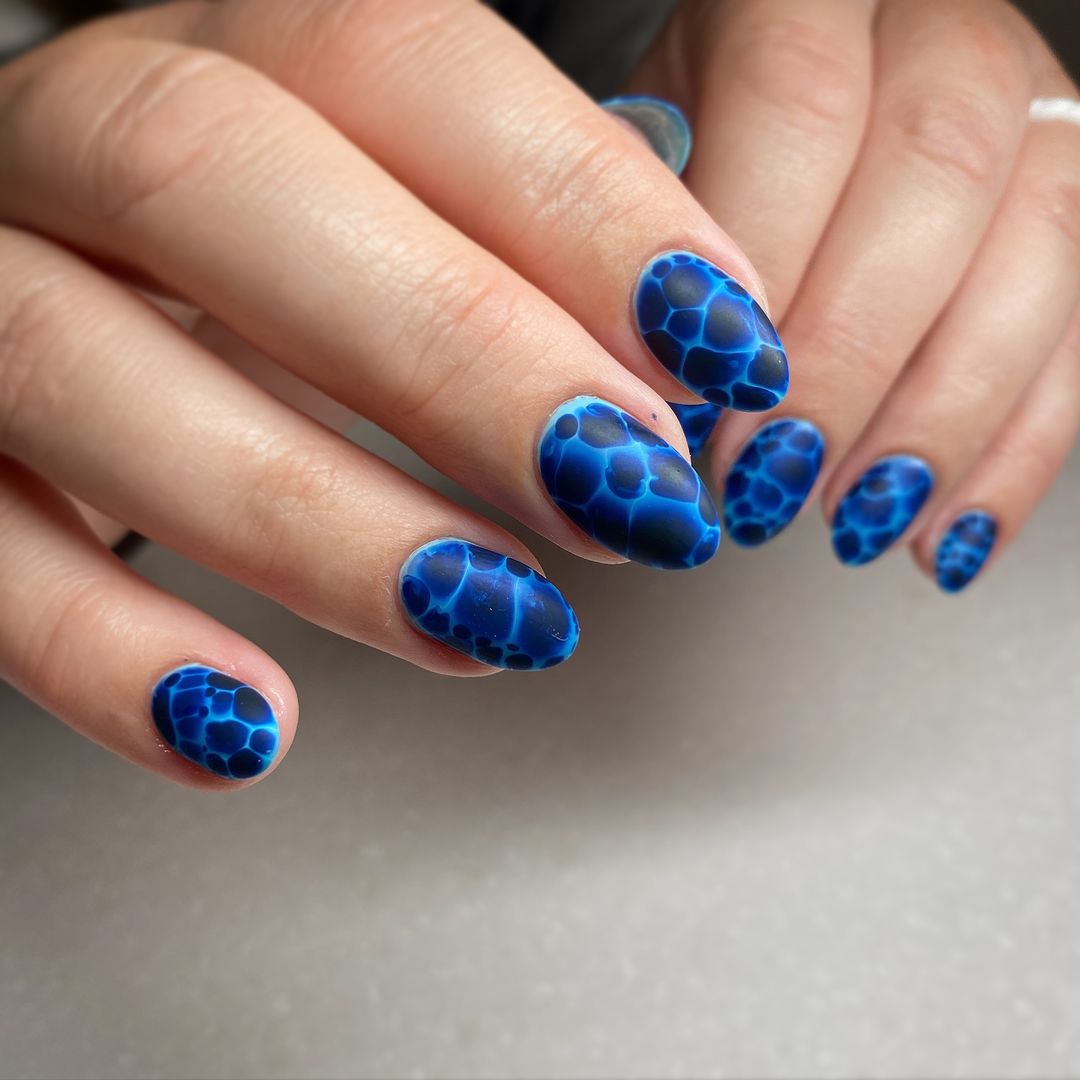
-
- Base Coat: to protect the nail.
- Deep Blue and Light Blue Polishes: for base colors and detail.
- Dotting Tool or Small Brush: for creating cell patterns.
- Top Coat: High-gloss to enhance the deep colors and give a water-like effect.
The technique involves applying a deep blue base and using a lighter blue with a dotting tool to add detailed cell patterns, giving an almost biological microscopy aesthetic.
Start with a protective base coat. Apply a dark blue polish as the base color. While still slightly wet, use a lighter blue polish with a dotting tool or a fine brush to create interconnected cell-like patterns. This should be done delicately to maintain the appearance of natural, organic shapes. Finish with a high-gloss top coat to add shine and depth, enhancing the microscopic ocean life effect.
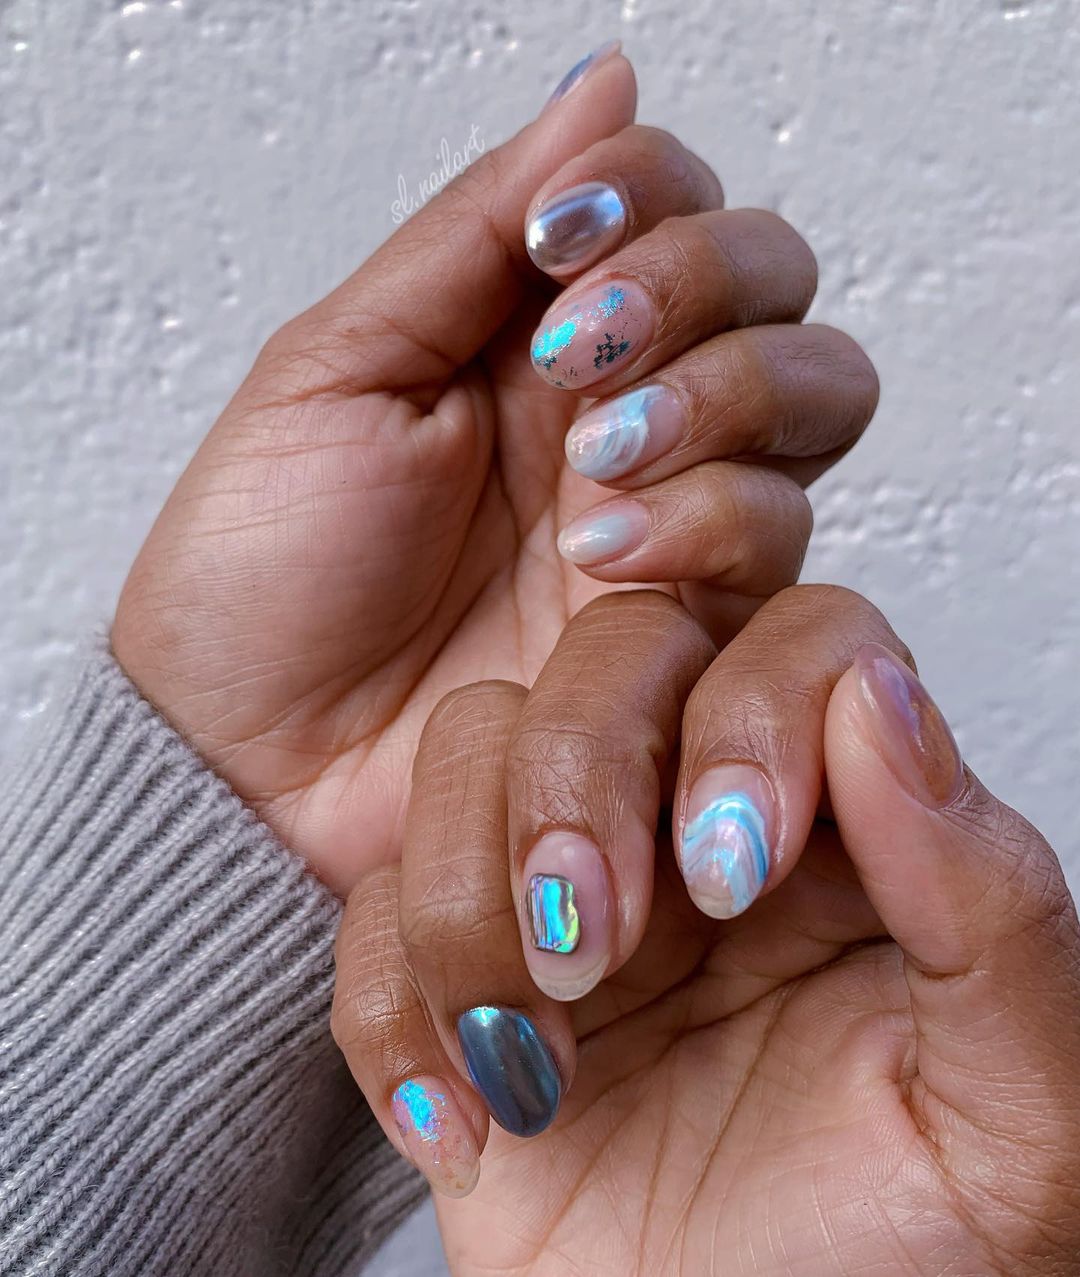
Holographic Ocean Waves
This design integrates a holographic polish that reflects light with the movements of the hand, simulating the shimmering surface of the ocean. The use of subtle blue and silver hues makes this perfect for anyone who wants their nails to stand out with a modern, tech-inspired twist on traditional ocean themes.
-
- Base Coat: for nail health.
- Holographic Polish: for the main reflective effect.
- Blue Accents: to enhance the oceanic feel.
- Top Coat: to seal in the design and ensure longevity.
The application involves a simple yet precise layering of holographic polish over a base coat, followed by strategic placement of blue accents to mimic the appearance of light playing on water.
Apply a base coat to prepare your nails. Once dry, apply a layer of holographic polish. If desired, add thin streaks of blue polish before the holographic layer dries to integrate a subtle ocean wave effect. Allow it to set briefly, then apply a top coat to seal the design and maximize the reflective properties of the holographic polish.
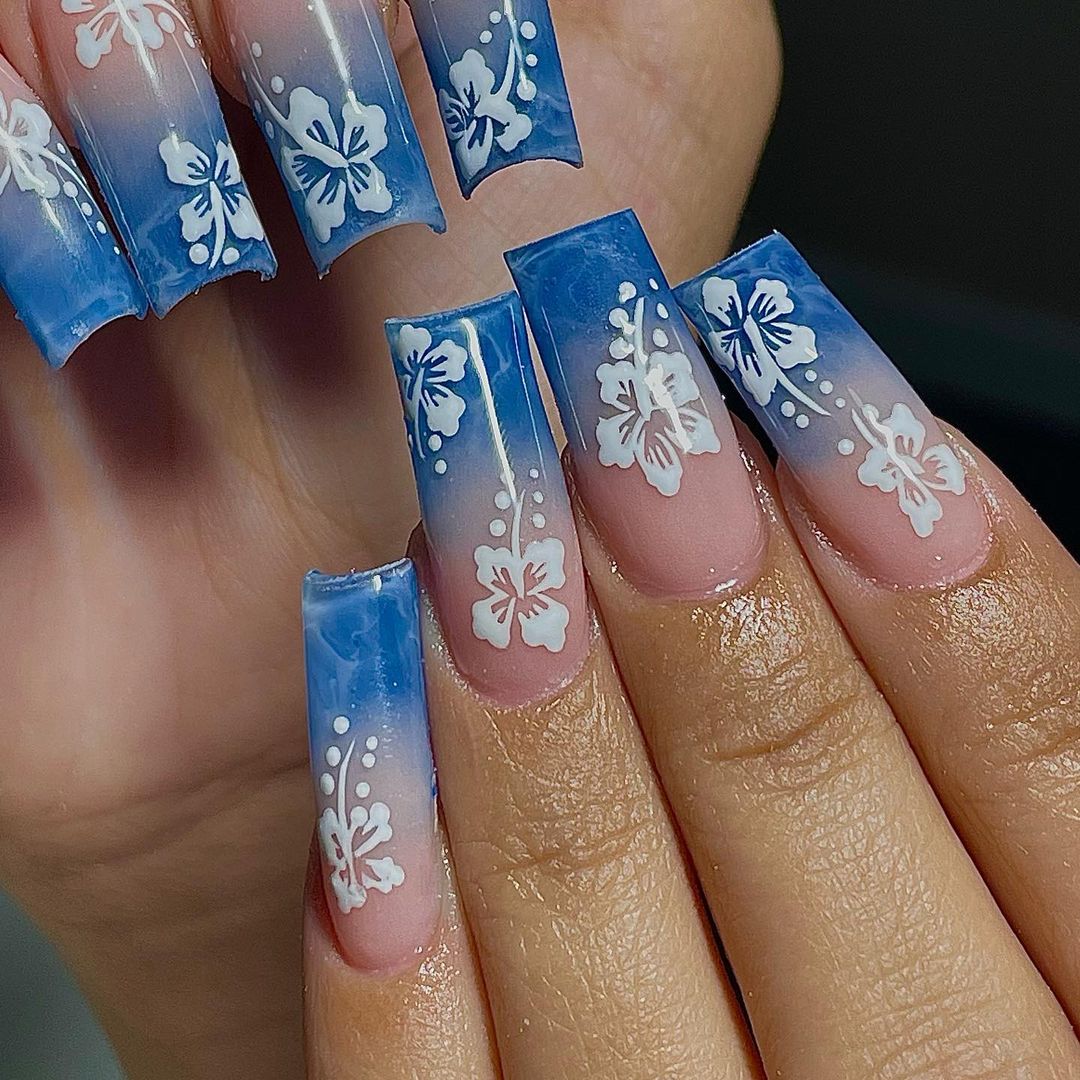
Floral Ocean Breeze
This nail art features a clear ocean blue background with white floral patterns overlaid, evoking the light, breezy feel of a floral-scented ocean breeze. The combination of clear blue and white offers a fresh, clean look suitable for both casual and formal occasions.
-
- Base Coat: to protect the nail.
- Light Blue Polish: for a soft, ocean-like background.
- White Polish: for the floral details.
- Detailing Brush: for precise application.
- Top Coat: Matte finish for a modern, understated look.
The process includes painting a light blue base, then meticulously hand-painting white flowers to create a delicate, elegant design.
Begin with a base coat to protect your nails. Apply a light blue polish as the base. Use a detailing brush dipped in white polish to paint small, simple floral designs over the blue. Focus on creating light, airy patterns that do not overpower the soft blue background. Finish with a matte top coat to soften the sheen and give the nails a contemporary, stylish finish.
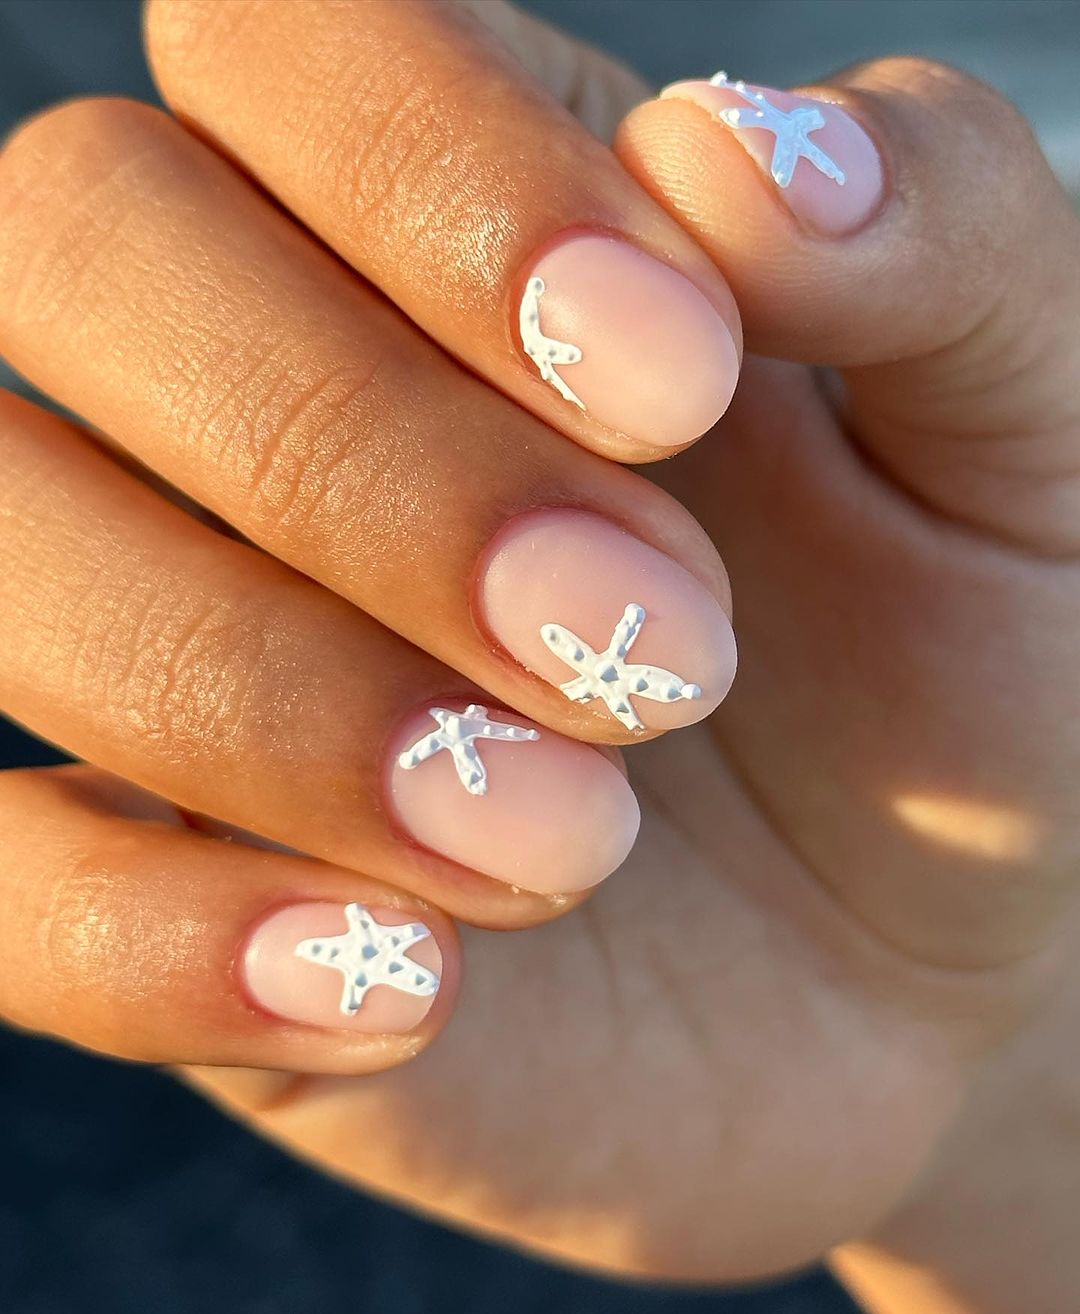
Serene Starfish Elegance
This nail design beautifully showcases the delicate charm of starfish motifs on a clear, soft pink base, perfect for a subtle nod to ocean life. The minimalistic approach uses white to outline the starfish, enhancing the natural elegance of the simple yet stylish pattern. This design is ideal for those who prefer understated beauty with a thematic touch of the sea.
-
- Base Coat: for nail protection.
- Soft Pink Polish: for a natural, subtle background.
- White Polish: for the starfish designs.
- Detailing Brush: for precise application.
- Top Coat: Clear for a glossy finish.
The use of a soft pink base with white accents offers a fresh and clean look, maintaining the focus on the intricate starfish designs.
Apply a base coat to protect your nails and ensure a longer-lasting manicure. Paint a soft pink base, allowing it to dry completely. Use a fine detailing brush dipped in white polish to carefully draw starfish shapes on each nail. The key is to keep the lines crisp and thin, emphasizing the natural elegance of the starfish form. Finish with a clear top coat to enhance the design’s durability and shine.
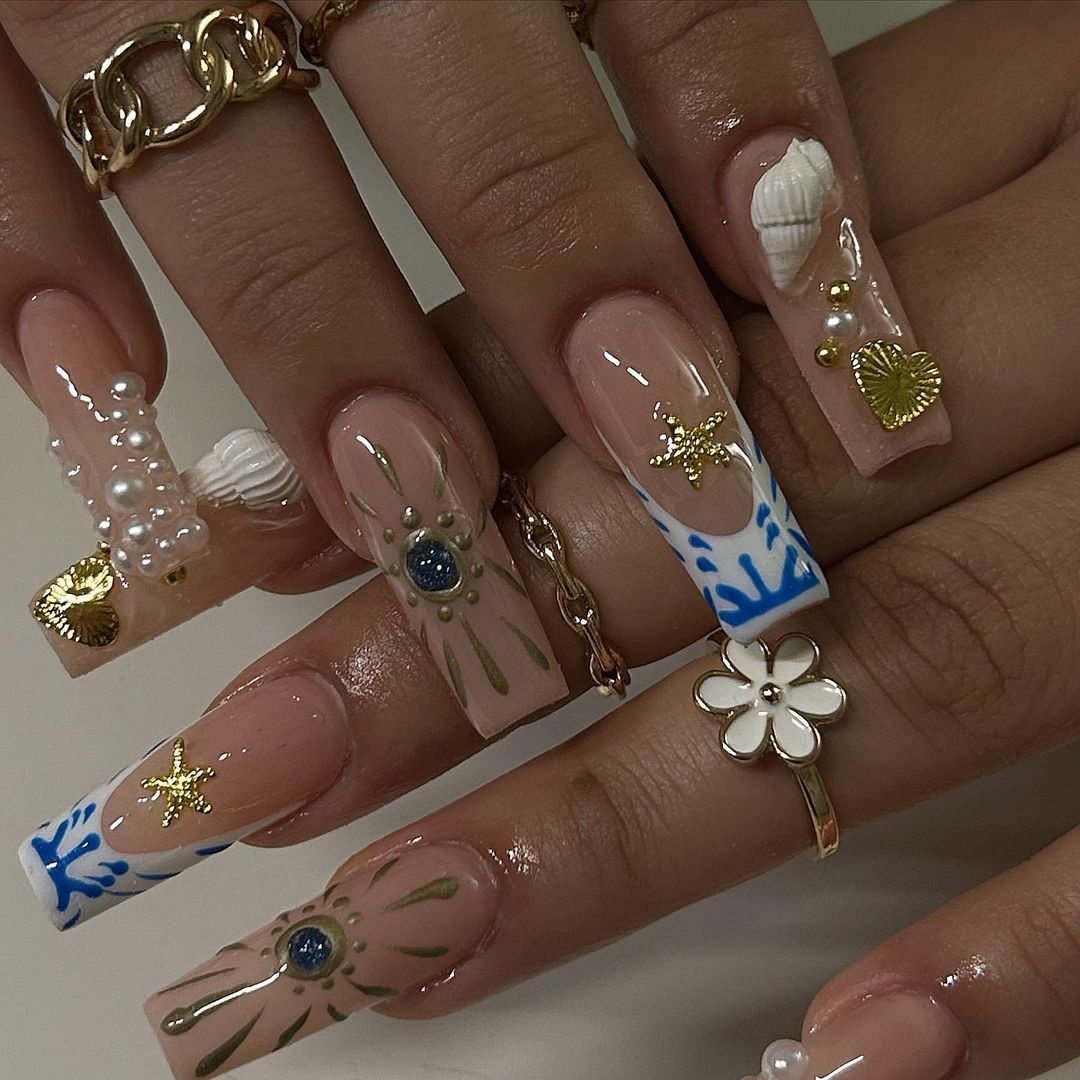
Luxurious Sea Treasure Art
This nail art transforms your nails into a rich tapestry of ocean treasures, featuring intricate embellishments such as pearls, gold flakes, and detailed aquatic motifs. Each nail tells a story of the ocean’s wealth, from deep sea blues to sandy textures, making this design perfect for those who love elaborate and ornate styles.
-
- Base Coat: to protect the nail.
- Nude Polish: for a universal appealing background.
- Various Embellishments: pearls, gold flakes, miniature seashells.
- Jewelry Adhesive: to securely attach embellishments.
- Top Coat: High-gloss for a luxurious finish.
This design requires precision in placing each decorative element to create a balanced yet lavish look that captures the essence of underwater treasures.
Start with a base coat to protect your nails. Apply a nude polish as the base color. Once dry, plan the placement of your pearls, gold flakes, and seashells. Using a jewelry adhesive, carefully place each embellishment on the nails, creating a harmonious design that resembles a treasure trove found beneath the ocean waves. Finish with a high-gloss top coat to secure the embellishments and give your nails a polished, refined look.
In summary, ocean nails encapsulate the serene beauty and mesmerizing depths of the sea, offering a canvas for endless creativity and inspiration. Whether you opt for tranquil blue hues, intricate seashell designs, or vibrant coral accents, ocean nails transport you to a world of aquatic wonder. Embrace the allure of the ocean with these stunning nail art ideas, and let your fingertips become a captivating reflection of the sea’s boundless charm. Dive deep into this trend and discover the endless possibilities for expressing your love for the ocean through your manicure.
Save Pin
URL Copied
