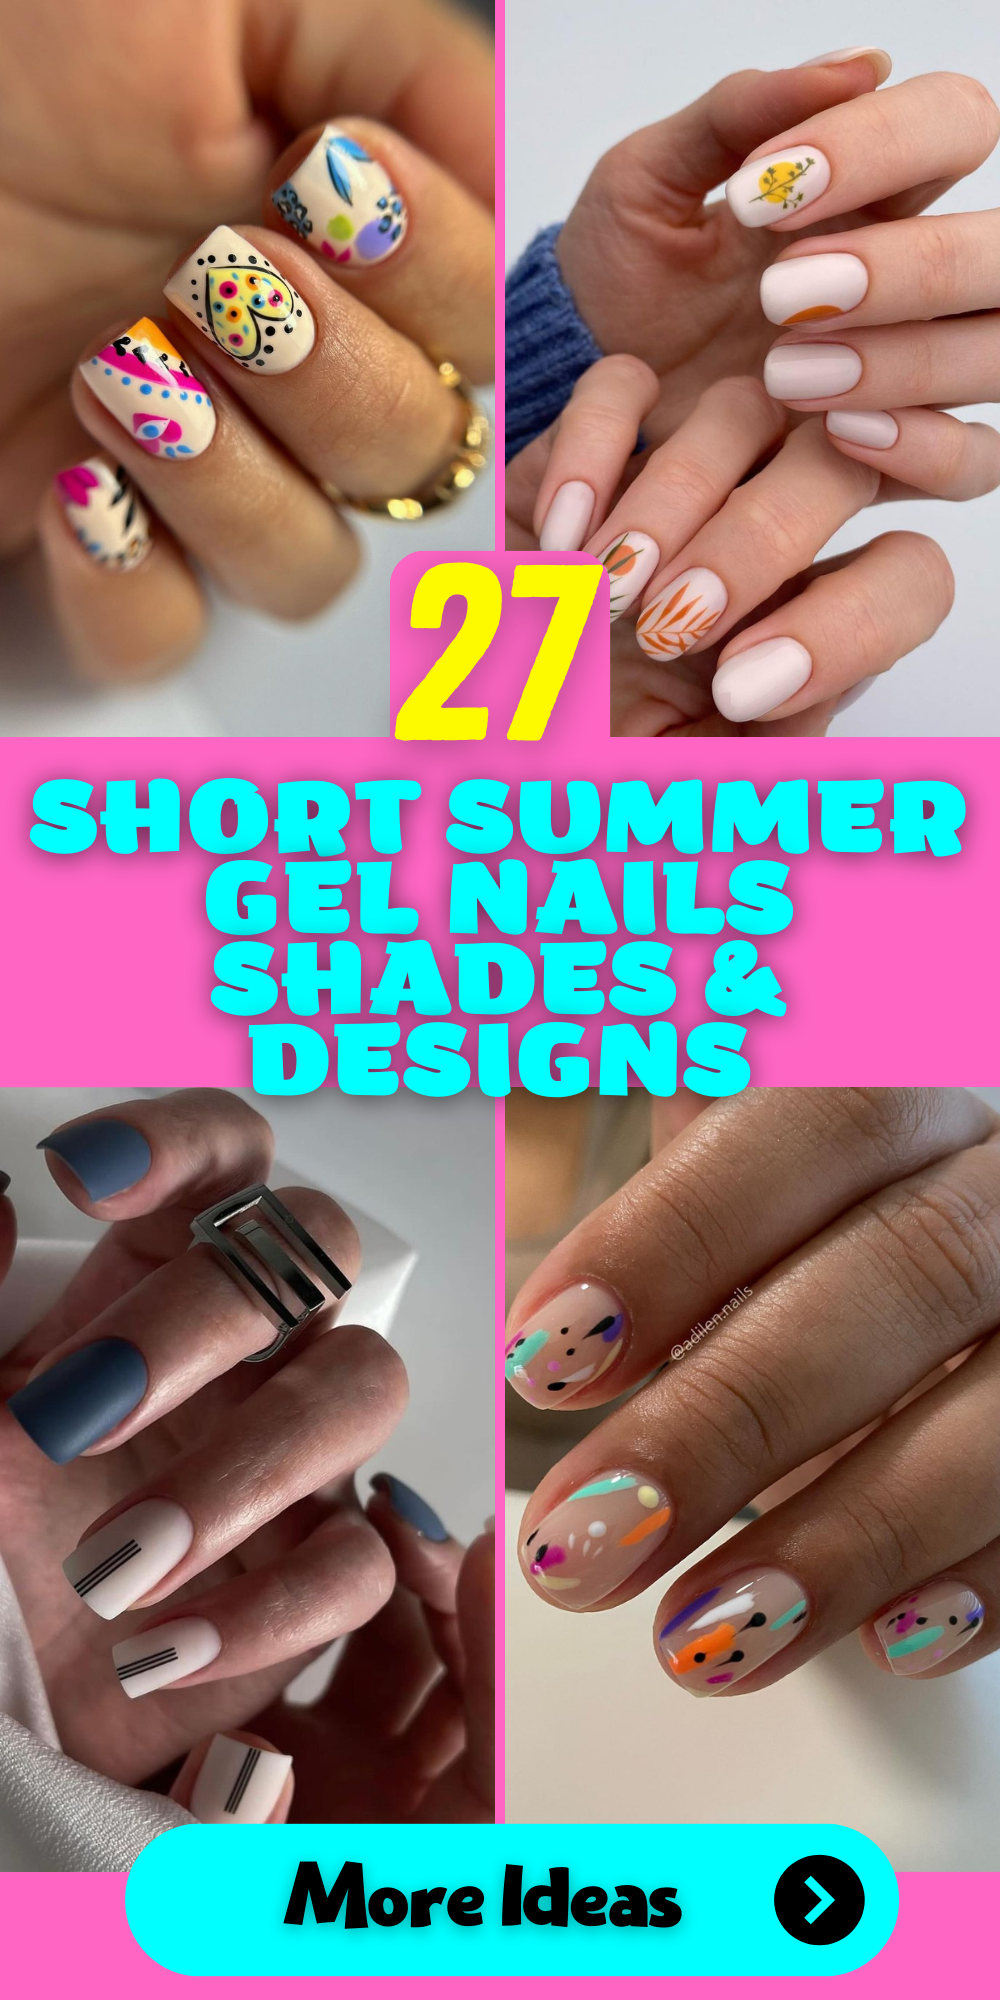
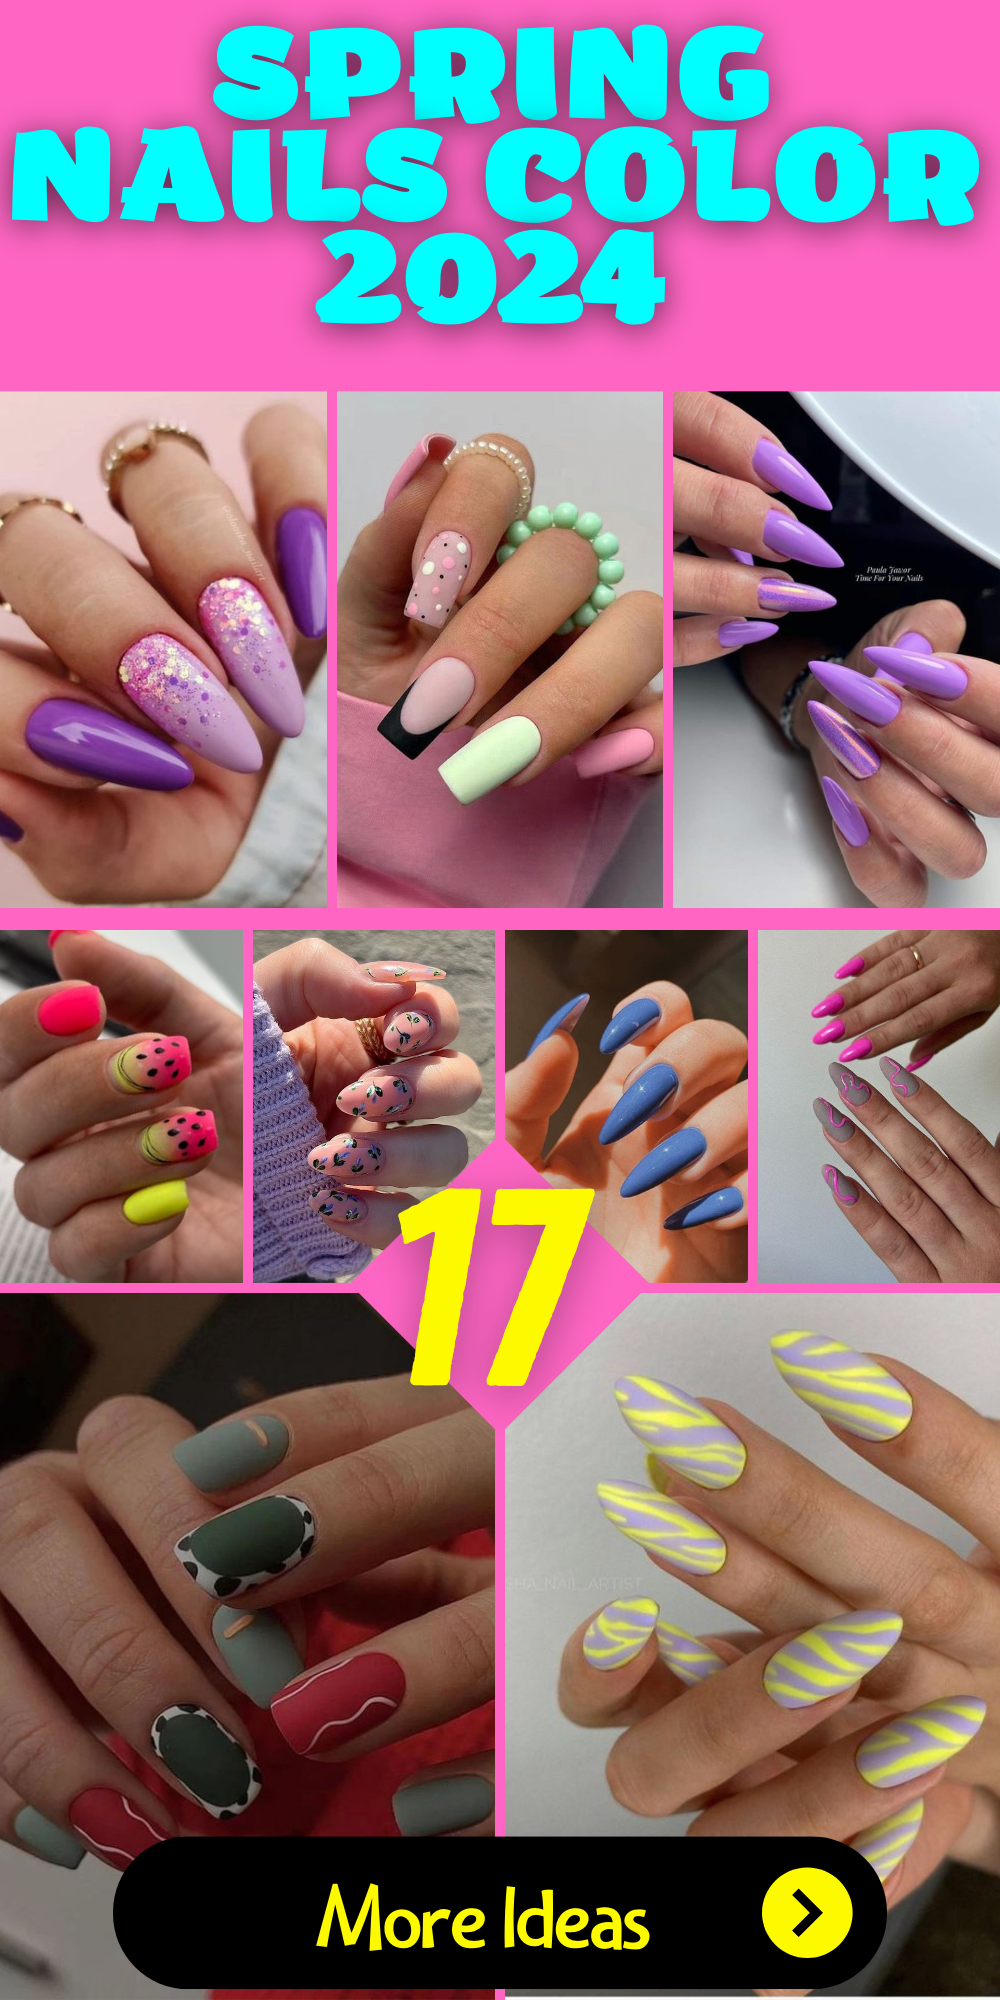
When the sun is hot and the beach is calling, there’s no better time to let your nails scream summer! Have you thought about what could summer nail art do for your look? Can simple designs bring out the playfulness in our summers? Well, stick around because we are going to unwrap some really cool and adorable ideas that are simple enough to copy and perfect for creating an impact!
Bold and Wild: Embracing Animal Prints
Animal prints are a timeless classic but when it comes to summer manicures they can get downright groovy. This design plays on the light/dark contrast of the traditional black and tan print with shots of pink and neon green, incorporated into a fun twist on the badem tırnak (almond nail) shape. The random placement of the print reflects the carefree nature of summer while the pink accents represent a flirty femininity.
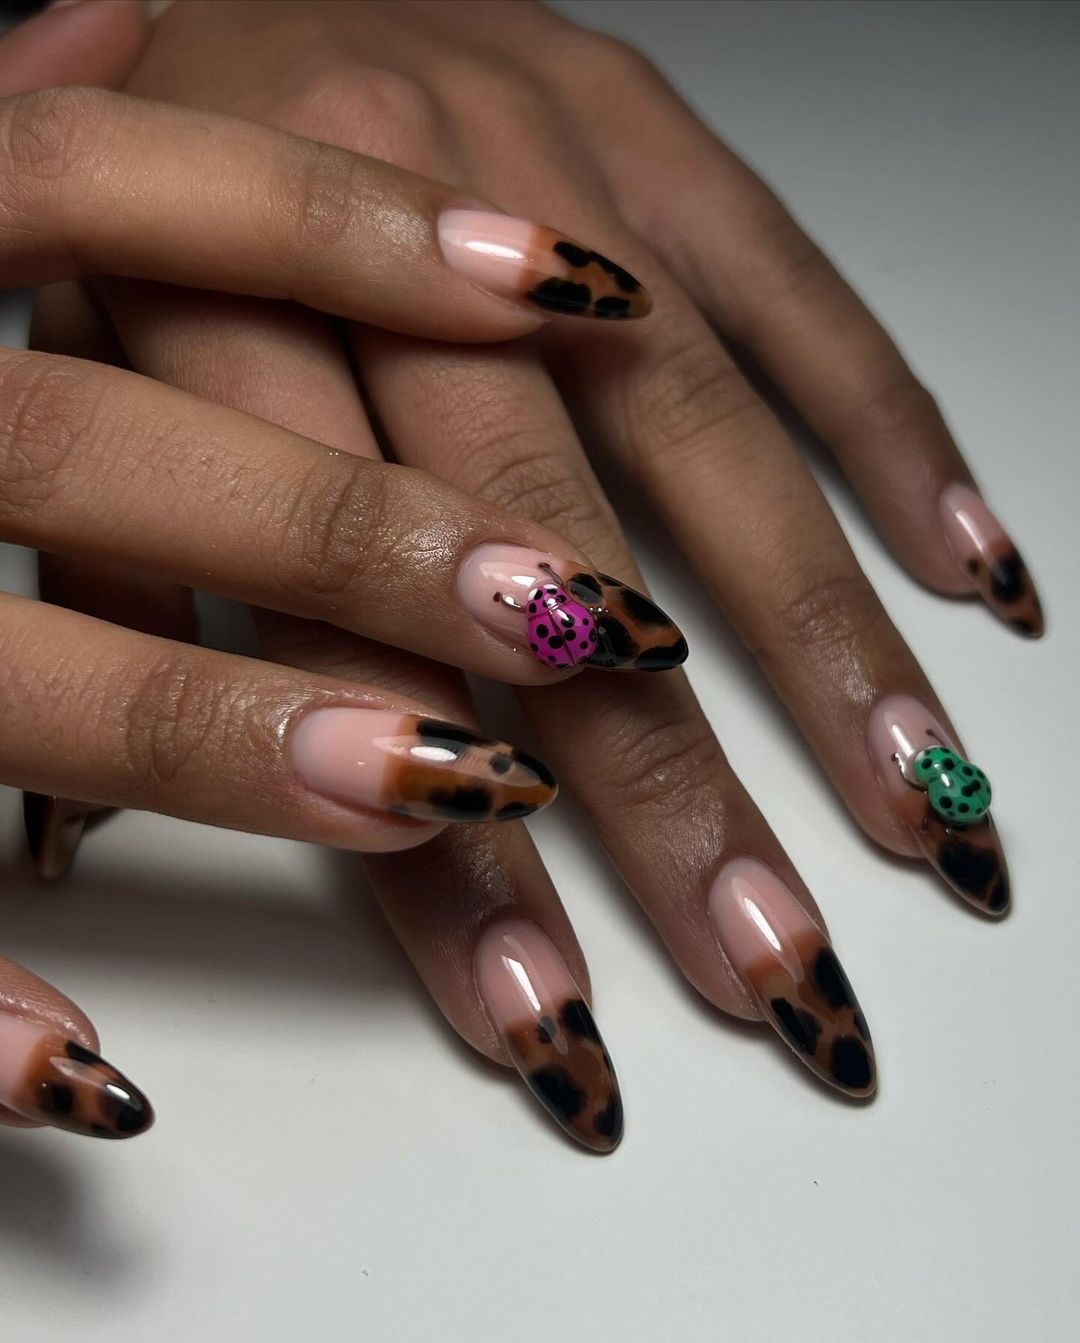
- Base coat: Seche Vite Clear Base
- Tan polish: Essie “Sand Tropez”
- Black polish: OPI “Black Onyx”
- Pink and green neon polish: China Glaze Neon Collection
- Top coat: CND Vinylux Weekly Top Coat
- Dotting tool and fine brush for detailing
These polishes have a gel finish which will ensure their longevity, plus high pigment neons that really pop in the beach days.
Start with a simple base coat to protect your nails. Apply two coats of tan polish, allowing it to dry between each. For the animal print, use a dotting tool to place irregular black spots over all nails or as an accent on one or two. For neon accents you want those dots in pink and green – add around 3 per nail, then take your fine brush dipped in pink to create petal-like designs at random around one or two nails for more emphasis. Finish off with glossy top coat so everything shines bright and lasts long!
Playful Geometry: A Colorful Harmony
Here’s a simple and elegant summer nail art idea that plays around with pastel colours and geometric shapes. The best thing about this design is that you don’t need long nails to pull it off. You only need to keep your nails short so they can be the bold base for fun and funky artistry.
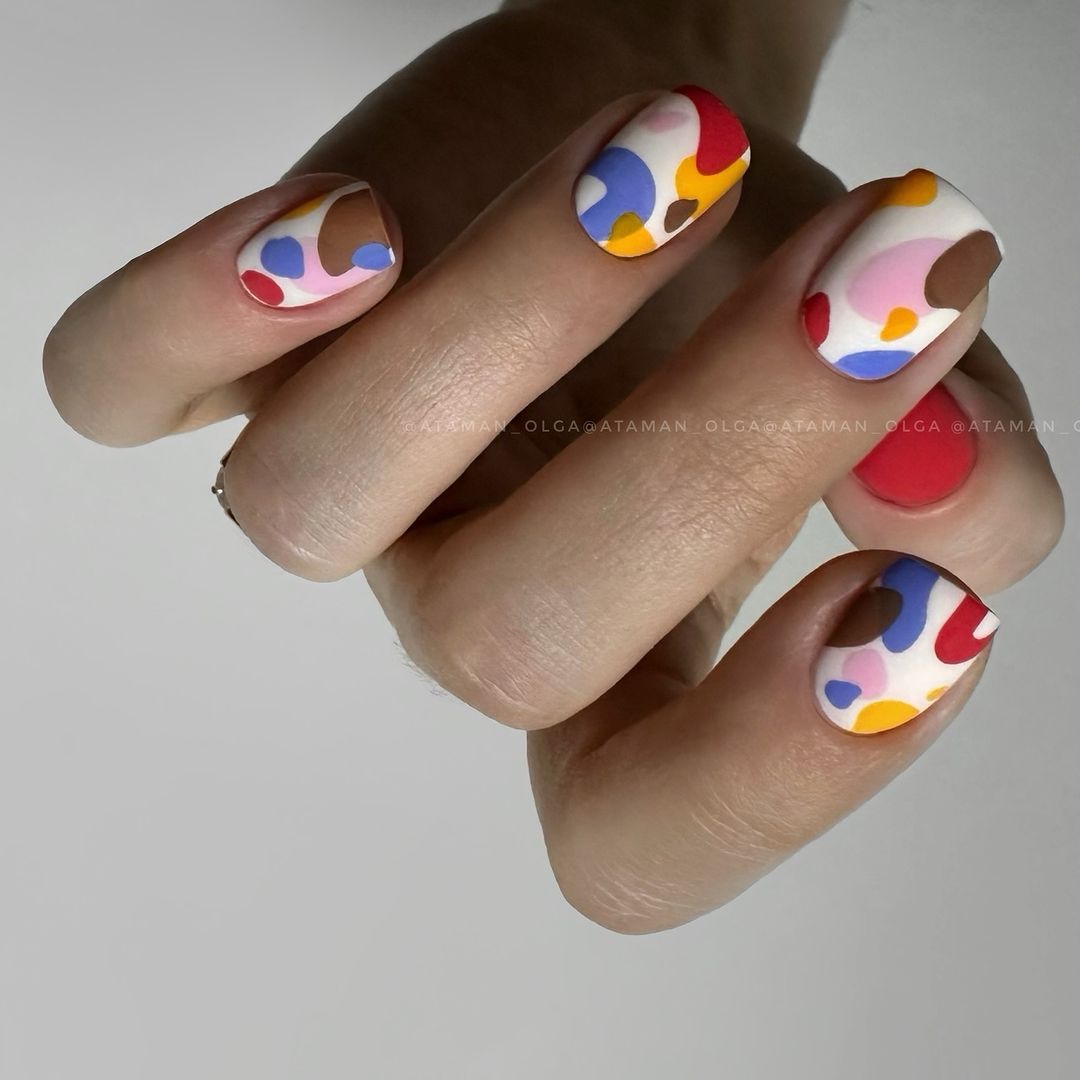
- Base coat: OPI Natural Nail Base Coat
- Pastel polishes: Sally Hansen Insta-Dri Pastels
- Red and white polish: Essie “Russian Roulette” & “Blanc”
- Detailing brush
- Top coat: Seche Vite Dry Fast Top Coat
These polishes are popular for being easy to apply, as well as providing vibrant colours, which is perfect when doing nail designs bright colours.
After applying the base coat, paint each nail a different pastel shade. Once these dry (and they shouldn’t take long), use a detailing brush to add simple shapes in contrasting colours. Don’t worry too much about making them perfect – just aim for aesthetic spontaneity instead. Finish with a quick top coat for an understated yet artistic finish.
Citrus Twist: Neon Edges with a Dash of Elegance
This is a very simple concept for summer nails with neon and acrylic overlays. The neon yellow color frames the white base in such a way that it screams summer fun. There are plain elegant lines mixed with vibrant accents which make your nails look like an accessory.
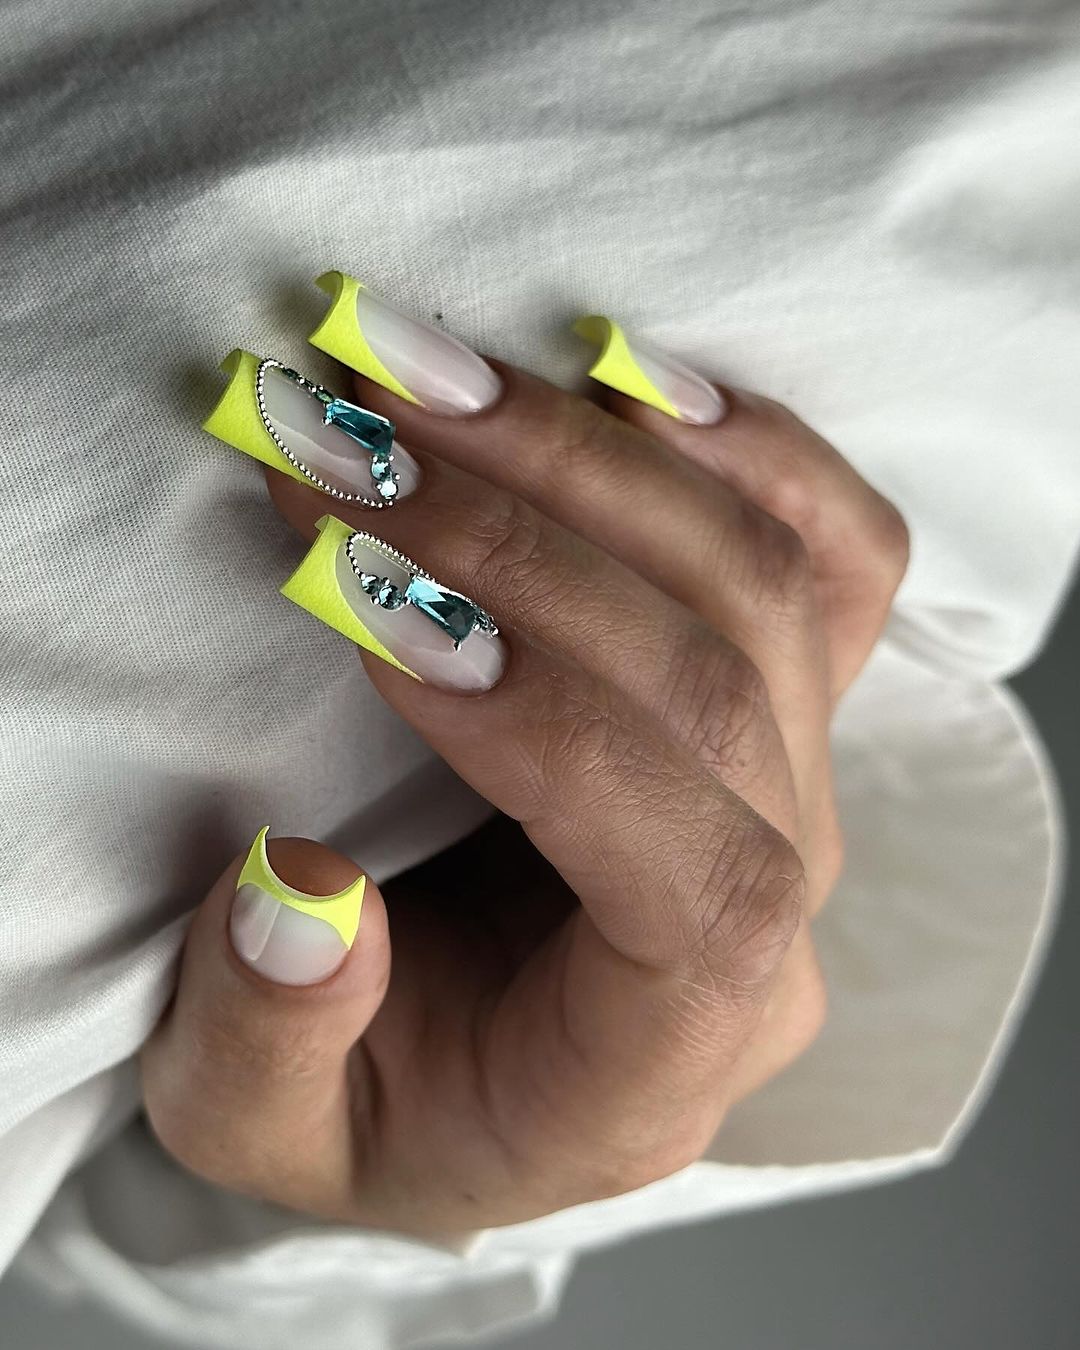
- ORLY Bonder Rubberized Base
- Mia Secret White Acrylic Powder
- China Glaze “Celtic Sun” Neon Polish
- Silver Studs and Caviar Beads
- Nail Glue
- Glisten & Glow Top Coat
When using gel and acrylic together it can create a design that will last longer.
Start off by applying base gel and sculpting with white acrylic. Once set, paint tips with neon polish using a straight brush for precision. Decorate with silver studs and beads using nail glue for that modelleri touch. Finish off with top coat of shine and protection.
Delicate Florals: Whisper of Summer
Envision fragile cherry blossoms against a bright white backdrop—a gentle homage to the tranquility of summer. These protez tırnak (fake nails) are made even more luxurious by artful splashes of gold, while delicate flower accents speak to eternal grace. It’s a lovely combination of simple elegance and refinement that can be adapted for both short and long nails.
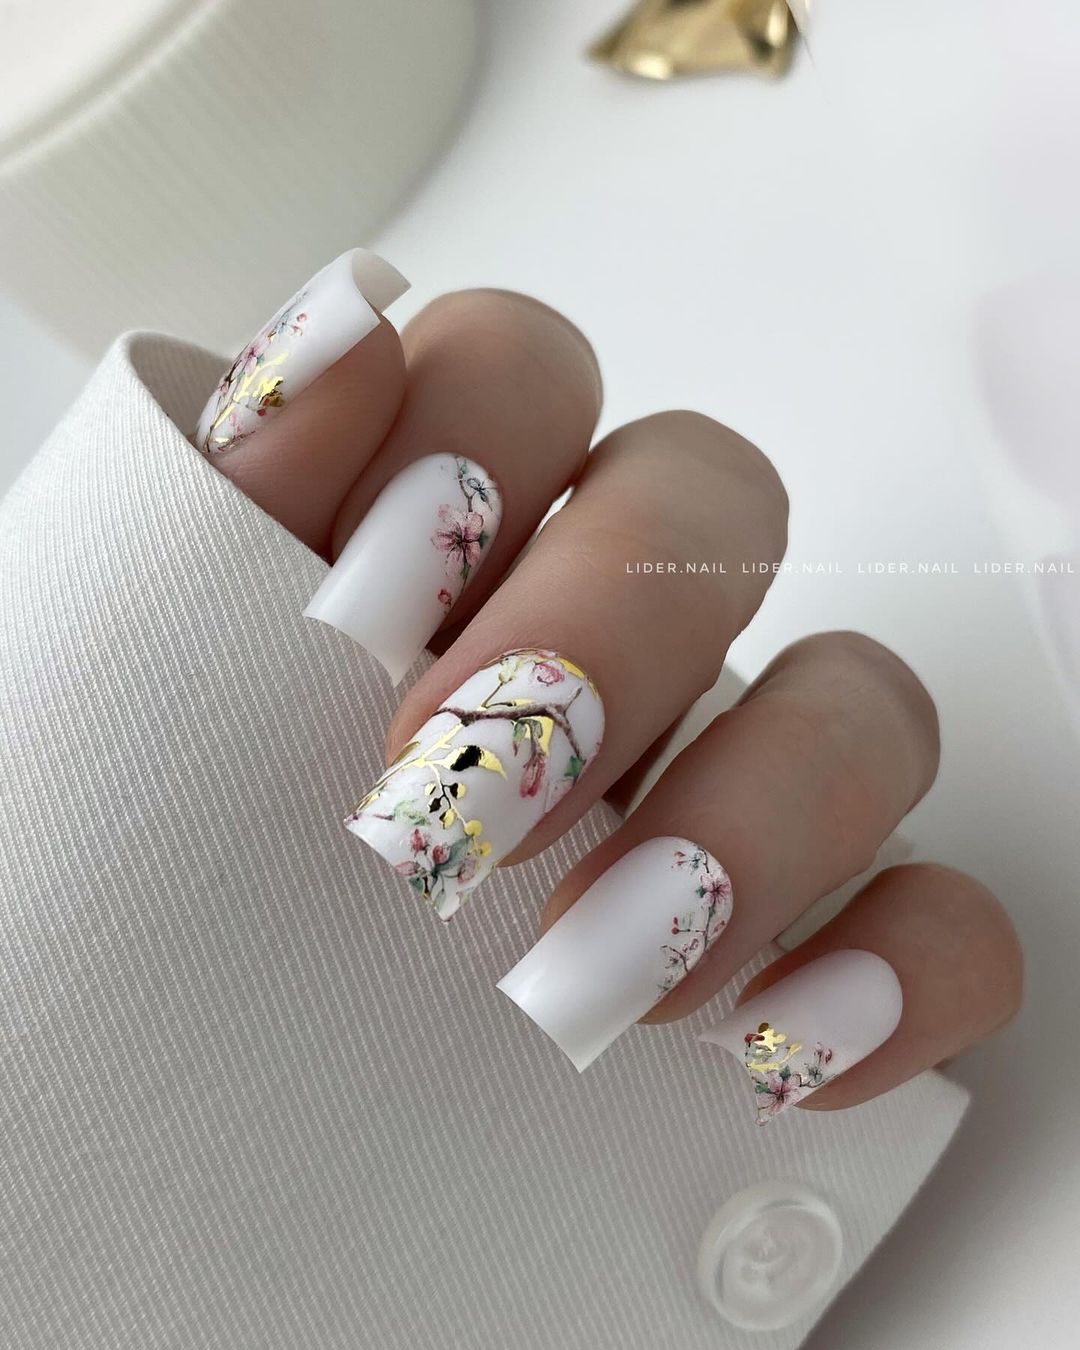
- Base coat: ORLY Breathable Treatment + Color
- White gel polish: Gelish “Arctic Freeze”
- Floral nail stickers: Sally Hansen Nail Art Pens
- Gold foil: Born Pretty Nail Art Foil
- Top coat: OPI Gel Top Coat
These products guarantee an uncomplicated yet stunning aesthetic result. Use a gel system for its durability and shine.
Apply two coats of white gel polish after your base coat. When it has cured, place the floral stickers carefully with tweezers and highlight with gold foil pieces. Finish off your masterpiece by sealing it with a gel top coat for lasting gel-like shine.
Save Pin
Vivid Pinks: Summer’s Bold Statement
Within that range of pale beautiful to electric aesthetic pastels, this is where hot pink blooms. In fact, the gel overlay does not only have an attractive appearance but it also ensures stronger coverage. This modelleri (model) is a simple yet elegant look that brings inspiration to life on your nails.
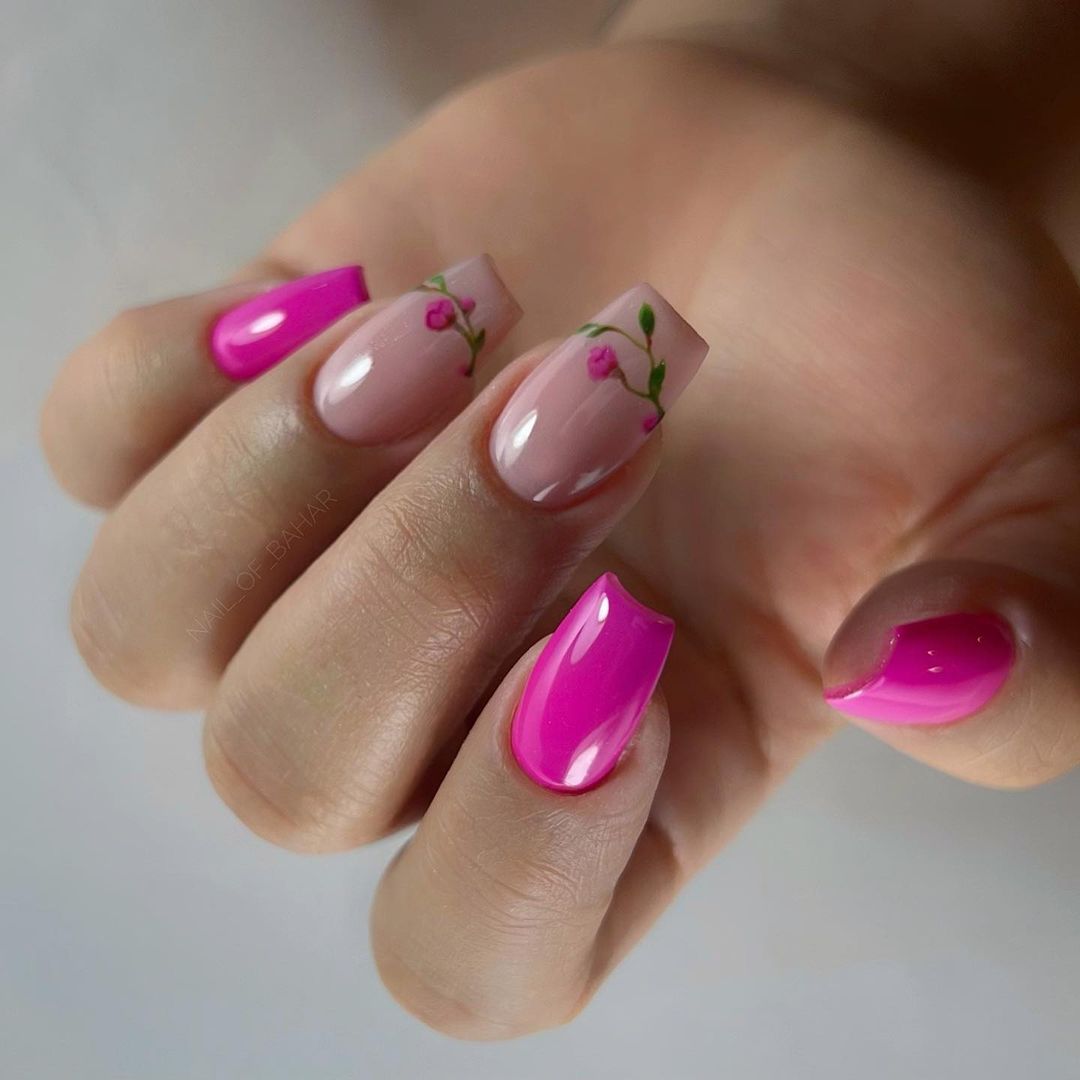
- Essie Gel Couture Base Coat
- LeChat Perfect Match “Hot Pink” & “Baby Pink”
- Nails Inc. Nail Art Pen in “Green Park”
- Gelish Top It Off
Pick high-quality gel polishes for the gradient effect; they will blend seamlessly and give you a neat finish.
Begin with applying a base coat. Then use two shades of pink gel polish to create a gradient by sponging them on. Wait until it sets and add small leaves using green nail art pen for more details. Finally seal everything with top coat to make it glossy and protect the design from peeling off easily.
Soft Pastels: Featherlight Elegance
For this simple and cute summer design, a soft blue matte background is used with pink heart accents. It’s an easy way to have fun with short nails that combines aesthetic pastel tones and a basic elegant shape. This look can be worn as daytime or night time for those glamorous summer events.
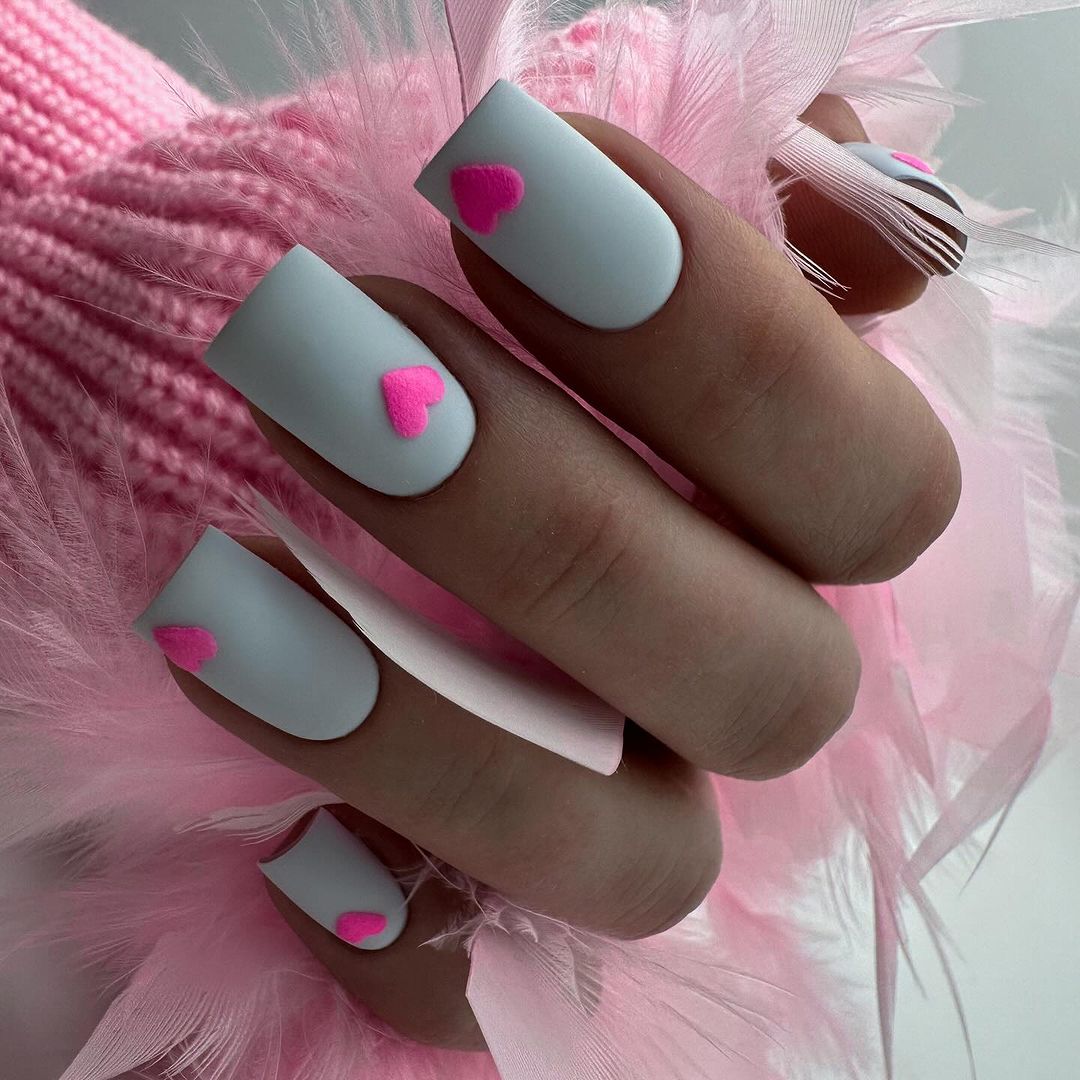
- Matte top coat: Sally Hansen Big Matte Top Coat
- Blue polish: China Glaze “Rain Dance The Night Away”
- Pink polish: Essie “Mod Square”
- Heart-shaped stencil or sticker
Choose a matte top coat for trendy non-gloss finish that makes the colours pop.
Paint your nails using the blue polish and let them dry completely. If you’re using a stencil, place it on the nail then apply pink polish; if using stickers just adhere them. Finish off with a matte top coat for that velvety touch.
Petal Pink Blossoms: Delicately Daring
The nails are cute or simple, that’s undeniable. It was achieved by putting two different shades of pink at the forefront. One is a light and delicate matte while the other is a bright and shiny statement. Decorated with white petals and small bright gems, they’re like fun signs to summer flowers. Whether you have short nails or longer lengths doesn’t matter because they represent an uncomplicated refined beauty of the season.
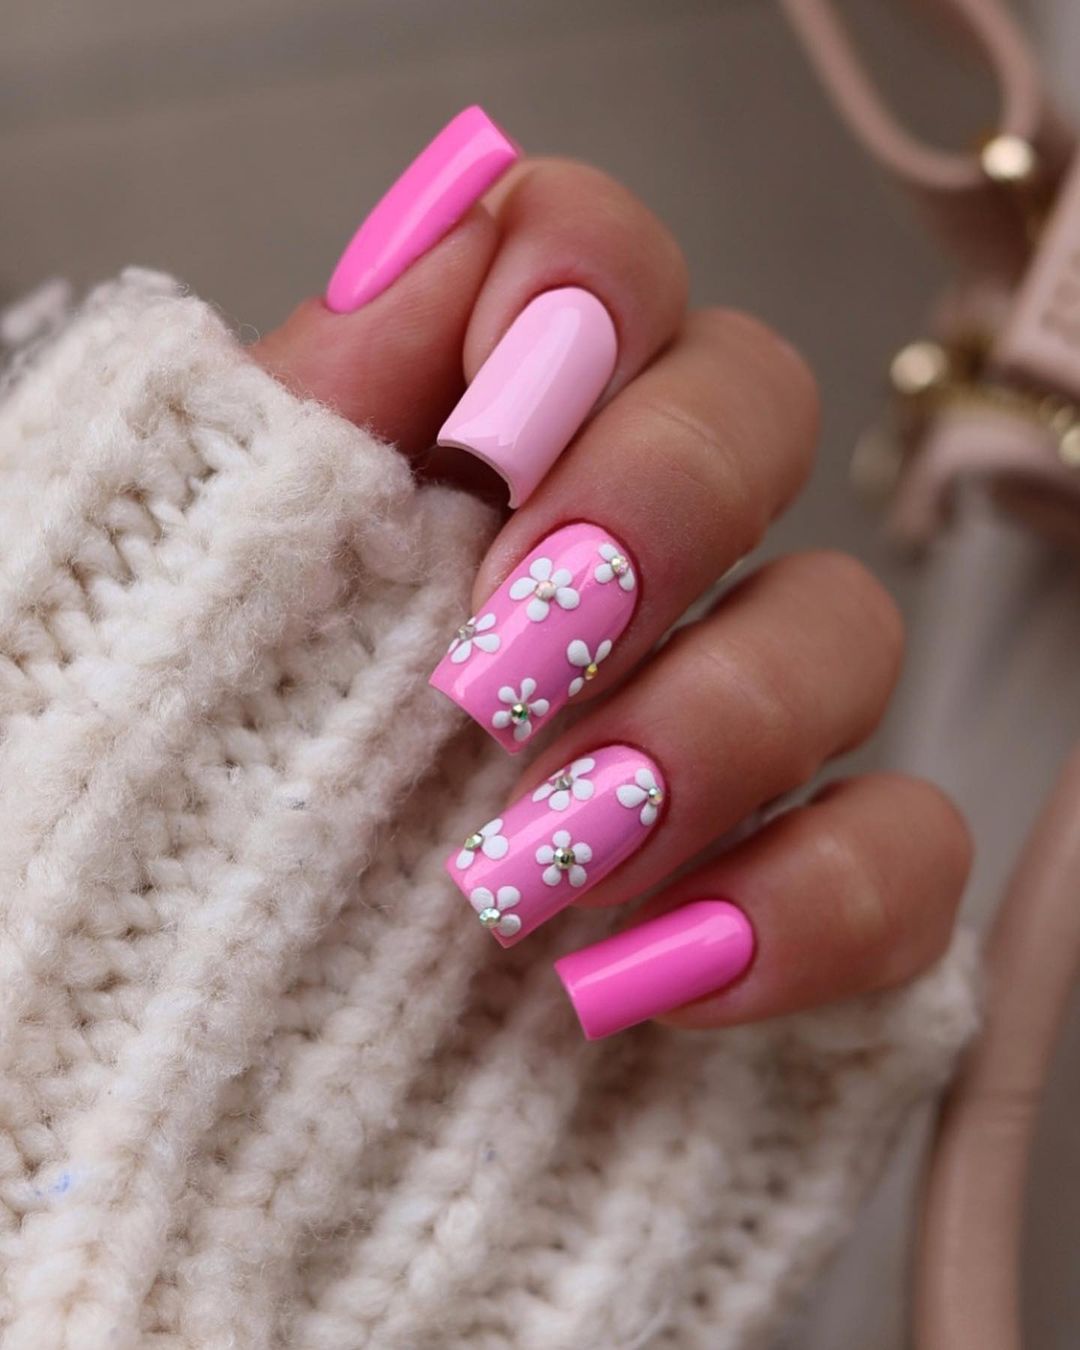
- Base coat: Nail Foundation Priming Basecoat Butter London
- Pink polishes: “Let’s Be Friends!” OPI, “Kiss Me on My Tulips” OPI
- Matte top coat: Matte Top Coat OPI
- White nail art pen: I Heart Nail Art Pen Sally Hansen
- Rhinestones: Clear Flatback Crystals Swarovski
- Glossy top coat: Out The Door Fast Drying Top Coat INM
This combination of textures (matte vs glossy) adds playfulness to look what makes it versatile enough for both day time or evening events in summer.
Apply base coat first. Then paint every other nail with soft pink polish and vivid one after that. Use white nail art pen on matte nails for petal design. Add some rhinestones if you want extra glam! Put matte top coat over the light pink painted ones but not over bright pinks so as to achieve multi-dimensional effect
Glossy Pink Elegance: A Touch of Shine
They have a clear glass-like appearance with pink roots that glow like healthy natural nails, while being classically simple. What catches the light and the eye is the glittering frontal nail. It’s easy but chic, combining the clean mani aesthetic with summer fun.
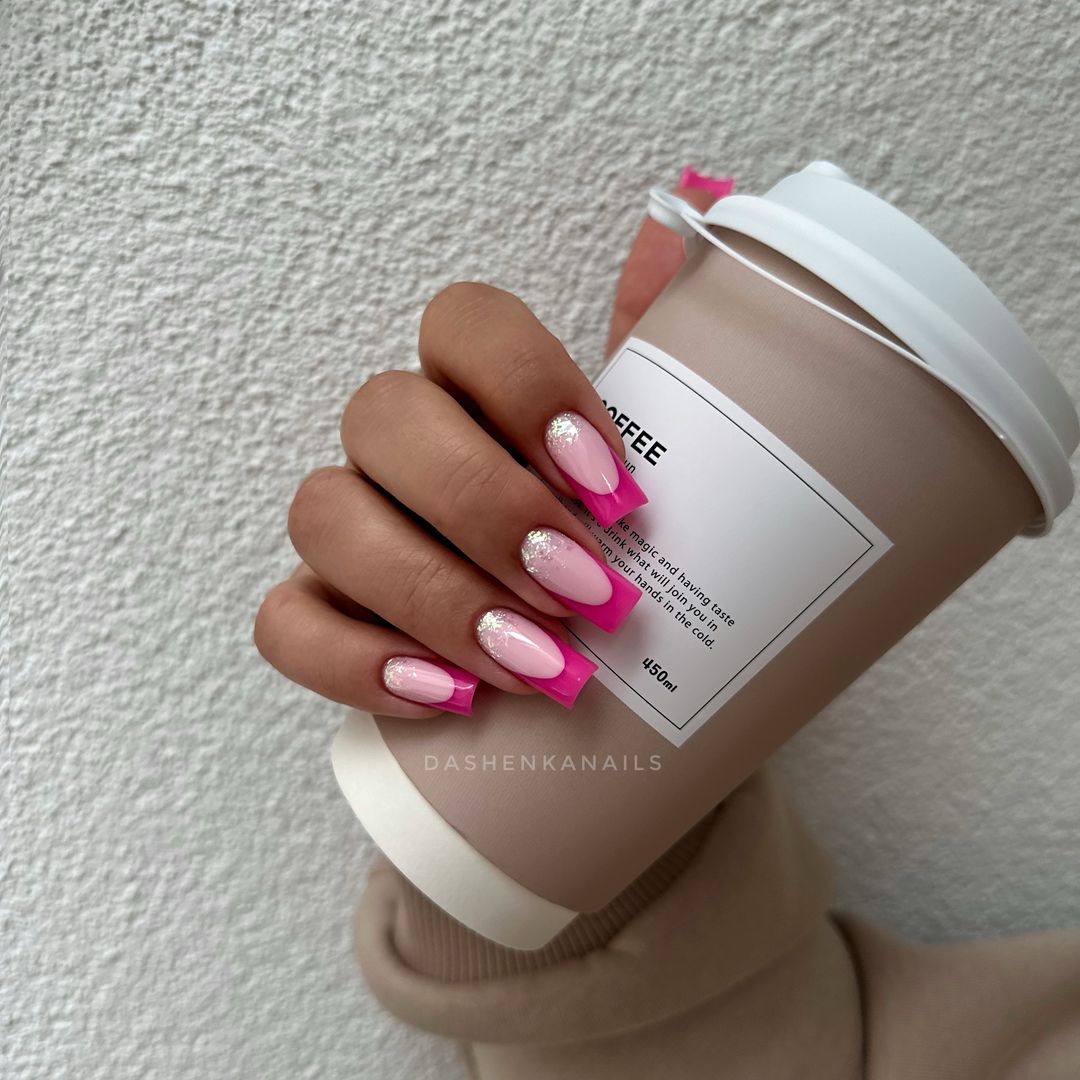
- Essie Strong Start Base Coat (or any other base coat)
- Gelish “Tickle My France-y” (or any other pink gel polish)
- ILNP “Juliette” (or any other glitter polish)
- Gelish Top It Off (or any other top coat)
These products will give you a subtle biab effect with strength and longevity provided by gel.
Start off with a base coat for protection. Apply two coats of pink gel polish on all nails, then add another two coats of glitter polish on only one accent nail. Finish up with a glossy top coat to seal in shine and give it a professional finish.
Citrus Charm: Zesty and Sweet
These nails are very fun, cool and they give you a fresh summertime vibe. A bright representation of the citrusy joys of summer; the white foundation is good as it acts like a blank canvas that makes the orange fruit designs look more vibrant popping out at you with all their summer-y freshness. But these aren’t just adorable, they’re also a great way to start a conversation.
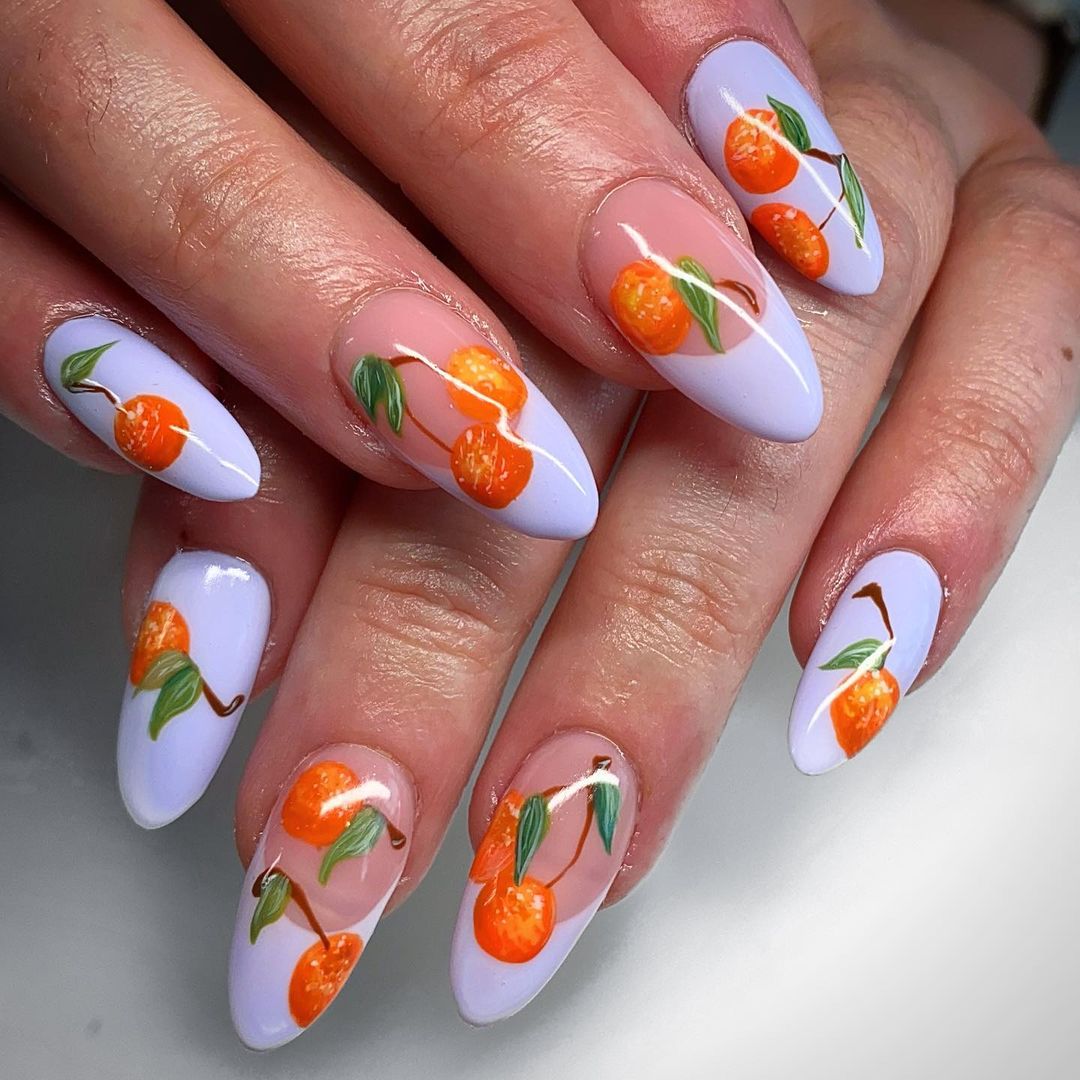
- Zoya Anchor Base Coat
- China Glaze “White on White”
- Essie “Meet Me At Sunset” & “Off Tropic”
- Detailing brush
- Zoya Armor Top Coat
Use these bold shades if you want to represent some summer fruits vibes through your nails.
Begin by applying base coat then paint your canvas white. Use orange polish for painting fruit parts and green for leaves making sure to use smaller brushes when dealing with stems. Finish off by sealing in design with top coat which will add glossy finish perfect for those sunny days.
Save Pin
Pastel Dreams: Abstract and Sleek
A simple but elegant nail design is created by mixing soft pastels with bold abstract lines. This gel manicure includes a dreamy lavender and muted peach with accents of stark black line that frames and elevates the whole look; it is the ultimate understated chic touch for any summer outfit.
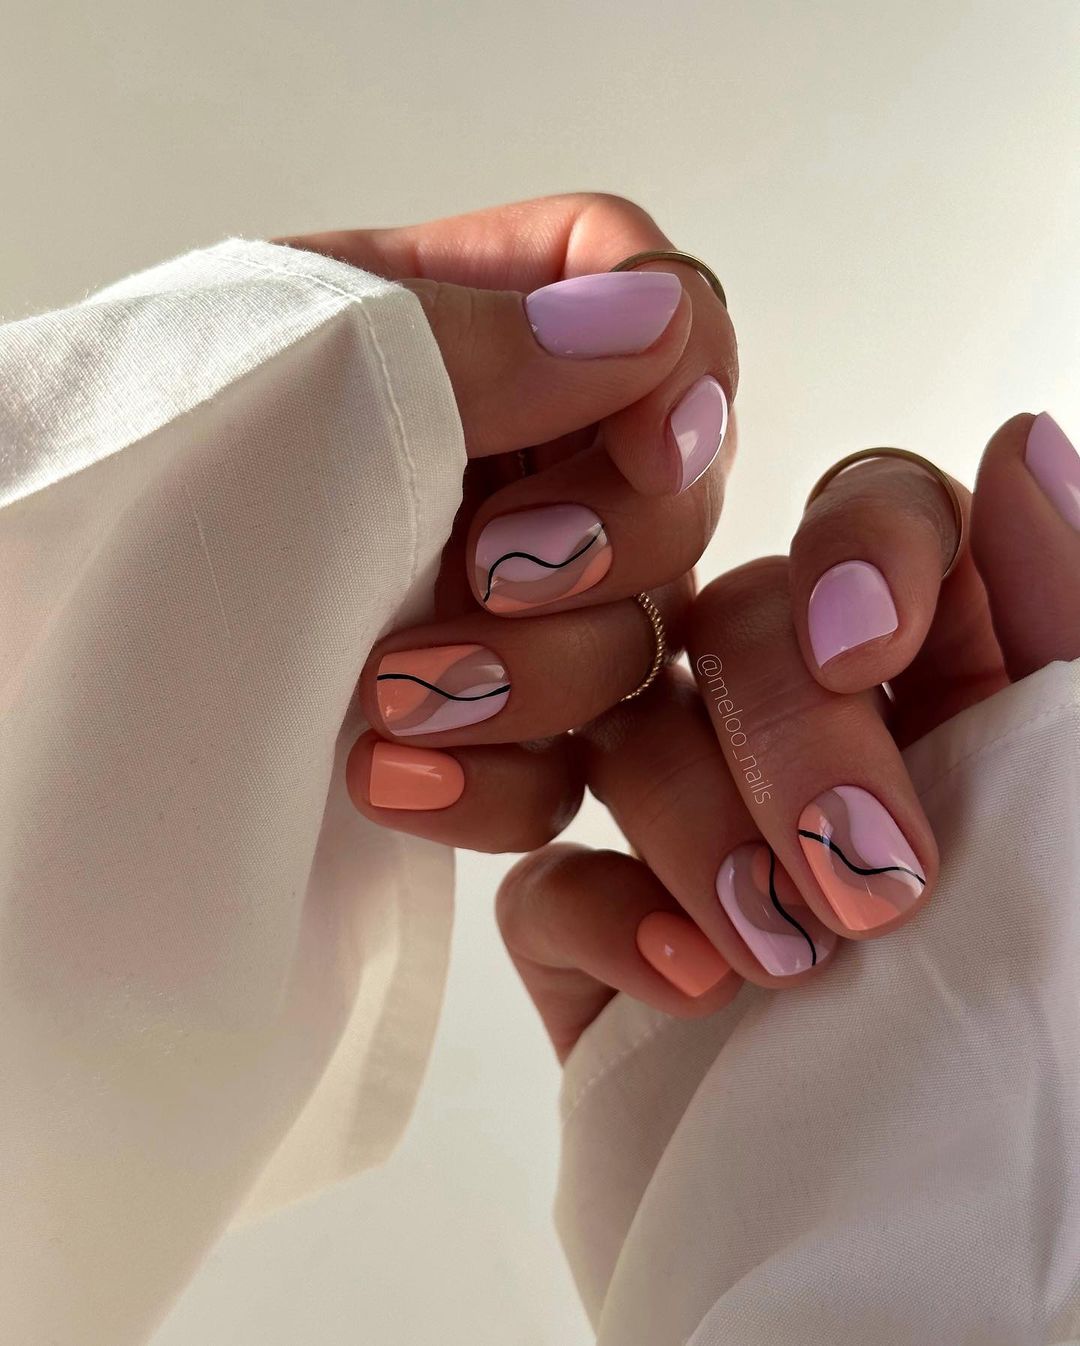
- Base coat: Orly Bonder
- Pastel polishes: Essie “Lilacism” and “Peach Side Babe”
- Black nail art liner: LA Girl, black
- Top coat: Seche Vite Dry Fast Top Coat
Apply one layer of base coat followed by two layers of each pastel polish; use the brush provided in each bottle to apply polish evenly onto nails. One thin wavy line should be drawn across the centre of nail plate using black nail art liner brush – this creates an abstract pattern which is unique to every individual’s nails; finally seal all this in with one generous layer of top coat to give long lasting gel like shine finish.
Modern Artistry: Bold Lines and Pops of Color
This plan is a new take on summer nail art. For this design, you will need a base of creamy white upon which bold wavy lines are drawn in black with hot pink and purple accents. It looks funky and modern like something you’d see in an art gallery. It’s perfect for anyone who wants their manicure to make a statement. This gel design is aesthetic as well as fun.
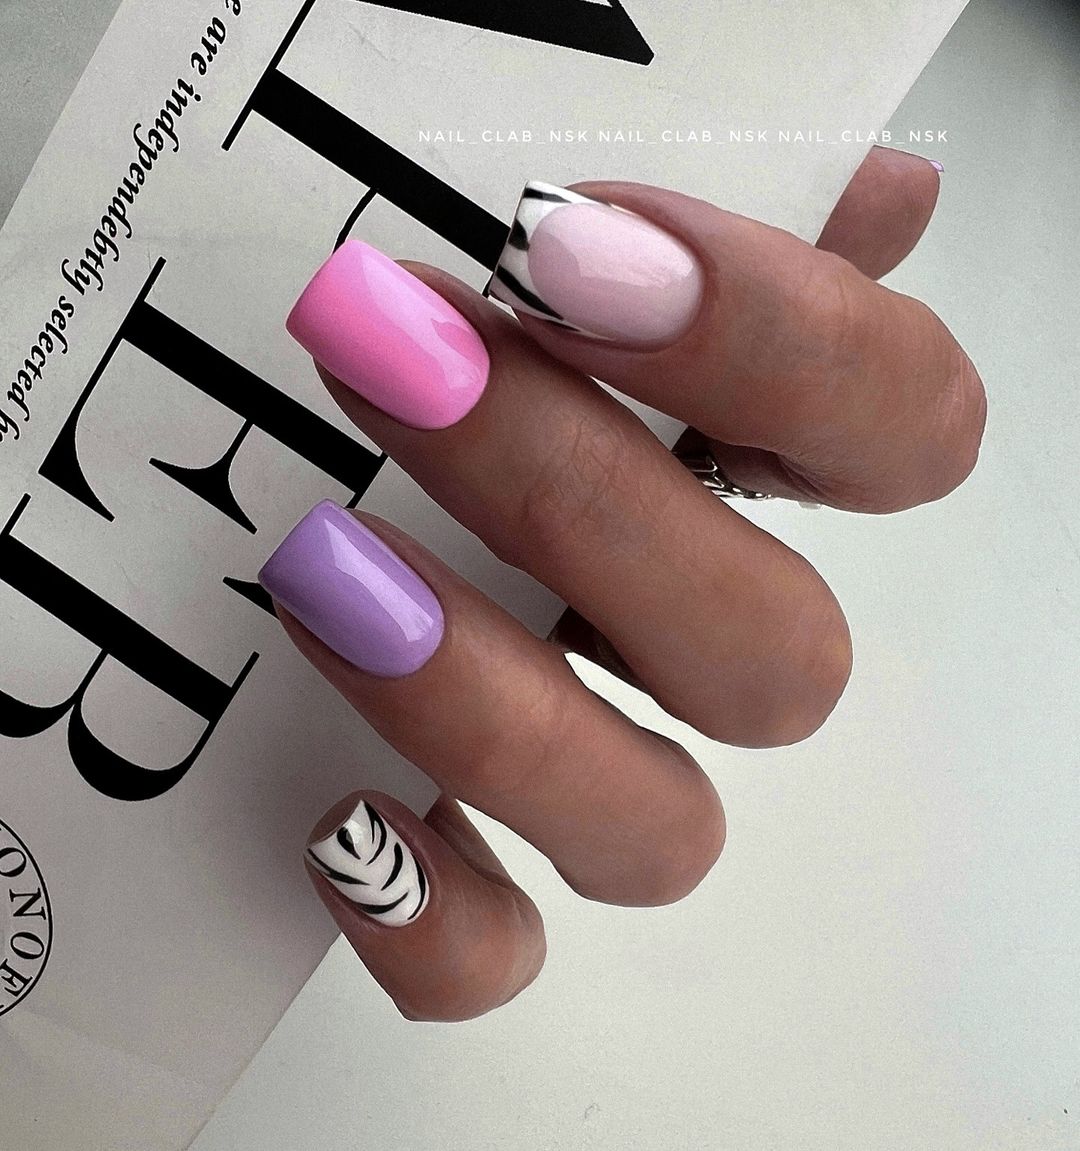
- Base coat: CND Stickey Base Coat
- White polish: OPI “Alpine Snow”
- Black striping polish: Stripe Rite in Black
- Pink and purple polishes: OPI “Shorts Story”and”Do You Lilac It?”
- Top coat: CND Super Shiney Top Coat
Using good-quality polishes ensures that the final result will be vibrant and long-lasting enough for complicated designs.
Apply the base coat first, then follow it up with two coats of white polish to create a blank canvas. Using the striping polish, make large irregular waves across each nail, leaving some areas empty. Fill in these spaces with alternating pink or purple color blocks. Finally, finish off with one layer of glossy top coat for smoothness and shine.
Festival of Flowers: Joyous and Vibrant
Here is a toast to the vivid colors and flower patterns that represent summer festivals. These nails mix gentle pink with neon tips and scattered simple flowers for a fun-loving design. Every nail tells its own tale of summer fun, making this design perfect for beach trips or summer parties.
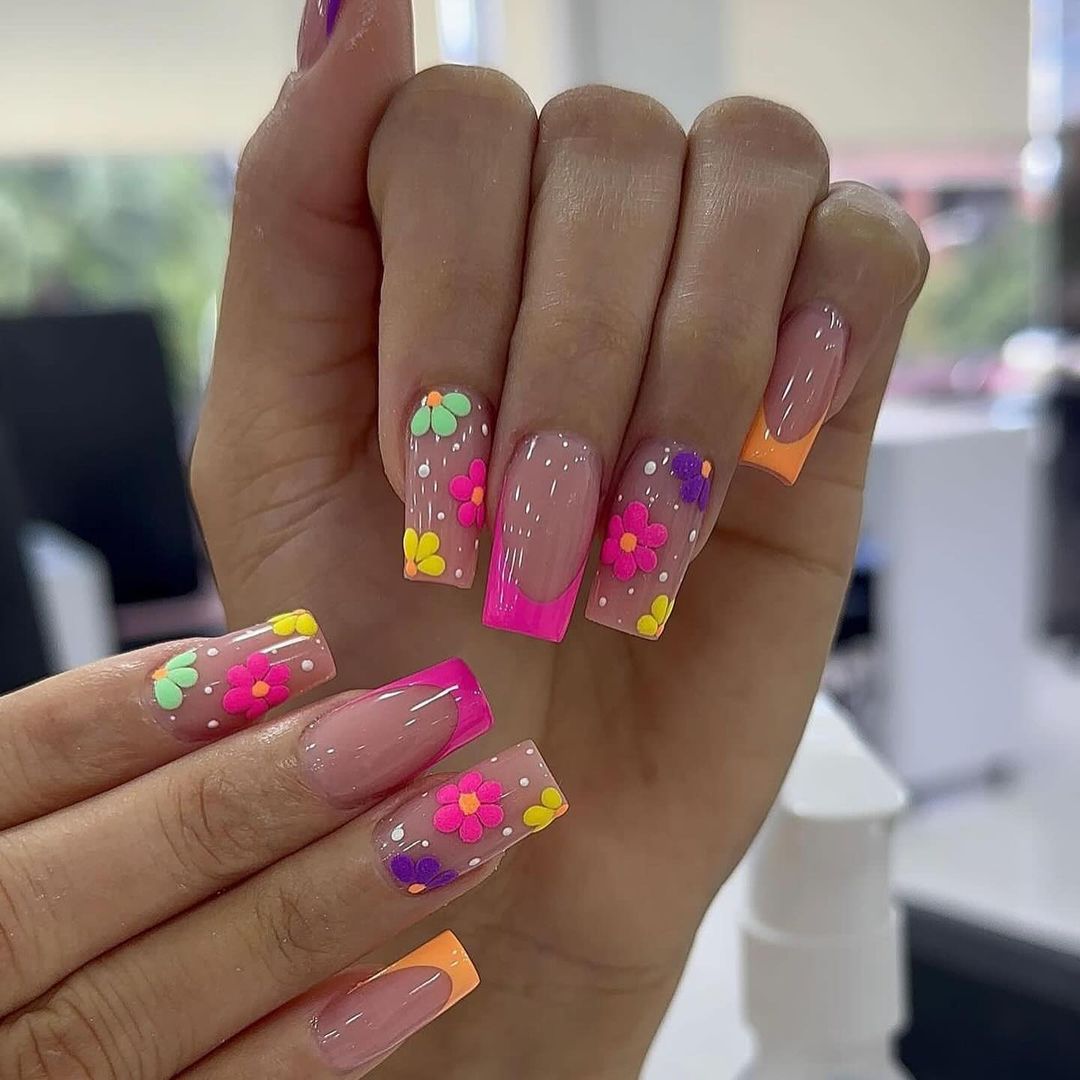
- Base coat: ORLY Bonder Rubberized Basecoat
- Pink polish: Zoya “Jordan”
- Neon polishes: China Glaze “Pool Party” and “Highlight of My Summer”
- Dotting tool
- Flower decals
- Top coat: Seche Vite Dry Fast Top Coat
Apply the pink polish after the base coat. Use the dotting tool to put neon polish at the tips, then add some flower decals. Finish with a top coat so your designs can survive all summer long.
Groovy Waves: Retro Vibes and Modern Twist
This design revives the old school with a new twist by making use of groovy waves created through cold colors such as mint and light yellow. It’s an easy and fun gel design inspired by the carefree 60s and perfect for the summer vibes of today.
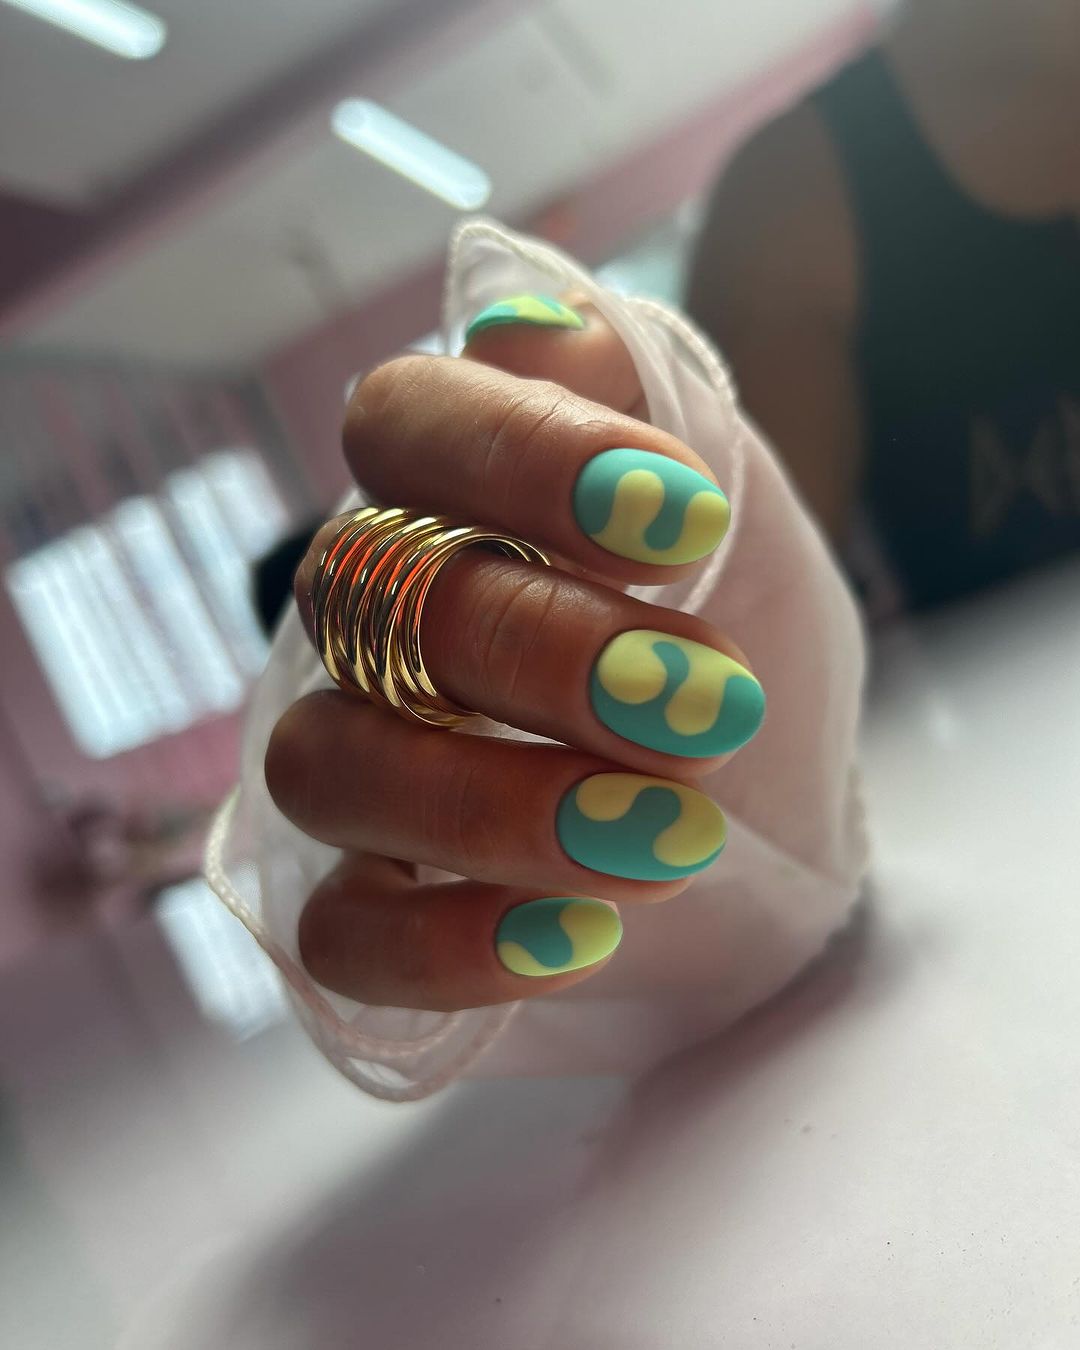
- Base coat: OPI Natural Nail Base Coat
- Mint gel polish: Essie Gel Couture “Mint Candy Apple”
- Yellow gel polish: CND Shellac “Banana Clips”
- Nail art brush for detailed work
- Top coat: OPI GelColor Top Coat
Apply two coats of mint gel polish after the base. Use yellow gel polish with a fine brush to create wavy lines. Cure and finish with a gel top coat for long lasting neon effect.
Striped Harmony: Bold Contrasts
To make a look both wild and elegant, this design is an encounter between classic white with bold neon pink and complex zebra stripes. It’s a statement of confidence as well as style that represents the vibrant spirit of summer nail art.
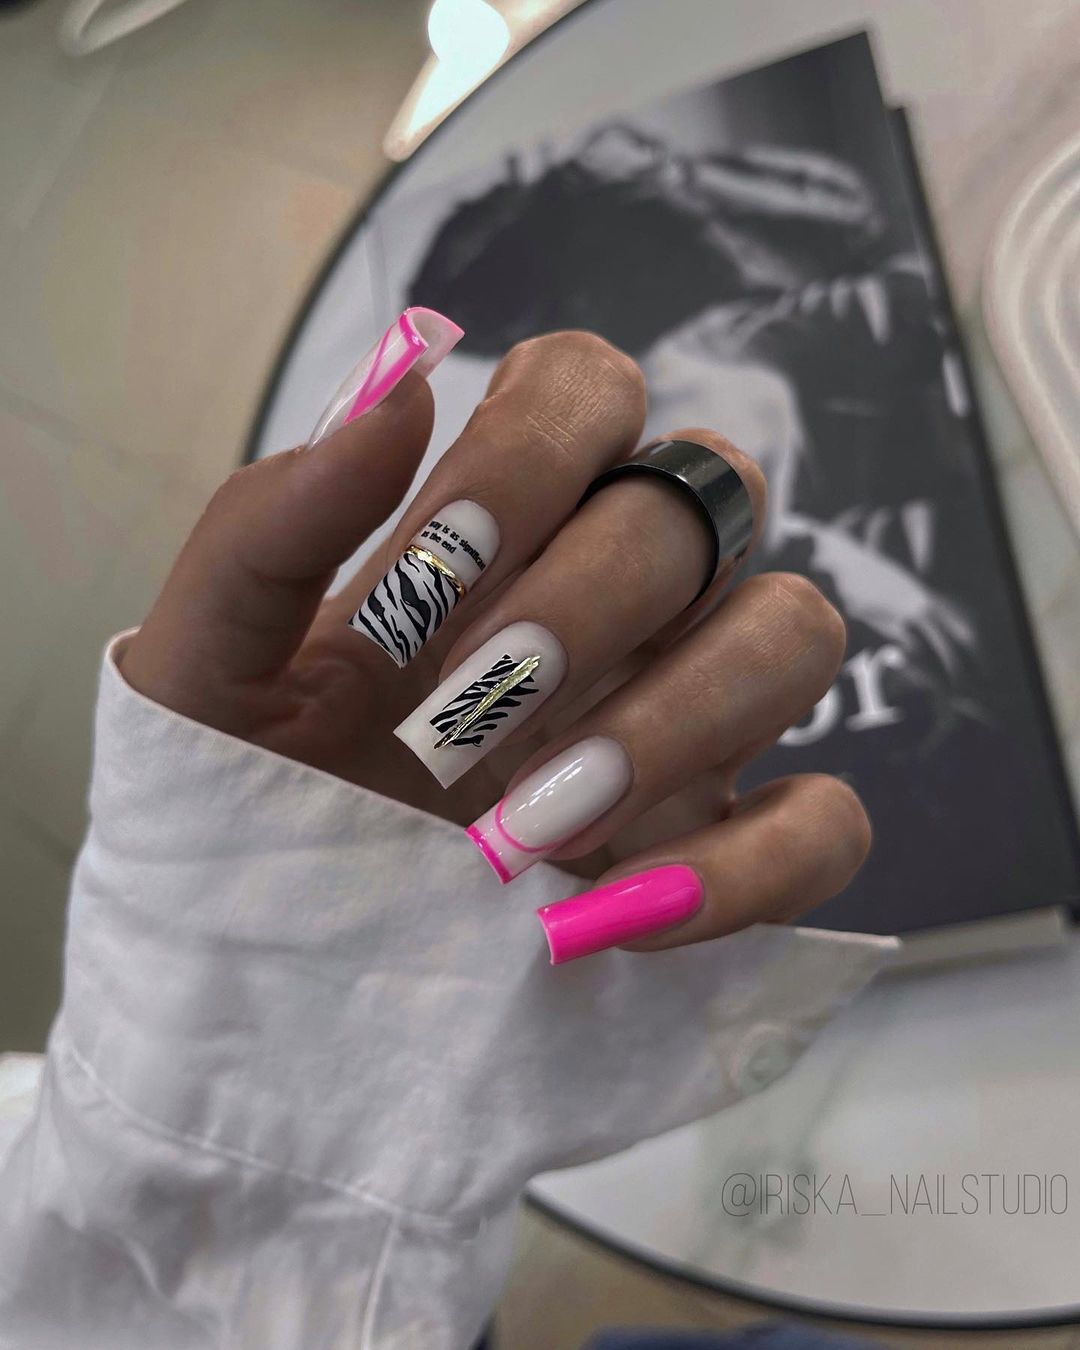
- Base coat: ORLY Bonder Rubberized Base Coat
- White polish: Sally Hansen Insta-Dri “White Pick It Fence”
- Neon pink polish: China Glaze “Pool Party”
- Black nail art pen: Nails Inc Nail Art Pen in “Black”
- Top coat: Seche Vite Dry Fast Top Coat
Apply base, then white polish. For neon tips, tape off sharp line and paint neon pink. Add zebra stripes with art pen. Finish with top coat.
Neon Ombré: Summer Sunset
This design in neon ombré looks as if it were part of a summer sunset and has lively yellows and pinks that blend into one another around an intense black line. It is funky, bright and represents the comforting heat of summer.
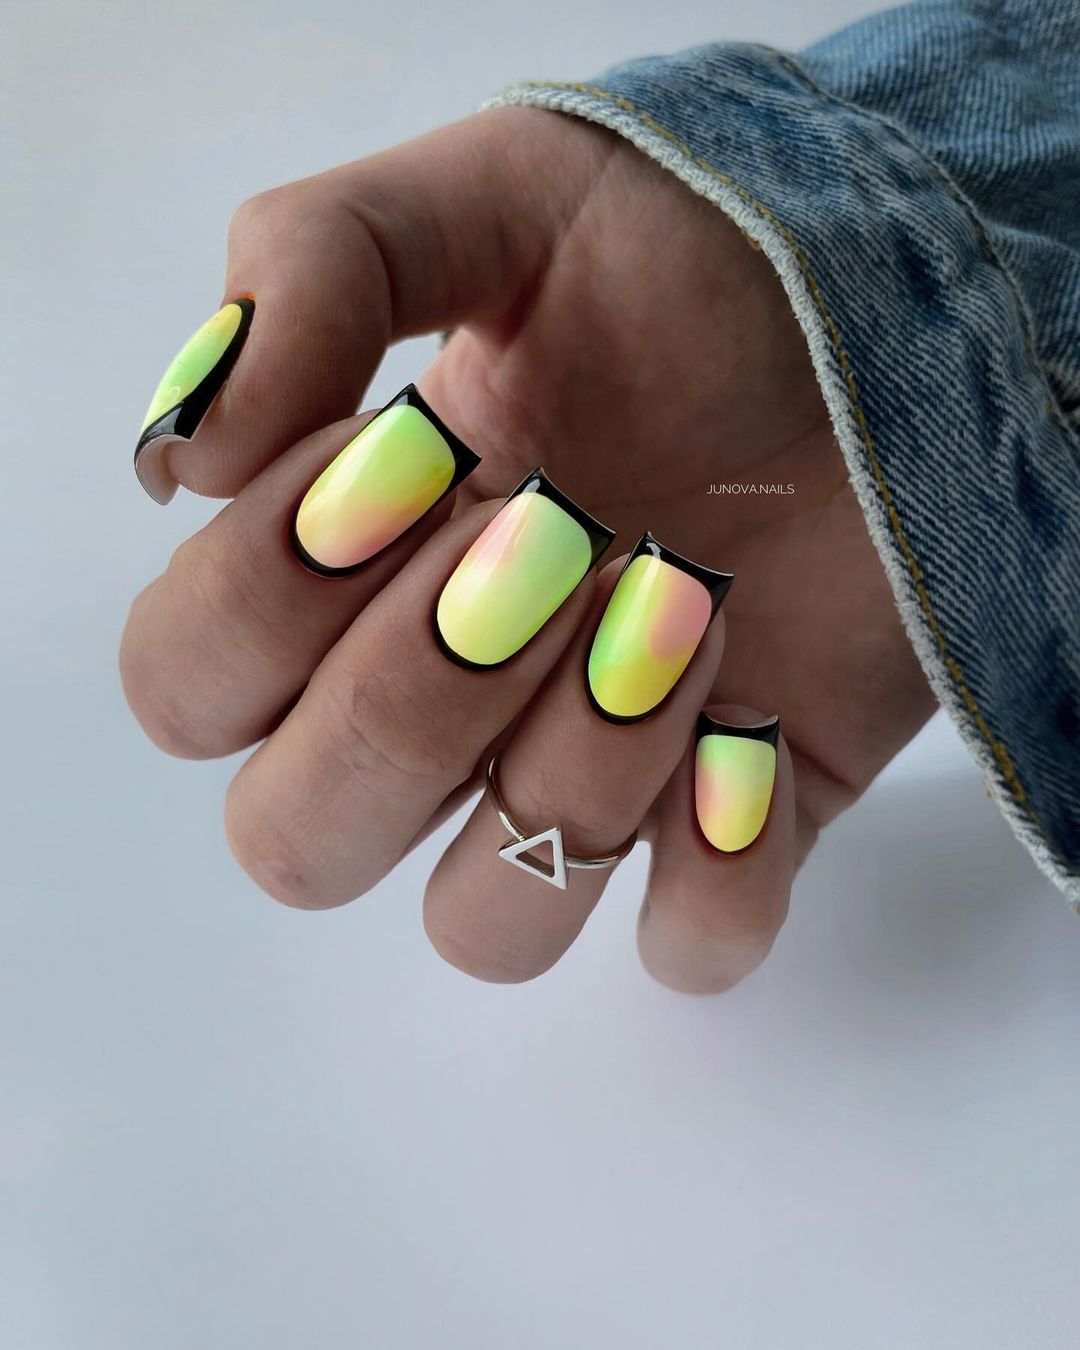
- Base coat: Essie Here To Stay Base Coat
- Neon polishes: Orly “Neon Heat” and “Hot Shot”
- Black striping polish: Stripe Rite in Black
- Sponge for ombré effect
- Top coat: INM Out the Door Top Coat
Start with applying base coat. Blend neon polishes using a sponge for ombre effect. Wait until dry then outline your nails with black striping polish. Apply top coat for gel-like shine, which dries quickly so it won’t smudge.
Pink Stripes and Silver Studs: Bold and Edgy
Inject summer with a hint of rock and roll via a gel manicure that can’t be ignored. Bright pink stripes create a bold backdrop, while silver studs add an aggressive finish. This design doesn’t whisper; it screams confidence.
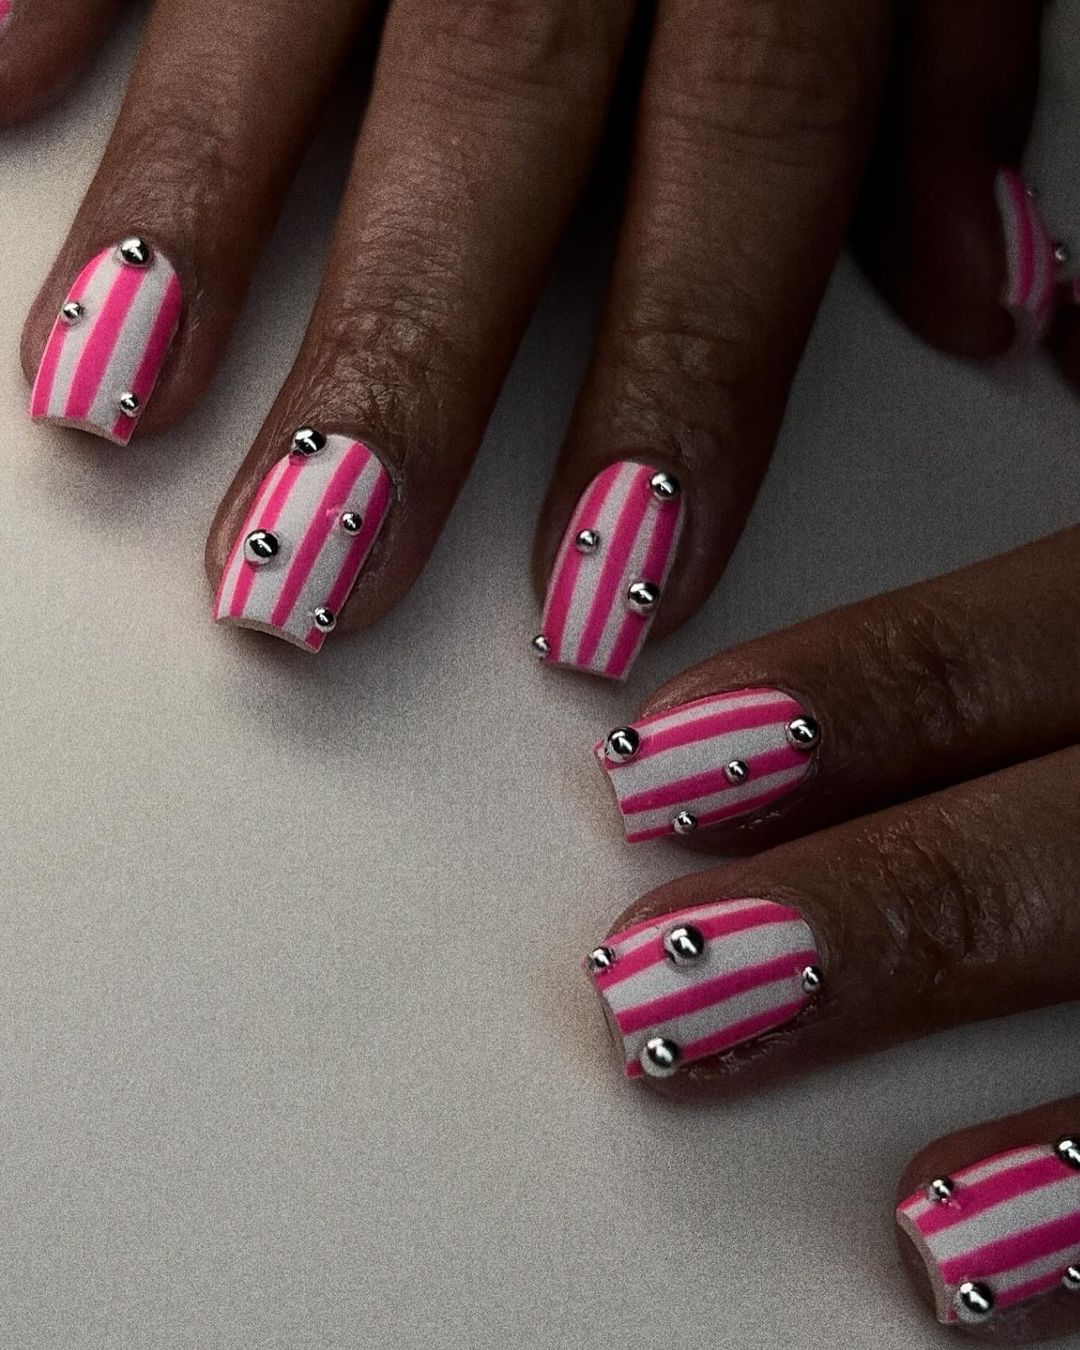
- Base coat: Orly Rubberized Base
- Bright pink polish: Essie “Bachelorette Bash”
- Silver studs and nail glue
- Top coat: Seche Vite Dry Fast Top Coat
Begin with applying a base coat to safeguard your nails against damage. Paint the bright pink polish in evenly spaced lines. While the polish is still sticky, position the silver studs with nail glue so they will not fall off easily. Seal this with another top coat for more shine and protection.
Dainty Fruit: Whimsical and Delicate
The nails gain a sweet, simple and aesthetic appearance coming from a soft base of pale pink color decorated with strawberries and flowers. This is one gel manicure that you will fall in love with easily; therefore, it would be perfect for those summer days filled with fun.
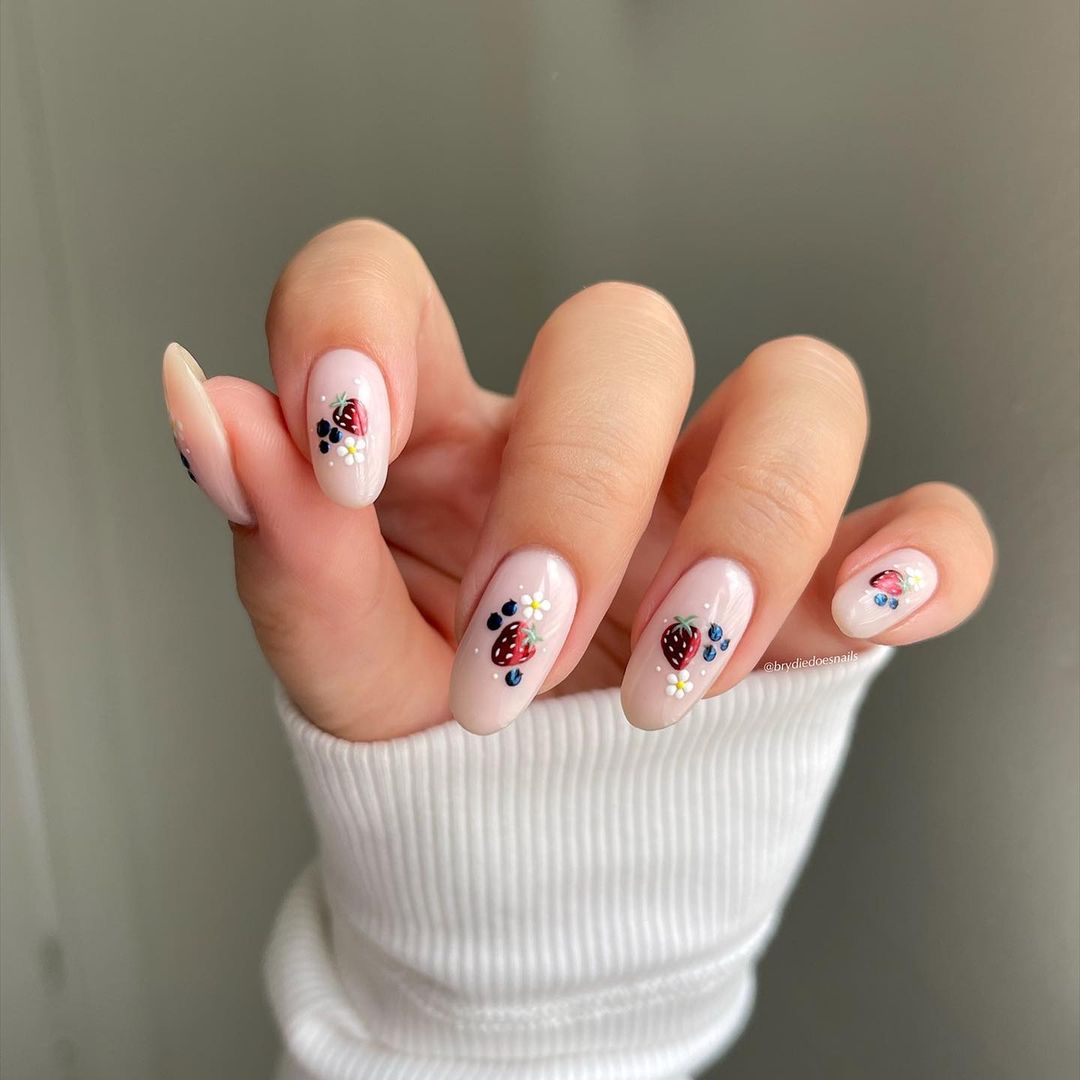
- Base coat: CND Sticky Base
- Pale pink gel polish: CND Shellac “Romantique”
- Red, green, and white gel polish for detailing: CND Shellac “Wildfire,” “Lush Tropics,” and “Cream Puff”
- Fine brush for detailing
- Top coat: CND Shellac Top Coat
Apply your base coat, then apply a pale pink gel polish over the top. Using your fine brush add on some reds greens or whites to create strawberries or flowers respectively. Cure this under UV light before finishing off with another layer of top-coat which should give it that long-lasting gel finish.
Modern Almond: Abstract and Trendsetting
Welcome the summer with an abstract gel mani, mixing soft almond shapes with a modern touch. Luxe it up with gold accents and add a pop of freshness with green. Simple but fancy, this manicure is undoubtedly chic.
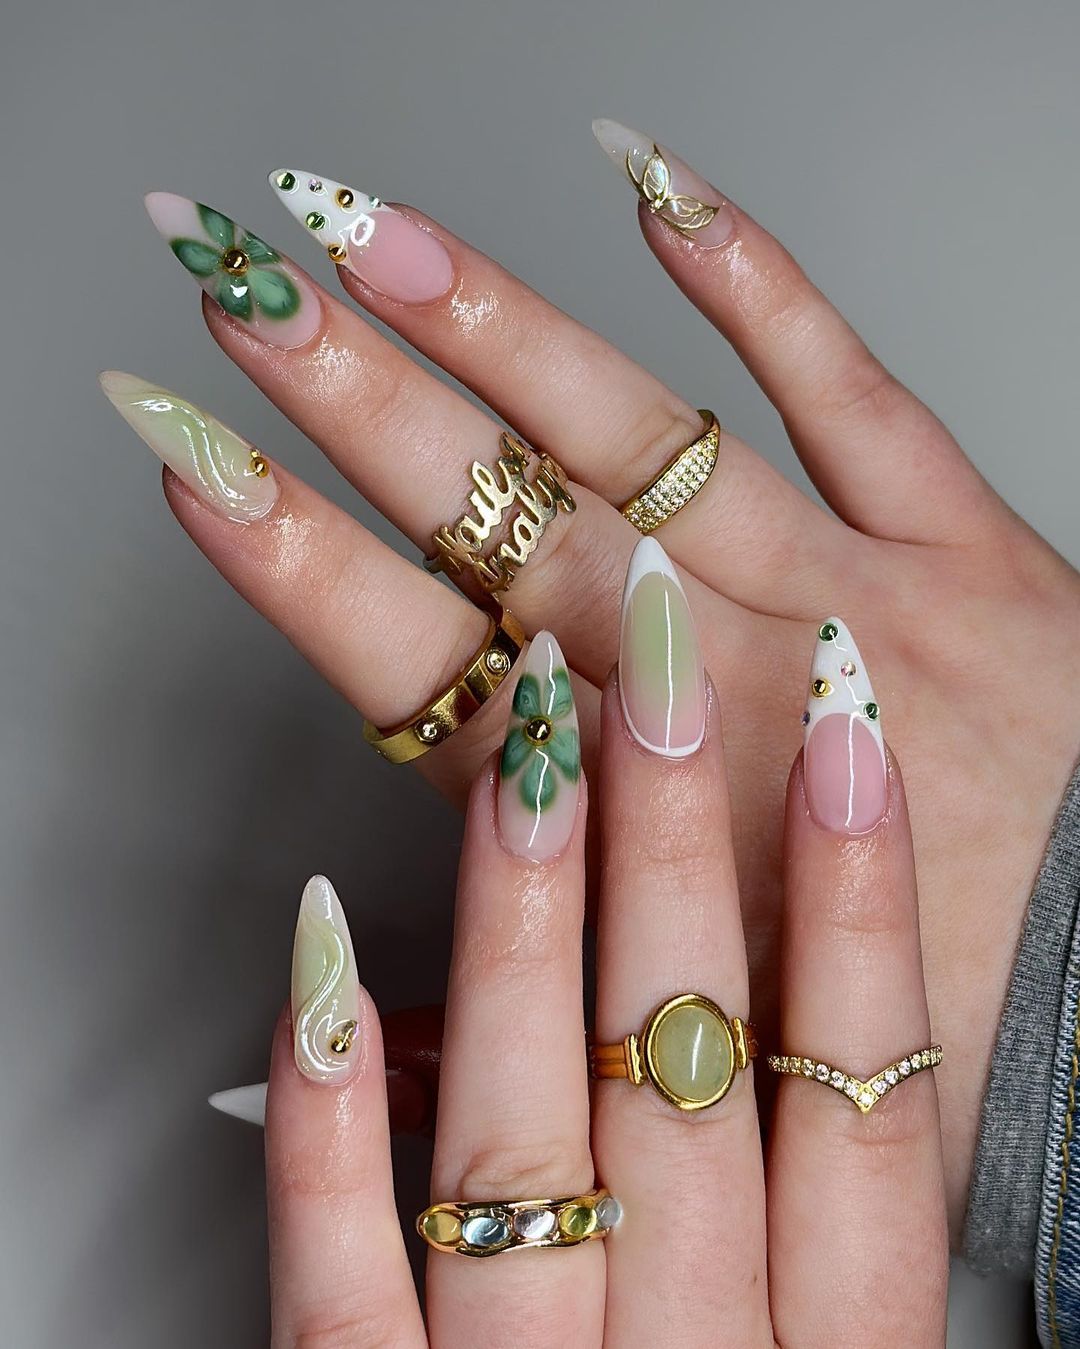
- Gelish Foundation Base Gel
- Gelish “Arctic Freeze” and “Amazon Flirt”
- White and green gel polish
- Gold foil or polish for accents
- Gelish Top It Off Sealer Gel
Start off by applying your base coat. Paint on a white gel polish once that’s cured. Next, paint on some almond shapes using your green color before adding gold accents with either foil or polish. After that’s all cured under either a UV or LED lamp, seal it all in with a top coat to encapsulate the artistry!
Folkloric Elegance: A Touch of Tradition
Welcomingly accept the unsophisticated gracefulness of people art with this gel polish manicure. A cream-colored nude base makes it possible for the complex blue flower motifs to come out, giving it a hand-painted appearance. Not only is this design adorable, but it also has an old-fashioned appeal that makes it perfect for starting conversations at any gathering during summer.
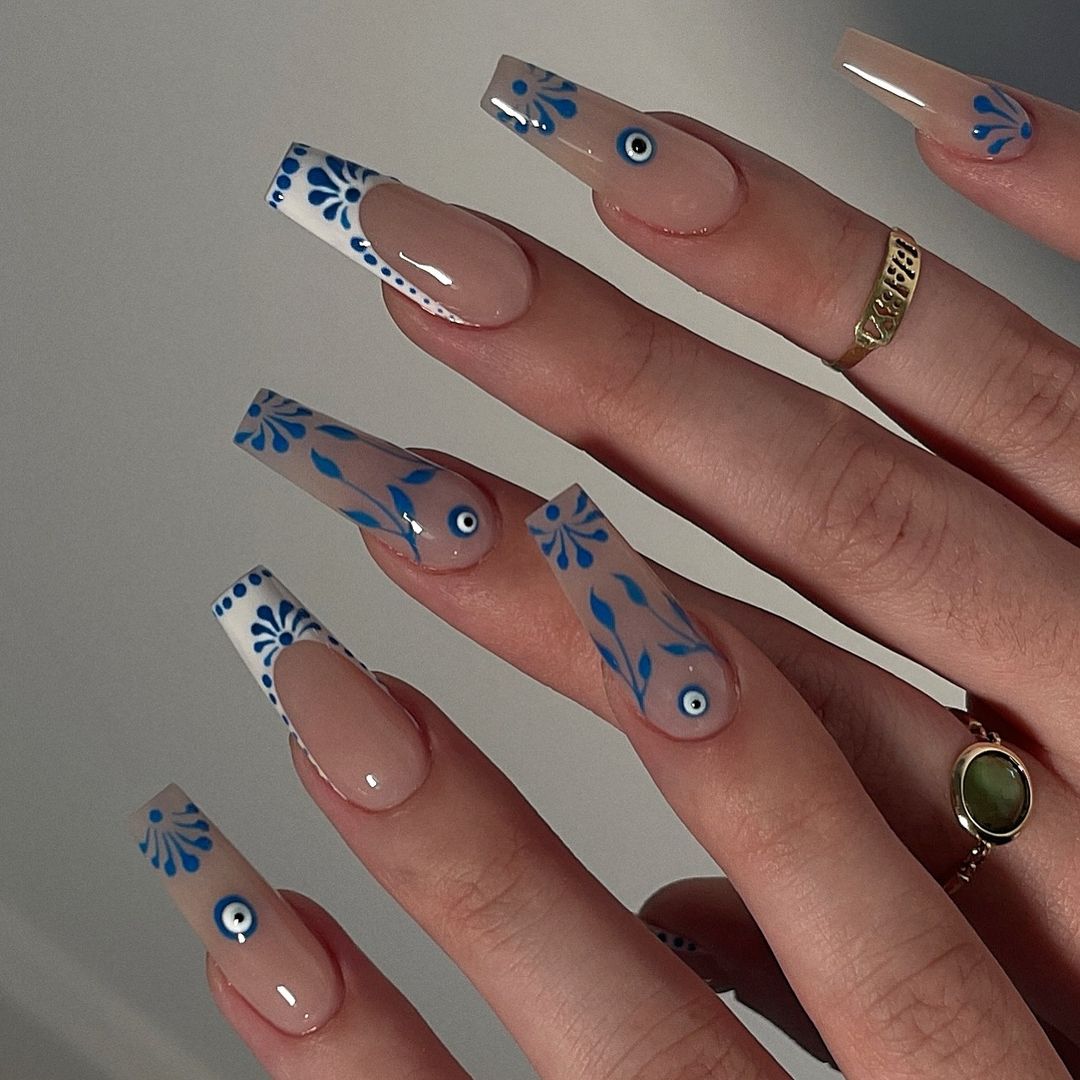
- Base coat: CND Essentials Base Coat
- Nude gel polish: DND “Café au Lait”
- Blue nail art polish: Nails Inc. “Baker Street”
- Dotting tools and fine brushes for detailed work
- Top coat: OPI GelColor Top Coat
Firstly apply a base coat then add a layer of nude gel polish as your background color. Using blue polish and a fine brush, paint on the floral designs. Use your dotting tool to add details where necessary. Cure under a lamp and finish with top coat for lasting results.
Playful and Bold
This nail design proves summer’s adventurousness with its vibrant dark purple that is as deep as the night sky in June. A 3D effect is created by a pattern of gel droplets placed in a clever way, this plays with light and shade to give life to an otherwise plain manicure.
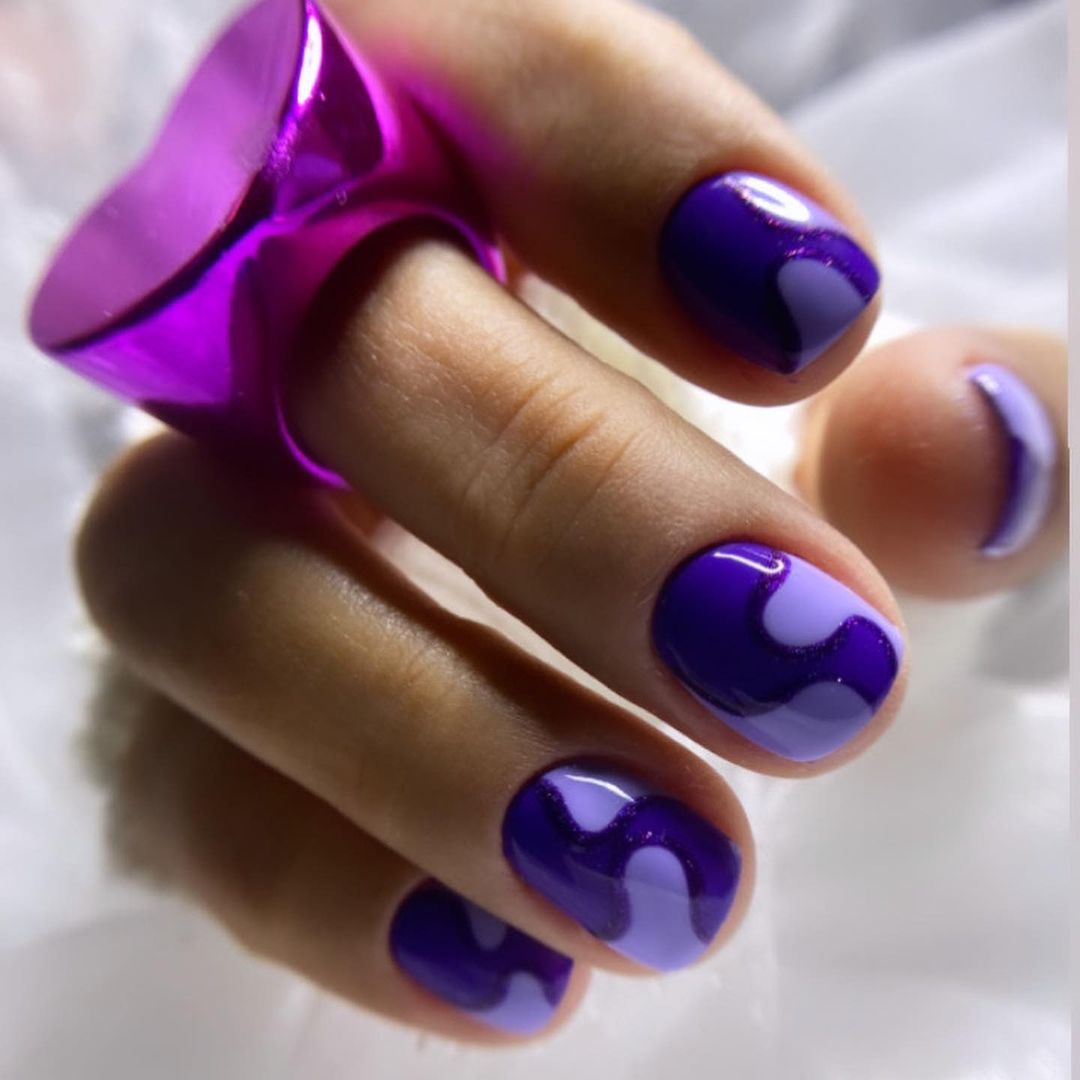
- Sally Hansen Miracle Cure base coat
- Gelish “Plum and Done” purple gel polish
- Gellen Top Coat clear gel for droplets
- Sally Hansen Insta-Dri Anti-Chip Top Coat top coat
Apply the purple polish after your base coat. While it’s still sticky, put some clear gel on where you want the drops to be and cure it. Add an extra shine by finishing with a glossy topcoat.
Lavender Whimsy: Delicate and Daring
This gel mani croons a gentle purple, providing the perfect canvas for big cat spots that whisper of a mischievous summer full of class. It is a design that marries quiet grace with a touch of wilderness — every nail is loud and funky in its own right.
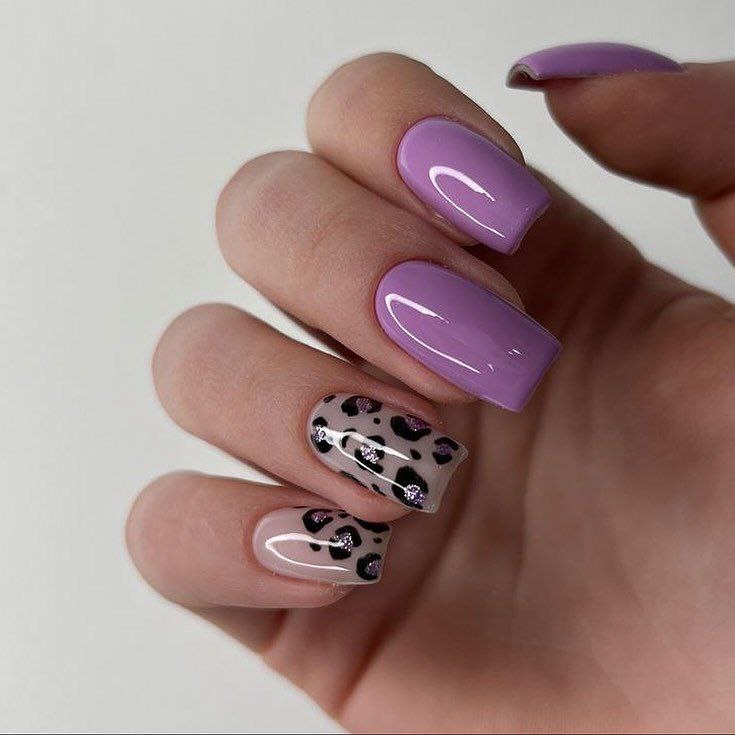
- Base coat: Essie Strong Start
- Lavender polish: OPI “Do You Lilac It?”
- Black and white polishes for spots: Sally Hansen “Black Out” and “White On”
- Rhinestones and nail glue
- Top coat: Essie Good To Go
Start with your base coat, then apply the lavender polish. Once dry, dot on leopard spots using a thin brush. Add rhinestones to kick up the glamour. Finish with top coat to make it last.
Playful Patterns: Colorful and Creative
A clear white canvas welcomes splashes of neon to celebrate summer with bright animal prints and solid colours. It is a cute and fun design that is funky and easy, showing many different designs which you can mix and match depending on your summer mood or outfit.
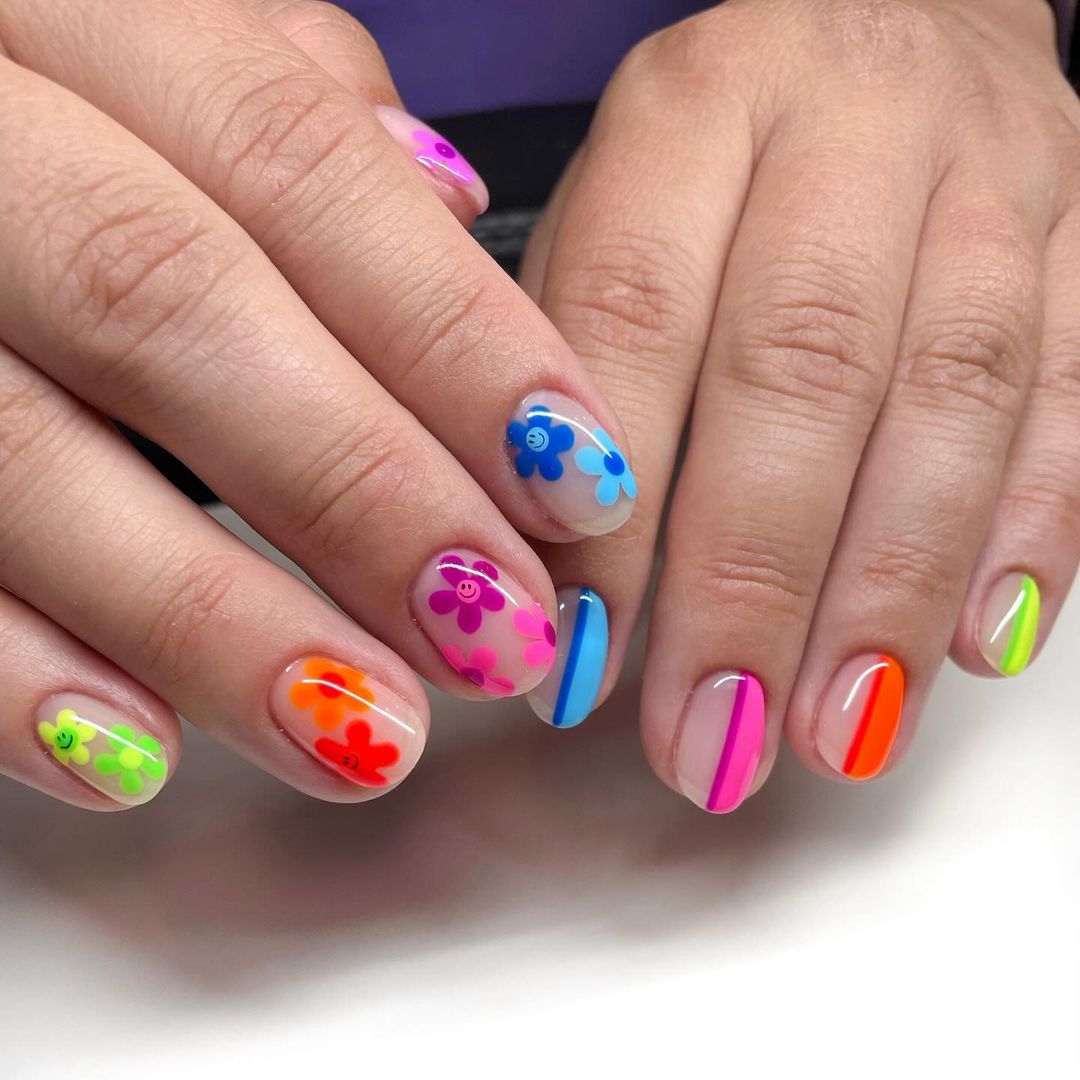
- Base coat: Deborah Lippmann All About That Base
- White polish: China Glaze “White on White”
- Neon polishes: Various colors from the OPI Neon Collection
- Dotting tool
- Top coat: Seche Vite Dry Fast
Apply base coat to protect nails. Paint white as the base color then create neon patterns using a dotting tool or small brush. You can have different color/pattern for each nail. Apply top coat for gel-like shine.
Fluid Art: Red and Refined
Connect with this gel manicure to the beauty of liquid art. Funky, cool and elegant at one time—the combination of red and nude comes with a flowy design that imitates marbling effects. The conventional flowers are used as cute folk accents to enhance brightness in summer-themed nails.
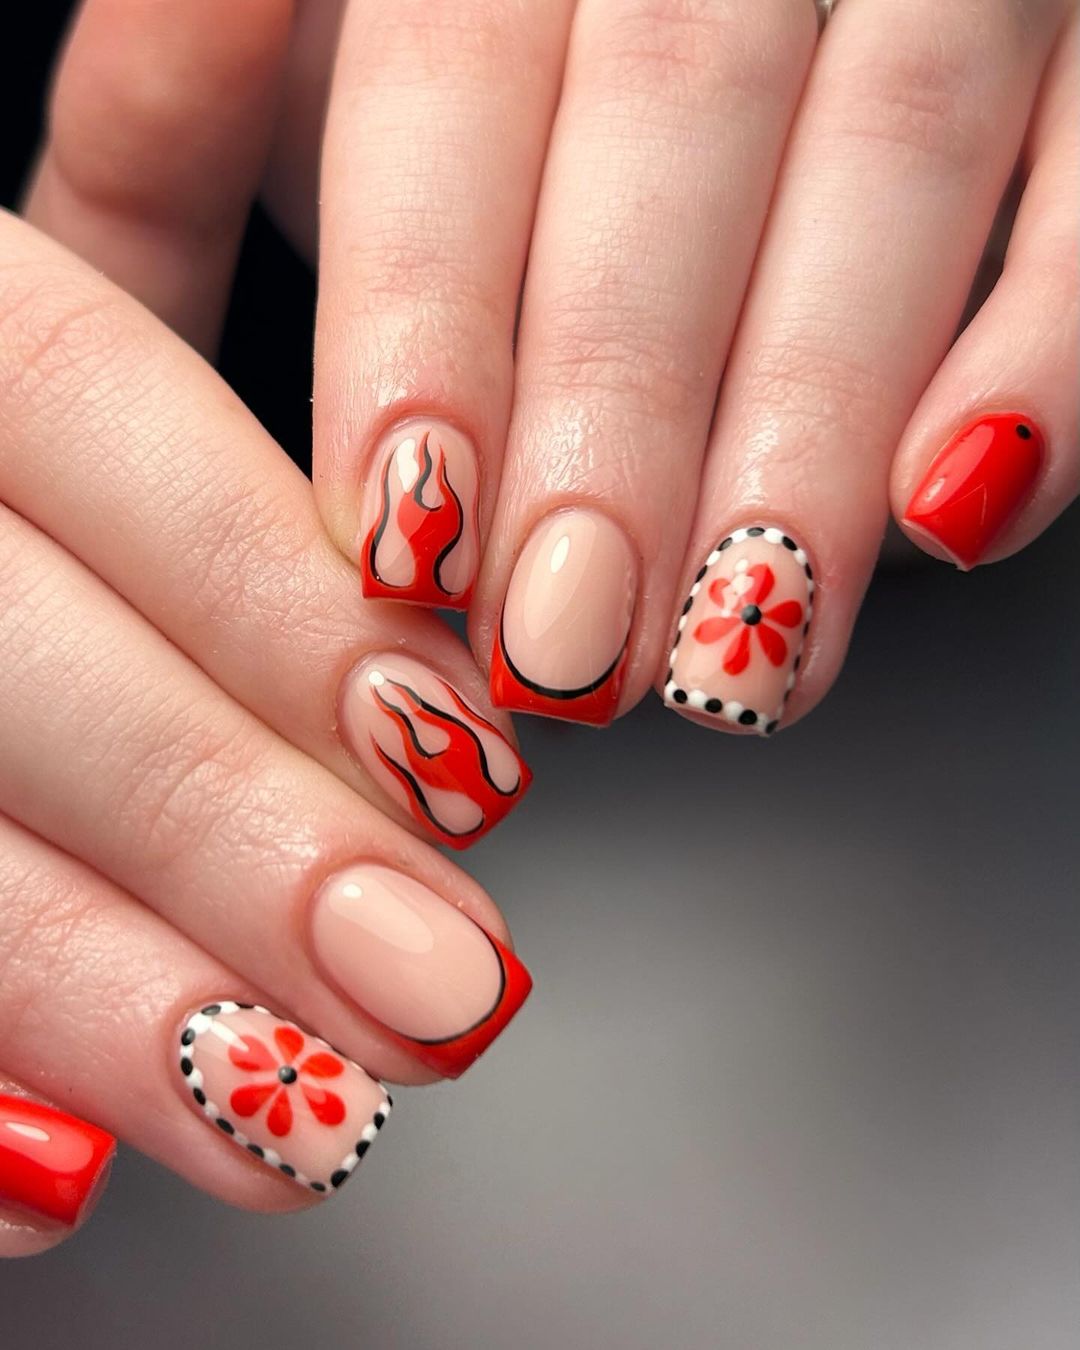
- Base coat: CND Stickey Base Coat
- Red gel polish: Gelish “Red Roses”
- Nude polish: Essie “Ballet Slippers”
- Black detailing polish: Nails Inc. Nailkale in “Victoria”
- Dotting tools and fine brushes
- Top coat: CND Super Shiney Top Coat
Start off with a nude base after your base cote then drop red and black polish on a mat, swirling them together. Press your nail onto the pattern and lift for unique designs. Using a small brush, add flower details before sealing everything with top coat.
Citrus Zest: A Splash of Vitamin C
Summer is all about citrus, so this gel manicure takes that concept and runs with it. The lemon and lime designs are vibrant against a warm yellow backdrop – it’s like having fruity nails, but with a neon twist instead of fruit salad vibes.
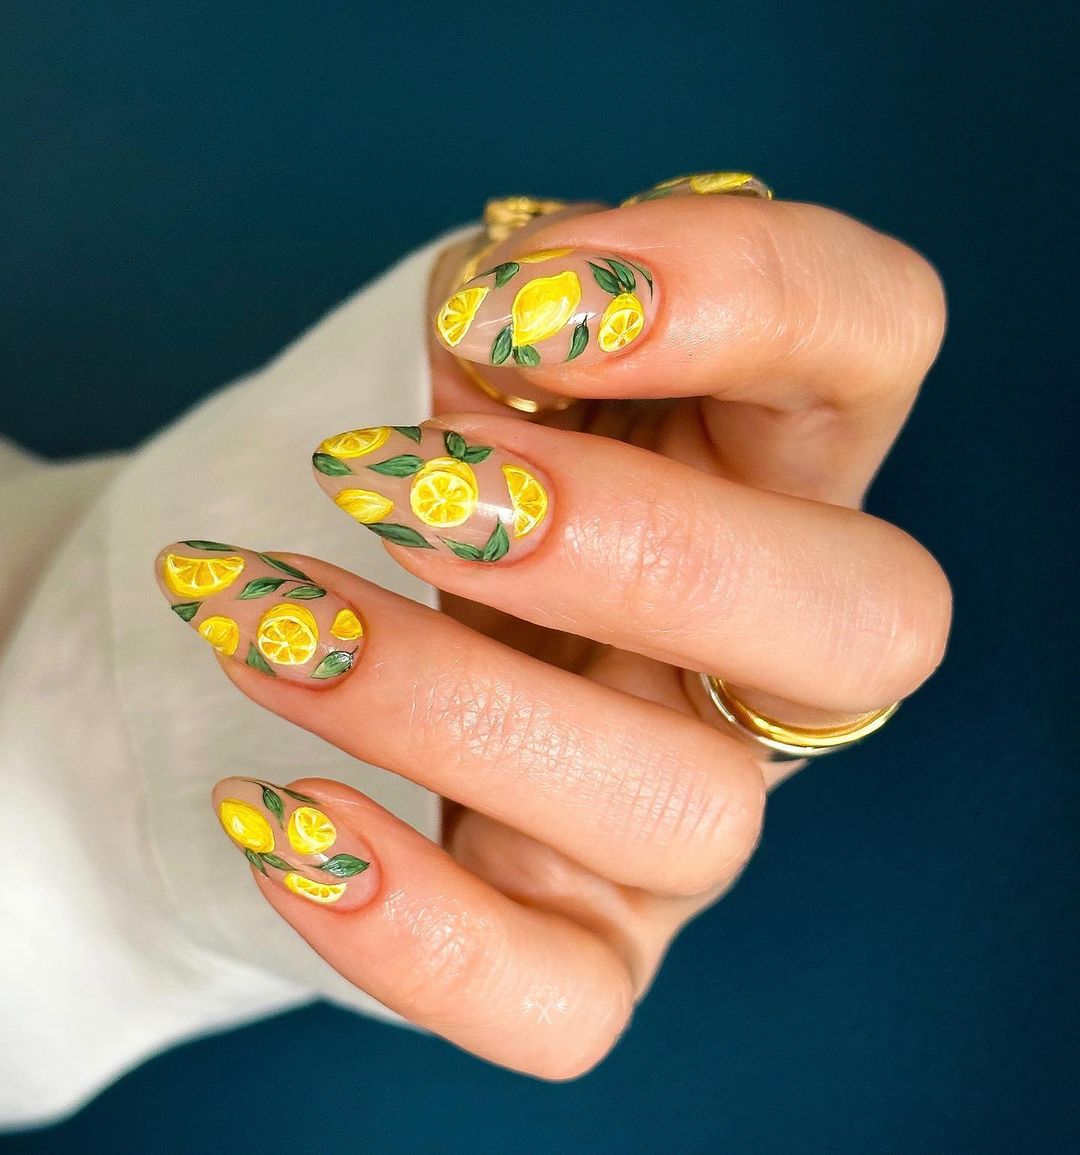
- Base coat – Orly Bonder Rubberized Base Coat
- Yellow gel polish – Gelish “I’m Brighter Than You”
- Green and white polish for detail – Essie “Mojito Madness” and “Blanc”
- Detailing brush
- Top coat – Gelish Top It Off
Start off by applying your base coat, followed by the yellow for your background. Take your detailing brush and add some white and green to create lemon and lime slices. Finish everything off with a top coat to give it that glossy gel shine which also protects the design from chipping.
Pink Passion: Hearts Aflutter
Summertime passion is best represented by this playful gel design that’s all about hearts. A light pink backdrop sets the stage for each nail, which showcases adorable hearts in a slightly darker shade that are just oozing charm and personality. This cute look is lots of fun as well as easy to wear on summer dates or when you want to show some love.
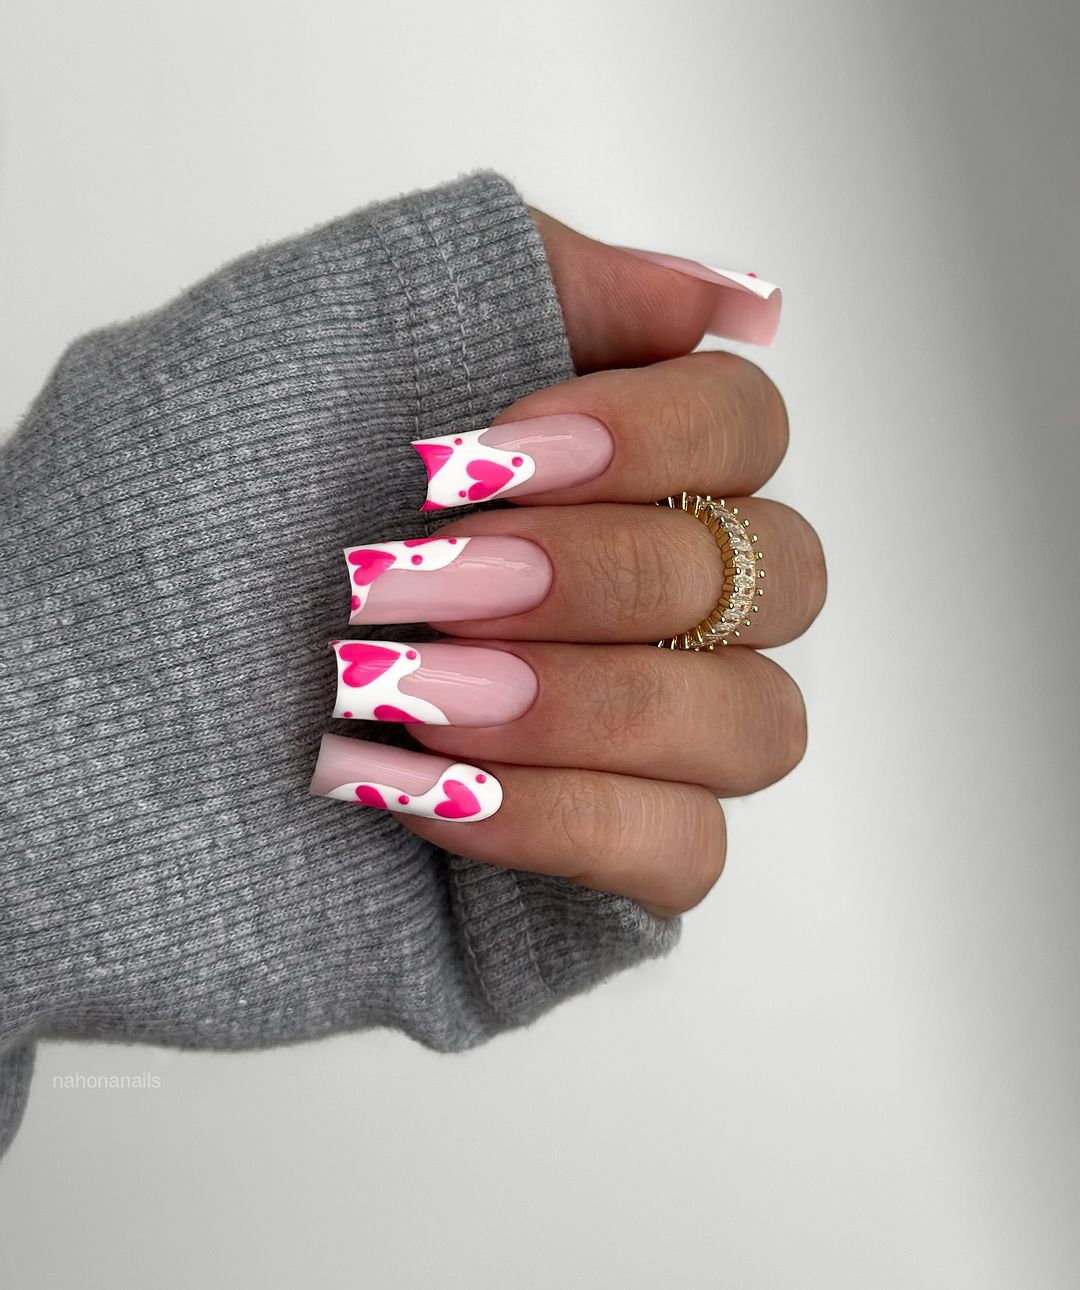
- Essie First Base base coat
- Gelish Pink Smoothie and Hot Rod Red (for the hearts)
- Dotting tool
- Essie Gel Setter Top Coat top coat
Start off with your base coat, then apply a light pink gel polish. While the polish is still tacky, use a dotting tool to drop in dots of darker pink and drag them out into heart shapes. Finish with a top coat to seal the love!
Koi Creativity: Tranquil and Artistic
Suggestive of still and beautiful koi ponds, this nail treatment combines gel art with a peaceful outlook. The plain cover allows the hand painted fish to stand out, giving an adorable and quirky look that is sure to turn heads at any summer party.
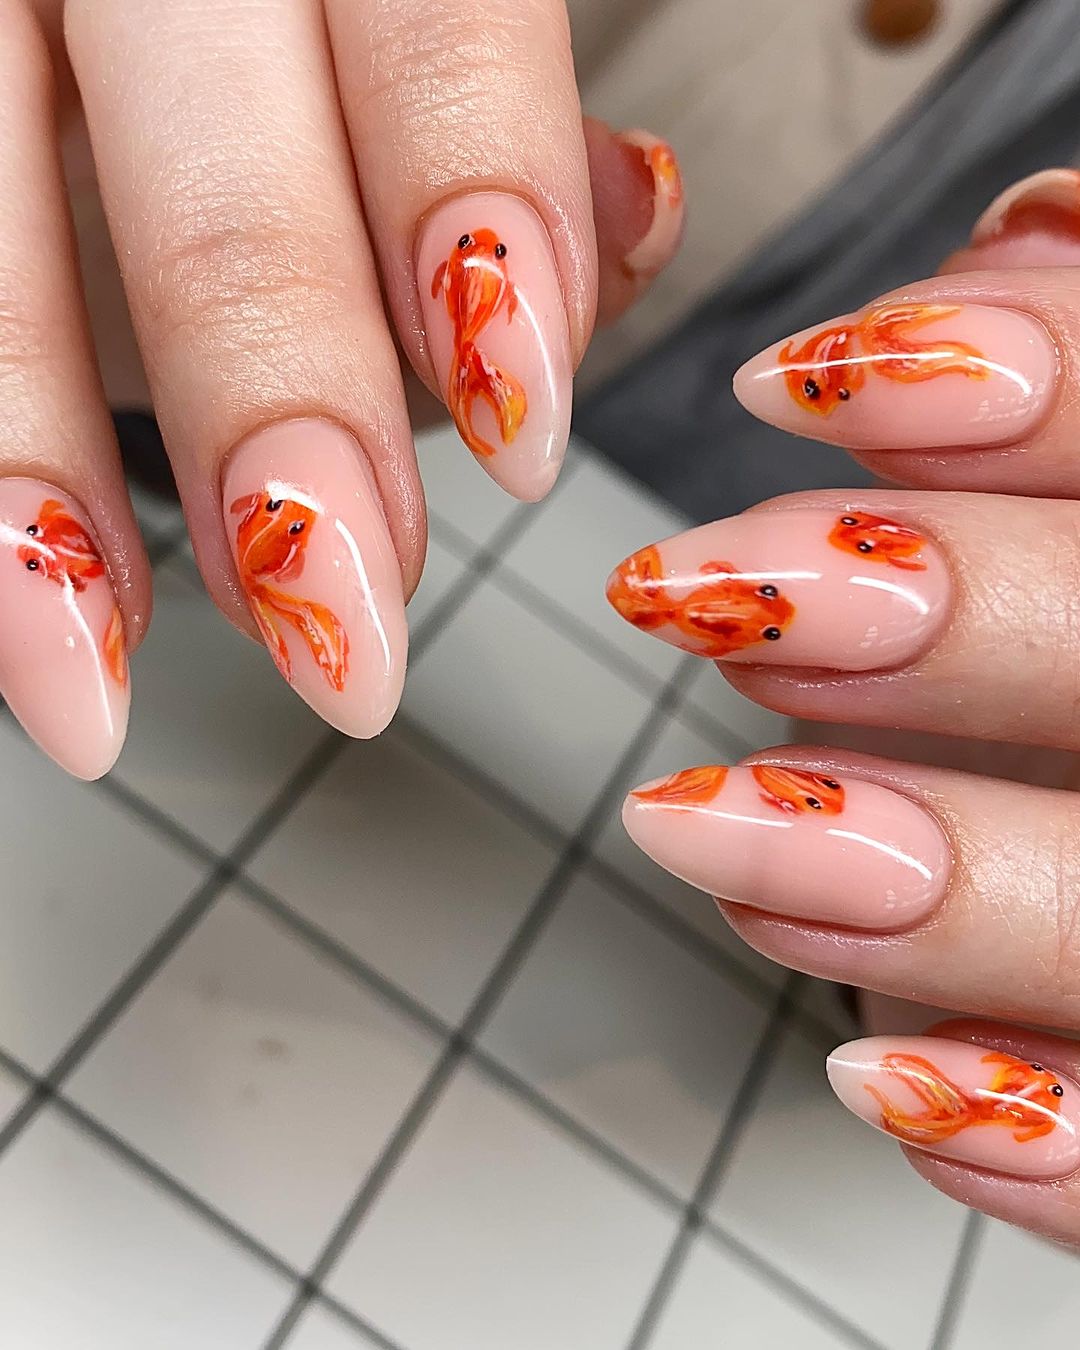
- Base coat: CND Stickey Base Coat.
- Nude polish: OPI “Samoan Sand”.
- Orange, black and white polish for koi details: China Glaze “Papaya Punch”, “Liquid Leather” and “White on White”.
- Detailing brush.
- Top coat: CND Super Shiney Top Coat.
Apply the base coat followed by the nude polish. Use orange as the base for the fish design, painting it with a fine brush, then adding in black and white details.
Tropical Pink and Yellow: Summer in Bloom
Get into the spirit of summer with a gel polish that explodes in the colors of tropical flowers. The vibrant pink and bright yellow are a bold combination, with delicate floral touches to match. It’s a fun, adorable, funky design that speaks to summer’s noncommittal attitude.
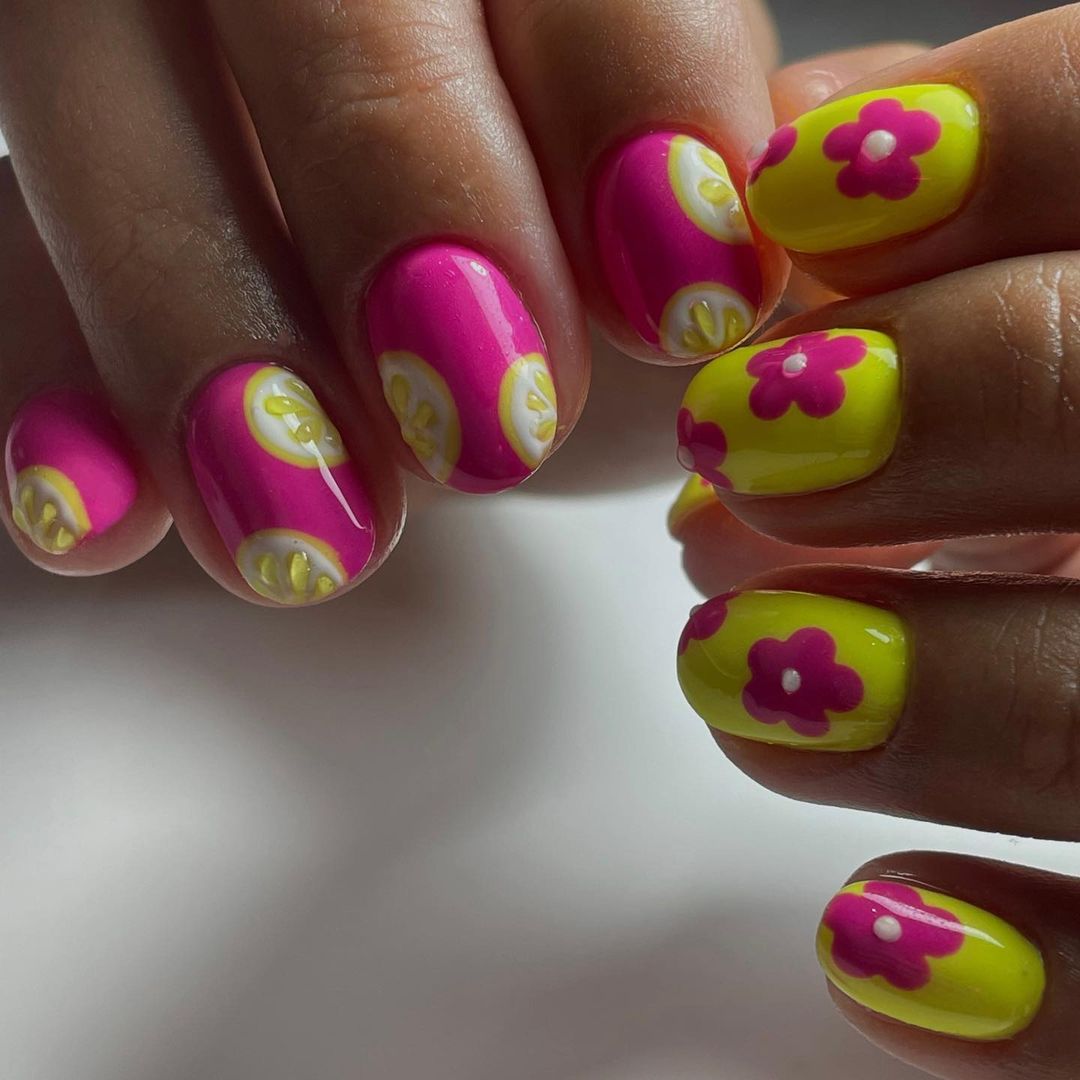
- Base coat: Essie All-in-One Base
- Pink polish: OPI “Strawberry Margarita”
- Yellow polish: OPI “Exotic Birds Do Not Tweet”
- White accent polish: Essie “Blanc”
- Top coat: Essie Gel.Setter Top Coat
Start with a base coat for protection. Paint alternating coats of pink and yellow, adding white floral accents for contrast. Finish with a glossy top coat for vibrant shine that lasts as long as the sun sets on a summer solstice.
Freshly Picked Strawberries: Sweet and Stylish
This cute design is as sweet as a ripe strawberry picked from the garden. The light pink base creates a contrast with the rest of the red strawberries and gives them even more charm with some small green leaves. It’s great for picnics or summer parties when you want to have some fun.
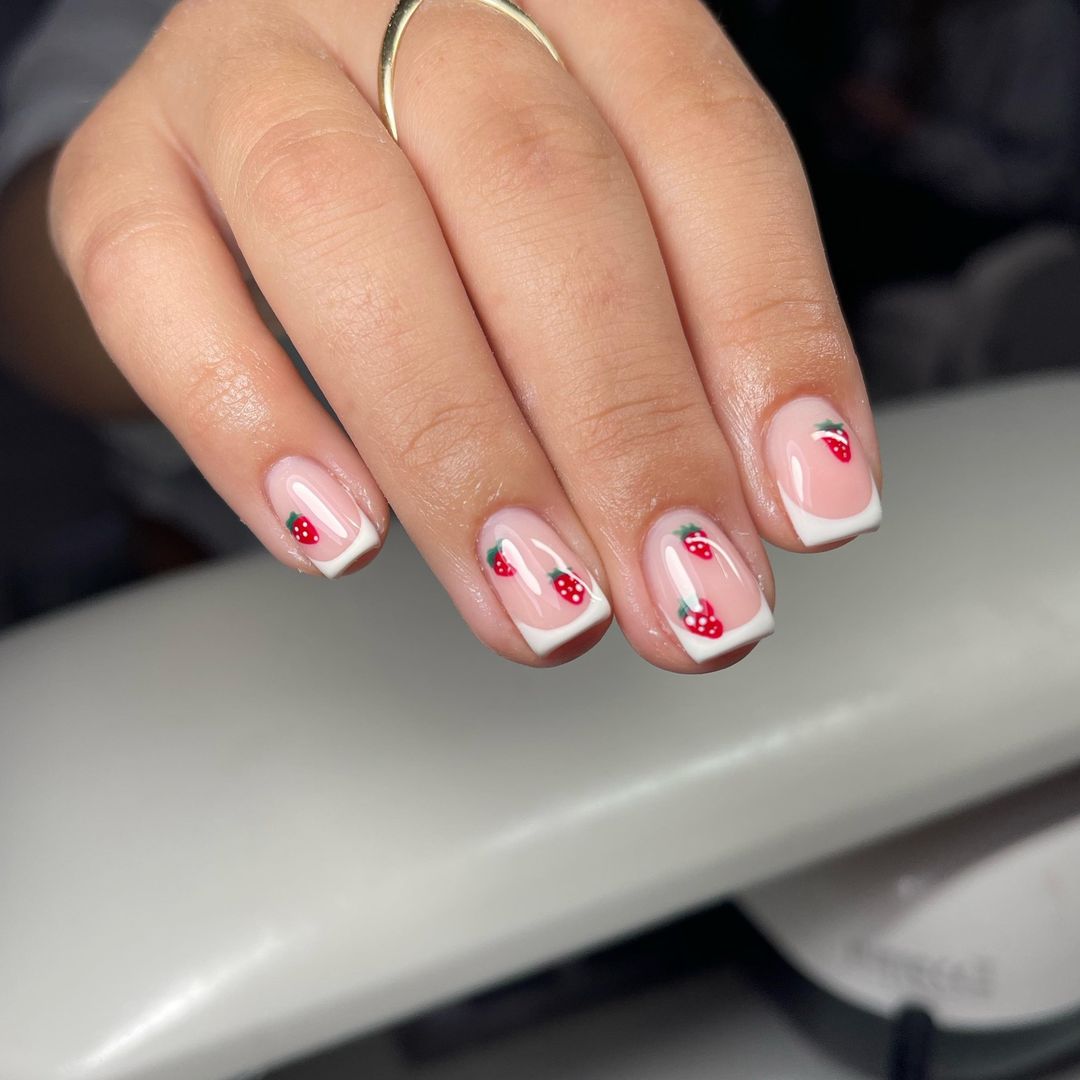
- Base coat: OPI Natural Nail Base Coat
- Pale pink polish: OPI “Bubble Bath”
- Red and green polish for strawberries: China Glaze “Rose Among Thorns” and “In the Limelight”
- Dotting tool for seeds
- Top coat: OPI Top Coat
First paint your nails with a light pink color, then draw strawberry shapes using red nail polish. Next, add little leaves in green around each one and put white dots on top of them to represent seeds. Finish everything off by applying clear top coat so that it looks like they were just picked this summer!
Enchanted Doodles: Whimsical Charm
During summer, fairy tales and whimsy are in season. This is captured through dainty doodles on a soft pink base. On every nail cute and fun illustrations have been drawn; these may be as small as bees or abstract patterns. In terms of aesthetics, this gel manicure is funky. It will therefore add some magic to your everyday summer look.
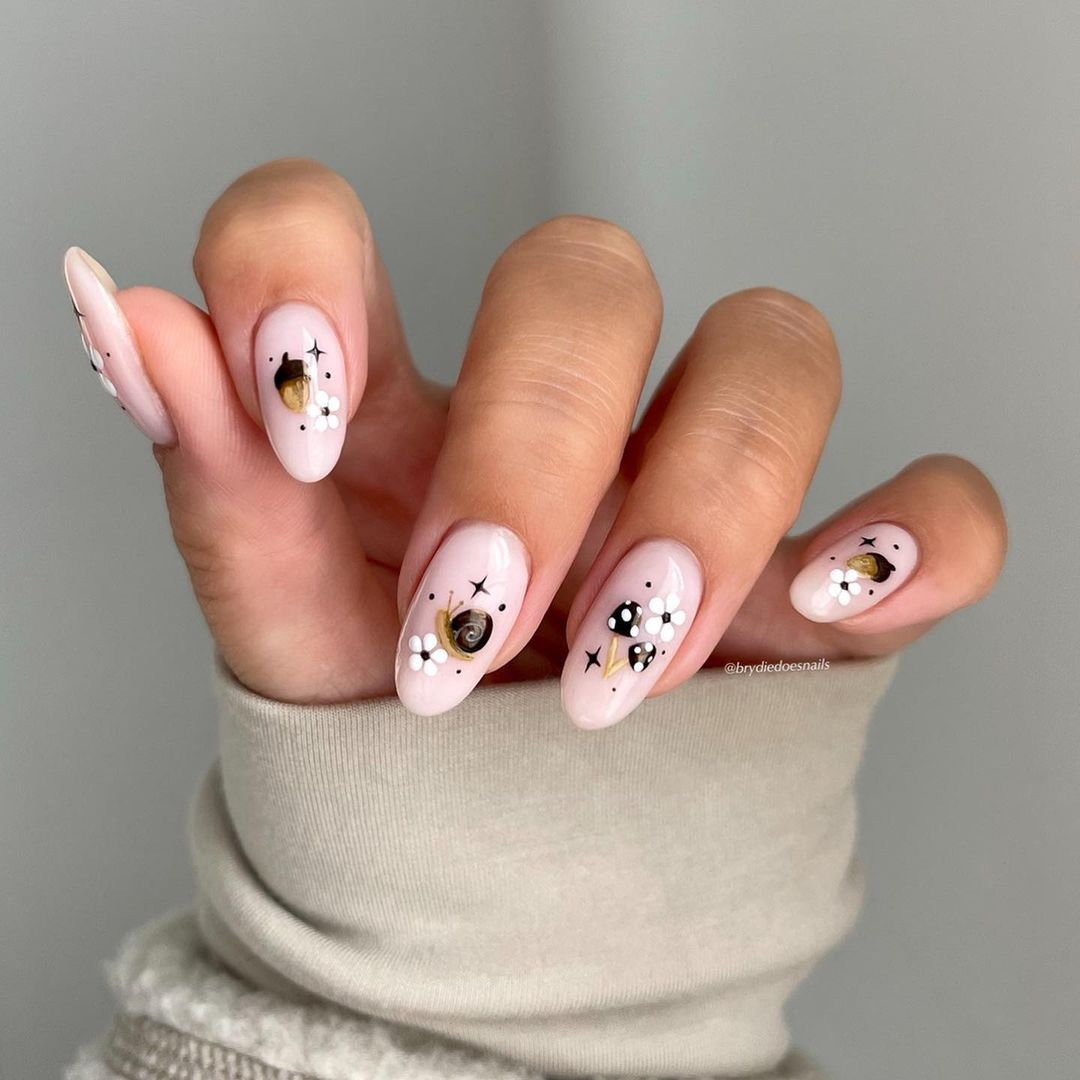
- Base coat: Zoya Anchor Base Coat
- Soft pink polish: OPI “Put it in Neutral”
- Black detailing polish for doodles: Nails Inc. “Black Taxi”
- Dotting tool and fine brush for precision
- Top coat: Zoya Armor Top Coat
Apply the base coat first, followed by the soft pink polish for a neutral background.With a fine brush you can draw any doodles you like.Use a dotting tool if you want precise dots.Finally, apply a top coat to give it that enchanting finish.
Wild Luxe: Exotic and Daring
Go for a walk on the wild side with a gel manicure that combines the timeless elegance of leopard print and the vibrancy of red accents. This design is dripping with luxury and confidence, adorned with metallic charms that scream exotic summer night.
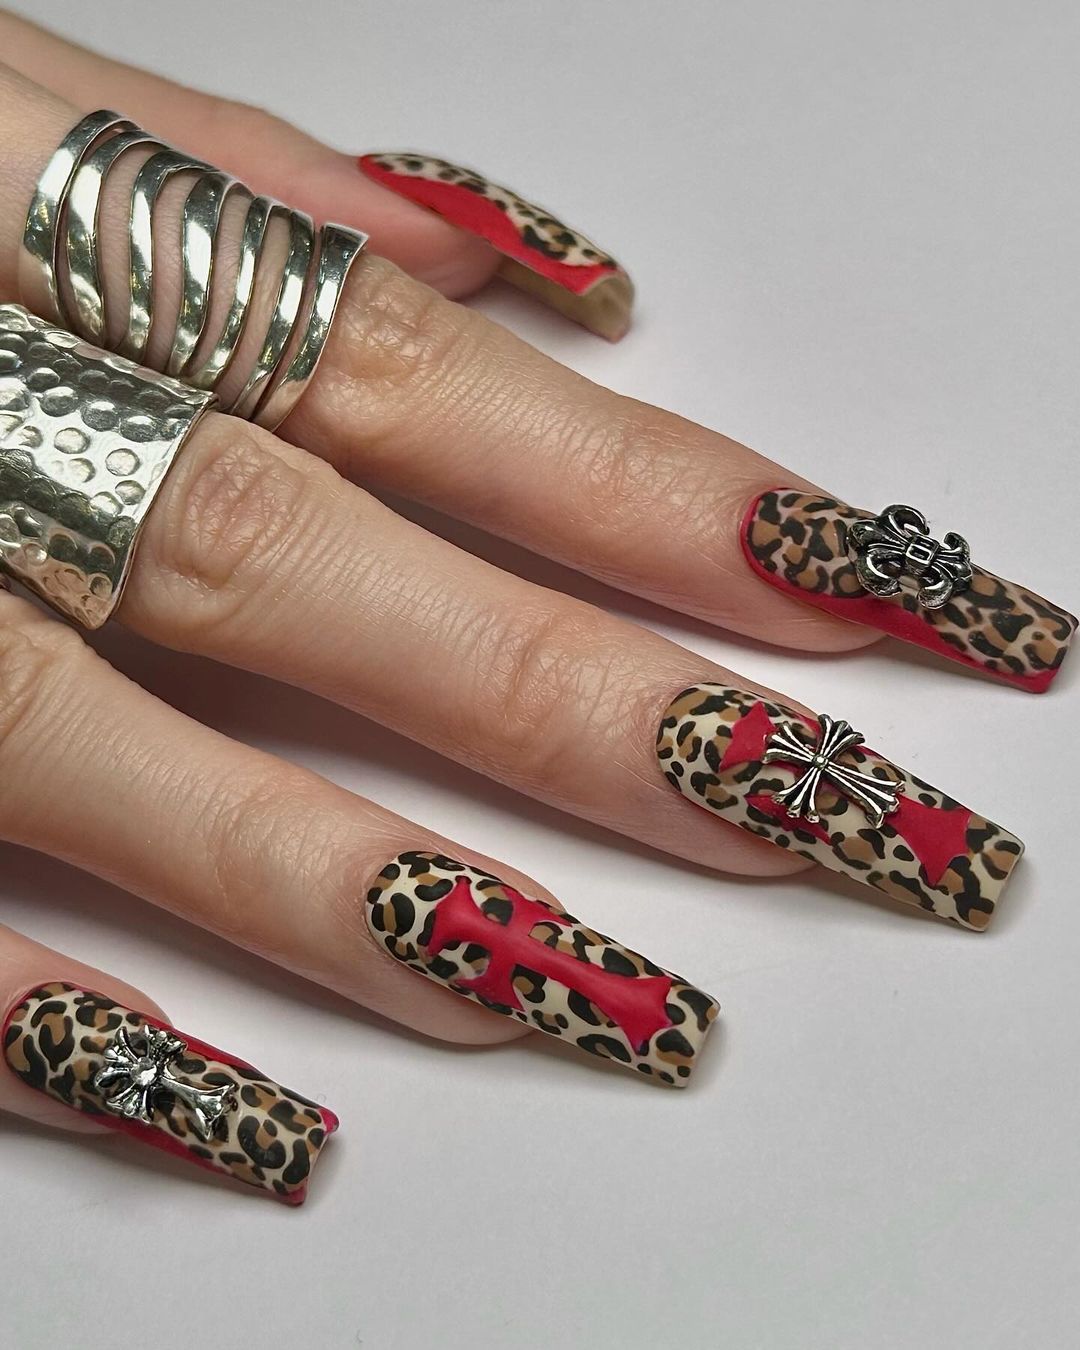
- Base coat: OPI Natural Nail Base Coat
- Nude polish: Essie “Sandy Beach”
- Black and red detail polishes: OPI “Black Onyx” and “Big Apple Red”
- Gold charms and nail glue
- Top coat: OPI GelColor Top Coat
Start by applying a base coat, followed by one coat of nude polish. Use your black and red polishes to create leopard spots as well as bold accents. Stick on gold charms using nail glue for an extravagant touch. Finish off with a glossy top coat to not only make your nails look fantastic but also ensure they are long-lasting.
Abstract Elegance: Modern and Chic
This gel nail art combines modernism with manicure. Allowing for some gold decorations on a monochrome base, it is an elegant option for those who like simple but not too simple designs. These abstract lines are uncomplicated and graceful – just what you need to subtly express yourself in summer.
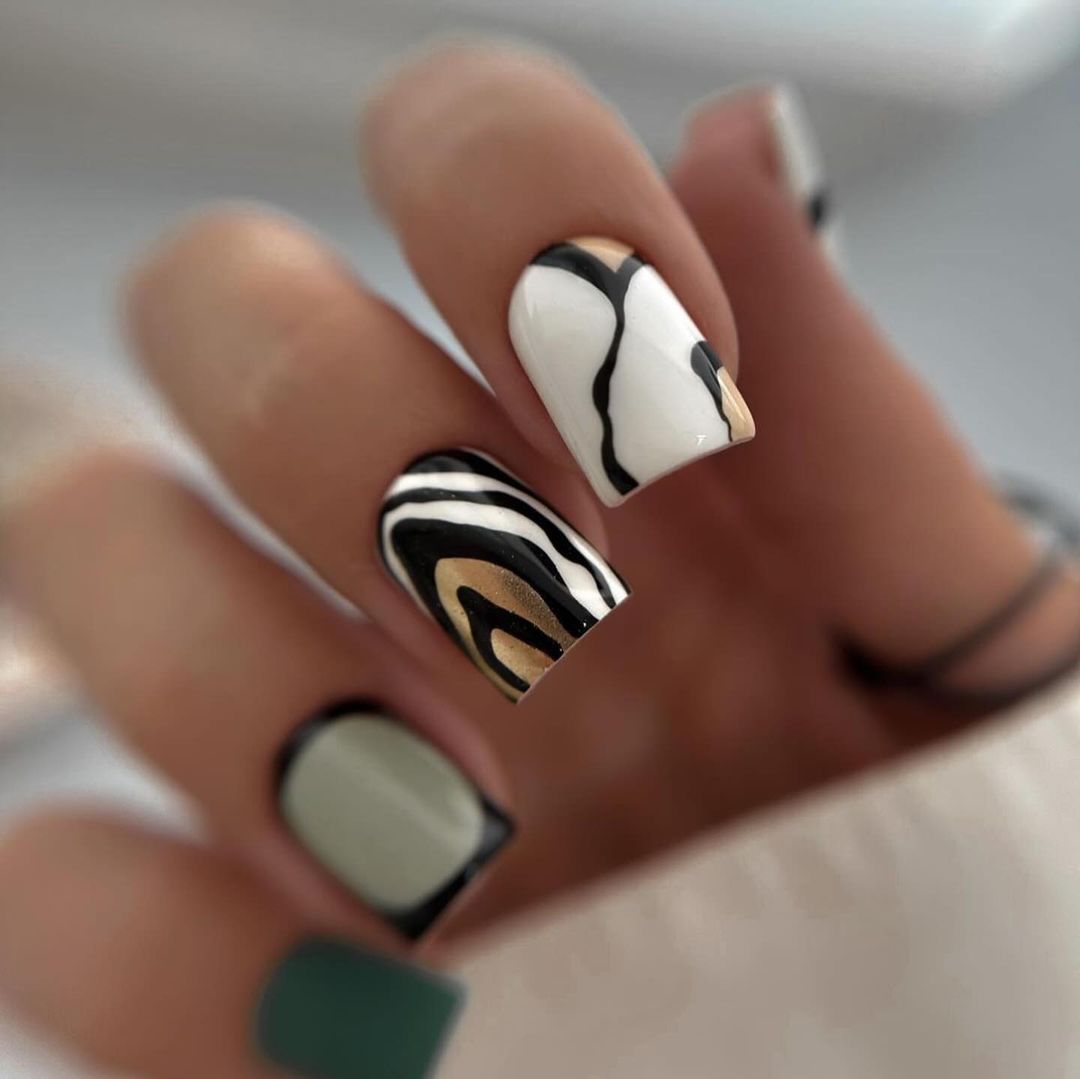
- Base coat: Sally Hansen Miracle Cure
- White polish: China Glaze “White on White”
- Black striping polish: Stripe Rite in Black
- Gold polish for accents: Essie “Good as Gold”
- Top coat: Seche Vite Dry Fast Top Coat
Apply white polish after your base coat has dried. Take the striping polish and create thick black lines then use gold accents to make them fancier. Finish with topcoat for glossy finish that looks expensive.
FAQ
Q: If I am a beginner, can I do these nail arts at home?
A: Of course! Work your way up to more complicated patterns–start with simpler ones until you grow more confident. Dotting pens and fine brushes as well as striping tape may be employed for more intricate designs.
Q: What is the usual duration of a gel manicure?
A: A gel manicure will last about two weeks or more if it has been applied properly and cared for correctly. Protect your nails from activities that could cause chips.
Q: Are charms and decorations uncomfortable on the nails?
A: They can take some getting used to but should not be painful. If done right, charms should lie flat against the nail and be held down securely by a strong adhesive.
Q: How do I remove gel polish?
A: Use a specific gel remover or acetone to get rid of gel polish. Soak your nails in the solution then gently scrape off any remaining bits using a wooden stick; this prevents damage to natural nails.
Q: Can nail art hurt my real fingernails?
A: No, it won’t – provided that it is done correctly. Always use base coats for protection and handle polish removal carefully; also give natural nails some rest from gels now and then to keep them healthy.
Q: Is there anything I can do so my nail art doesn’t chip easily?
A: Add top coat every few days to prolong wear time, plus gloves when cleaning with hands (don’t use them as tools either)–these steps would help avoid chipping altogether
Save Pin
URL Copied
