Lily Plant Care
Even though there are nine distinct divisions, all types require similar care and maintenance.
Lilies are one-of-a-kind perennials that produce tall, beautiful spring and summer blossoms. The remarkable plants hoist striking, sweet-smelling blossoms above the other flowers, annual and otherwise, in our gardens.
Planting with care ensures that you will have beautiful, graceful blossoms the following growing season and for many seasons to come.
You’ll want to place your lilies where they will receive adequate sunshine. Full sunlight to partial shade is best. But the most important consideration in planting lilies is drainage. Sticking the bulbs in heavy clay soils can make for a lily disaster. Without proper drainage, lilies will be stunted and have less chance of surviving year to year.
Avoid places in your garden where water may collect. Lilies don’t like wet feet. Not only does saturated soil impair their growth, but it also allows fungus and the few other diseases that attack them to gain a foothold.
Yet lilies need a constant supply of water. Adding plenty of organic material that holds the moisture that roots can draw from is as important as maintaining good drainage.
Asiatics are generally the first to bloom, with flowers appearing in late spring. Orientals and Trumpets bloom in midsummer, followed by Martagon hybrids in mid-to-late summer.
Remove spent blooms but leave about 2/3 of the stem and leaves for photosynthesis after flowering.
Allow stems to wither and die back naturally before cutting back to the ground and cleaning around the plants for the winter.
Lilies require a time of cold winter hibernation and do not thrive in mild winter climates.
Container care is straightforward. Use the same rich, well-draining soil as with other methods, and make sure the container is large enough to accommodate mature, flowering plants as they can become top-heavy.
Advances in over-winter storage of commercial lily bulbs have allowed gardeners to buy and plant lilies in the spring. But autumn is still the best time to get them in the ground.
Deeply planted and well-mulched, lily bulbs planted in fall will take all but the coldest days of the season to establish themselves before taking off in the spring. Fall planting assures bulb preservation and a good, strong start.
Liles return year after year, generally becoming taller and spreading a little as they establish themselves until they reach maturity height.
Check the hardiness zone of your lilies and pick a kind that will provide you joy year after year, as there are winter-hardy lilies available to bloom in practically all parts of the United States.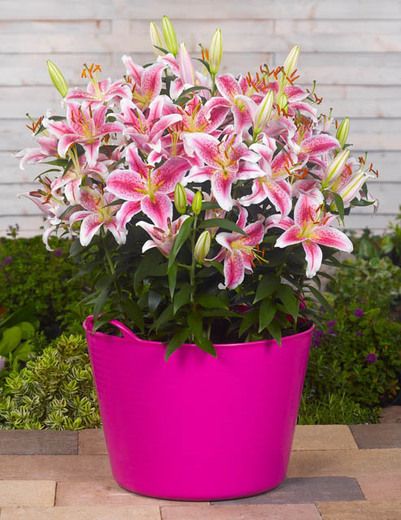
Light
Lilies require a lot of sunlight. For consistent blooms, lilies require 6 to 8 hours of direct sunlight every day, that is they need ‘full sun’ like other flowering plants. If there is too much shade, the stems will try to lean toward the sun or become weak and fall over.
Soil
Lilies typically prefer soil that is rich in organic matter and has a pH between 6.0 and 6.5. They also favor conditions that are similar to those of clematises, such as cool, moist roots and sunny areas for their heads.
They require well-draining soil to thrive. Any bulbs that are left to stand in water will start rotting. To promote proper drainage, enrich the soil with leaf mold, compost, or well-rotted manure.
To improve soil drainage, you can also dig up the patch where lilies will go — they’ll be spaced 8 to 10 inches apart, 15 inches for larger types — and add sphagnum peat moss or coconut coir in an amount equal to 1/3rd the volume of soil dug.
Turn up an area large enough to hold as many bulbs as you plan to plant and to accommodate their multiplication from year-to-year. But make the space no larger than the space you want them to occupy. Planting lilies in raised beds or along walkways and borders help confine them.
Turning the soil deeply — double digging — will help facilitate good drainage.
Adding perlite or vermiculite to your soil will improve both drainage and aeration, things that help keep bulbs from rot and disease.
Mixes of peat, perlite, and limestone with other minerals that help lighten heavy soils are a good choice as long as they don’t make existing soils alkaline.
Lilies tolerate a range of pH readings depending on their type. Asian lilies do best in slightly acidic soils, 7.0 (neutral) down to 6.0. Oriental lilies are alkaline averse, preferring soils with a pH from 5.5 to 6.5.
Pine needles and certain leaf mulches can help keep soils on the acidic side. All soils should be amended with plenty of compost and organic matter to help keep them from drying out completely. This is especially important with sandy soils.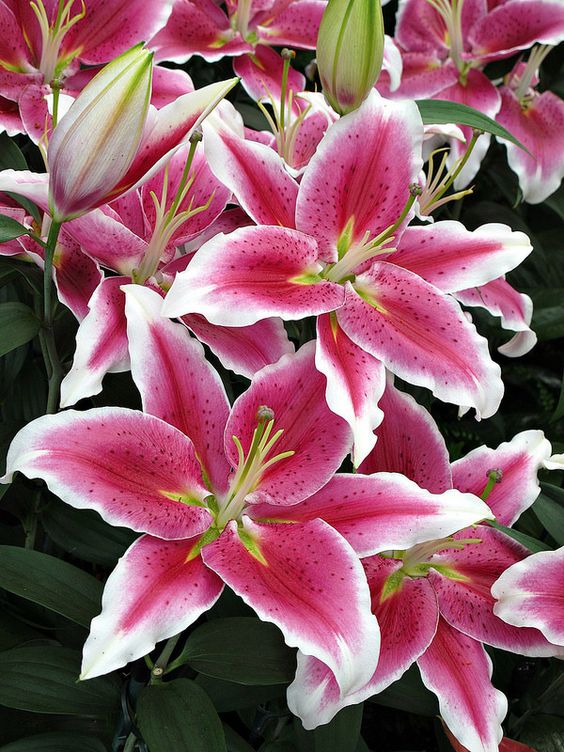
Water
Maintain moist but not wet or soggy soil. Moisture-retentive soil amendments, such as peat or vermiculite, help bulbs keep cool and hydrated.
You can aid moisture drainage by planting your lilies on a slope where gravity helps carry away the excess. In addition to containing their spread, raised beds to allow for heaping soil, something that also uses gravity to prevent soggy conditions.
Temperature and Humidity
Depending on the variety, lilies can be generally grown in hardiness zones 4 to 8, but you’ll find that many are hardy in zones 3 to 9 as well. It all depends on the particular variety you choose, so make sure to look into that before selecting which lily you want to plant.
Fertilizer
Lilies prefer rich soil. Add one-third of compost or aged manure to the soil to improve its quality.
To help keep moisture, add one-third of shredded coconut coir, peat moss, perlite, or vermiculite. If necessary, add additional coarse sand to aid drainage.
Pruning
After the petals have withered and fallen off, break or cut off the spent blooms, leaving 2/3 of the stem intact. Remove the entire flower head, including the bulging seed pods at the flower base, to transfer energy to the bulb.
During the growing season, remove any dead or damaged leaves and let stems wilt and wither on their own.
Cut down to ground level once the foliage has withered, but don’t pluck the stems to avoid dislodging the bulbs. Every three to four years, lift mature bulbs to gather offsets for further propagation.
Overwintering
Mulching over winter helps protect both your soil and bulbs. Regions where winters are continuously wet need less mulch, those with long cold winters — we’ve known folks who keep lilies year after year in cold zone three — need more.
Don’t be in a hurry to remove the layer of mulch in the spring. Lily shoots are extremely delicate. Give them a chance to extend out of the mulch.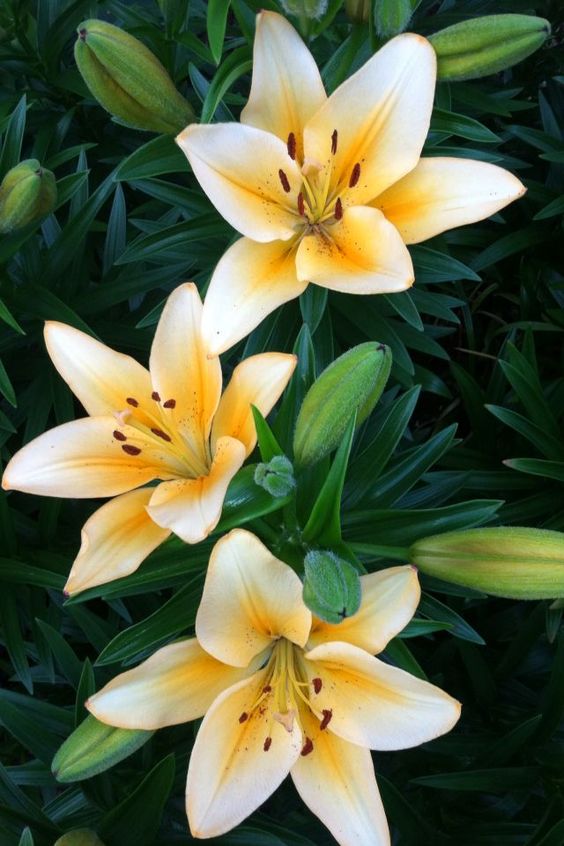
How to Plant and Grow Lilies
Plant lily bulbs in the fall or early spring. When planting in the fall, it is essential to do it at least four weeks before the last frost date so that the plants can establish deep roots prior to the ground freezing. Plant in the early spring, when the ground is dry enough to work with but not too wet.
How to Plant Lilies from Seed
Expect to wait three or four years before seeing blooms from seed-grown plants. The seeds can be collected on a dry day in late summer, roughly 8 weeks after the plants have stopped flowering.
The pods swell visibly as they age, then turn brown and split open, revealing mature seeds that are black, dry, and solid.
For seeds to sprout, they need three months of moist, warm weather, followed by three months of cold weather. This is called hypogeal germination.
To do this, combine the seeds with two cups of wet peat moss, then put the mixture in a plastic bag or some other container. Loosely cover it and store the peat and seed mixture in a warm, dark place. Check the peat every two weeks to ensure that it does not dry out, and add water as necessary to keep it moist.
When the seeds have expanded and developed little bulbs, refrigerate them for an additional three months. Keep peat moist and between 45 and 55°F during their cold spell.
After three months, take the young bulbs out of the cold and plant them 1/2 inch deep in 4 to 6-inch pots with organically rich, well-draining soil.
Put the planters in an area of the garden that is protected from the wind and receives bright, indirect light. Ensure that the soil is damp but not wet and saturated at all times. When the 18–24 month mark has passed, carefully dig out the bulbs and replant them in the ground or in large containers.
Young bulbs can be planted outside when they have a diameter of more than 1 inch, but they may not bloom for another year or two.
How to Plant Lilies from Stem Bulbils
Plants grown from stem bulbils can begin to bloom in two years. In late summer, carefully remove the bulbils from the leaf axils, which are where the leaves meet the stem.
Fill several small, 4 to 6-inch pots with a moist, sterile potting mix and drainage material such as coconut coir, broken pottery, pebbles, or gravel. Plant four to six bulbils 1/2 inch deep and an inch apart in each container, then cover them with soil.
Place pots outside in a shaded location with enough moisture and indirect light. Allow the containers to remain in place for between 18 and 24 months. The soil must have adequate drainage and be kept moist, but not soggy or waterlogged.
Apply a granular, low-nitrogen bulb fertilizer once the shoots appear. At the beginning of their second spring, remove the bulbs from their containers and gently separate them. Plant bulbs that are at least one inch in diameter in the garden, then replant smaller bulbs in the same container for an additional six to twelve months of growth.
How to Plant Lilies from Offset Bulblets
Bulblets are the simplest to propagate, and the process is the same for bulb and stem offsets. Offsets can range in size from a pea to a golf ball. While bigger offsets can bloom in one to two years, smaller offsets can take two to four years to do so.
Bulblets will be identical in type to the parent plant, making this procedure suitable for hybrid cultivars as well as species plants.
Detach offsets from the bulb or stem and lift mature bulbs from the ground. Smaller offsets should be potted up in 4- or 6-inch pots using sterile potting soil that drains well.
There are a number of methods to determine the depth at which to plant your lilies. Some sources recommend three times the height of the bulb, others say anywhere from four to nine inches beneath the soil.
Check growing instructions for the particular type of lily you plant. Some — namely the Madonna lily — need no more than one inch of soil to cover. We’ve found that five inches deep works for most regular-sized bulbs. Smaller bulbs can be planted less deeply.
Spread the roots at the bottom of the bulb and stand bulbs upright on their bed. If you’re planting in groups, say in a side circle, plant no more than five or six in a cluster.
Cover with soil then water thoroughly so that the dirt will settle around the plant’s roots. Label each plant in the group with a garden marker if you like, or just wait to be surprised in the spring.
Larger ones can be planted in the ground right away. The pots should be given similar care to bulbils, placed in a protected area with indirect light, and kept moist but not wet and soggy.
Allow the bulblets to mature for a year or two before planting them in rich, well-draining soil, depending on their size. Plant out when the bulbs are 1 inch in diameter or larger.
Common Pests and Plant Diseases for Lily Plant
Lilies are easy to grow and usually don’t face a lot of pests and plant disease issues. Maintaining soil that has good drainage will help counter most issues this beautiful plant can face.
Make sure to space out the plants properly to provide adequate air circulation and to help minimize fungal diseases such as lily mosaic disease and botrytis, a common fungal disease that damages parts above ground, like leaves, stems, and sometimes flowers.
Pests that you may want to keep an eye out for include aphids and red lily beetles. Make sure to check the undersides of the leaves for eggs and larvae, and remove them immediately if you spot them.
Also, make sure to keep deer out of your garden and also rodents as they are attracted to these beautiful blooms as well.
And there you have it, that’s everything you need to know to grow lilies at home easily.
