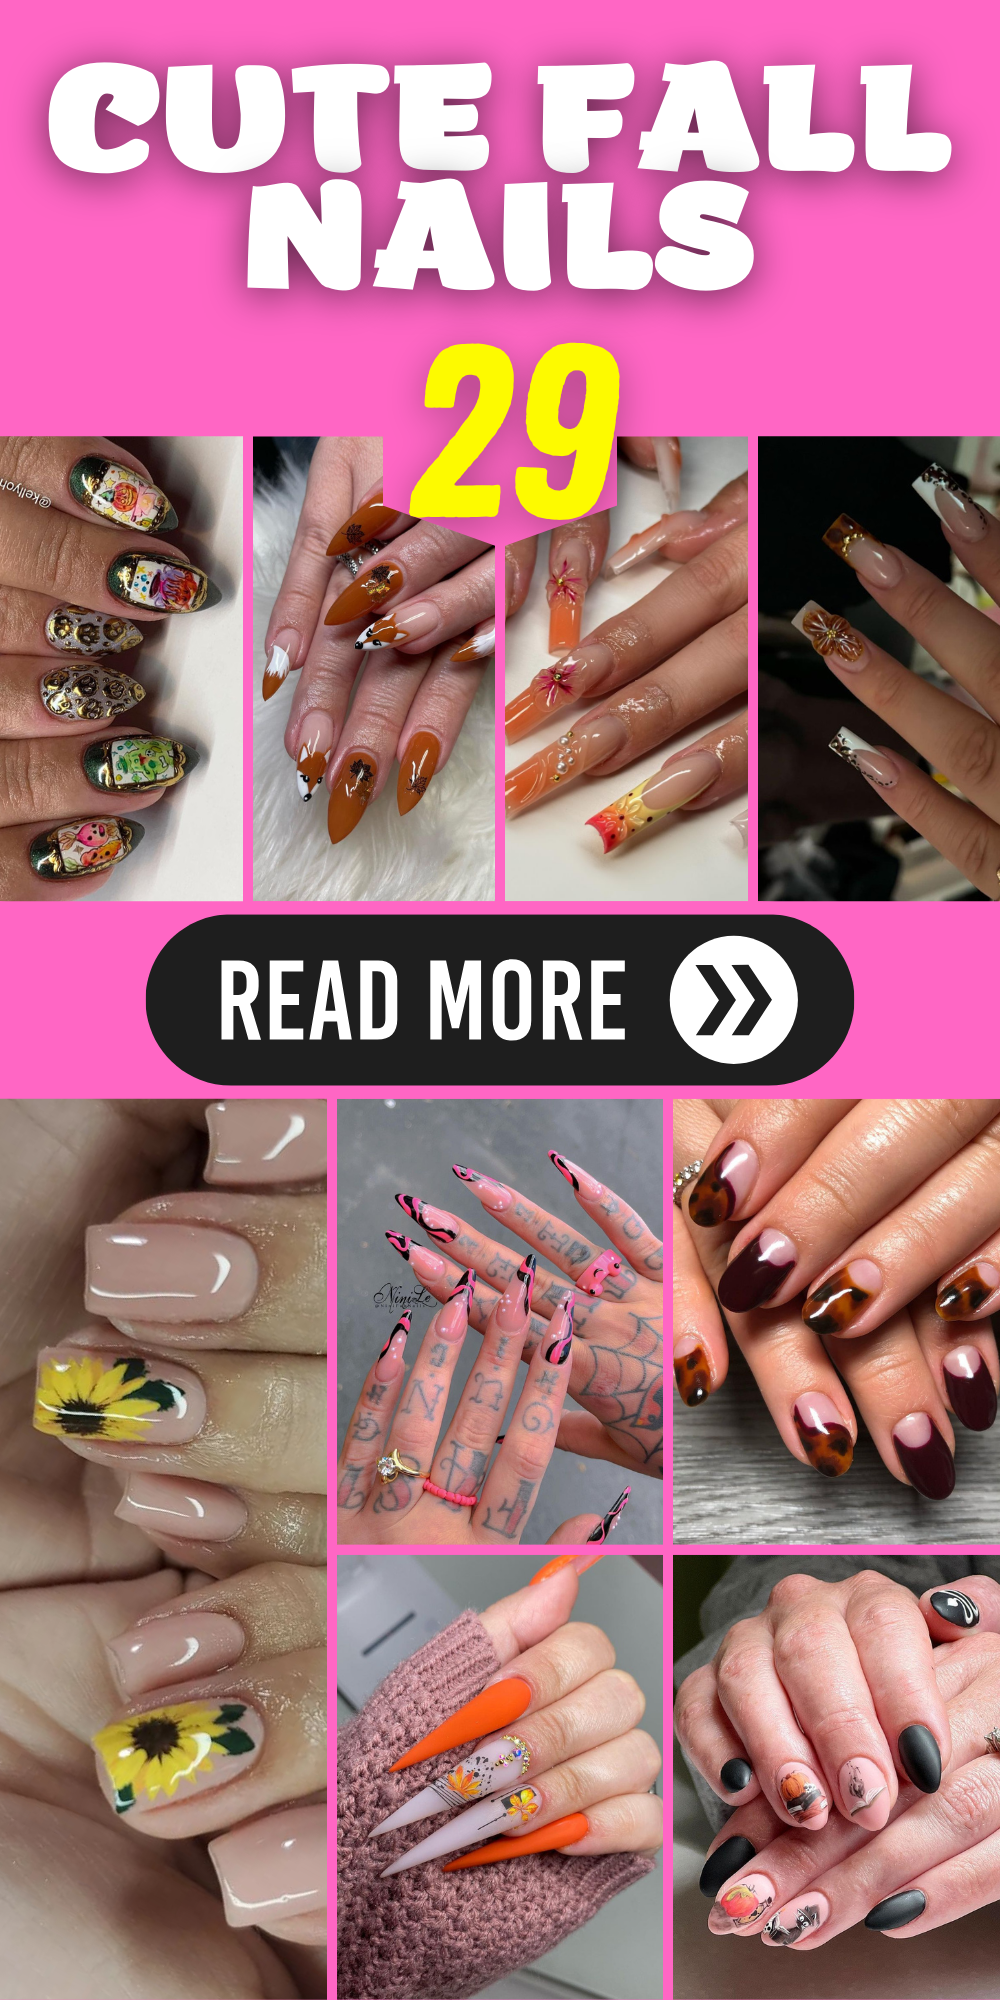
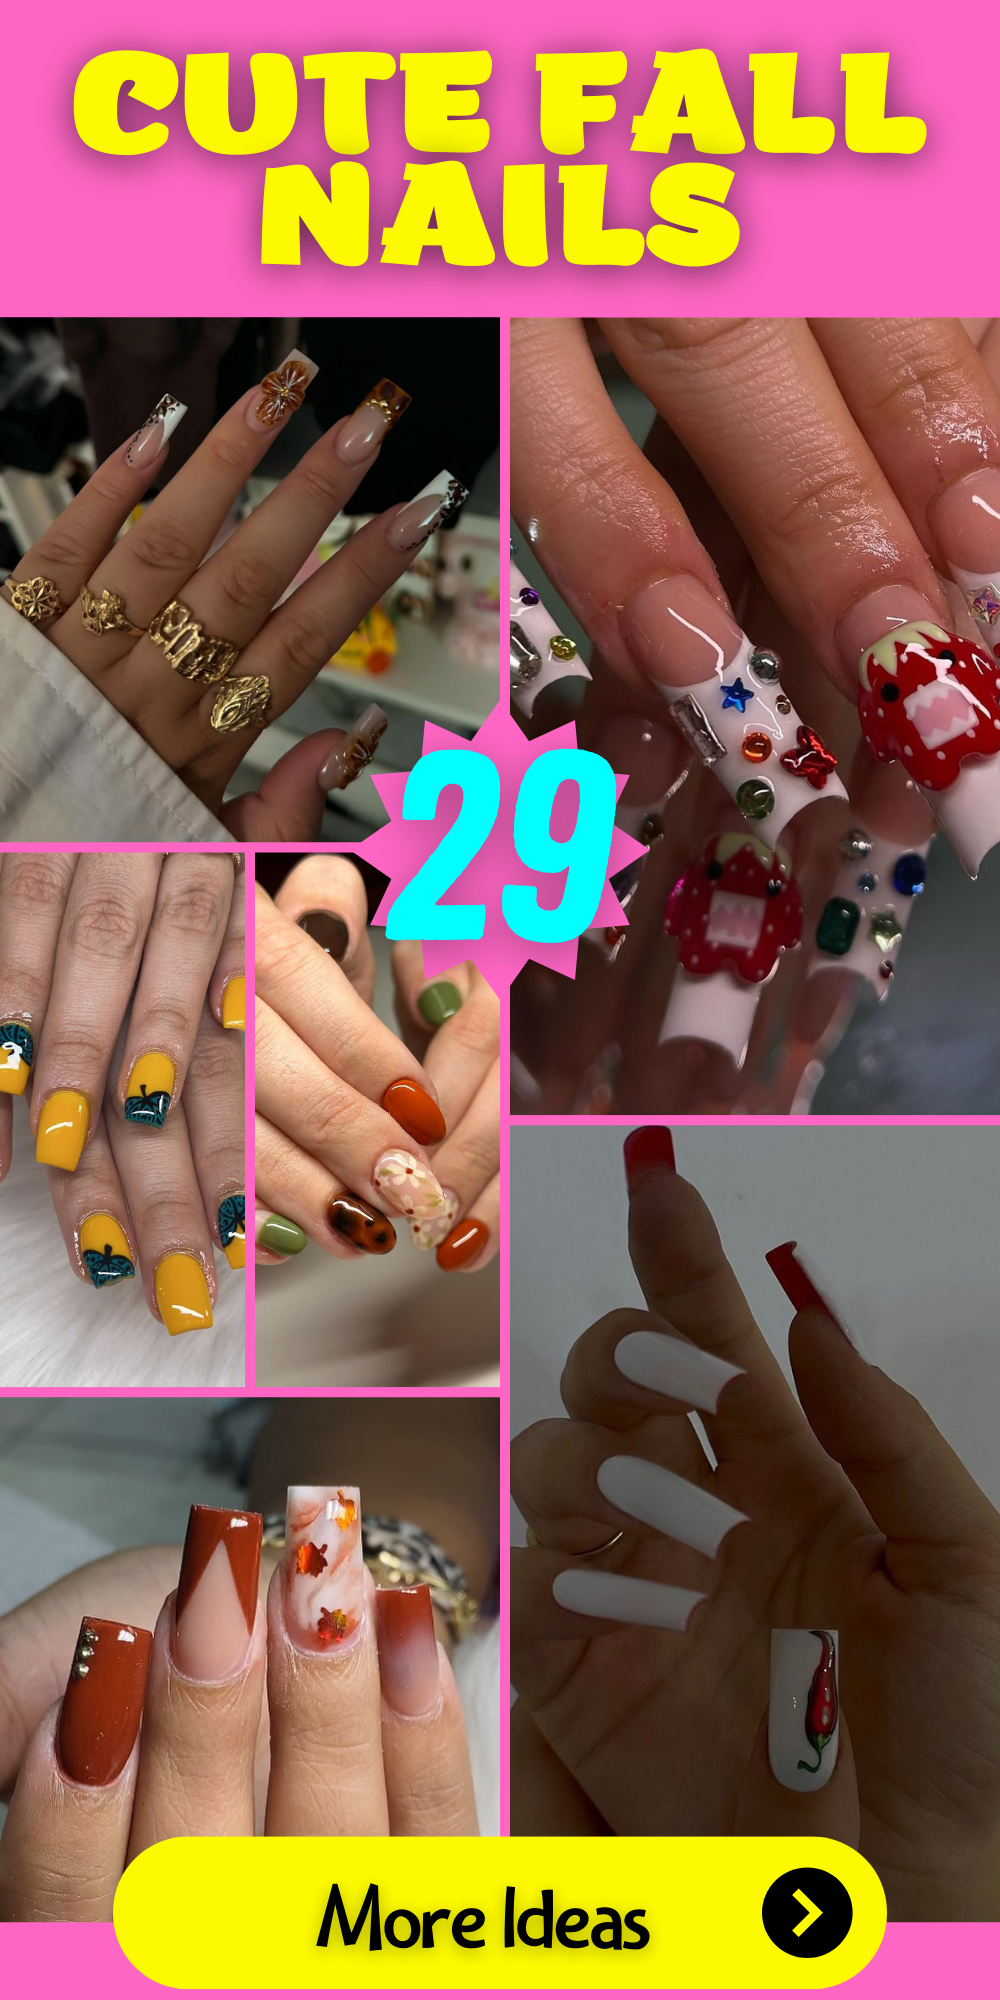
Fall is the perfect time to refresh your nail game with some stunning and creative nail designs. From subtle hues to bold art, there are countless ways to celebrate the season on your fingertips. Let’s explore some cute fall nails that will inspire your next manicure.
Short and Sweet Autumn Nails
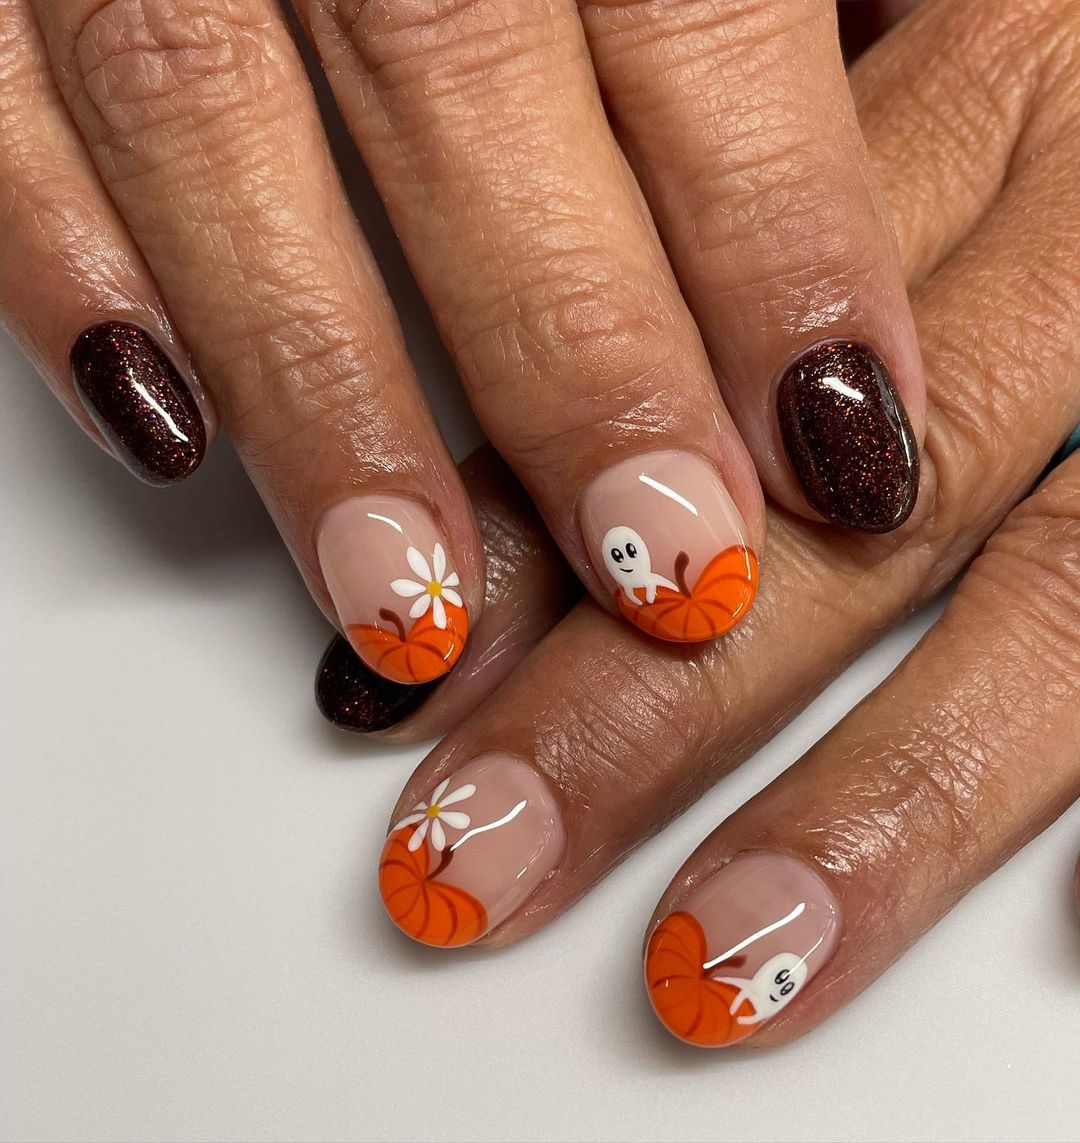
When it comes to cute fall nails, shorter lengths can be just as stylish and versatile. The design in this photo features a mix of autumn-themed elements that capture the essence of the season beautifully. This manicure showcases a delightful blend of pumpkin orange, white accents, and cute little ghosts, making it perfect for the fall season. The design is complemented by a touch of floral art, adding a feminine and playful touch to the overall look. The dark, glittery nails on the pinky and thumb add a sophisticated contrast, balancing the simplicity of the other nails.
- Base coat: Essie Ridge Filling Base Coat
- Orange polish: OPI “It’s a Piazza Cake”
- White polish: OPI “Alpine Snow”
- Black polish for detailing: Sally Hansen “Black Out”
- Glitter polish: Zoya “Storm”
- Top coat: Seche Vite Dry Fast Top Coat
- Nail art brush: Winstonia Fine Line Brush
- Dotting tool: PUEEN 5 Piece Nail Art Dotting Tools
Instructions:
- Apply the base coat to protect your natural nails.
- Paint the pinky and thumb nails with the glitter polish.
- On the other nails, apply the orange polish as the base color.
- Use the white polish to paint the ghost and floral designs, using a fine nail art brush for detailing.
- Use the dotting tool and black polish to add eyes and other small details to the designs.
- Seal your manicure with a top coat for a long-lasting finish.
Elegant Autumn Acrylics
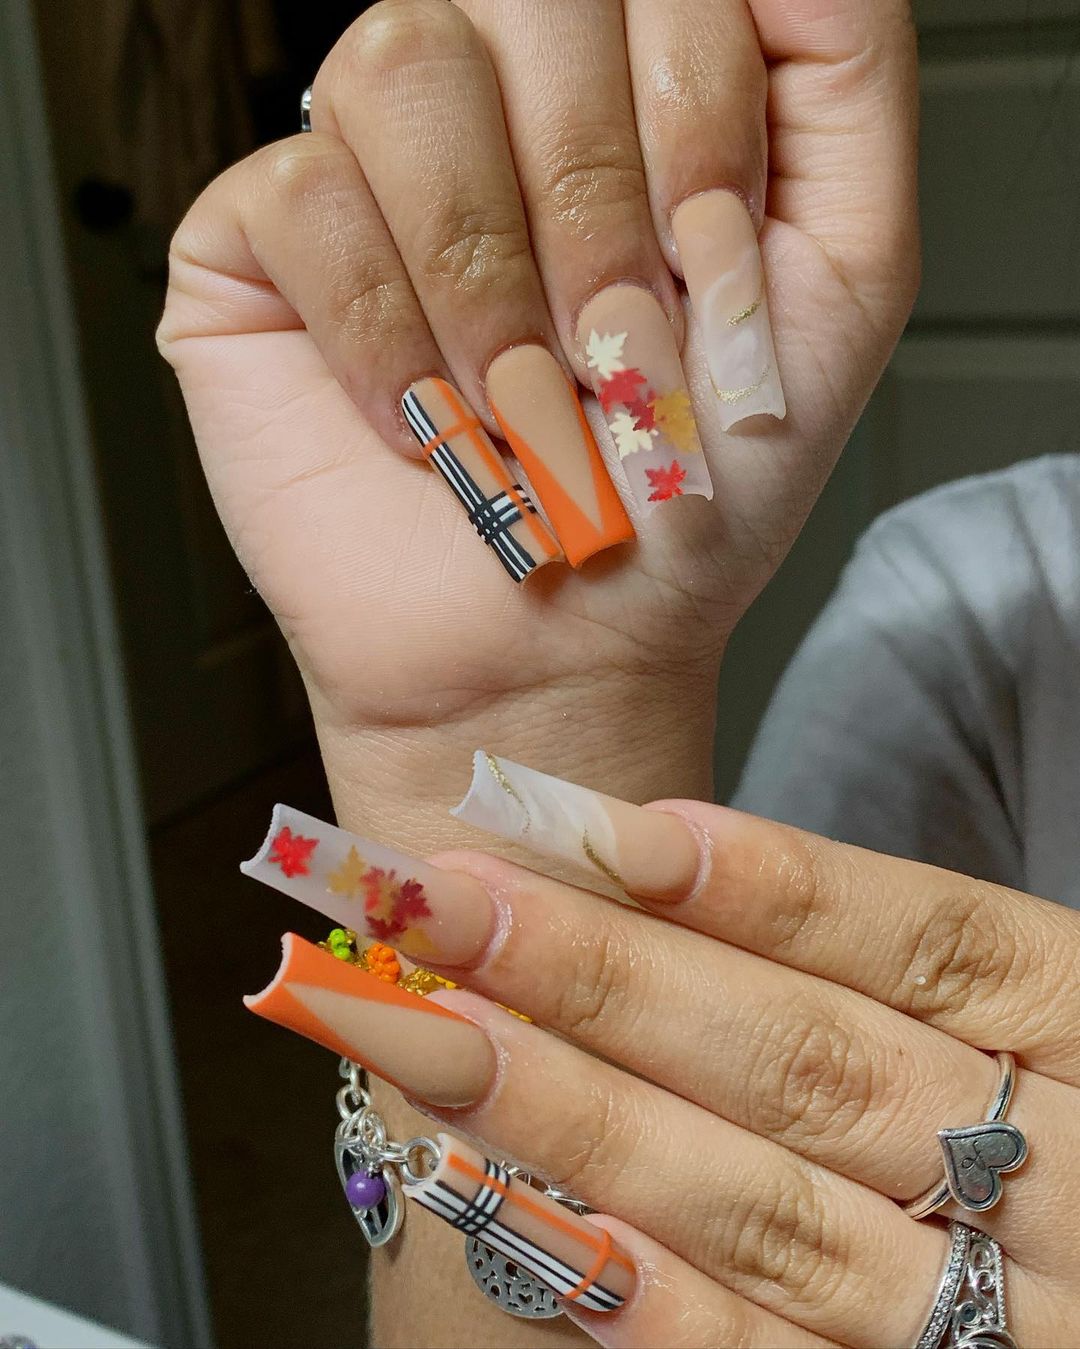
For those who love a longer nail look, acrylic coffin short nails are a perfect canvas for creative fall designs. This set combines autumn leaves and plaid patterns for a chic and sophisticated style. The nails feature a harmonious blend of fall colors like orange, beige, and nude, with a touch of plaid and leaf patterns that scream autumn. The varied designs on each nail keep the look interesting and dynamic, while the acrylics provide a sturdy base that can last through the season.
- Base coat: CND Stickey Base Coat
- Orange polish: China Glaze “Autumn’s Up”
- Nude polish: OPI “Dulce de Leche”
- Black and white polish for plaid: OPI “Black Onyx” and “Alpine Snow”
- Leaf decals: Born Pretty Store Fall Leaves Nail Stickers
- Top coat: Glisten & Glow Top Coat
- Acrylic kit: Mia Secret Professional Acrylic Nail System
- Nail file and buffer: OPI Crystal Nail File
Instructions:
- Apply the base coat to all nails.
- Use the acrylic kit to build the coffin shape and ensure they are all even.
- Paint each nail with the chosen base colors.
- Apply the leaf decals on selected nails.
- For the plaid design, use a fine brush to create thin black and white lines over the nude polish.
- Finish with a top coat to protect the designs and add shine.
Artistic Long Nails
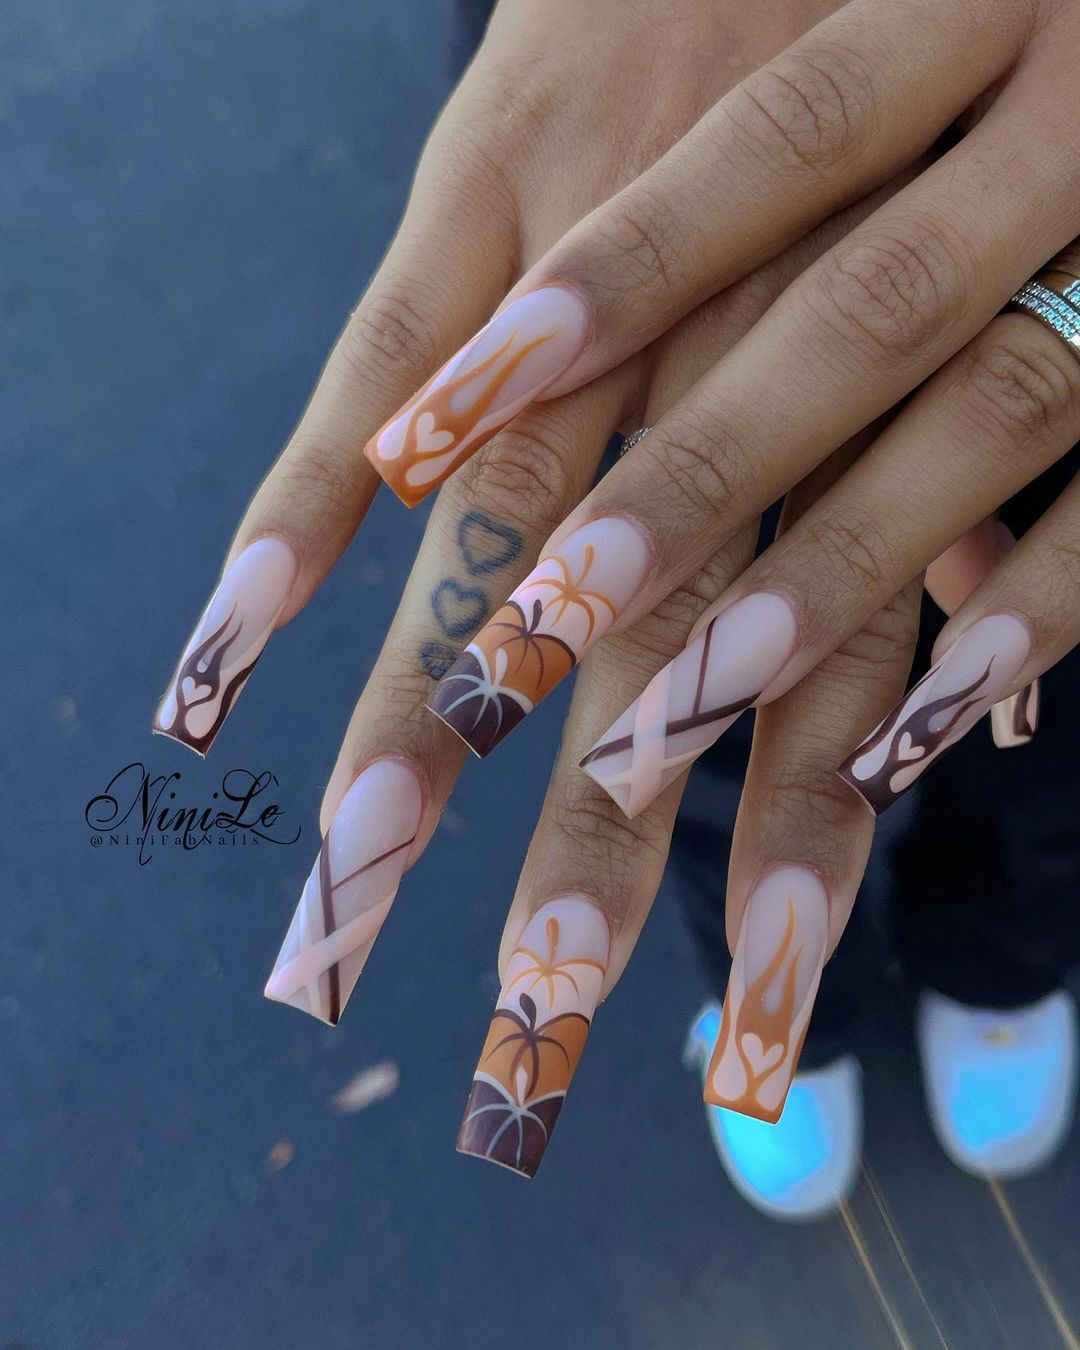
Long nails offer a large canvas for more intricate and detailed designs. This set is a perfect example of how to combine various patterns and colors for a standout fall manicure. These long nails are decorated with a mix of swirls, hearts, and floral patterns in shades of brown and orange. The intricate designs are balanced with a clear base, allowing the art to pop. This look is perfect for those who love artistic and unique designs.
- Base coat: Orly Bonder Base Coat
- Brown polish: Essie “Partner in Crime”
- Orange polish: Zoya “Jinx”
- White polish: OPI “Funny Bunny”
- Nail art brushes: Winstonia Fine Line Brush Set
- Top coat: Sally Hansen Miracle Gel Top Coat
Instructions:
- Start with a base coat to protect your nails.
- Apply the clear base polish.
- Use the nail art brushes to create the swirl, heart, and floral designs with the brown, orange, and white polishes.
- Ensure each layer is dry before applying the next to avoid smudging.
- Finish with a top coat to seal the design and add a glossy finish.
Vibrant Yellow and Blue Fall Nails
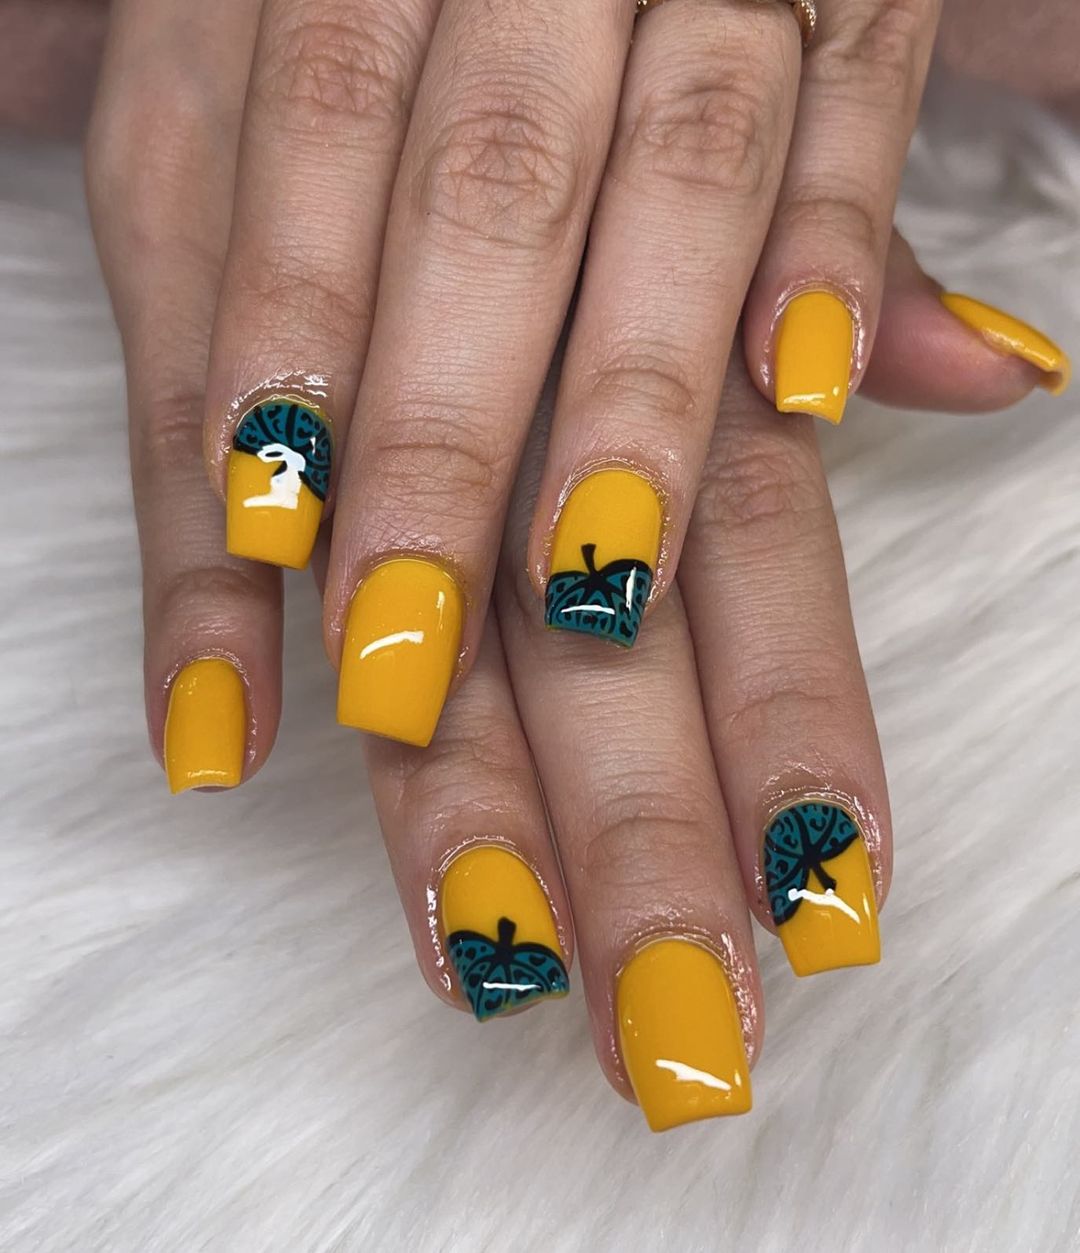
These nails are a stunning display of bright yellow paired with intricate blue designs. The yellow base color instantly catches the eye, making it a bold choice for autumn. The vibrant yellow polish is perfect for those looking to stand out this fall. The accent nails featuring detailed blue patterns add a touch of elegance and creativity. The contrast between the bright yellow and deep blue creates a visually striking look that’s perfect for both casual and formal settings.
- Base coat: Essie Ridge Filling Base Coat
- Yellow polish: OPI “Sun, Sea, and Sand in My Pants”
- Blue polish for detailing: Essie “Butler Please”
- Top coat: Seche Vite Dry Fast Top Coat
- Nail art brush: Winstonia Fine Line Brush
- Dotting tool: PUEEN 5 Piece Nail Art Dotting Tools
Instructions:
- Start with a base coat to protect your nails.
- Apply two coats of yellow polish on all nails.
- Use the blue polish and a fine nail art brush to create the intricate designs on the accent nails.
- Allow the designs to dry completely before applying the top coat to seal and protect your manicure.
Save Pin
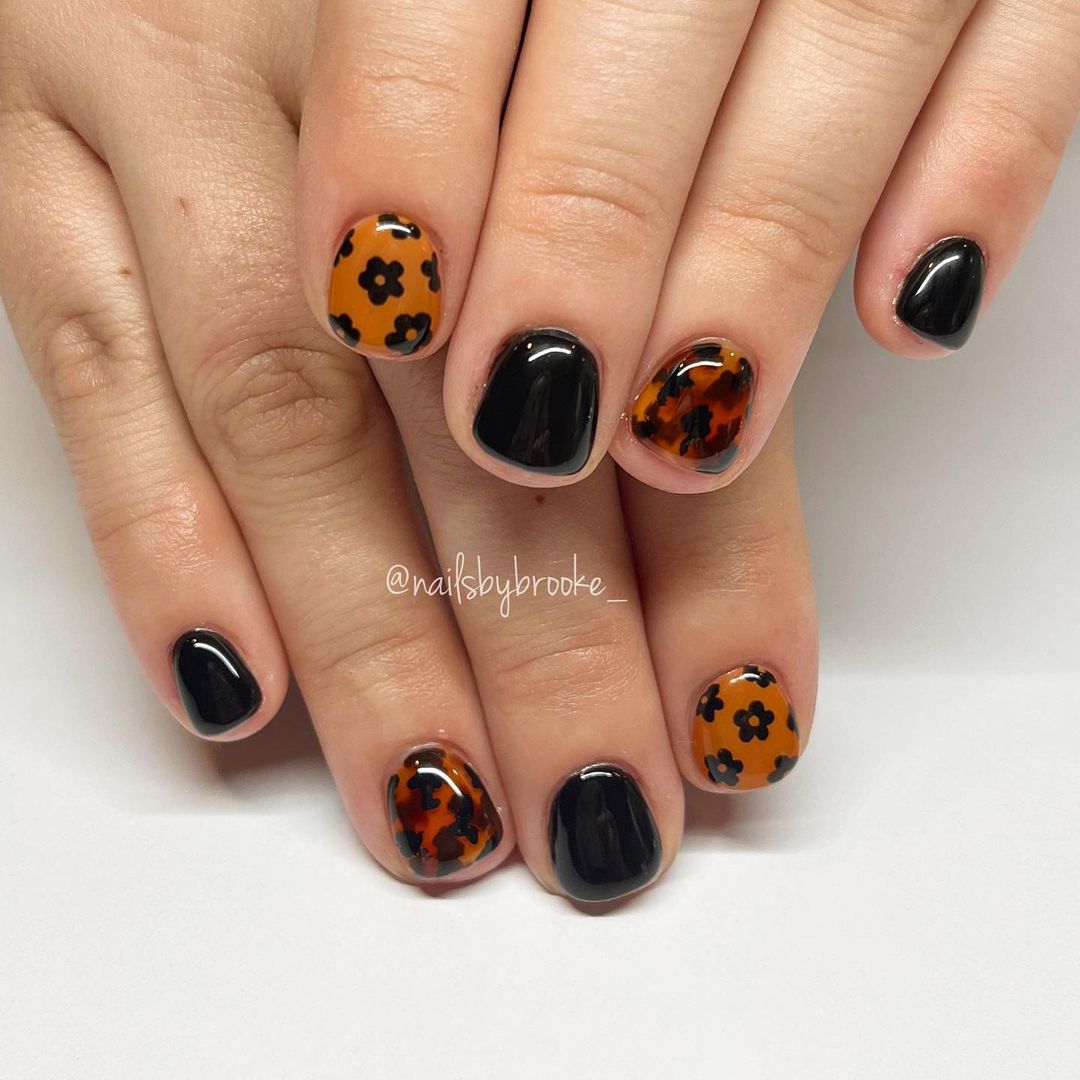
Classic Black and Floral Tortoiseshell Nails
This design features a combination of classic black nails and autumn-inspired tortoiseshell with floral accents. It is a sophisticated and versatile look for the fall season. The glossy black nails paired with the tortoiseshell pattern exude elegance and sophistication. The addition of small black floral designs over the tortoiseshell nails brings a unique touch, making this manicure both chic and seasonally appropriate. The combination of these elements makes it a standout look for anyone wanting a classy yet trendy style.
- Base coat: CND Stickey Base Coat
- Black polish: OPI “Black Onyx”
- Brown and orange polish for tortoiseshell: Sally Hansen “Mochachino” and OPI “It’s a Piazza Cake”
- Black polish for floral designs: Sally Hansen “Black Out”
- Top coat: Glisten & Glow Top Coat
- Nail art brush: Winstonia Fine Line Brush Set
Instructions:
- Begin with a base coat to protect your nails.
- Apply the black polish to three nails on each hand.
- Create the tortoiseshell pattern by dabbing the brown and orange polishes on the remaining nails, using a small brush to blend them slightly.
- Add small black floral designs over the tortoiseshell nails.
- Finish with a top coat to ensure a long-lasting shine.
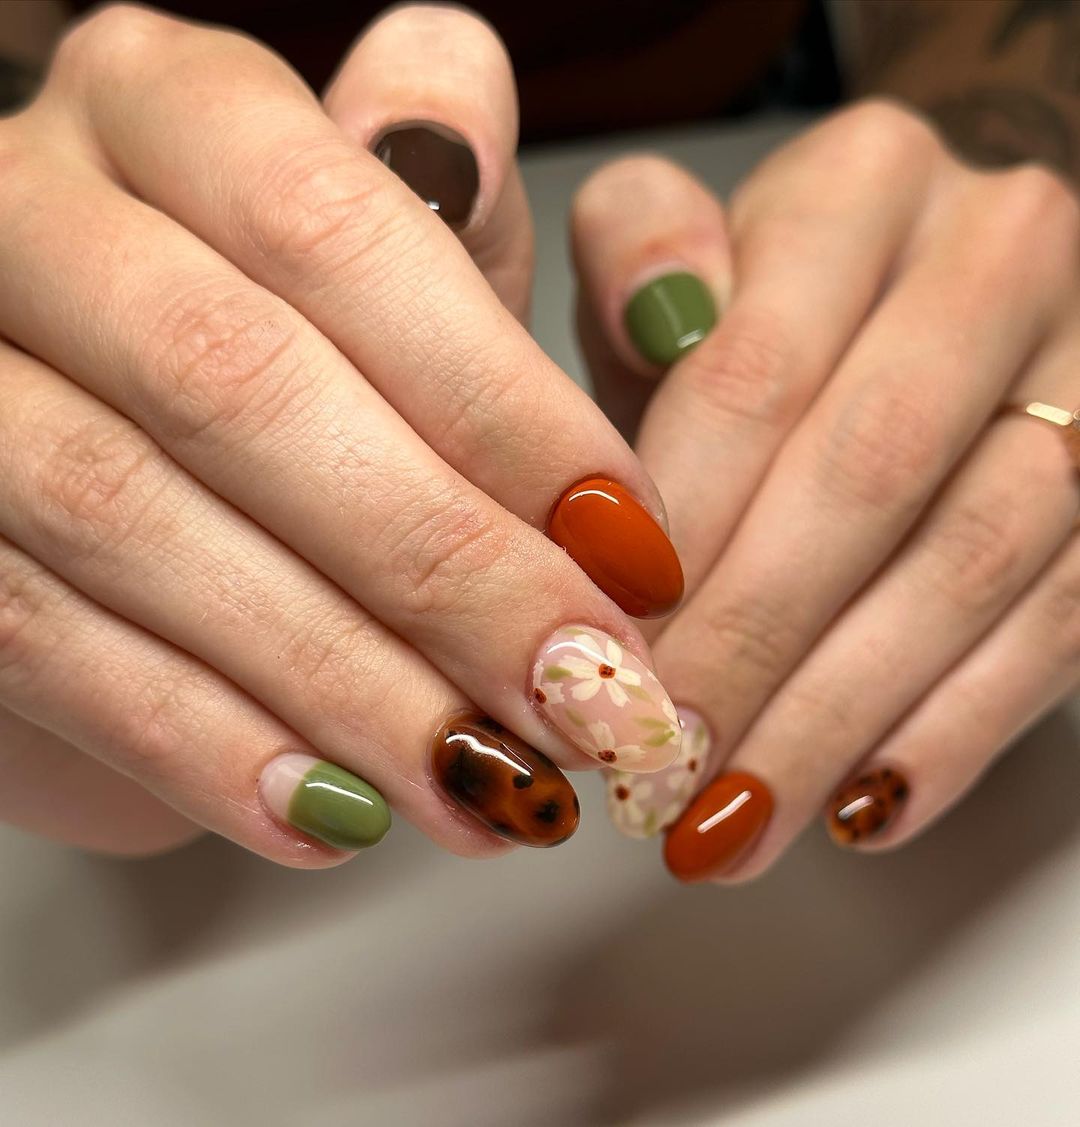
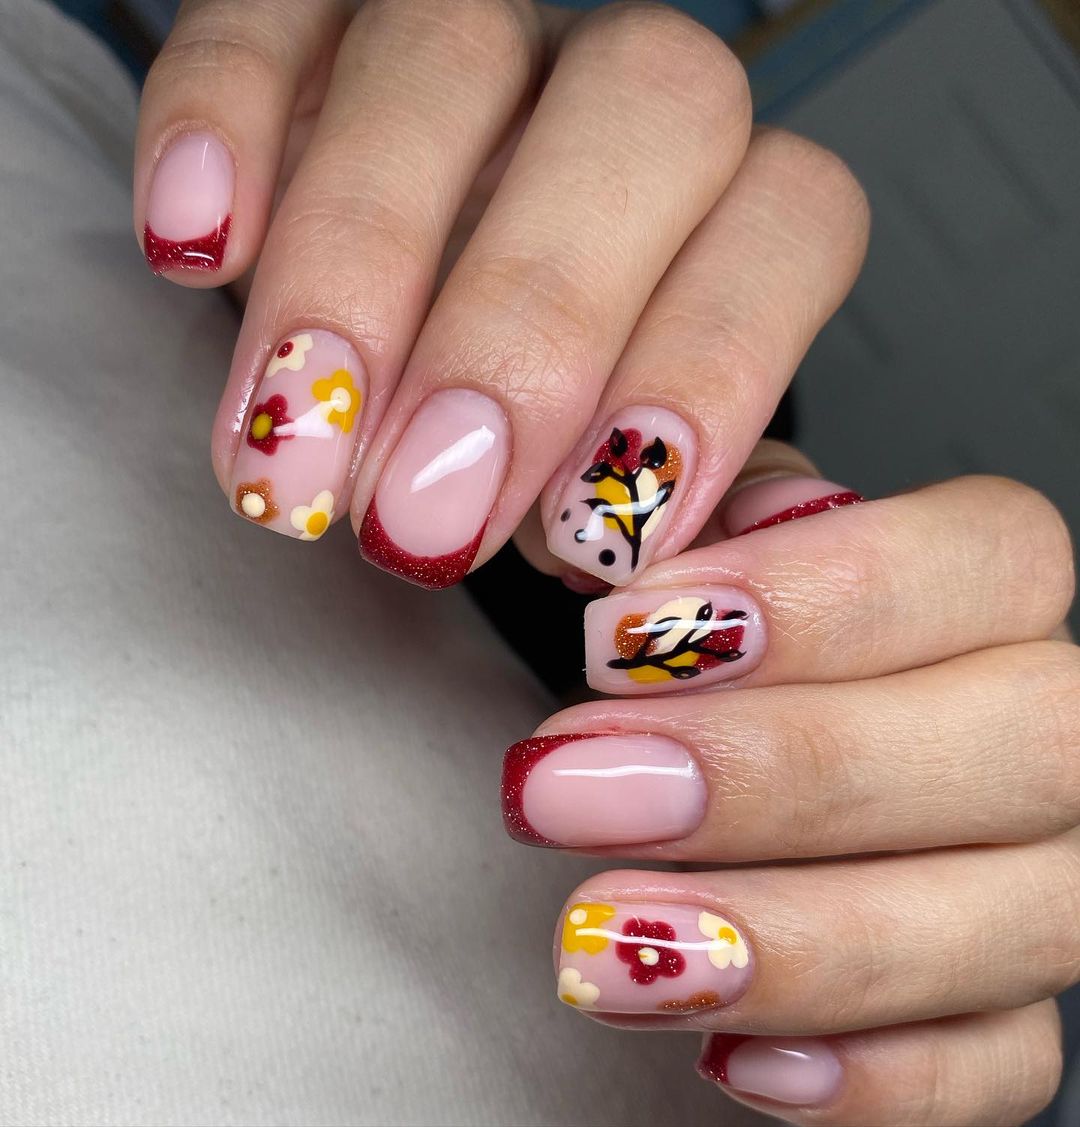
Autumnal Multi-Color Nails with Floral Accents
This manicure combines multiple autumnal colors with delicate floral accents, creating a cohesive and stylish fall look. The mix of green, brown, and orange polishes provides a rich, autumnal palette that’s perfect for the season. The floral accents on the ring finger add a soft and feminine touch to the overall design. This manicure strikes the perfect balance between simplicity and creativity, making it a great choice for those who love a bit of variety in their nail designs.
- Base coat: Orly Bonder Base Coat
- Green polish: Essie “Going Incognito”
- Brown polish: Zoya “Louise”
- Orange polish: OPI “It’s a Piazza Cake”
- White polish for floral accents: OPI “Alpine Snow”
- Top coat: Sally Hansen Miracle Gel Top Coat
- Nail art brush: Winstonia Fine Line Brush Set
- Dotting tool: PUEEN 5 Piece Nail Art Dotting Tools
Instructions:
- Apply the base coat to all nails.
- Paint each nail with the chosen colors: green, brown, and orange.
- Use the white polish and a fine nail art brush to create floral accents on the ring finger.
- Allow the designs to dry before applying the top coat for a glossy finish.
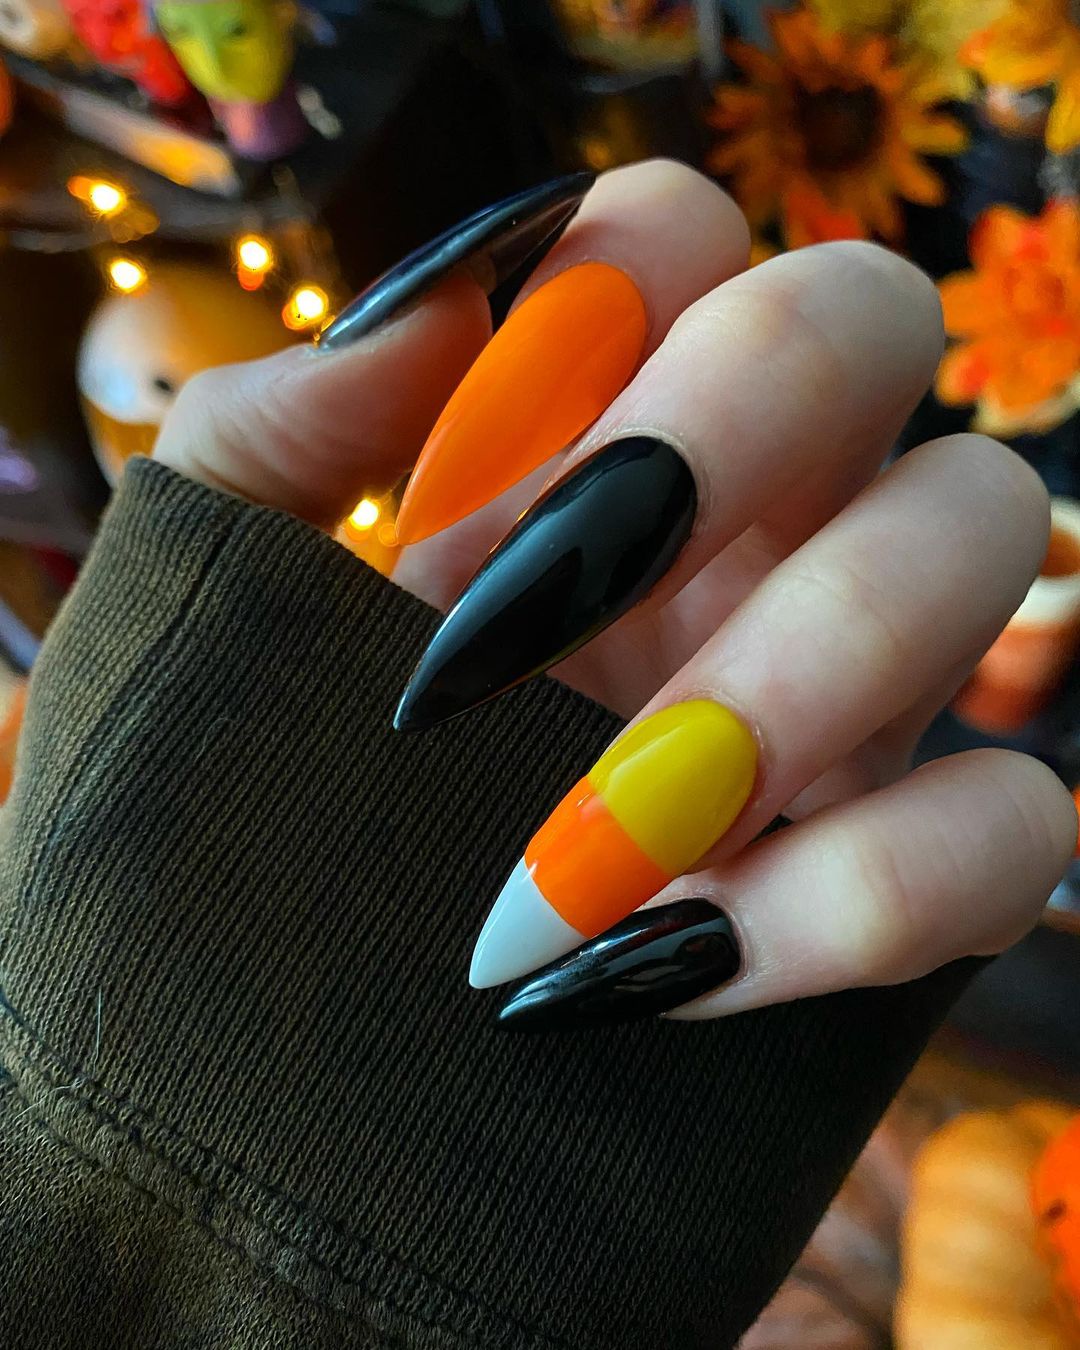
Halloween-Inspired Stiletto Nails
This manicure features a mix of classic Halloween colors in a stiletto shape, perfect for the spooky season. The bold use of orange, black, yellow, and white creates a striking look that’s perfect for Halloween. The long stiletto shape adds a dramatic flair, making the design even more eye-catching. The candy corn-inspired nail stands out as a fun and playful element, while the black and orange nails keep the look cohesive and festive.
- Base coat: Orly Bonder Base Coat
- Black polish: OPI “Black Onyx”
- Orange polish: OPI “A Good Man-darin is Hard to Find”
- Yellow polish: China Glaze “Happy Go Lucky”
- White polish: OPI “Alpine Snow”
- Top coat: Seche Vite Dry Fast Top Coat
- Nail art brush: Winstonia Fine Line Brush Set
Instructions:
- Apply the base coat to all nails.
- Paint each nail with the designated color (black, orange, yellow, and white for candy corn).
- For the candy corn nail, paint the entire nail yellow, then add an orange stripe in the middle, and finish with a white tip.
- Allow each layer to dry completely before applying the top coat to seal the design.
Elegant Tortoiseshell and Floral Accent Nails
This elegant design combines tortoiseshell patterns with delicate floral accents for a sophisticated autumn look. The combination of tortoiseshell and white French tips creates a classic and elegant design. The addition of the 3D floral accents adds a touch of luxury and uniqueness. This manicure is perfect for special occasions or when you want your nails to make a subtle yet stylish statement.

- Base coat: Essie Ridge Filling Base Coat
- White polish: OPI “Alpine Snow”
- Brown and amber polish for tortoiseshell: Sally Hansen “Mochachino” and OPI “Amber Waves”
- 3D floral nail art pieces: Born Pretty Store 3D Nail Art
- Top coat: Glisten & Glow Top Coat
- Nail art brush: Winstonia Fine Line Brush Set
Instructions:
- Apply the base coat to all nails.
- Create the French tips with the white polish.
- Use the brown and amber polishes to create the tortoiseshell pattern on selected nails.
- Attach the 3D floral pieces using nail glue or a small dot of clear polish.
- Seal with a top coat for a glossy finish.
Checkerboard and Floral Nail Art
This design features a fun mix of checkerboard patterns, floral accents, and tortoiseshell elements on a short, rounded nail shape. The checkerboard pattern is a bold and trendy choice, while the floral accents add a touch of whimsy. The tortoiseshell design ties the look together with a classic fall feel. This manicure is perfect for those who love to experiment with different patterns and styles.
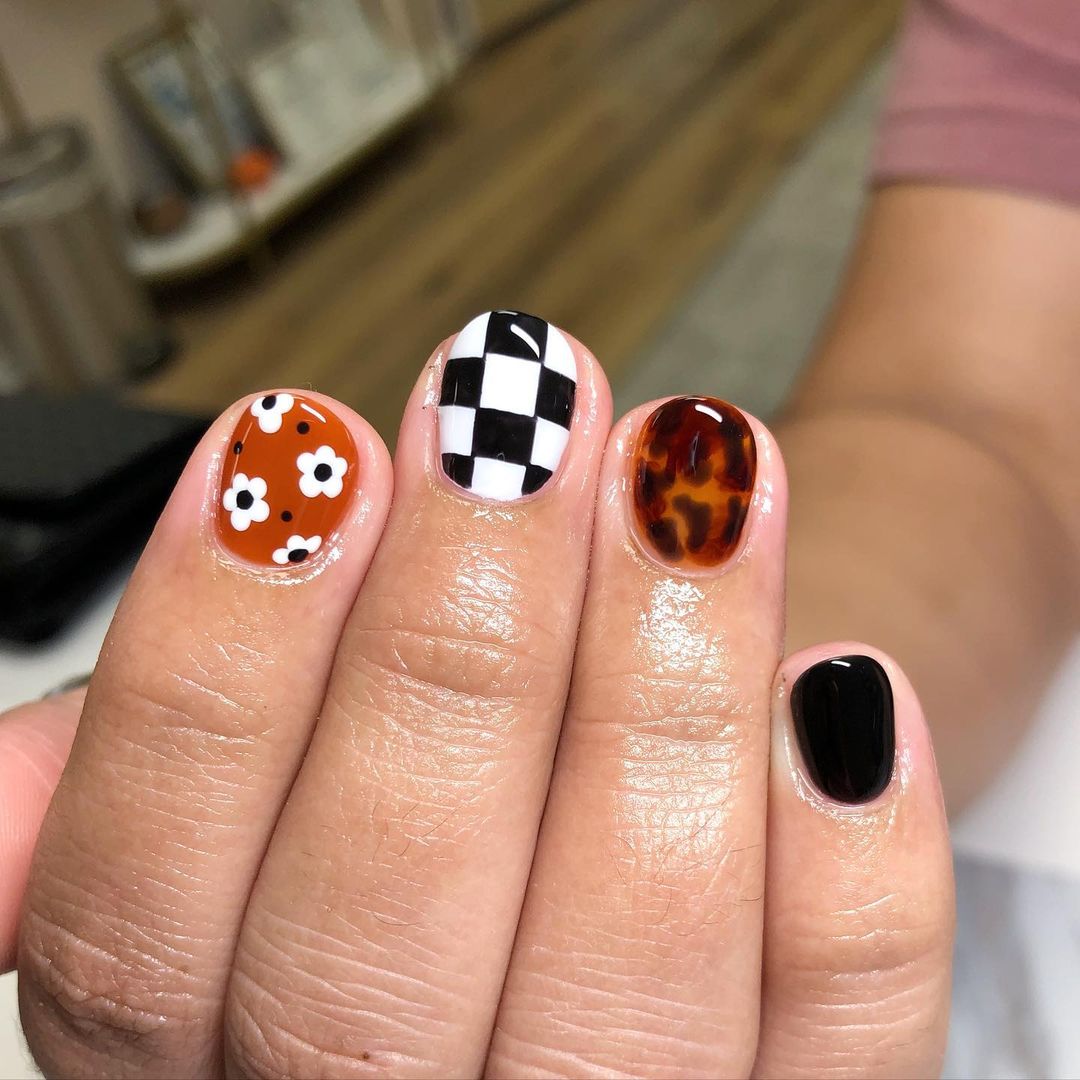
- Base coat: CND Stickey Base Coat
- Black polish: OPI “Black Onyx”
- White polish: OPI “Alpine Snow”
- Brown and amber polish for tortoiseshell: Sally Hansen “Mochachino” and OPI “Amber Waves”
- Orange polish: OPI “It’s a Piazza Cake”
- Top coat: Seche Vite Dry Fast Top Coat
- Nail art brush: Winstonia Fine Line Brush Set
Instructions:
- Apply the base coat to all nails.
- Paint the floral and tortoiseshell nails first.
- Create the checkerboard pattern using the black and white polishes and a fine nail art brush.
- Allow each layer to dry before applying the top coat to protect the designs.
Save Pin
Matte Grey and Black Almond Nails
This manicure features a matte finish with grey and black tones, accented by delicate floral designs. The matte finish gives this design a modern and sophisticated look. The combination of grey and black creates a sleek and chic aesthetic, while the floral accents add a touch of femininity. The almond shape enhances the elegance of this design, making it perfect for both everyday wear and special occasions.
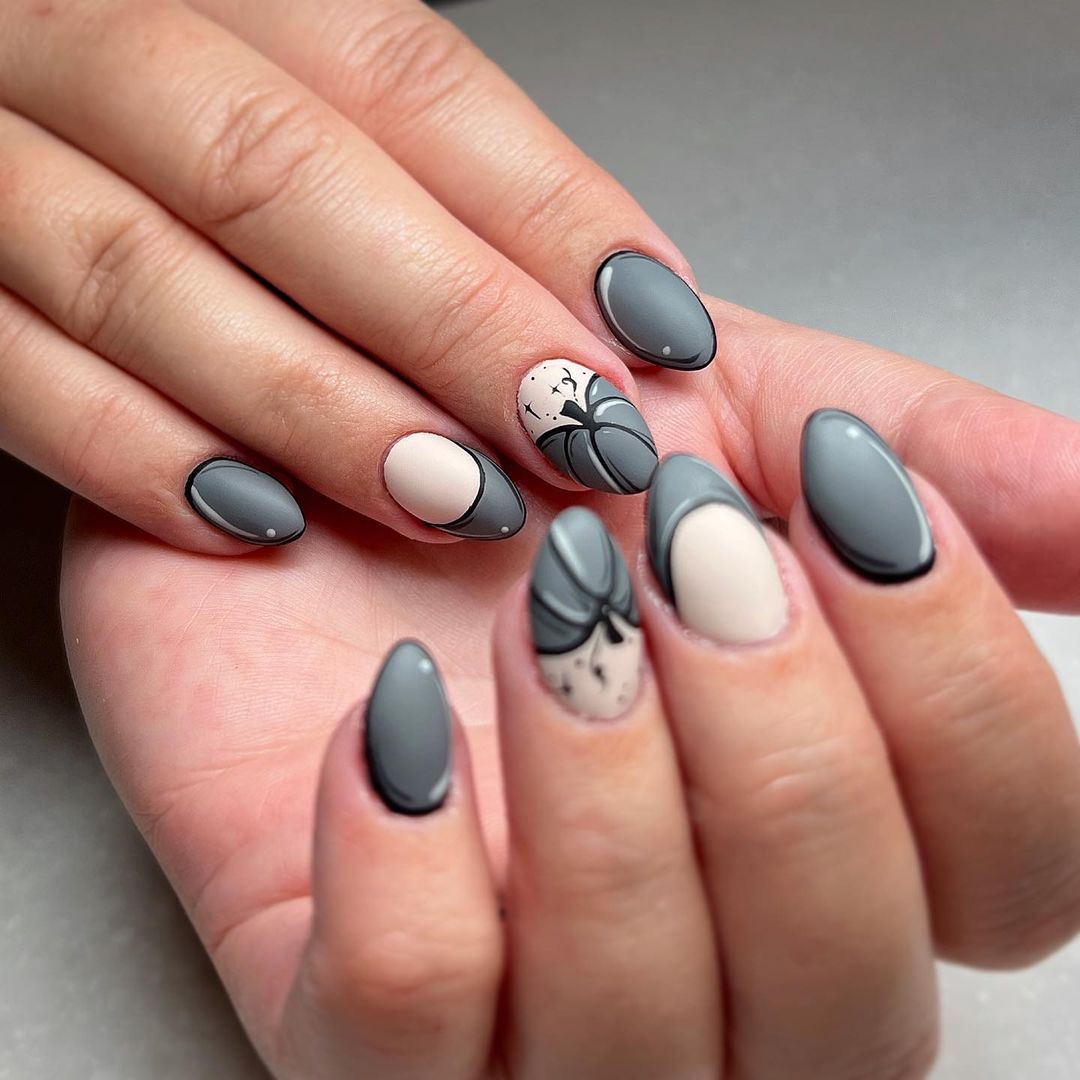
- Base coat: Orly Bonder Base Coat
- Matte top coat: Essie Matte About You Top Coat
- Grey polish: OPI “I Can Never Hut Up”
- Black polish: OPI “Black Onyx”
- White polish for floral accents: OPI “Alpine Snow”
- Nail art brush: Winstonia Fine Line Brush Set
Instructions:
- Apply the base coat to all nails.
- Paint the nails with the grey and black polishes.
- Use the white polish and a fine nail art brush to create the floral designs.
- Finish with a matte top coat for a smooth, non-glossy finish.
Floral and Rhinestone Long Coffin Nails
This design combines bright floral elements with rhinestone accents on long coffin-shaped nails. The vibrant floral designs and rhinestone accents make this manicure stand out. The use of pink and orange colors adds a cheerful and lively touch, perfect for brightening up the fall season. The long coffin shape provides ample space for intricate designs and embellishments, making this manicure a true statement piece.

- Base coat: Essie Ridge Filling Base Coat
- Pink and orange polishes: OPI “Getting Nadi On My Honeymoon” and “A Good Man-darin is Hard to Find”
- Rhinestones: Born Pretty Store Nail Rhinestones
- Nail art brush: Winstonia Fine Line Brush Set
- Nail glue: Mia Secret Nail Glue
- Top coat: Glisten & Glow Top Coat
Instructions:
- Apply the base coat to all nails.
- Paint the nails with the pink and orange polishes.
- Use the nail art brush to create the floral designs.
- Attach the rhinestones using nail glue.
- Seal the design with a top coat for added shine and durability.
Fox and Leaf Autumn Nails
This playful design features adorable fox faces and leaf accents in warm autumn colors. The fox and leaf designs are perfect for capturing the spirit of autumn. The warm orange tones combined with the white and black details create a cozy and charming look. The almond shape adds to the overall elegance of this design, making it a delightful choice for the fall season.
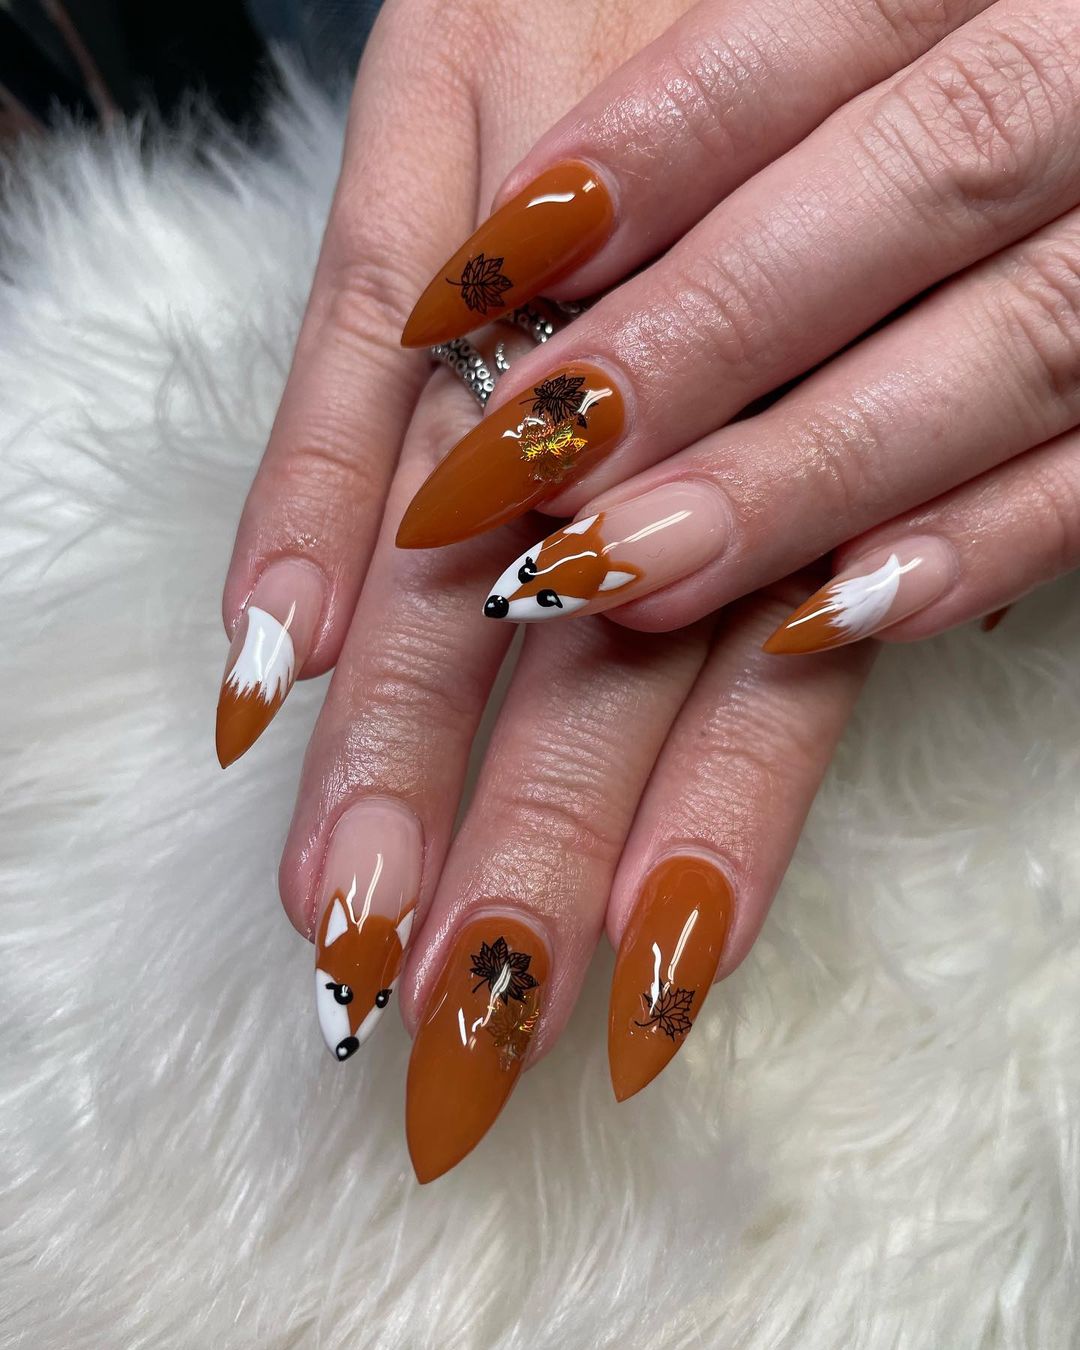
- Base coat: Orly Bonder Base Coat
- Orange polish: OPI “It’s a Piazza Cake”
- White polish: OPI “Alpine Snow”
- Black polish for detailing: Sally Hansen “Black Out”
- Leaf decals: Born Pretty Store Fall Leaves Nail Stickers
- Top coat: Seche Vite Dry Fast Top Coat
- Nail art brush: Winstonia Fine Line Brush Set
Instructions:
- Apply the base coat to all nails.
- Paint the nails with the orange polish.
- Use the white and black polishes to create the fox faces, and apply the leaf decals.
- Allow the designs to dry before applying the top coat to seal and protect the manicure.
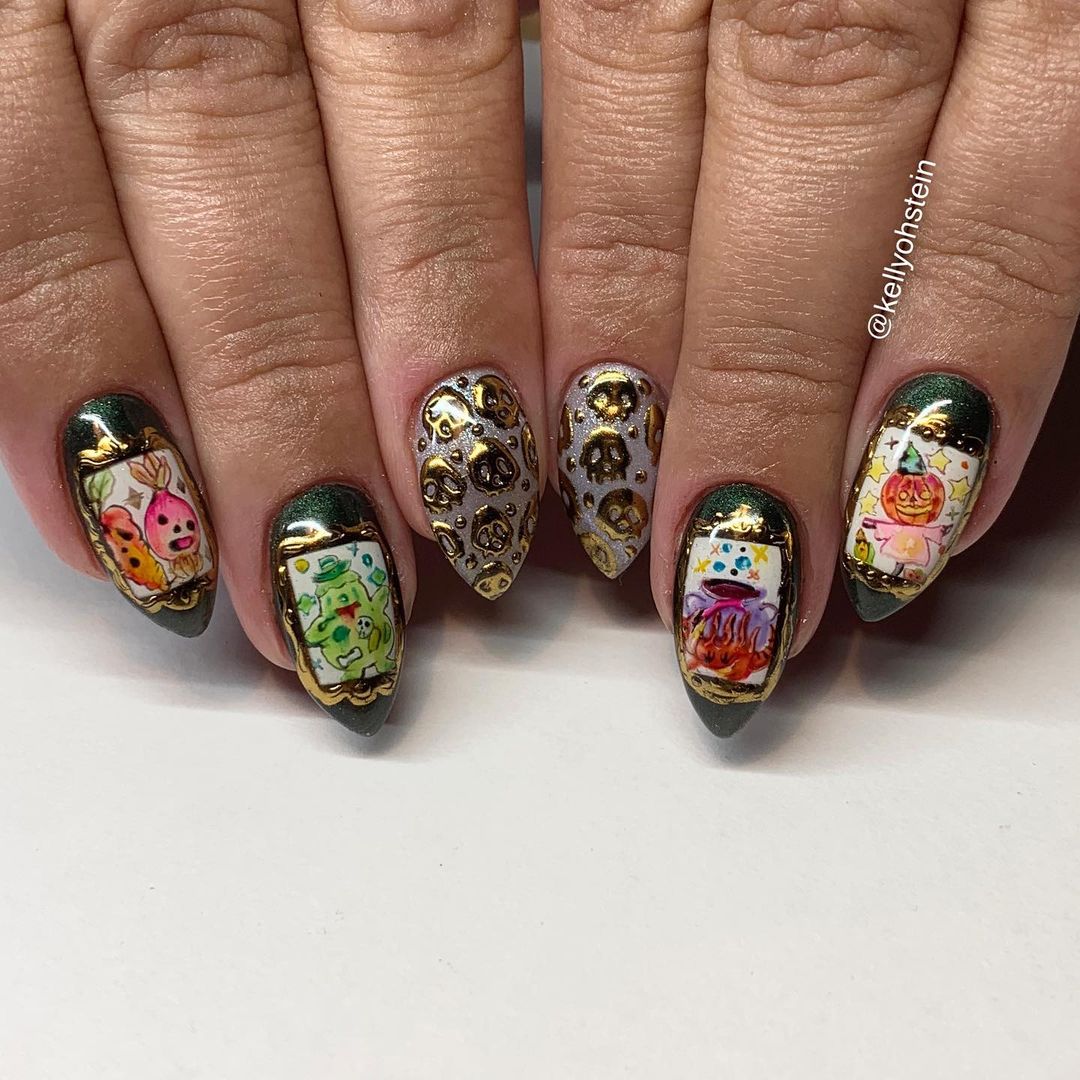
Halloween Character Nail Art
This intricate design features a variety of colorful Halloween characters and motifs, making it a perfect choice for celebrating the spooky season in style. The detailed illustrations of Halloween characters, combined with metallic gold accents, create a rich and vibrant look. The deep green and grey base colors provide a dark, moody background that allows the colorful characters to stand out. This design is perfect for those who want their nails to be a conversation starter.
- Base coat: Essie Ridge Filling Base Coat
- Dark green polish: OPI “Stay Off the Lawn!”
- Grey polish: Essie “Cocktail Bling”
- Gold polish for accents: China Glaze “24K Gold”
- Nail art stickers or decals: Born Pretty Store Halloween Nail Stickers
- Top coat: Seche Vite Dry Fast Top Coat
- Nail art brush: Winstonia Fine Line Brush Set
Instructions:
- Apply the base coat to all nails.
- Paint the nails with the dark green and grey polishes.
- Use the gold polish to create metallic accents around the characters.
- Apply the Halloween character stickers or decals carefully.
- Finish with a top coat to seal and protect the design.
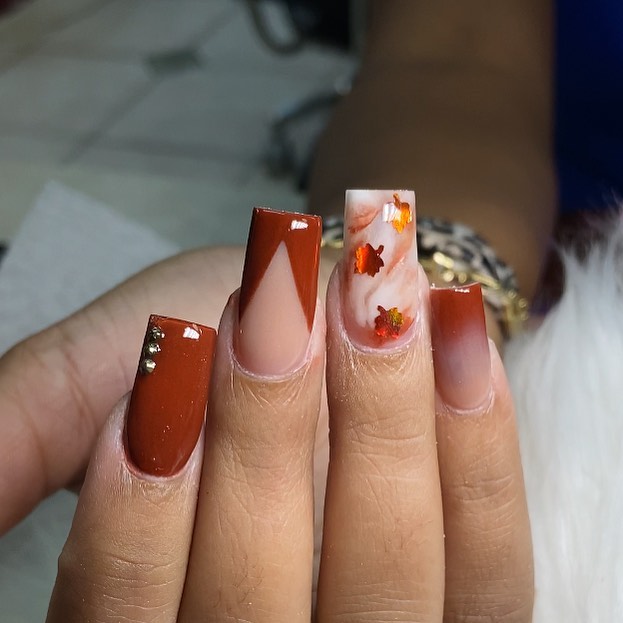
Autumn Leaves and Brown Marble Nails
This design combines rich brown tones with delicate autumn leaves and a marble effect, perfect for capturing the essence of fall. The rich brown polish paired with a marble accent nail featuring embedded autumn leaves creates a warm and cozy look. The subtle gold studs add a touch of elegance to the overall design. This manicure is perfect for those who want to celebrate the beauty of fall with their nails.
- Base coat: CND Stickey Base Coat
- Brown polish: OPI “Chocolate Moose”
- Nude polish for marble effect: Essie “Bare With Me”
- Gold studs: Born Pretty Store Nail Studs
- Autumn leaf decals: Born Pretty Store Fall Leaves Nail Stickers
- Top coat: Seche Vite Dry Fast Top Coat
- Nail art brush: Winstonia Fine Line Brush Set
Instructions:
- Apply the base coat to all nails.
- Paint the nails with the brown polish.
- For the marble effect, apply the nude polish and create the marble pattern using a thin brush and the brown polish.
- Apply the autumn leaf decals to the marble accent nail.
- Add the gold studs to the brown nails.
- Finish with a top coat to seal the design.
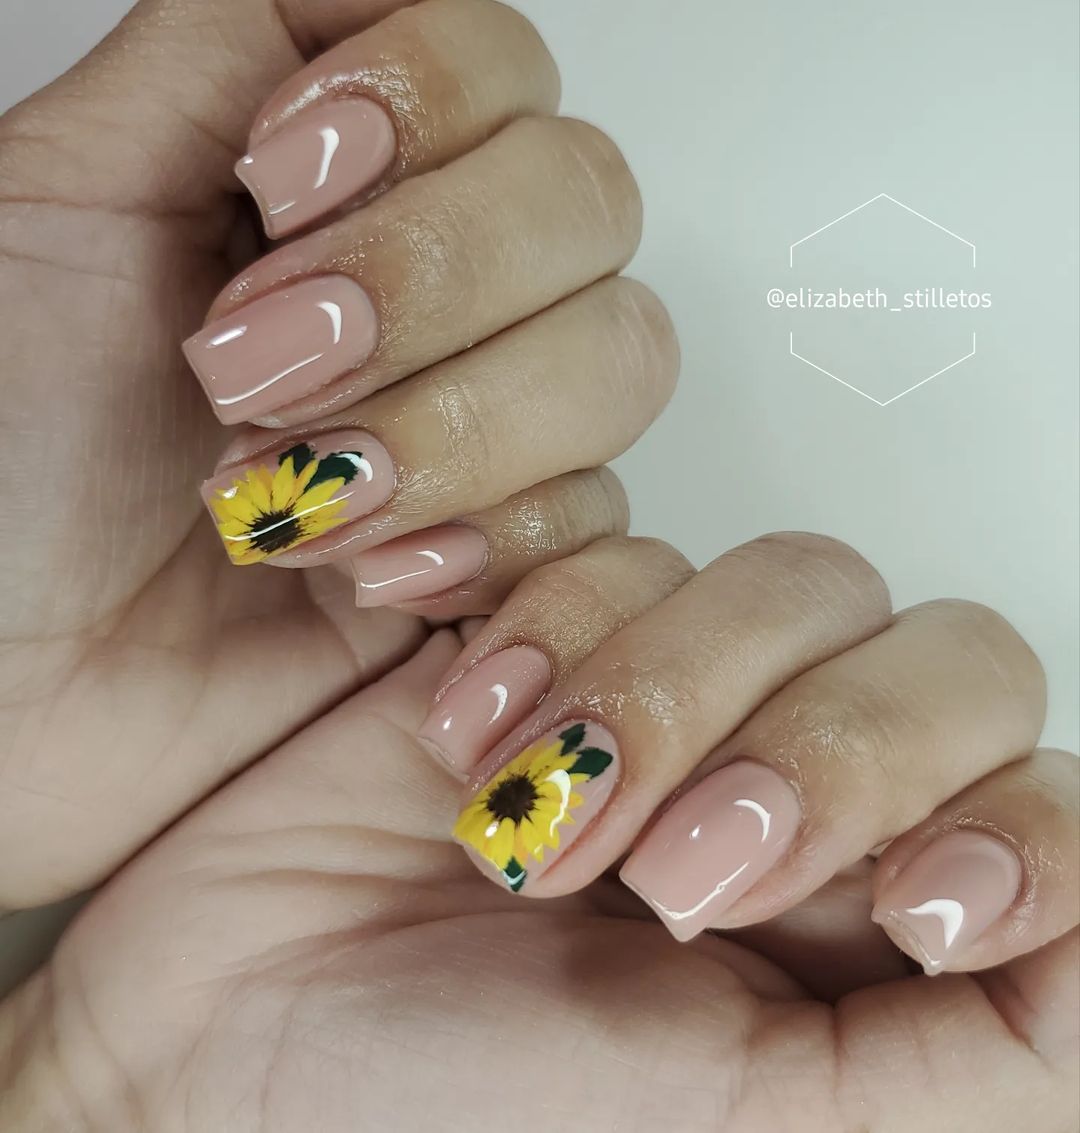
Sunflower Accent Nails
This design features a delicate sunflower accent on a nude base, perfect for adding a touch of summer warmth to your fall nails. The nude base color provides a clean and elegant canvas for the vibrant sunflower accents. This design is simple yet eye-catching, making it perfect for those who prefer a more understated look with a pop of color.
- Base coat: Orly Bonder Base Coat
- Nude polish: OPI “Samoan Sand”
- Yellow polish for sunflowers: China Glaze “Happy Go Lucky”
- Brown polish for sunflower centers: OPI “Suzi Loves Cowboys”
- Green polish for leaves: Essie “Going Incognito”
- Top coat: Seche Vite Dry Fast Top Coat
- Nail art brush: Winstonia Fine Line Brush Set
Instructions:
- Apply the base coat to all nails.
- Paint the nails with the nude polish.
- Use the yellow, brown, and green polishes to create the sunflower accents using a fine nail art brush.
- Finish with a top coat to protect the design and add shine.
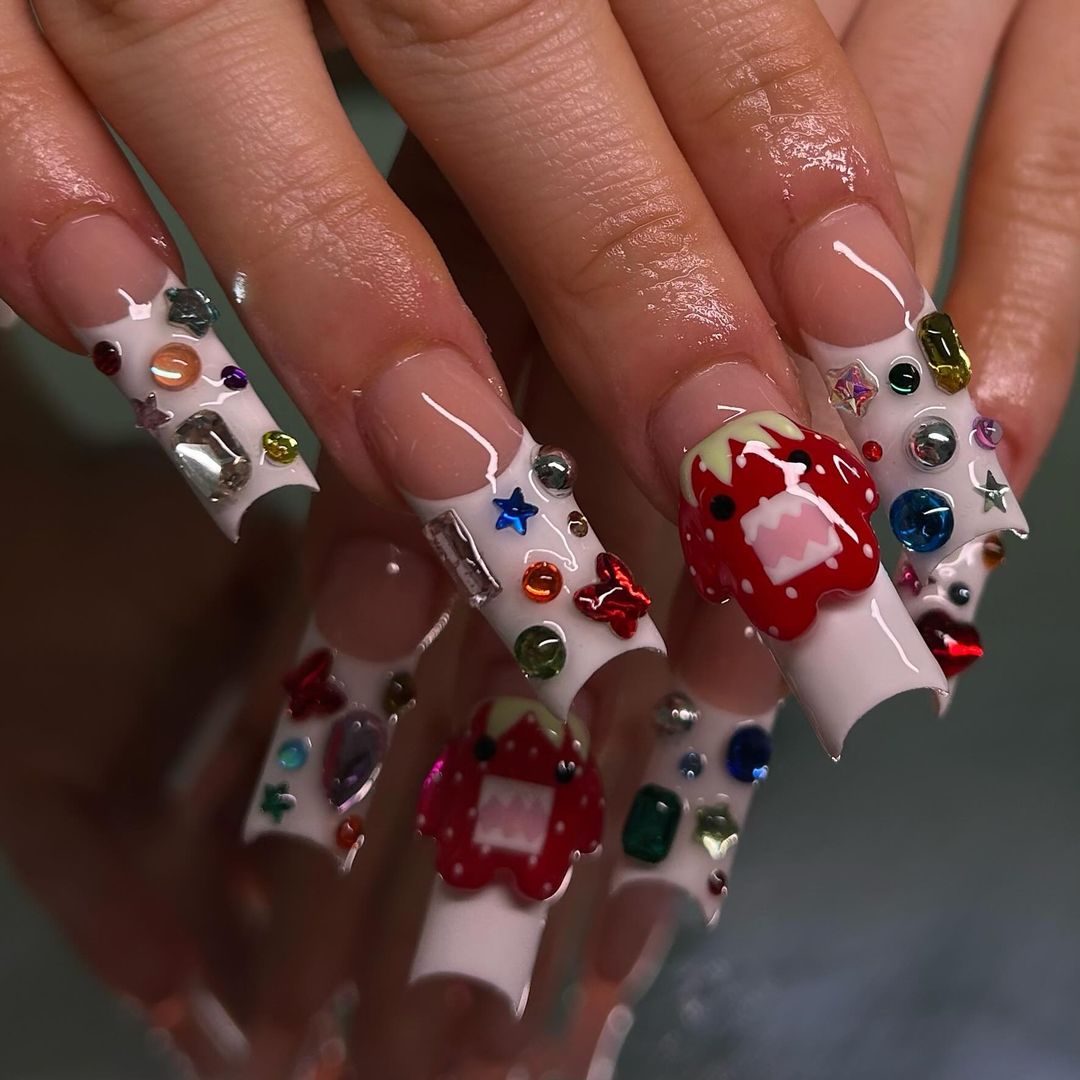
Colorful Gemstone Nails
This extravagant design features a variety of colorful gemstones and intricate 3D nail art, perfect for making a bold statement. The clear base allows the colorful gemstones to take center stage, creating a dazzling and luxurious look. The addition of 3D elements adds depth and texture, making this manicure perfect for special occasions or when you want to stand out.
- Base coat: Essie Ridge Filling Base Coat
- Clear polish: OPI “Top Coat”
- Colorful gemstones: Born Pretty Store Nail Rhinestones
- Nail glue: Mia Secret Nail Glue
- 3D nail art pieces: Born Pretty Store 3D Nail Art
- Top coat: Seche Vite Dry Fast Top Coat
Instructions:
- Apply the base coat to all nails.
- Paint the nails with the clear polish.
- Attach the colorful gemstones and 3D nail art pieces using nail glue.
- Finish with a top coat to seal and protect the design.
Heart and Polka Dot Nails
This fun and whimsical design features red hearts and white polka dots on a rich red base, with green accent nails for a playful twist. The combination of red hearts and white polka dots on a red base creates a cute and playful look, while the green accent nails add a touch of contrast. This design is perfect for those who love fun and quirky nail art.
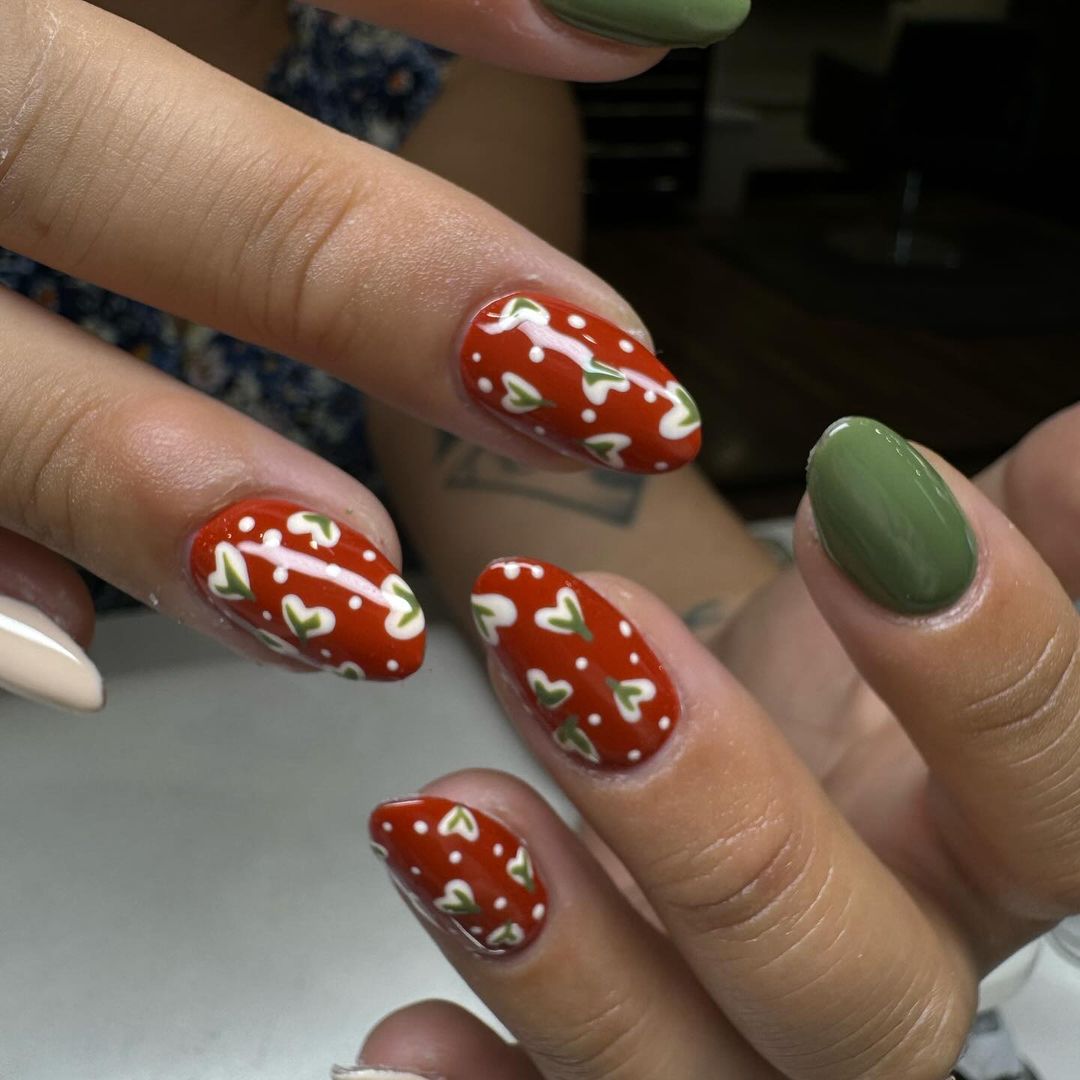
- Base coat: CND Stickey Base Coat
- Red polish: OPI “Big Apple Red”
- Green polish: Essie “Going Incognito”
- White polish for dots and hearts: OPI “Alpine Snow”
- Top coat: Seche Vite Dry Fast Top Coat
- Dotting tool: PUEEN 5 Piece Nail Art Dotting Tools
- Nail art brush: Winstonia Fine Line Brush Set
Instructions:
- Apply the base coat to all nails.
- Paint the red and green nails.
- Use the white polish and a dotting tool to create the polka dots and hearts on the red nails.
- Finish with a top coat to seal the design.
Ghost and Leaf Olive Green Nails
This spooky and festive design features olive green nails with ghost and leaf accents, perfect for celebrating Halloween. The olive green base color provides a unique and stylish backdrop for the ghost and leaf accents. The combination of spooky and autumnal elements makes this manicure perfect for the fall season and Halloween celebrations.
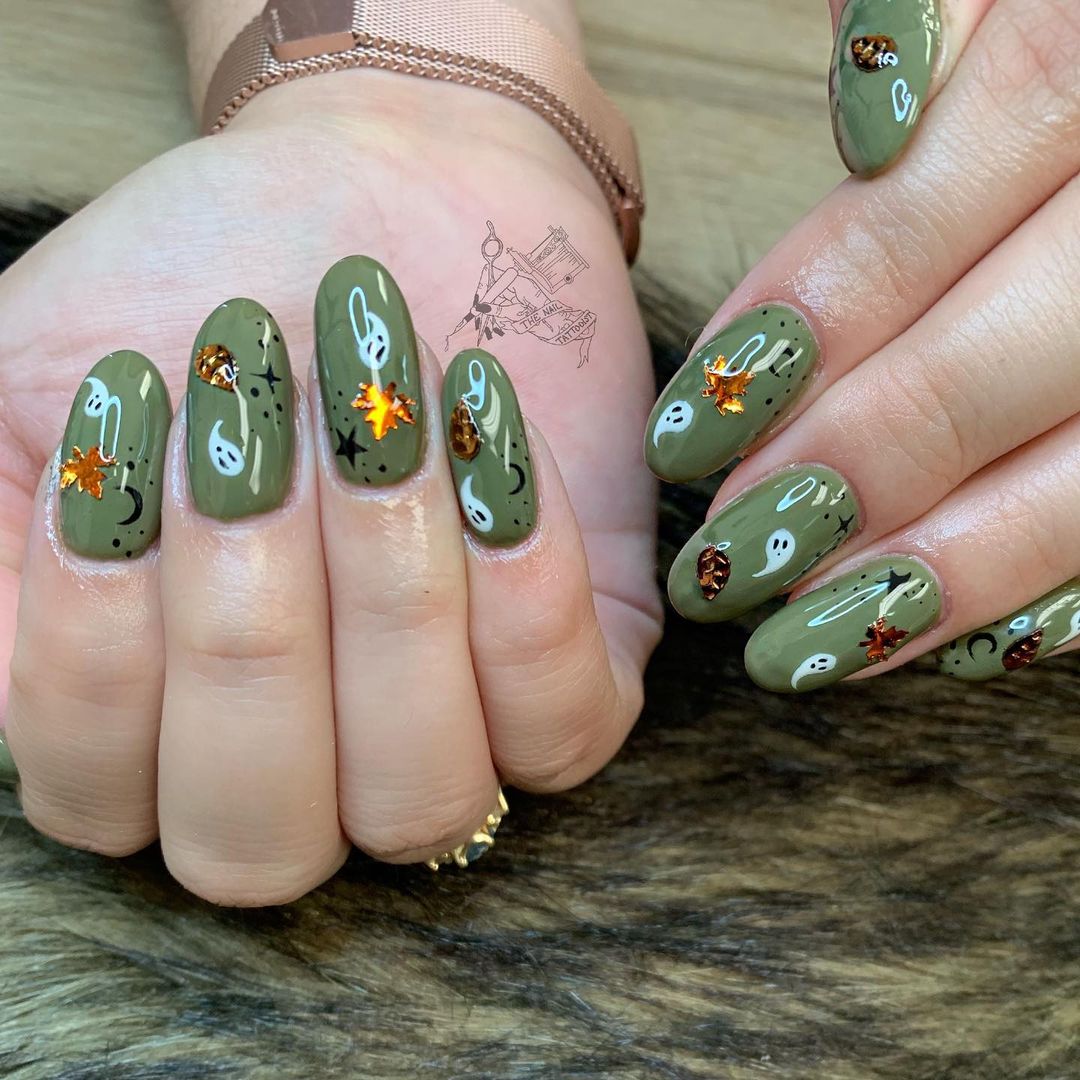
- Base coat: Orly Bonder Base Coat
- Olive green polish: OPI “Suzi – The First Lady of Nails”
- White polish for ghosts: OPI “Alpine Snow”
- Black polish for detailing: Sally Hansen “Black Out”
- Autumn leaf decals: Born Pretty Store Fall Leaves Nail Stickers
- Top coat: Seche Vite Dry Fast Top Coat
- Nail art brush: Winstonia Fine Line Brush Set
Instructions:
- Apply the base coat to all nails.
- Paint the nails with the olive green polish.
- Use the white and black polishes to create the ghost accents using a fine nail art brush.
- Apply the autumn leaf decals.
- Finish with a top coat to seal and protect the design.
Tortoiseshell and Burgundy Nails
This elegant design combines the classic tortoiseshell pattern with rich burgundy accents, creating a sophisticated look for fall. The mix of tortoiseshell and burgundy polish is a chic choice for the autumn season. The tortoiseshell design adds depth and texture, while the burgundy accents provide a bold contrast. This combination is perfect for both casual and formal occasions, offering a timeless yet trendy style.
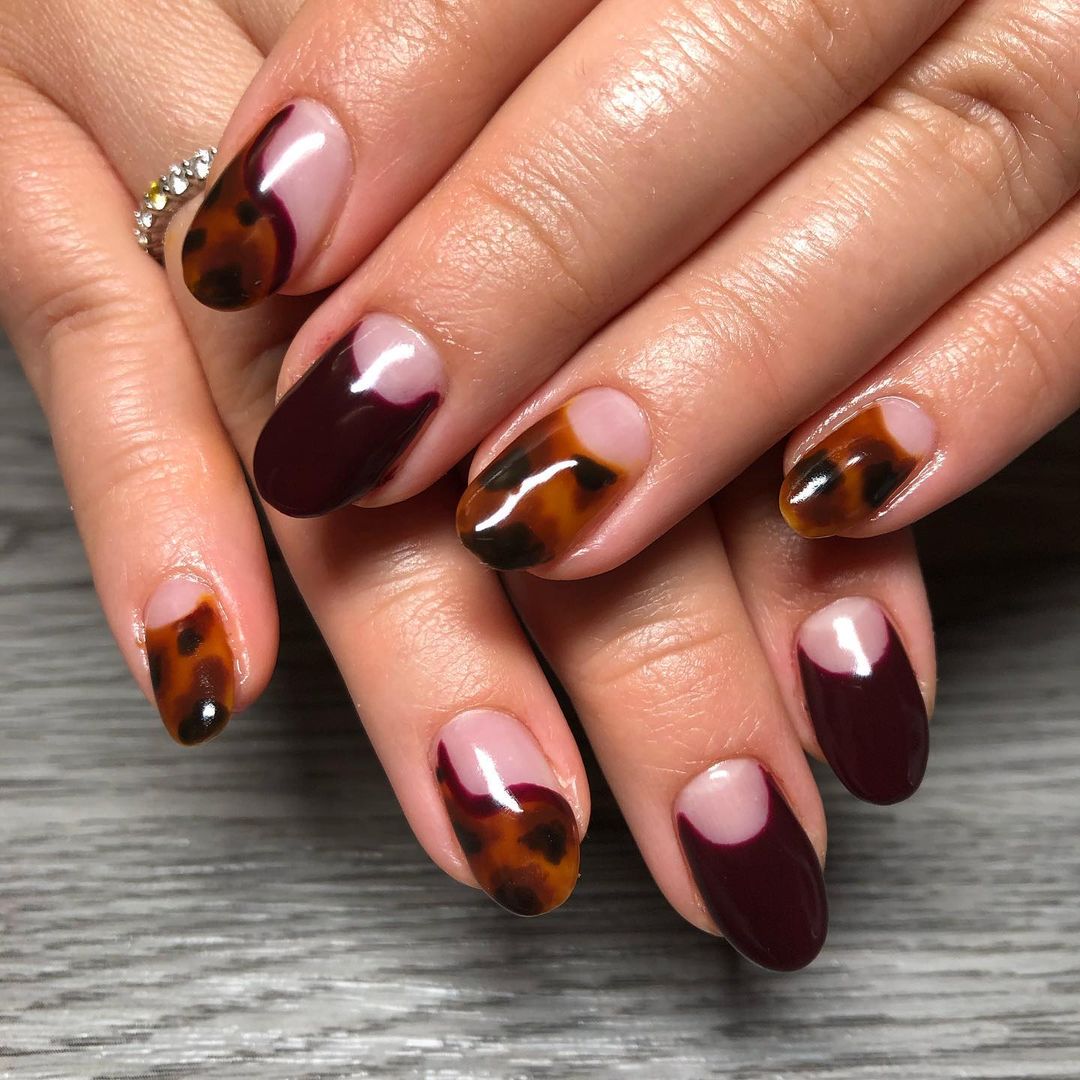
- Base coat: Essie Ridge Filling Base Coat
- Tortoiseshell polish: Sally Hansen “Mochachino” and OPI “Amber Waves”
- Burgundy polish: Essie “Berry Naughty”
- Top coat: Seche Vite Dry Fast Top Coat
- Nail art brush: Winstonia Fine Line Brush Set
Instructions:
- Apply the base coat to all nails.
- Paint alternating nails with the tortoiseshell and burgundy polishes.
- Use the nail art brush to create the tortoiseshell pattern by blending the polishes.
- Allow each layer to dry before applying the top coat to seal the design.
Neutral Checkerboard Nails
This design features a neutral checkerboard pattern, offering a modern and minimalist take on nail art. The neutral tones of beige and white create a clean and contemporary look. The checkerboard pattern is a trendy yet timeless design that adds visual interest without being overwhelming. This manicure is perfect for those who prefer a subtle and sophisticated style.
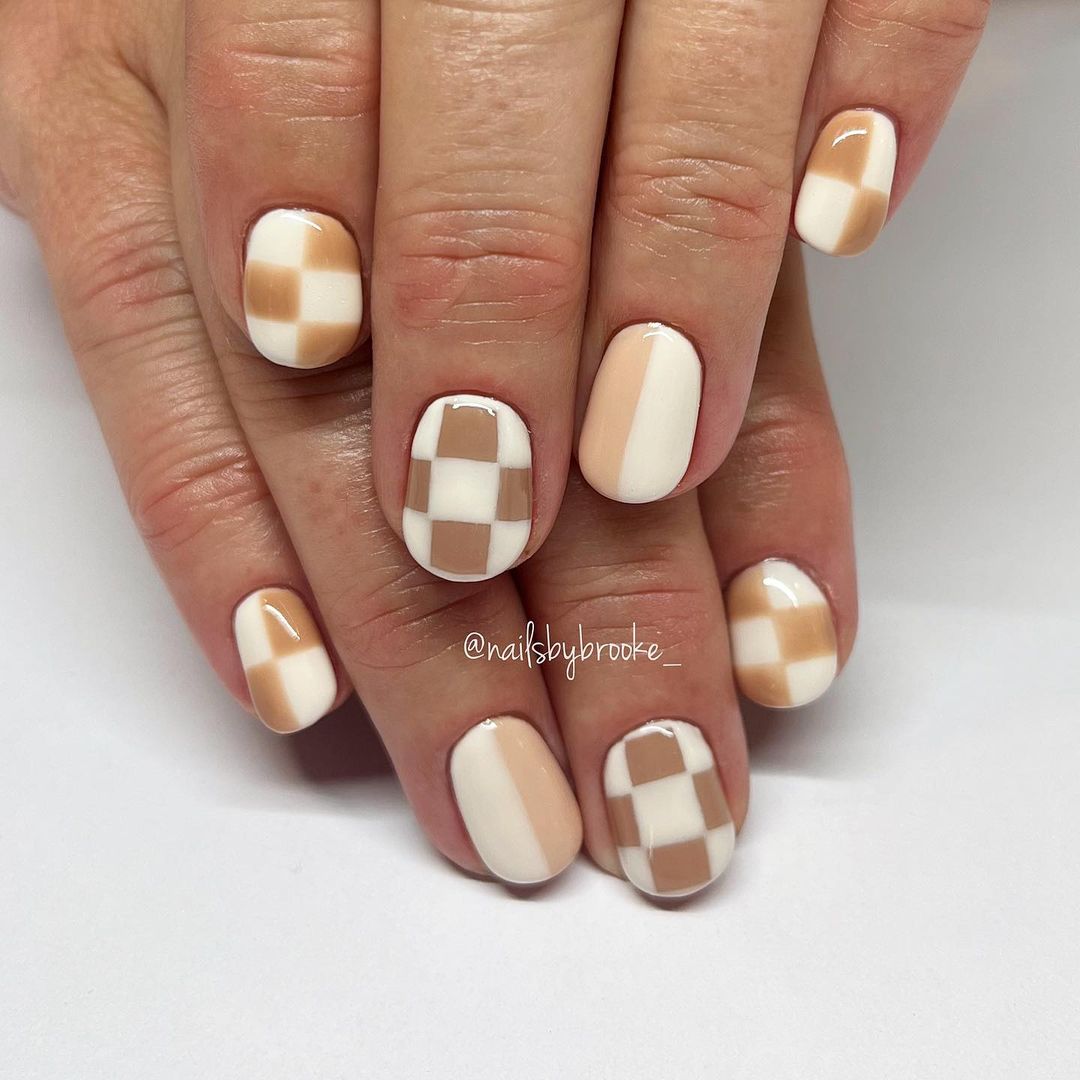
- Base coat: CND Stickey Base Coat
- Beige polish: OPI “Samoan Sand”
- White polish: Essie “Blanc”
- Top coat: Seche Vite Dry Fast Top Coat
- Nail art brush: Winstonia Fine Line Brush Set
Instructions:
- Apply the base coat to all nails.
- Paint the nails with the beige polish.
- Use the white polish and nail art brush to create the checkerboard pattern.
- Finish with a top coat to protect the design and add shine.
Floral French Tips with Red Accents
This playful design features red French tips and floral accents, adding a touch of whimsy to a classic look. The red French tips bring a bold twist to the traditional French manicure, while the floral accents add a fun and feminine touch. This design is perfect for those who want to add a bit of color and creativity to their nails.
- Base coat: Orly Bonder Base Coat
- Red polish: OPI “Big Apple Red”
- Nude polish: Essie “Mademoiselle”
- Yellow, white, and brown polishes for floral accents: China Glaze “Happy Go Lucky”, OPI “Alpine Snow”, and OPI “Suzi Loves Cowboys”
- Top coat: Seche Vite Dry Fast Top Coat
- Nail art brush: Winstonia Fine Line Brush Set
Instructions:
- Apply the base coat to all nails.
- Paint the nails with the nude polish.
- Create the red French tips using the red polish.
- Use the nail art brush to paint the floral accents with the yellow, white, and brown polishes.
- Finish with a top coat to seal the design.
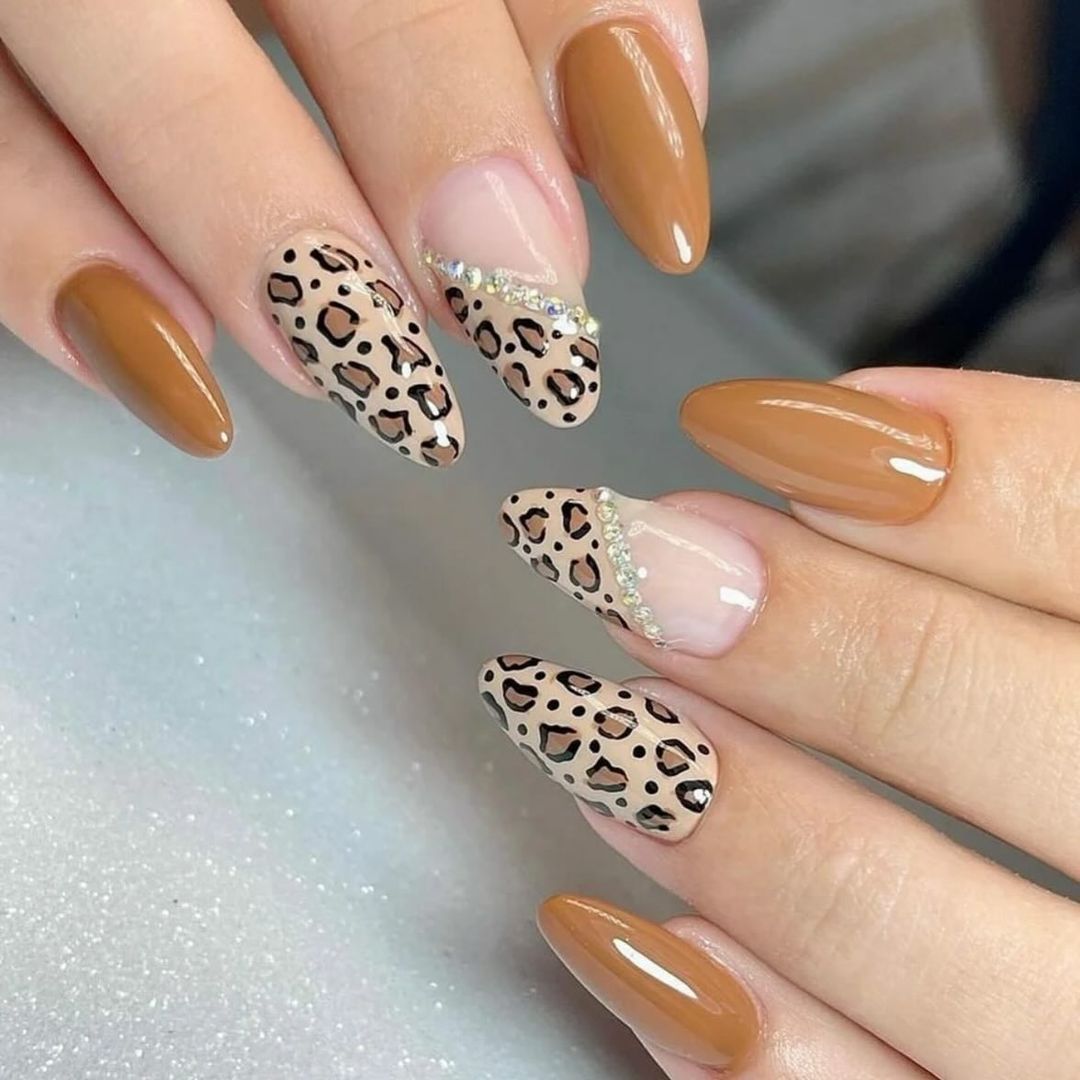
Leopard Print and Nude Nails
This chic design combines leopard print with nude and brown tones, creating a stylish and modern look. The leopard print adds a wild and trendy element to the classic nude and brown palette. This design is perfect for those who love animal prints and want to incorporate them into their nail art. The addition of rhinestones adds a touch of glamour, making the manicure suitable for both day and night.
- Base coat: Essie Ridge Filling Base Coat
- Nude polish: OPI “Samoan Sand”
- Brown polish: Essie “Wicked”
- Black polish for leopard spots: OPI “Black Onyx”
- Rhinestones: Born Pretty Store Nail Rhinestones
- Top coat: Seche Vite Dry Fast Top Coat
- Nail art brush: Winstonia Fine Line Brush Set
Instructions:
- Apply the base coat to all nails.
- Paint the nails with the nude and brown polishes.
- Use the black polish and nail art brush to create the leopard spots on the nude nails.
- Attach the rhinestones using nail glue.
- Finish with a top coat to protect the design.
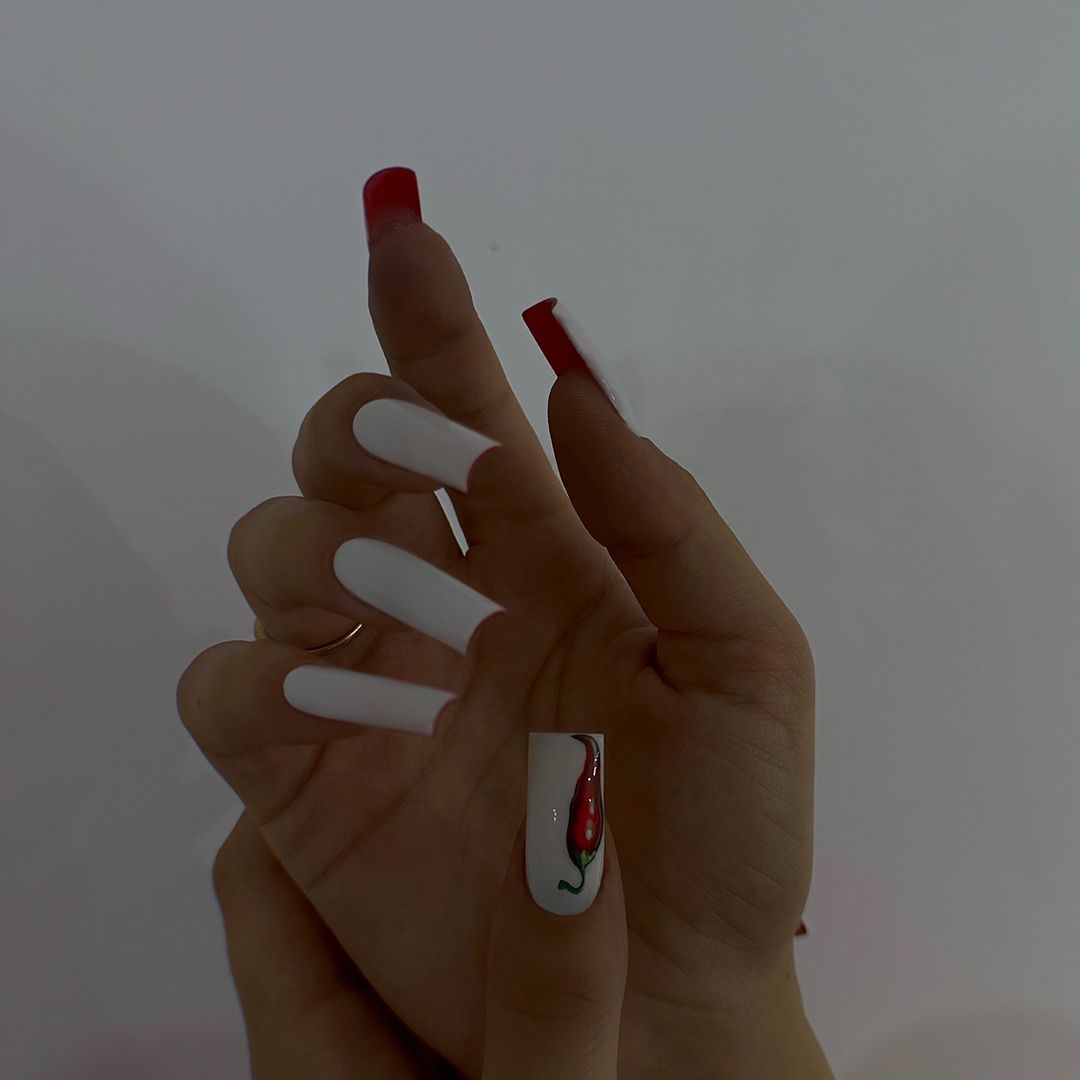
Red and White French Tips with Chili Pepper Accent
This bold design features red and white French tips with a chili pepper accent nail, adding a spicy twist to a classic look. The red and white French tips are a striking combination, and the chili pepper accent nail adds a playful and unique element. This design is perfect for those who want to make a statement with their nails while keeping a touch of humor and creativity.
- Base coat: Orly Bonder Base Coat
- Red polish: OPI “Big Apple Red”
- White polish: OPI “Alpine Snow”
- Green polish for detailing: Essie “Going Incognito”
- Top coat: Seche Vite Dry Fast Top Coat
- Nail art brush: Winstonia Fine Line Brush Set
Instructions:
- Apply the base coat to all nails.
- Paint the nails with the white polish.
- Create the red French tips using the red polish.
- Use the green polish and nail art brush to paint the chili pepper accent on the ring finger.
- Finish with a top coat to seal the design.
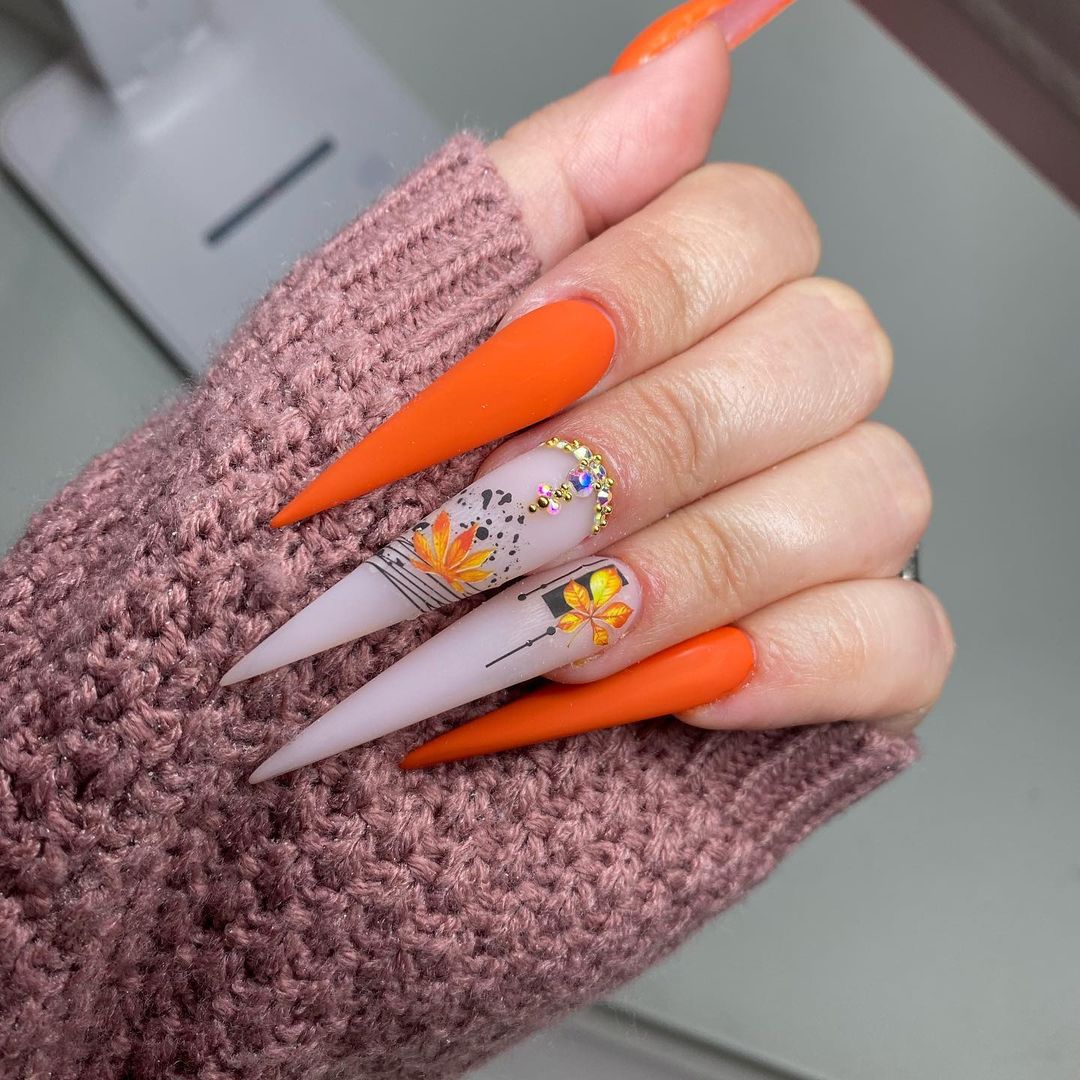
Bright Orange and Floral Stiletto Nails
This vibrant design features bright orange stiletto nails with floral accents and rhinestones, perfect for a bold and colorful look. The bright orange polish is a daring choice that immediately draws attention. The floral accents and rhinestones add a touch of elegance and femininity, making this manicure perfect for those who love to stand out. The stiletto shape enhances the boldness of the design.
- Base coat: Essie Ridge Filling Base Coat
- Bright orange polish: China Glaze “Orange Knockout”
- White polish for floral accents: OPI “Alpine Snow”
- Rhinestones: Born Pretty Store Nail Rhinestones
- Top coat: Seche Vite Dry Fast Top Coat
- Nail art brush: Winstonia Fine Line Brush Set
Instructions:
- Apply the base coat to all nails.
- Paint the nails with the bright orange polish.
- Use the white polish and nail art brush to create the floral accents.
- Attach the rhinestones using nail glue.
- Finish with a top coat to protect the design and add shine.
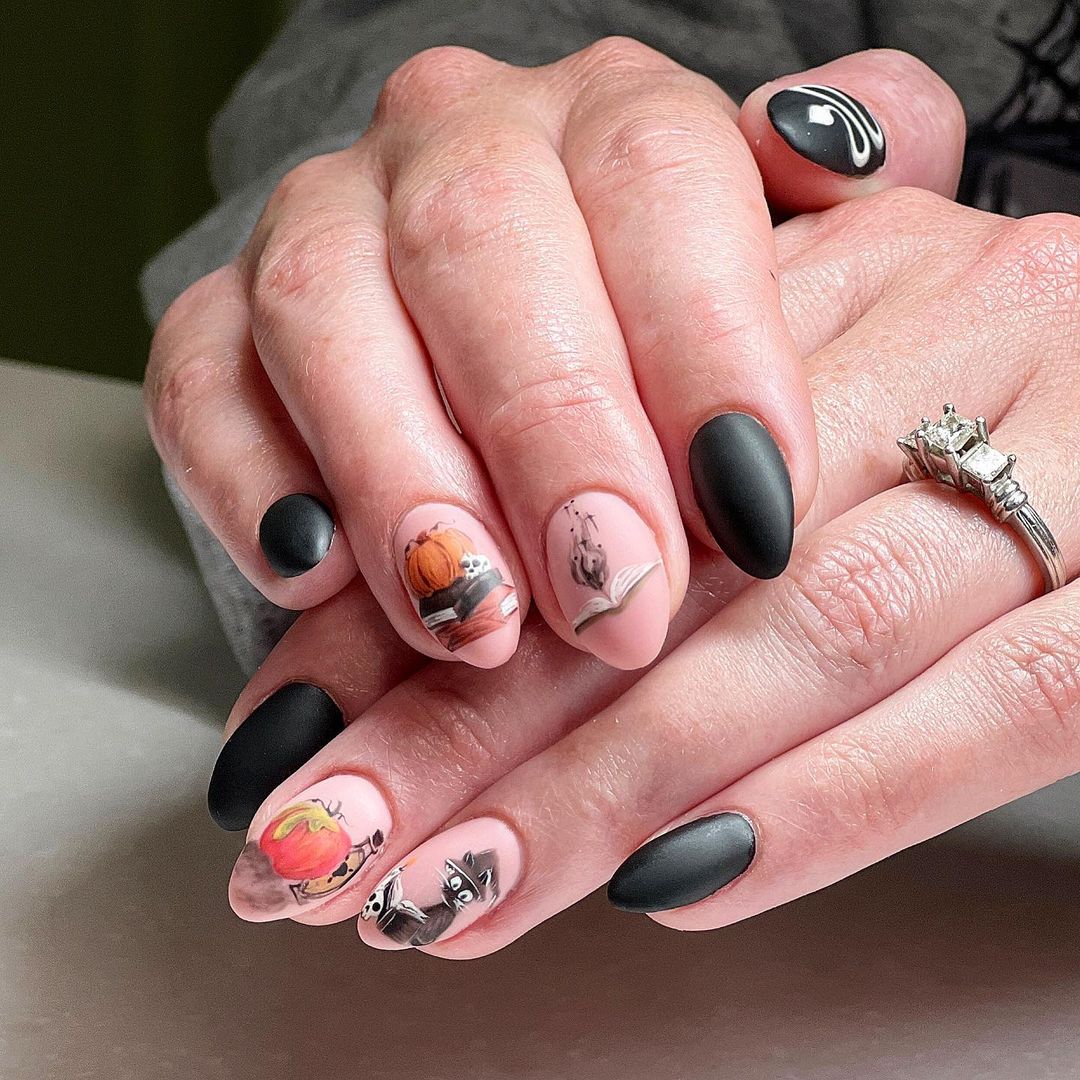
Matte Black and Witchy Designs
This nail design features matte black polish with intricate, witchy designs that are perfect for the spooky season. The matte black polish provides a sleek and modern base for the intricate Halloween-themed designs. Each nail features different spooky elements, such as pumpkins, black cats, and spell books, adding a playful yet mysterious vibe. This look is perfect for those who want to embrace the Halloween spirit in a subtle and stylish way.
- Base coat: Essie Ridge Filling Base Coat
- Matte top coat: Essie Matte About You Top Coat
- Black polish: OPI “Black Onyx”
- Nude polish for the base: Essie “Bare With Me”
- Nail art stickers or decals: Born Pretty Store Halloween Nail Stickers
- Top coat: Seche Vite Dry Fast Top Coat
- Nail art brush: Winstonia Fine Line Brush Set
Instructions:
- Apply the base coat to all nails.
- Paint the nails with the nude polish.
- Apply the black polish to the designated nails for the matte look.
- Use the nail art stickers or decals to create the Halloween-themed designs.
- Apply the matte top coat to seal the design and give it a matte finish.
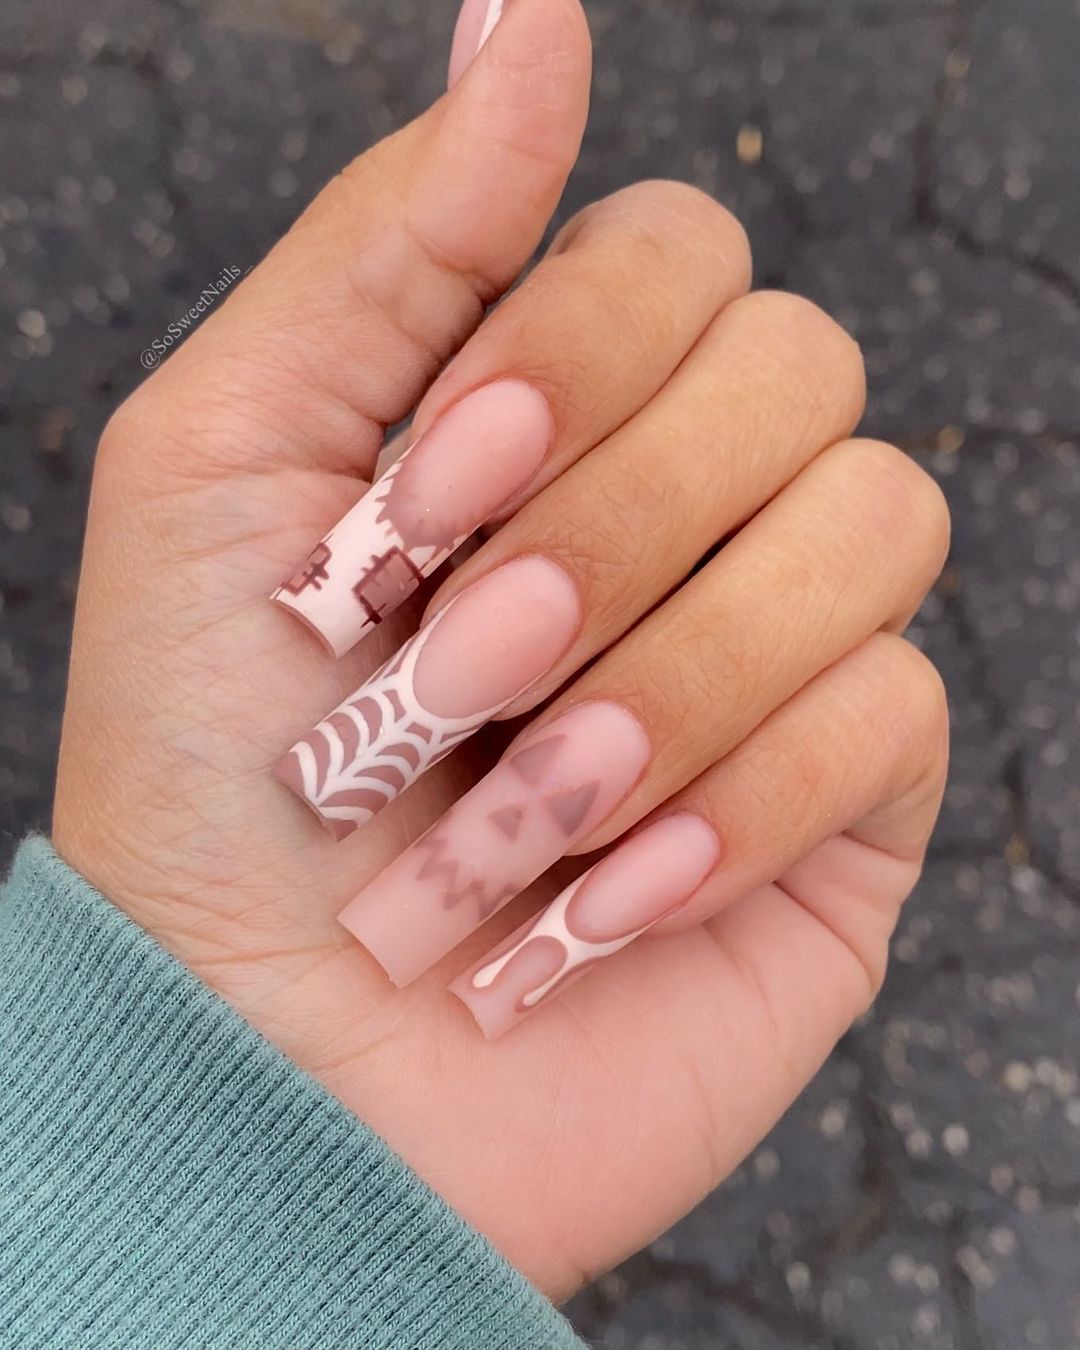
Nude and White Spider Web Nails
This design features a nude base with white spider web patterns, creating a subtle yet festive look for Halloween. The nude base color combined with the white spider web designs offers a chic and understated Halloween look. The coffin shape of the nails adds a trendy and elongated appearance. This design is ideal for those who want a stylish yet minimalist approach to Halloween nails.
- Base coat: Orly Bonder Base Coat
- Nude polish: OPI “Samoan Sand”
- White polish for spider webs: Essie “Blanc”
- Top coat: Seche Vite Dry Fast Top Coat
- Nail art brush: Winstonia Fine Line Brush Set
Instructions:
- Apply the base coat to all nails.
- Paint the nails with the nude polish.
- Use the white polish and nail art brush to create the spider web designs.
- Finish with a top coat to protect the design and add shine.
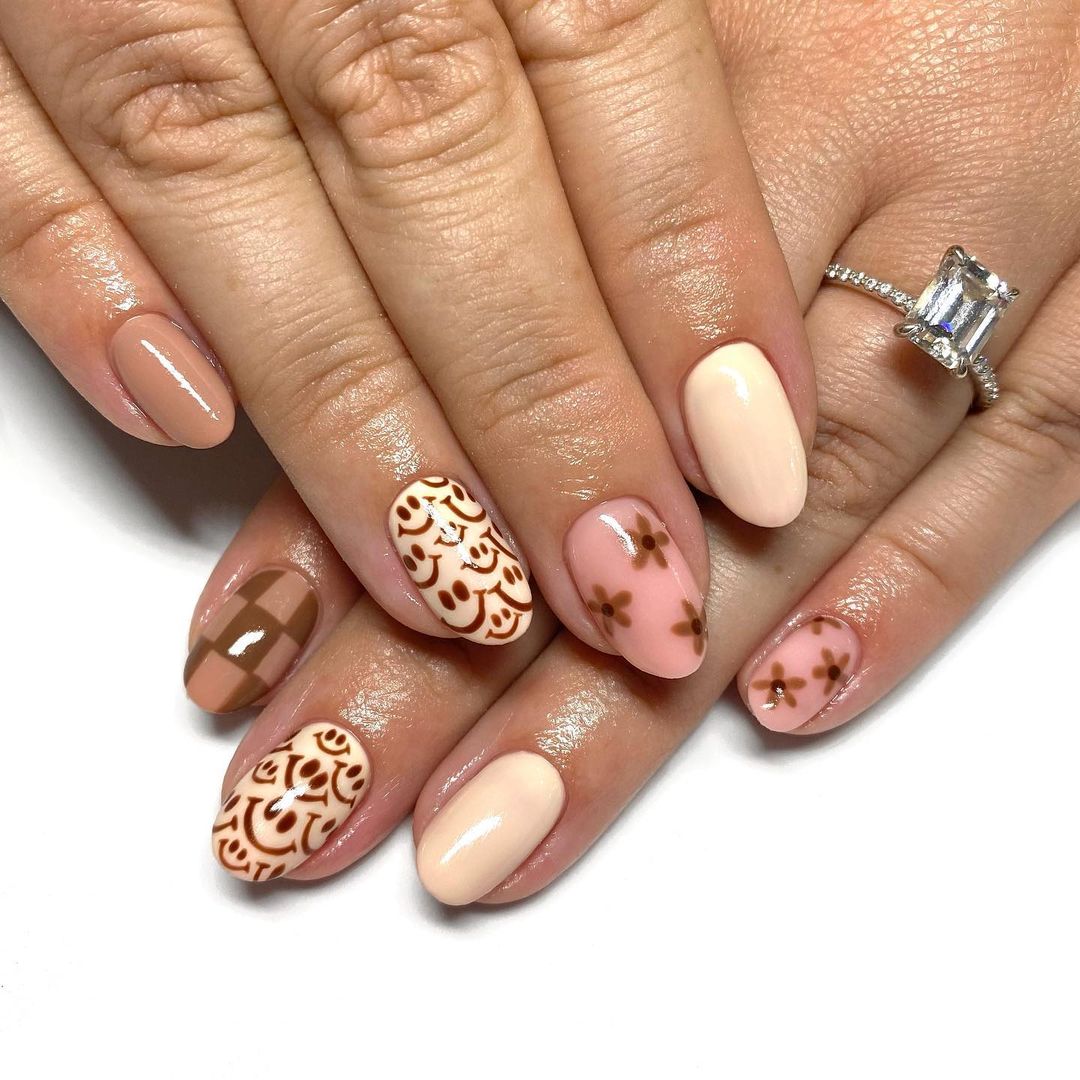
Brown and Nude Autumn Nails
This elegant autumn nail design features a mix of brown and nude shades with delicate floral and geometric patterns. The combination of brown and nude polishes creates a warm and sophisticated look, perfect for the fall season. The floral and geometric patterns add a touch of whimsy and elegance, making this manicure suitable for any occasion. The almond shape enhances the overall chicness of the design.
- Base coat: CND Stickey Base Coat
- Brown polish: Essie “Wicked”
- Nude polish: OPI “Samoan Sand”
- White polish for accents: Essie “Blanc”
- Top coat: Seche Vite Dry Fast Top Coat
- Nail art brush: Winstonia Fine Line Brush Set
Instructions:
- Apply the base coat to all nails.
- Paint the nails with the brown and nude polishes.
- Use the white polish and nail art brush to create the floral and geometric patterns.
- Finish with a top coat to seal the design.
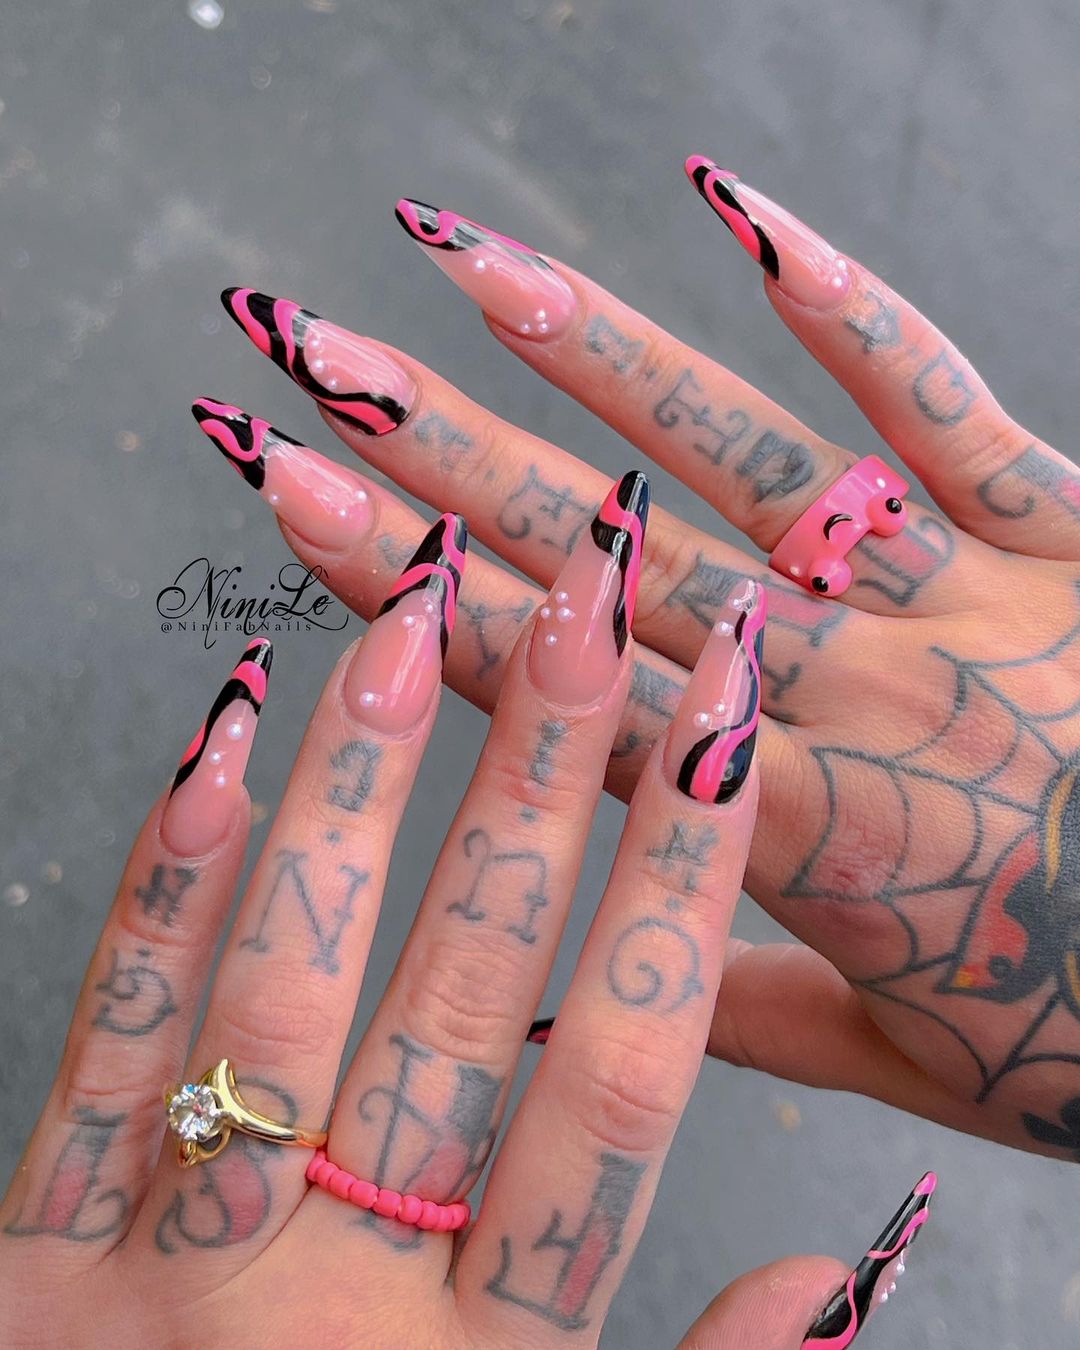
Pink and Black Swirl Nails
The contrasting pink and black swirls create a dynamic and edgy appearance. The long stiletto shape adds drama and flair to the overall design. This manicure is perfect for those who love bold and unconventional nail art.
- Base coat: Orly Bonder Base Coat
- Pink polish: OPI “Pink Flamenco”
- Black polish: OPI “Black Onyx”
- Top coat: Seche Vite Dry Fast Top Coat
- Nail art brush: Winstonia Fine Line Brush Set
Instructions:
- Apply the base coat to all nails.
- Paint the nails with the pink polish.
- Use the black polish and nail art brush to create the swirl patterns.
- Finish with a top coat to protect the design and add shine.
Red and Tortoiseshell Nails
The deep red polish paired with the tortoiseshell design creates a sophisticated and timeless look. The addition of 3D elements adds depth and texture, making this manicure perfect for special occasions. The long coffin shape enhances the elegance of the design.
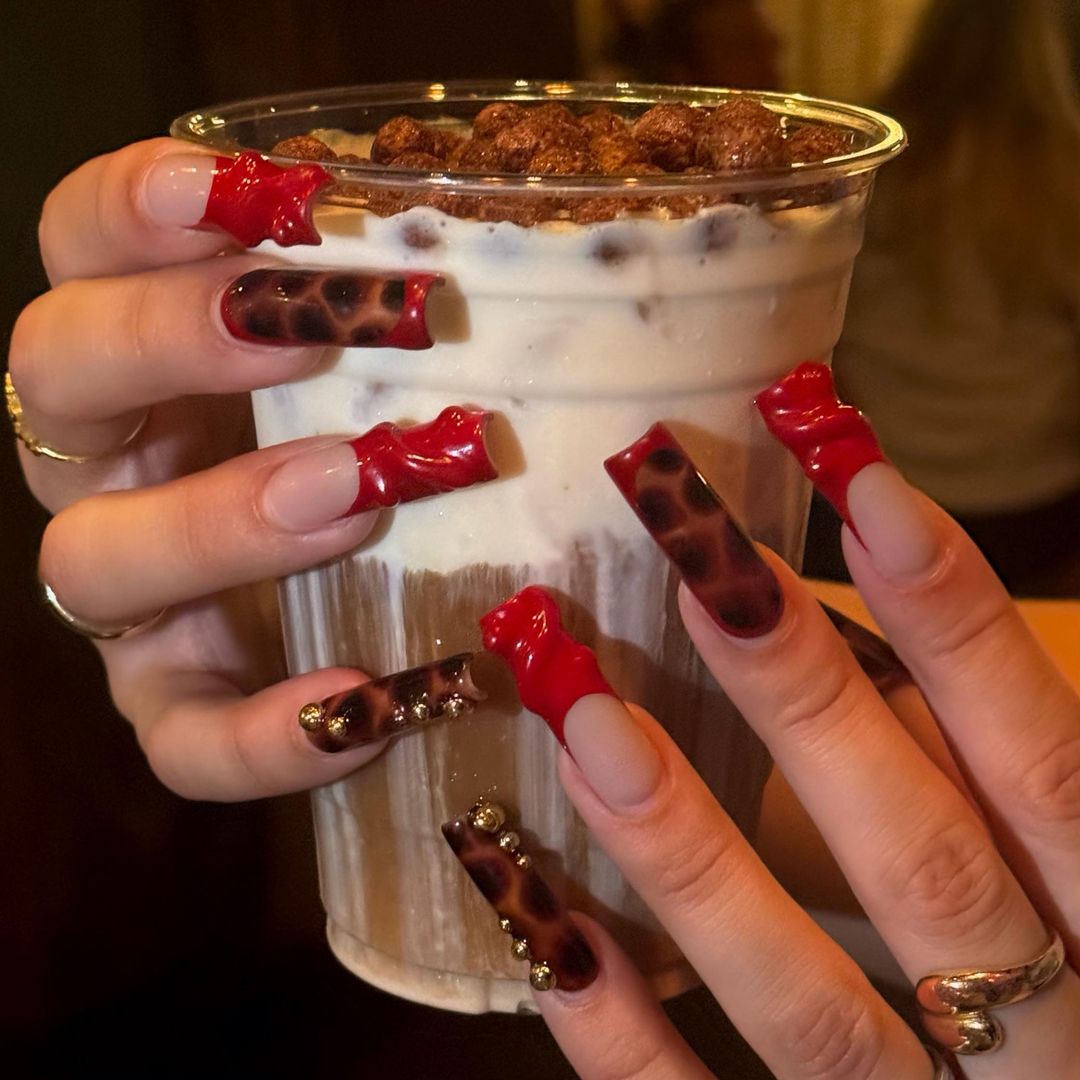
- Base coat: Essie Ridge Filling Base Coat
- Red polish: OPI “Big Apple Red”
- Tortoiseshell polish: Sally Hansen “Mochachino” and OPI “Amber Waves”
- 3D nail art pieces: Born Pretty Store 3D Nail Art
- Top coat: Seche Vite Dry Fast Top Coat
- Nail art brush: Winstonia Fine Line Brush Set
- Nail glue: Mia Secret Nail Glue
Instructions:
- Apply the base coat to all nails.
- Paint the nails with the red polish.
- Create the tortoiseshell pattern using the brown and amber polishes.
- Attach the 3D elements using nail glue.
- Finish with a top coat to seal the design.
FAQ
- What are the best colors for fall nails?
For fall, the best colors include deep browns, burnt oranges, rich burgundies, and classic nudes. These shades capture the essence of the season and complement any outfit.
- How can I make my nail designs last longer?
To ensure your nail designs last, always start with a good base coat, apply thin layers of polish, and finish with a high-quality top coat. Avoid using your nails as tools and apply cuticle oil daily to keep them hydrated.
- Can I achieve these designs at home?
Absolutely! With the right tools and a bit of practice, you can recreate these stunning fall nail designs at home. Follow the detailed instructions provided and don’t hesitate to experiment with your own creative twists.
Save Pin